Temple of Slaughter is a dungeon in Throne and Liberty that will feel familiar to players who have experienced the Temple of Roar level 30 dungeon. Many of the patterns and mechanics are reminiscent of that earlier challenge, providing a sense of continuity in your dungeon-crawling experience. This guide will walk you through the Temple of Slaughter, covering speed run routes, lore, boss strategies, and mini-boss encounters to help you conquer this instance.
Speed Run Efficiency
For those looking to clear the Temple of Slaughter quickly, there’s a notable shortcut available. Similar to strategies employed in Cursed Wasteland or Butcher’s Canyon, players can bypass groups of standard enemies between the first and second boss encounters. By having the tank strategically draw aggro from the mobs, the party can proceed directly to the second boss. It’s important to note that defeating the second boss is mandatory to progress to the final confrontation in the Temple of Slaughter.
Delving into the Lore of Temple of Slaughter
The Temple of Slaughter holds a dark history within the world of Throne and Liberty. Lore reveals that Ahzreil, an Elder of the Sylavean Order, halted inhumane experiments conducted within these temple walls. To prevent further atrocities, Ahzreil sealed away the monstrous creations deep within the temple, abandoning them entirely. Isolated and without other sources of sustenance, these creatures turned on each other in a brutal struggle for survival. From this chaos emerged King Chimaerus, a dominant beast who overwhelmed all others. Shadowmancer records hint at a terrifying possibility: should King Chimaerus absorb significant amounts of mana, it could undergo a further transformation into an even more formidable entity known as Rex Chimaerus. This transformation sets the stage for the ultimate boss encounter within the Temple of Slaughter.
Rex Chimaerus Boss Guide
The final challenge of the Temple of Slaughter is the Rex Chimaerus boss fight. This encounter requires coordination and understanding of specific mechanics. At the start of the battle, assign roles: four players should position themselves at each of the four statues located around the arena, and one player should be designated to interact with the chandelier in the center.
Rex Chimaerus Attack Pattern:
The boss follows a predictable attack sequence, allowing for strategic planning and execution:
Tail Poison → Slash + Tail Swipe → Tail Poison → Fury Attack → Fireball Mech → Tail Poison → Slash + Tail Swipe → Frenzy
Understanding these attacks is crucial for survival:
- Fireball Mechanic: This is a key mechanic requiring specific player actions.
- Frenzy: Be prepared for increased boss aggression during the Frenzy phase.
Detailed Mechanic Breakdown & Strategy:
- Tail Poison & Poison Puddles: Rex Chimaerus will target a player with a single poison marker. Immediately following this, three poison puddles will be expelled targeting three random players.
- Paralysis & Fireball Vulnerability: Players afflicted by the poison marker will soon become paralyzed. Paralyzed players become significantly more vulnerable to the Fireball attack, taking double damage. Furthermore, if a paralyzed player is killed during this phase, they will explode, likely causing further damage to the raid. The Purifying Touch ability can cleanse the paralysis effect.
- Triple Fireball Barrage: Rex Chimaerus will then unleash three fireballs at the paralyzed player. Simultaneously, the boss will spray poison from its tail, alternating between left and right sides with each fireball.
Rex Chimaerus Strategy:
- Marker Player Positioning: The player marked with poison should immediately move as far away as possible, ideally in the direction the tank is positioned. This helps to isolate the poison puddles and fireballs.
- Tanking Fireballs: The tank should be prepared to absorb 2-3 fireball hits with appropriate buffs and healing support. If survivability is a concern, other players can position themselves behind the tank to help mitigate damage, but avoid stacking directly on top of each other to prevent cleave damage from other attacks.
- Wand User Support: Players using wands can proactively cast Blessed Barrier on the designated fireball tank. With sufficient gear and buffs, Blessed Barrier may enable a player to withstand all three fireballs, simplifying the mechanic.
- Dagger Offhand & Shadow Step Technique: Tanks equipped with a dagger offhand can utilize Shadow Step to quickly reposition behind Rex Chimaerus. This allows the marked player to consistently stand in line with the tank, facilitating predictable positioning and damage mitigation.
Chandelier & Statue Mechanic Telegraph:
- Voice Line: A distinct voice line in another language will signal the start of this mechanic.
Chandelier & Statue Mechanic Description:
- Piton Ascent: Blue pitons will materialize in the air. One designated player must use these pitons to ascend to the chandelier directly above Rex Chimaerus. The player must use the lower piton first, followed by the higher piton to reach the chandelier.
- Lever Activation: Upon reaching the chandelier, the designated player must interact with and pull the lever.
- Statue Latch Disablement: Pulling the chandelier lever unlocks the latches located in front of the four statues around the arena. Four other designated players must then grapple to these latches and disable them simultaneously.
- Wipe Mechanic: Failure to disable all four latches within a short timeframe will result in a wipe, eliminating all players. Coordination and speed are essential for this mechanic.
Temple of Slaughter Mini-Boss Encounters
The Temple of Slaughter also features challenging mini-boss encounters that test different aspects of player skill and awareness.
Ancient Berserk Dark Enforcer
The first mini-boss encountered in the Temple of Slaughter, the Ancient Berserk Dark Enforcer, features a relatively straightforward mechanic.
Ignite Mechanic:
- Debuff Application: This mini-boss periodically applies a stacking burn debuff called Ignite to players. This debuff lasts for 20 seconds and stacks in intensity, making it crucial to manage effectively before healing becomes overwhelmed.
- Debuff Mitigation: Stepping into the water surrounding the arena will reduce the duration of the Ignite debuff, providing a tactical method to manage the burn stacks.
Ancient Berserk Shade Wizard
The Ancient Berserk Shade Wizard presents a more complex mini-boss encounter, focusing on crowd control and mechanic awareness.
Mechanic: Zombie Dog Summons & Fury Attacks
- Zombie Dog Summons: This mini-boss periodically summons Zombie Dogs.
- Fear on Fury Attack: These Zombie Dogs use Fury Attacks that inflict fear upon successful hits.
- Respawning Dogs: Defeating the Zombie Dogs is futile as they will continuously respawn throughout the encounter. Focus should remain on the Shade Wizard.
Telegraph & Mechanic Sequence:
- Voice Line Telegraph: The Shade Wizard telegraphs its mechanic sequence with the voice line: “Suffer endlessly!”
- Fury Attack & Puddles: Immediately after the voice line, the Shade Wizard will unleash a Fury Attack. Players should block this initial Fury Attack. Following this, void puddles will appear beneath players’ feet. Evade these puddles to avoid damage. The Shade Wizard will then execute a second Fury Attack, which should also be blocked.
- Stun Opportunity: The Shade Wizard can be stunned immediately after the voice line is uttered. Stunning at this point can interrupt the entire mechanic sequence, providing a window for increased damage uptime.
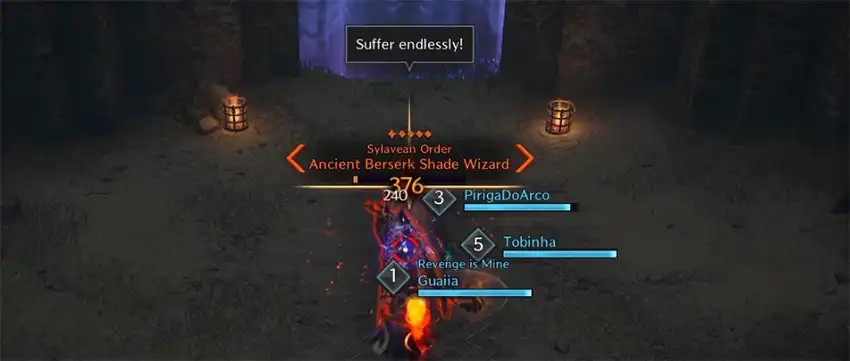 Ancient Berserk Shade Wizard Telegraph
Credits
Guide Written by Yaen
Reviewed by Nymphellas