Getting a new cleaning appliance can be exciting, but setting it up and understanding how to use it effectively is key to achieving the best results. If you’ve recently purchased a Bissell Little Green portable carpet cleaner, you’re in the right place! This user guide will walk you through everything you need to know to get started with your machine, ensuring you can tackle those tough spots and stains with confidence.
1. Understanding Your Bissell Little Green: Key Components
Before you dive into cleaning, let’s familiarize ourselves with the parts of your Bissell Little Green. Knowing each component will make assembly and operation a breeze.
| Product Overview |
|---|
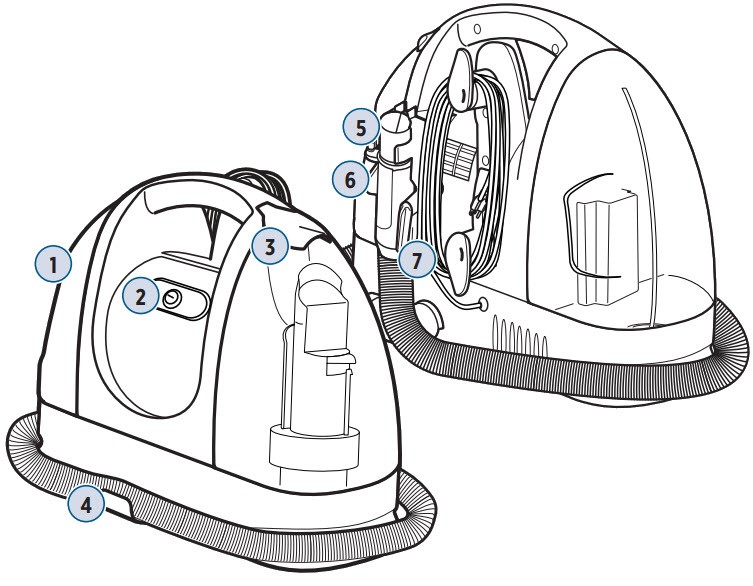

- Clean Water Tank: This tank holds the clean water and cleaning formula mixture that you’ll spray onto stains.
- Power Button: Simple on/off switch to control your Little Green.
- Dirty Water Tank & Retainer Lever: Collects the dirty water and debris extracted from surfaces. The retainer lever secures the tank.
- Flex Hose & Clip: Provides flexibility for reaching stains and spots. The clip helps store the hose neatly when not in use.
- Hose Grip Bracket: A bracket to hold the hose grip for storage.
- Spray Trigger: Located on the hose handle, this trigger controls the release of cleaning solution.
- Hose Grip Bracket Latch: Locks the hose in place on the storage bracket.
2. Assembly: Setting Up Your Little Green
Assembling your Bissell Little Green is straightforward. Follow these simple steps to get it ready for use:
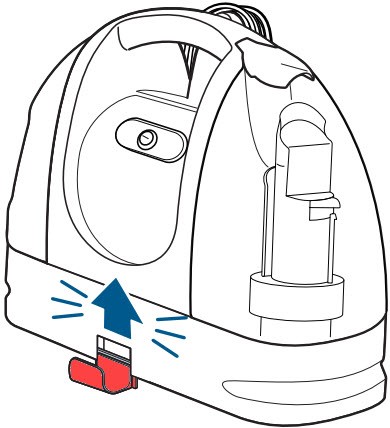
First, attach the flex hose clip. Locate the opening on the front of the machine and insert the back of the flex hose clip until you hear a click. This ensures the hose is securely stored when not in use.
Next, you’ll need to attach the flex hose storage bracket. Slide the lower plate of the bracket into the designated opening at the back of the machine. Then, insert the provided screw and tighten it using a Phillips head screwdriver. This bracket is essential for wrapping and storing the hose.
Two images illustrating the attachment of the flex hose storage bracket: the first showing sliding the lower plate into the back opening, and the second showing inserting and tightening the screw with a screwdriver.
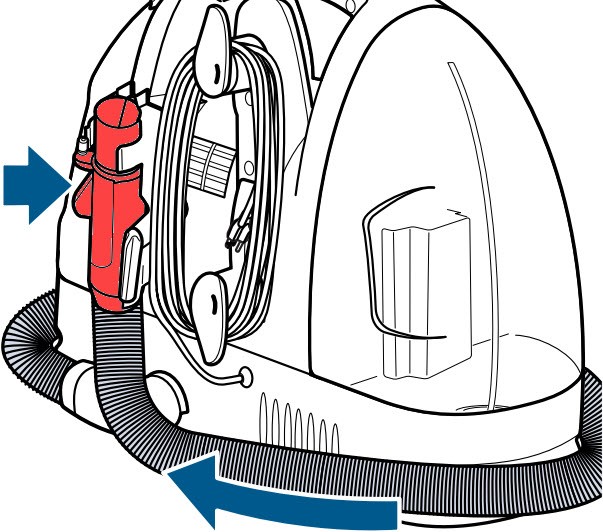
Once the bracket is secure, wrap the flex hose around the machine. Secure the end of the hose into the storage bracket, and turn the latch clockwise to lock it firmly in place. This keeps the hose tidy and prevents it from dangling during storage.
3. Filling the Clean Water Tank: Preparing Your Cleaning Solution
Properly filling the clean water tank is crucial for effective cleaning. Here’s how to do it:
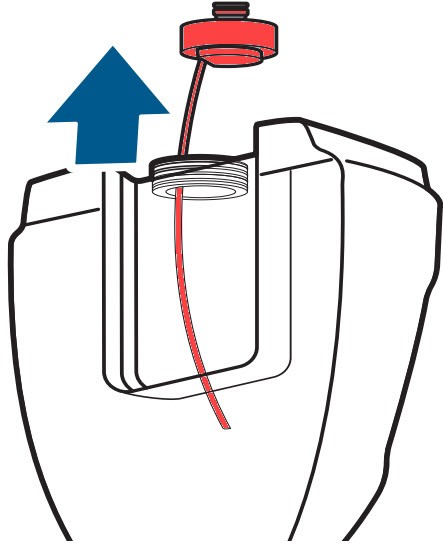
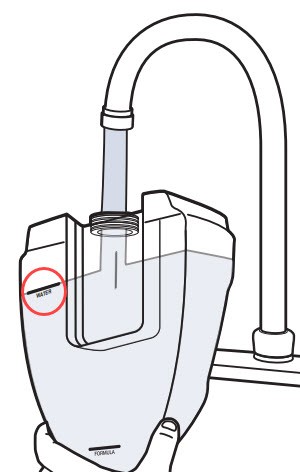
Start by removing the clean water tank from the machine. Simply lift it up and it should detach easily. Then, unscrew the cap on the tank to access the filling area.
For optimal cleaning performance, use warm tap water. The ideal temperature is around 140°F (60°C) MAX. Fill the tank with warm water up to the WATER fill line. Then, add your chosen BISSELL formula to the FORMULA fill line. It’s important not to use excessively hot water as it could potentially damage the clean water tank and affect the machine’s performance.
The Bissell Little Green is designed to work best with BISSELL portable carpet cleaner formulas. For the best cleaning results and to maintain your machine’s longevity, it’s recommended to use genuine BISSELL formulas. You can purchase these formulas and other accessories at BISSELL Parts & Accessories.
Once you’ve filled the clean water tank with water and formula, securely screw the cap back on. Finally, re-insert the clean water tank back into the machine until you hear it click into place, ensuring a tight seal.
4. Cleaning with Your Bissell Little Green: Stain Removal Steps
Now that your Little Green is assembled and filled, you’re ready to start cleaning! Follow these steps for effective stain removal:
Before using your portable carpet and upholstery cleaner, it’s important to pre-treat the area by removing any loose debris or solids with a dry vacuum cleaner. This prevents clogging and ensures your machine operates smoothly.
For stubborn stains, consider using a BISSELL stain pretreat formula. Spray it on the soiled area and let it sit for a few minutes before using the Little Green. This can significantly improve stain removal.
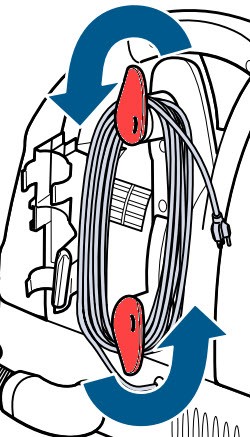
Release the hose from the flex hose clip for easy handling. Unwind the power cord by twisting the cord wrap to release it fully.
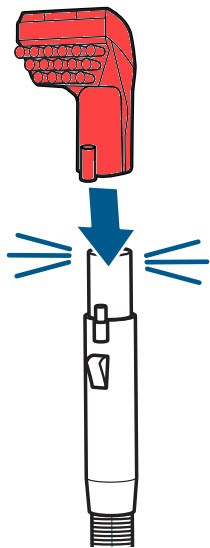
Attach the desired cleaning tool to the hose end. The Little Green comes with various tools designed for different cleaning tasks. Choose the one that best suits your needs.
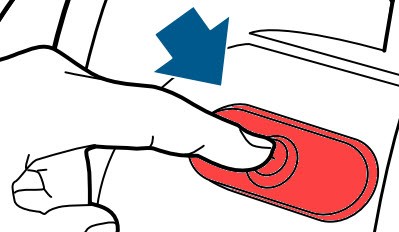
Plug the machine into a nearby power outlet and press the power button to turn it ON.
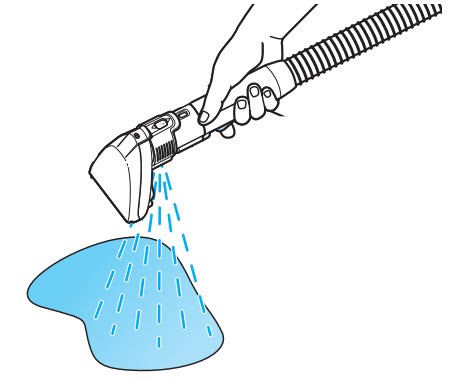
To dispense the water and cleaning solution, hold the spray trigger on the handle. Priming the pump is important for consistent spray. Hold the trigger for about 30 seconds to allow the pump to prime properly. Once primed, the machine will spray steadily.
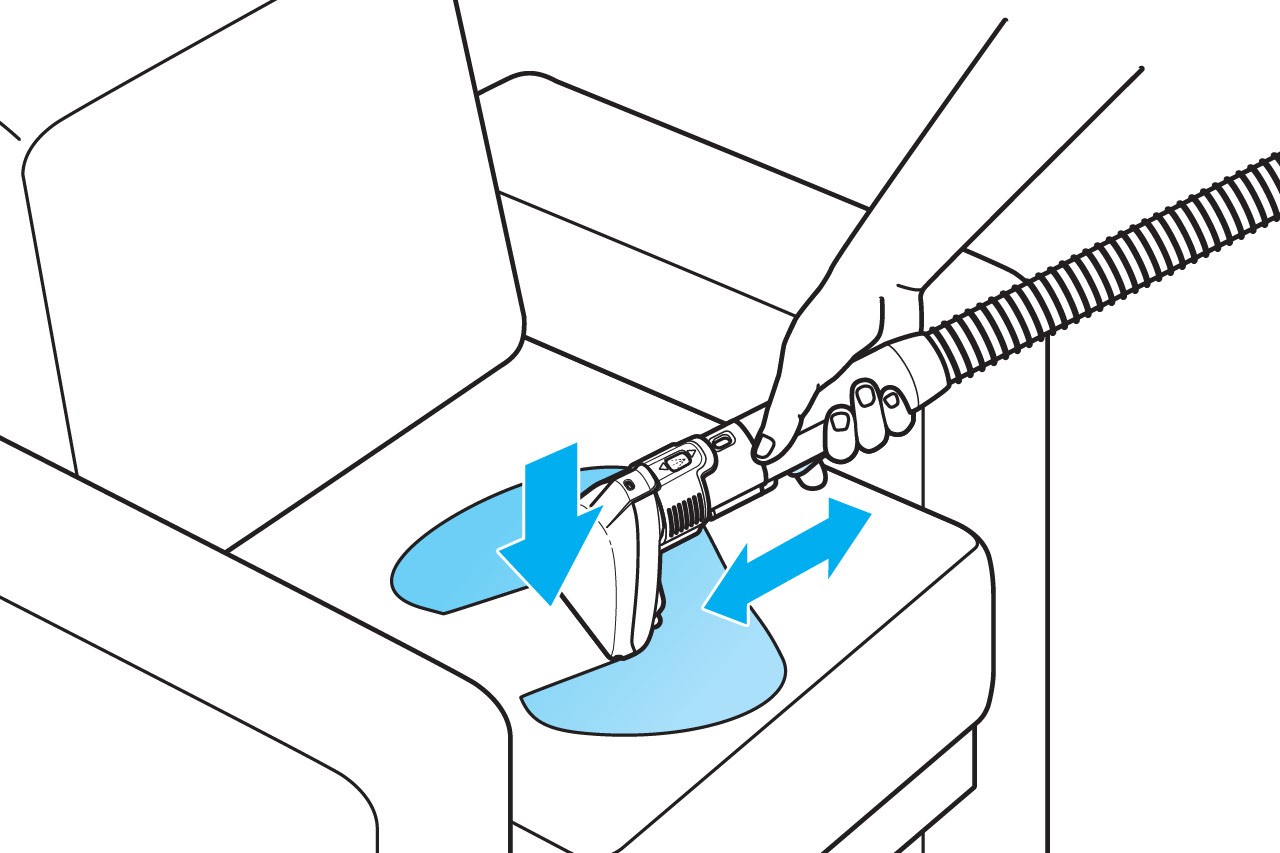
For best results, hold the cleaning tool a few inches above the stain and press the spray trigger to saturate the area. Release the trigger and gently scrub the stain using the brush or scrubbing feature of the tool.
After scrubbing, tilt the tool forward to engage the suction. Ensure the suction channel makes full contact with the surface and slowly move the tool back and forth over the stain to lift away the mess. Repeat this process until the stain is removed or until you no longer see dirty water being suctioned up through the tool nozzle.
During your cleaning session, you may need to refill the clean water tank or empty the dirty water tank. A change in the machine’s sound or a loss of suction can indicate that the dirty water tank is full and needs to be emptied.
Once you’ve finished cleaning, turn the machine OFF using the power button.
5. Emptying the Dirty Water Tank: Post-Cleaning Maintenance
After each cleaning session, or whenever the dirty water tank is full, it’s essential to empty and clean the dirty water tank. Avoid letting the dirty water level exceed the “FULL” line to prevent machine issues.
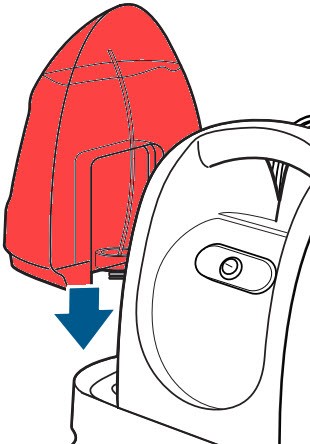
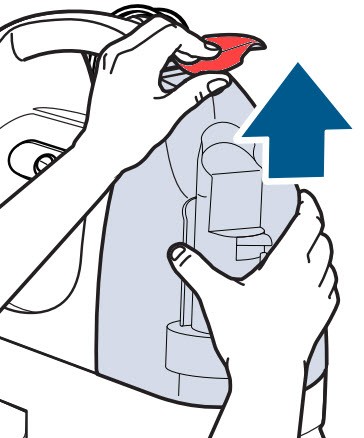
To remove the dirty water tank, lift up the dirty water tank retainer lever and then pull the tank upwards to detach it from the machine.
Empty the dirty water tank by carefully tilting it over a sink or disposal area. Once emptied, rinse the tank thoroughly with water to remove any loose debris and ensure it’s clean for the next use.
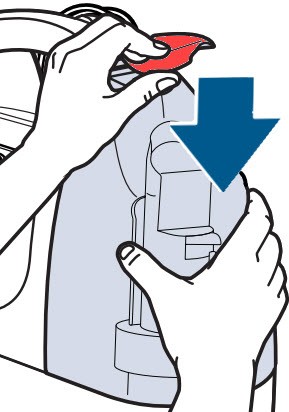
Reinstall the cleaned dirty water tank back onto the machine. Press down on the dirty water tank retainer lever until you hear a click, ensuring it is securely fastened.
Congratulations! You’ve now mastered the basics of using your Bissell Little Green. With these simple steps, you can keep your carpets and upholstery looking fresh and stain-free. Happy cleaning!
For further assistance or troubleshooting, please visit BISSELL Support.