Welcome to the definitive guide to mastering Weber grilling! Whether you’re just starting your charcoal grilling journey or looking to refine your skills, this guide is packed with expert tips and tricks to elevate your outdoor cooking game. We’ll cover everything from choosing the right charcoal to mastering temperature control and smoking techniques, all tailored for your Weber grill.
Cooking with charcoal on a Weber grill is more than just a method – it’s an experience. The flavor, the versatility, and the sheer satisfaction of grilling over live fire are unmatched. If you’re new to Weber kettle grills, or charcoal grilling in general, don’t worry! This comprehensive guide will transform you into a confident grill master in no time.
Feel free to jump to specific sections using the table of contents below, especially if you’re already familiar with certain aspects of charcoal grilling.
Contents
Hide
1. Why Choose a Weber Charcoal Grill?
2. Understanding Grilling, BBQ, and Smoking
2.1. Grilling: Hot and Fast
2.2. Barbecue: Low and Slow
2.3. Smoking: Infusing Flavor
3. Charcoal Essentials: Lump vs. Briquettes
3.1. Lump Charcoal: The Hot and Fast Fuel
3.2. Charcoal Briquettes: Consistent and Long-Burning
3.3. Verdict: Choosing Your Charcoal
4. Essential Weber Grilling Gear
5. The Importance of Cleaning Your Weber Grill
5.1. Flavor Enhancement
5.2. Optimal Airflow
5.3. Grilling Safety
6. Step-by-Step Guide to Cleaning Your Weber Charcoal Grill
7. Lighting Your Weber Charcoal Grill Like a Pro
8. How Much Charcoal to Use for Weber Grilling?
8.1. High-Heat Grilling Charcoal Quantity
8.2. Low and Slow Cooking Charcoal Strategies
8.2.1. The Snake Method for Weber Kettle
8.2.2. The Minion Method for Weber
9. Mastering Time and Temperature for Weber BBQ
10. Increasing Temperature on Your Weber Grill
10.1. Boost Airflow for Higher Heat
10.2. Adding More Charcoal Fuel
11. Decreasing Temperature on Your Weber Grill
11.1. Reduce Airflow for Lower Heat
11.2. Time and Temperature Summary
12. Smoking Meat on Your Weber Charcoal Grill
12.1. Best Wood Types for Weber Smoking
12.2. Top Weber Smoking Tips
13. Must-Have Weber Grilling and Smoking Accessories
Let’s dive in and get you grilling like a Weber master!
1. Why Choose a Weber Charcoal Grill?
When it comes to charcoal grills, Weber stands out for a reason. For decades, Weber has been synonymous with quality, durability, and exceptional grilling performance. Here are the top three reasons why you should choose a Weber charcoal grill:
- Unmatched Flavor: Nothing beats the authentic smoky taste that charcoal imparts to food. Weber grills are designed to maximize this flavor, giving your food that craveable, fire-kissed taste you can’t achieve with gas or electric grills. Plus, you can easily transform your Weber into a smoker for true BBQ flavor.
- Versatility Beyond Grilling: A Weber kettle grill is incredibly versatile. Yes, it excels at grilling and smoking, but with the right techniques and accessories, you can also bake, roast, deep fry, braise, steam, and even make pizza! From searing steaks to slow-smoking ribs, your Weber grill can handle virtually any cooking method you desire.
- The Weber Grilling Experience: Ask any Weber enthusiast, and they’ll tell you it’s more than just cooking – it’s a passion. There’s a unique satisfaction in preparing your Weber, lighting the coals, and anticipating the delicious meal to come. The aroma of grilling food and the sizzle of juices hitting hot coals create an immersive and enjoyable cooking experience that brings people together.
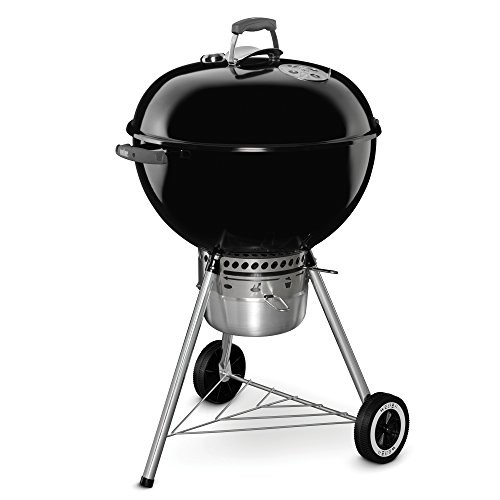
The Weber Premium Kettle Grill
A classic choice for grilling enthusiasts, the Weber Premium Kettle Grill boasts enhanced features like a hinged cooking grate and the One-Touch cleaning system, making grilling and maintenance a breeze.
Weber Original Kettle Premium Charcoal Grill, 22-Inch, Black. A timeless and user-friendly grill for all grilling levels.
While there’s a learning curve to mastering charcoal grilling, Weber grills are designed to be user-friendly. With a bit of practice and this guide, you’ll find that using a Weber kettle grill is easier and more rewarding than you might think.
2. Understanding Grilling, BBQ, and Smoking
The terms grilling, barbecue, and smoking are often used interchangeably, but they represent distinct cooking methods, especially when it comes to Weber charcoal grilling. Here’s a breakdown:
2.1. Grilling: Hot and Fast
Grilling is all about high, direct heat. You cook food directly over hot coals for a relatively short period. This method is ideal for tender cuts of meat like steaks, chicken breasts, burgers, and seafood, as well as vegetables.
The intense heat sears the outside of the food, creating beautiful grill marks and locking in juices. As fats render and drip onto the coals, they vaporize, producing flavorful smoke that further enhances the food. Techniques like reverse searing, where you start with indirect heat and finish with a high-heat sear, are also fantastic on a Weber for achieving perfectly cooked steaks with minimal overcooking.
2.2. Barbecue: Low and Slow
Barbecue, in the traditional sense, is a low and slow cooking method. It’s perfect for tougher cuts of meat with more connective tissue and fat, such as brisket, pork shoulder, and ribs. These cuts require longer cooking times at lower temperatures to break down the connective tissue and render the fat, resulting in incredibly tender and flavorful results.
On a Weber grill, barbecue is achieved through indirect heat and temperature control. This method allows you to cook large cuts of meat evenly and infuse them with smoky flavor over many hours.
2.3. Smoking: Infusing Flavor
Smoking is a technique that can be incorporated into both grilling and barbecue. It’s about adding wood to your charcoal fire to create smoke that flavors your food. Many Weber grillers believe that adding smoke elevates almost any dish cooked over charcoal.
Whether you’re grilling chicken, salmon, or slow-cooking brisket, adding wood smoke can take the flavor to the next level. Smoking adds depth and complexity, transforming ordinary dishes into extraordinary culinary experiences. Experiment with different wood types to discover your favorite smoke profiles for various foods.
3. Charcoal Essentials: Lump vs. Briquettes
Choosing the right charcoal is fundamental to successful Weber grilling. While the market offers various options, the two main types are lump charcoal and charcoal briquettes. Understanding their differences will help you select the best fuel for your grilling needs.
3.1. Lump Charcoal: The Hot and Fast Fuel
Lump charcoal is made by burning wood in a low-oxygen environment, leaving behind pure carbon. It’s known for burning hotter and faster than briquettes, making it excellent for searing steaks and achieving high temperatures quickly on your Weber.
Lump charcoal tends to light faster and reach higher temperatures, ideal for quick grilling and searing. Some grillers also believe lump charcoal imparts a subtle wood-smoked flavor, possibly due to less complete carbonization of the wood.
Lump charcoal pieces of varying sizes. Ideal for high-heat Weber grilling due to its rapid and intense burn.
However, lump charcoal can be more expensive and burns faster, which might not be ideal for long cooks. The irregular size of lump charcoal pieces can also make temperature control slightly less consistent compared to briquettes.
3.2. Charcoal Briquettes: Consistent and Long-Burning
Charcoal briquettes are manufactured by combining charcoal dust with binders and additives, then pressing them into uniform pillow shapes. Briquettes are prized for their consistent burn rate and temperature, making them a reliable choice for all types of Weber grilling, especially low and slow barbecue.
Briquettes provide a steady and predictable heat, perfect for maintaining consistent temperatures during longer cooks. They are also generally more economical than lump charcoal.
Uniform charcoal briquettes neatly arranged. Preferred for low and slow Weber cooking due to their consistent burn.
While some purists prefer lump charcoal, modern briquettes, especially all-natural options, offer excellent performance with minimal additives. You can even find briquettes infused with wood for added smoke flavor, though adding your own wood chunks provides better control over smoke intensity. Avoid match-light briquettes, as the accelerant can negatively impact the flavor of your food.
3.3. Verdict: Choosing Your Charcoal
For most Weber grilling enthusiasts, briquettes are the go-to choice due to their versatility, consistent burn, and affordability. They perform admirably for both high-heat grilling and low-and-slow smoking. Lump charcoal is excellent for high-heat searing but may not be as practical for longer cooks or budget-conscious grillers. Ultimately, the best charcoal is the one that suits your cooking style and preferences.
4. Essential Weber Grilling Gear
Having the right tools enhances your Weber grilling experience and ensures success. While countless BBQ gadgets are available, focusing on the essentials is key, especially when starting. Here’s a list of must-have Weber grilling gear:
- Charcoal Chimney Starter: A charcoal chimney starter is indispensable for quickly and efficiently lighting charcoal. The Weber Rapidfire Chimney Starter is highly recommended for its quality and design. It eliminates the need for lighter fluid and gets your coals ready in minutes.
Weber Rapidfire Chimney Starter
The Weber Rapidfire Chimney Starter is essential for quickly and efficiently lighting charcoal for your Weber grill, ensuring perfectly lit coals every time.
Weber Rapidfire Chimney Starter, Standard, Silver. A must-have tool for fast and even charcoal lighting.
- Multi-Probe Thermometer: Accurate temperature monitoring is crucial, especially for low and slow cooking. A multi-probe thermometer, like the ThermoPro Wireless Meat Thermometer, allows you to track both grill temperature and meat internal temperature simultaneously. This ensures perfectly cooked food every time.
ThermoPro Wireless Meat Thermometer
The ThermoPro TP25 Wireless Thermometer with multiple probes provides precise temperature monitoring for both your Weber grill and your food, ensuring perfect results.
ThermoPro TP25 Wireless Meat Thermometer with 4 Probes. Essential for monitoring grill and food temperatures for BBQ success.
-
Instant-Read Thermometer: For quick temperature checks of smaller items like chicken breasts or burgers, an instant-read thermometer is invaluable. Invest in a reliable model like the ThermoPro Instant Read Thermometer for accurate readings.
-
Grill Scraper or Brush: Keeping your Weber grill grates clean is essential for flavor and safety. Choose a sturdy grill scraper or a no-bristle brush to avoid the risk of bristles ending up in your food. The Weber Three-Sided Brush is a great option for effective cleaning.
-
Heat-Resistant Gloves: Protecting your hands from heat is paramount when grilling with charcoal. Waterproof BBQ gloves that are heat-resistant up to 932°F, like Schwer Grill BBQ Gloves, offer excellent protection when handling hot coals, grill grates, or cooking tools.
Heat Resistant BBQ Gloves
Schwer Grill BBQ Gloves offer superior heat resistance and waterproof protection, making them essential for safe and comfortable Weber grilling.
Schwer Grill BBQ Gloves 932℉ Heat Resistant. Protect your hands from intense heat with these durable grilling gloves.
-
Fire Extinguisher: Safety first! Always keep a rechargeable fire extinguisher near your grilling area in case of flare-ups or grease fires.
-
Long Tongs: A pair of long metal tongs is essential for safely handling food on the grill. Having two sets – one for raw food and one for cooked food – prevents cross-contamination.
-
Sharp Knife: A good quality knife is crucial for trimming meats and preparing your ingredients. A boning knife is a versatile choice for various grilling tasks.
-
Weber Charcoal Baskets: Charcoal baskets are incredibly useful for organizing coals for different cooking zones and methods, especially for indirect cooking and the snake or minion methods.
-
Disposable Pans: Disposable aluminum pans serve multiple purposes, acting as drip pans, water pans (for smoking), and convenient serving dishes.
-
Cast Iron Pan or Dutch Oven: Cast iron cookware expands the versatility of your Weber grill. A cast iron pan is perfect for searing, sautéing, and even baking on the grill. A Dutch oven is excellent for stews, chili, and even deep frying outdoors. Lodge Cast Iron offers durable and high-quality options.
Head-on shrimp sizzling in a cast iron pan on a Weber grill. Cast iron cookware enhances Weber grill versatility for diverse recipes.
5. The Importance of Cleaning Your Weber Grill
Regular cleaning of your Weber charcoal grill is not just about aesthetics; it’s crucial for flavor, performance, and safety. Here’s why cleaning your grill is essential:
5.1. Flavor Enhancement
Built-up grease and food residue on your grill grates and inside the grill can turn rancid and negatively impact the flavor of your food. Burning old grease produces acrid smoke that taints your food. Clean grates and a clean grill ensure clean smoke and pure, delicious grilled flavors. Aim for thin, blue smoke – the hallmark of clean burning and flavorful grilling.
5.2. Optimal Airflow
Ash buildup in the bottom of the Weber kettle and the ash catcher obstructs airflow, hindering temperature control. Proper airflow is essential for consistent and efficient temperature management. Cleaning out ash regularly ensures your vents work effectively, allowing you to precisely control the heat.
5.3. Grilling Safety
Grease buildup is a significant fire hazard. Grease fires can quickly escalate and become dangerous. Regular cleaning minimizes grease accumulation, reducing the risk of flare-ups and uncontrolled fires, ensuring safer grilling.
6. Step-by-Step Guide to Cleaning Your Weber Charcoal Grill
Cleaning your Weber grill doesn’t have to be a daunting task. With regular maintenance, it can be quick and easy. Here’s a simple cleaning routine:
For regular cleaning, ideally after each grilling session while the grill is still warm:
- Scrape the Grates: Use a grill brush or scraper to remove food residue from the grates while they are still hot.
- Clean the Inside: Use your grill brush and a plastic putty knife to scrape down the inside walls of the kettle and lid, pushing debris towards the bottom.
- Empty the Ash Catcher: Once the ash is cool, remove the ash catcher and dispose of the ash. Ensure coals are completely extinguished before disposal.
For occasional deeper cleaning:
- Cool Down and Remove Grates: Ensure the grill is completely cool. Remove the grates.
- Soapy Water Wash: Wash the grates with hot, soapy water and a steel scrub pad.
- Clean Interior: Wash the inside of the kettle and lid with soapy water and a sponge or cloth. Rinse thoroughly.
- Reassemble: Once everything is dry, reassemble your Weber grill.
A Weber Kettle grill in need of cleaning. Regular cleaning is essential for flavor, airflow, and safety in Weber grilling.
Some Weber owners advocate for not cleaning, believing the buildup is “seasoning.” However, for optimal flavor and safety, regular cleaning is recommended. For a super deep clean, you can even use a pressure washer or take your grates to a car wash.
7. Lighting Your Weber Charcoal Grill Like a Pro
Lighting your Weber charcoal grill correctly is the first step to grilling success. Follow these guidelines for easy and effective charcoal lighting:
- Use a Chimney Starter: Always use a charcoal chimney starter. It’s the most efficient and safest way to light charcoal without lighter fluid.
- Avoid Lighter Fluid: Never use lighter fluid or quick-light charcoal. They impart unpleasant chemical flavors to your food.
- Choose Starters: Use paraffin wax cubes or tumbleweed starters for a consistent and odorless ignition. Alternatively, you can use newspaper or paper towels soaked in cooking oil.
- Position Starter and Chimney: Place your starter on the lower grate of your Weber. Place a chimney filled with charcoal directly over the starter.
- Ignite and Wait: Light the starter. Allow the chimney to do its work. The coals will be ready when they are glowing red and ashed over, usually in 20-25 minutes.
- Pour Coals: Carefully pour the lit coals onto the charcoal grate in your Weber, arranging them as needed for your cooking method (direct or indirect).
Pro Tip: Light your charcoal first! While the coals are heating in the chimney, use this time to prep your food, season meats, and gather your grilling tools. By the time your prep work is done, your Weber will be ready for cooking.
8. How Much Charcoal to Use for Weber Grilling?
The amount of charcoal needed for Weber grilling depends on your cooking method – whether you’re grilling hot and fast or cooking low and slow.
8.1. High-Heat Grilling Charcoal Quantity
For high-heat grilling (burgers, steaks, etc.), a full chimney of charcoal briquettes or lump charcoal is generally ideal for a standard-sized Weber kettle.
- Full Chimney: A full chimney provides ample heat for searing and grilling at high temperatures.
- Adjust for Smaller Cooks: If cooking for only one or two, you can use slightly less, but it’s better to have extra coals than not enough.
- Conserve Leftovers: After grilling, close the Weber vents to extinguish leftover coals for reuse in your next cook.
- For Large Crowds: If one chimney isn’t sufficient, you can add a second chimney of lit coals on top of the first layer to extend cooking time and heat.
8.2. Low and Slow Cooking Charcoal Strategies
Low and slow cooking on a Weber requires a more strategic approach to charcoal arrangement to maintain consistent low temperatures for extended periods. Two popular methods are the Snake Method and the Minion Method.
8.2.1. The Snake Method for Weber Kettle
The Snake Method is perfect for long, low-temperature cooks on a Weber kettle. It involves arranging charcoal briquettes in a snake-like pattern around the perimeter of the charcoal grate.
A 2x2x1 charcoal snake formation in a Weber kettle. This setup provides a long, slow burn for extended BBQ sessions.
- Snake Formation: Arrange briquettes in a 2×2 or 2x2x1 pattern (two rows of two briquettes, possibly with a third row on top). The size depends on your Weber kettle and desired cook time.
- Lighting the Snake: Light 8-10 briquettes in a chimney and place them at one end of the snake (“the tail”). The lit coals will slowly ignite the unlit briquettes, creating a long, slow burn.
- Wood Chunks: Place wood chunks on top of the snake to generate smoke as the coals burn.
- Temperature Control: Adjust vents to maintain a consistent low temperature (225-275°F).
- Extending Cook Time: For very long cooks (15+ hours), you can extend the snake or add more unlit briquettes to the head of the snake.
8.2.2. The Minion Method for Weber
The Minion Method is another effective technique for low and slow Weber cooking. It involves placing a large amount of unlit charcoal in the grill and then lighting a smaller amount to ignite the rest slowly.
- Unlit Charcoal Base: Fill charcoal baskets or one side of your Weber with unlit briquettes.
- Lit Charcoal Starter: Light a chimney of charcoal (about ¼ to ½ chimney) and pour the lit coals over the unlit briquettes.
- Slow Burn Ignition: The lit coals gradually ignite the unlit coals, providing a long, slow, and consistent burn.
- Temperature Management: Control temperature using the Weber vents.
Experiment with both the Snake and Minion methods to find which works best for your Weber grilling style and desired cook times.
9. Mastering Time and Temperature for Weber BBQ
Time and temperature are the twin pillars of successful low and slow Weber barbecue. While important for all cooking, they are especially critical when using a Weber charcoal grill for BBQ.
Low and slow cooking is essential for developing smoky flavor, creating bark on meats, and achieving tender, juicy results in tougher cuts like ribs, brisket, and pork shoulder. The goal is to break down connective tissues and render fat over time at a consistent low temperature.
- Temperature Range: Aim for a grill temperature range of 225°F to 275°F for low and slow BBQ.
- Internal Meat Temperature: Cook to internal meat temperature, not just time. Use a meat thermometer to monitor the internal temperature of your food.
- Temperature Control is Key: Unlike pellet grills, Weber charcoal grills require manual temperature management using vents and charcoal adjustments.
- Environmental Factors: Weather conditions like wind, rain, and ambient temperature can affect grill temperature, requiring adjustments.
Spatchcocked chicken on a Weber grill with temperature probes. Accurate temperature monitoring is crucial for perfectly cooked BBQ.
Don’t be intimidated by temperature control. With practice and a good thermometer, you can master it. Remember:
- Temperature Fluctuations are Normal: Weber grill temperatures will fluctuate. Aim to stay within a 25-50°F range of your target temperature.
- Use a Multi-Probe Thermometer: Use a multi-probe thermometer with one probe on the grill grate (for ambient temperature) and another in the meat (for internal temperature). Ignore the lid thermometer, which is often inaccurate at grate level.
10. Increasing Temperature on Your Weber Grill
Need to raise the temperature on your Weber grill? Here are effective methods:
10.1. Boost Airflow for Higher Heat
Increasing airflow is the primary way to raise the temperature in a Weber charcoal grill.
- Open Vents Fully: Ensure both the bottom and top vents are fully open. This maximizes oxygen flow to the coals, increasing combustion and heat.
- Prop Lid Slightly: For an extra boost, prop the lid open slightly (about ¼ to ½ inch) with a stick or rock. This significantly increases airflow. Note that temperature changes are not immediate and can take 15-20 minutes to fully register.
10.2. Adding More Charcoal Fuel
If increased airflow isn’t enough, adding more fuel will raise the temperature.
- Add Lit Charcoal: Add a small amount of lit charcoal to the existing coals. Start with about 10-12 lit briquettes to avoid overshooting your target temperature.
- Add Unlit Charcoal (for longer cooks): If you need to extend the cook time and raise the temperature slightly, you can add unlit charcoal, which will ignite over time.
Since it’s easier to lower temperature than raise it, it’s better to err on the side of running slightly hotter than too cold.
11. Decreasing Temperature on Your Weber Grill
Lowering the temperature on a Weber grill is typically done by restricting airflow.
11.1. Reduce Airflow for Lower Heat
Reducing airflow starves the fire of oxygen, lowering the combustion rate and temperature.
- Close Vents Partially: Partially close the bottom and/or top vents. Start by adjusting the bottom vent as it controls the primary airflow. Only adjust the top vent if further reduction is needed.
- Bottom Vent Control: Marking your bottom vent damper with permanent marker at ¼, ½, and ¾ open positions can help you easily reproduce temperature settings.
Weber kettle bottom damper with markings for temperature control. Marking vent positions allows for repeatable temperature settings.
11.2. Time and Temperature Summary
Mastering time and temperature on your Weber grill takes practice, but these guidelines will get you started. Remember to “cook to temperature, not time.” Meat is done when it reaches the correct internal temperature, regardless of recipe times. Follow reliable recipes as guides, but always use a thermometer and adjust as needed based on your grill and conditions.
12. Smoking Meat on Your Weber Charcoal Grill
Smoking meat on a Weber charcoal grill adds incredible depth of flavor. You can add smoke when grilling hot and fast or during low and slow barbecue. In both cases, wood is placed directly on the burning coals.
12.1. Best Wood Types for Weber Smoking
The type of wood you use significantly impacts the smoke flavor. Here’s a guide to common smoking wood types:
- Fruit Woods (Apple, Cherry, Peach): Mild, sweet smoke flavor. Excellent for chicken, seafood, pork tenderloin.
- Oak, Pecan, Hickory: Medium intensity smoke. Hickory is the strongest of these. Versatile for almost anything, including brisket, ribs, turkey.
- Mesquite: Very strong, intense smoke. Use sparingly, or like some Texan BBQ joints, use it exclusively. Best for beef and bold flavors.
Experiment to find your preferred wood types and combinations.
Smoked meatloaf on a Weber kettle grill with applewood. Smoking adds a layer of flavor depth to familiar dishes.
12.2. Top Weber Smoking Tips
- Less is More: Over-smoking can ruin food. Start with a small amount of wood and adjust in future cooks. For grilling, a fist-sized chunk of wood or a handful of chips is often enough.
- Chunks vs. Chips: Wood chunks are preferred for low and slow cooks due to their longer burn time. Chips are better for shorter grilling sessions but chunks can be used for everything.
- No Soaking Required: Don’t soak wood before smoking. Soaking creates steam and dirty smoke. Dry wood burns cleaner and produces better smoke flavor.
- Cold, Wet Meat Attracts Smoke: Cold meat from the refrigerator absorbs smoke better. Spritzing or mopping meat during cooking also enhances smoke absorption and keeps it moist.
- Keep a Grilling Journal: Track your cooks! Note the weather, wood type and amount, temperatures, and cooking times. Record your results and adjustments for future cooks. This helps you refine your Weber grilling skills over time.
13. Must-Have Weber Grilling and Smoking Accessories
Enhance your Weber grilling experience with these fantastic accessories:
- Vortex: The Vortex insert transforms your Weber into a high-heat convection oven, perfect for crispy chicken wings and fast, even cooking.
Vortex for Weber Grills
The Vortex insert concentrates heat for high-temperature, convection-style cooking on Weber grills, ideal for crispy chicken wings.
VORTEX (IN) DIRECT HEAT for Charcoal Grills, Medium Size. Enhances Weber grill versatility for high-heat convection cooking.
- Slow ‘N Sear: The Slow ‘N Sear insert is designed for superior low and slow cooking and searing on Weber kettles. It creates distinct cooking zones for indirect and direct heat.
Slow ‘N Sear Deluxe
The Slow ‘N Sear Deluxe insert creates dedicated zones for low and slow smoking and high-heat searing on Weber kettle grills.
Slow ‘N Sear SnS Grills Patented Deluxe Insert. Creates distinct cooking zones for Weber kettle grilling and smoking.
-
KettlePizza: The KettlePizza attachment turns your Weber kettle into a high-temperature pizza oven, capable of reaching 800°F for authentic wood-fired pizza.
-
Hunsaker Griddle: The Hunsaker griddle converts your Weber kettle into a flat-top griddle, perfect for smash burgers, breakfast, and more.
-
Onlyfire Rotisserie Kit: The Onlyfire Rotisserie Kit adds rotisserie cooking capabilities to your Weber, ideal for chicken, roasts, and more. Some kits also include a Santa Maria grill attachment for adjustable height grilling over open flames.
The Onlyfire Rotisserie Kit
The Onlyfire Rotisserie Kit adds a new dimension to Weber grilling, allowing for rotisserie cooking of chicken, roasts, and other meats.
Onlyfire Stainless Steel Rotisserie Ring Kit for Weber 22 Inch Charcoal Kettle. Expands Weber grilling techniques with rotisserie cooking.
With this ultimate Weber Grilling Guide, you’re now equipped to become a true backyard BBQ master. Fire up your Weber, experiment with techniques, and enjoy the journey of charcoal grilling! Happy grilling!