Salvation’s Edge is the ultimate raid in Destiny 2: The Final Shape expansion, challenging Guardians to penetrate The Witness’ Monolith within the Pale Heart of the Traveler. This intense raid demands strategic coordination, energy manipulation, and a solid grasp of geometry to confront and defeat The Witness.
The raid recommends a Power level of 1945, but thanks to the Fireteam Power system, you’re set as long as one teammate hits 1950 Power or higher. To embark on this raid, at least one fireteam member must have finished the campaign and the “Wild Card” quest.
This Witness Encounter Guide for Destiny 2: The Final Shape provides a detailed walkthrough for every stage of the Salvation’s Edge raid. Learn how to conquer each encounter, locate secret chests, and ultimately triumph over The Witness in the final boss fight.
For Guardians seeking extra rewards, explore our dedicated guide on Salvation’s Edge raid challenges to discover the additional steps needed for bonus loot and the prestigious Verity title.
Salvation’s Edge Raid Walkthrough: Encounters and Core Mechanics
Salvation’s Edge unfolds across five distinct encounters, each propelling you closer to the pivotal confrontation with The Witness. Here’s a breakdown of what awaits:
- Substratum: Navigate a complex maze, gather Resonance, and deposit it to unlock access deeper into The Witness’ Monolith.
- Dissipation: Face the Herald of Finality, a formidable Disciple reminiscent of Taniks, demanding strategic combat and resource management.
- Repository: Engage in a high-stakes race through increasingly intricate chambers, skillfully dunking Resonance to progress and overcome environmental challenges.
- Verity: Rescue your fireteam members from the shadow realm through intricate puzzle-solving involving shape manipulation and precise coordination.
- The Witness: In the final showdown, confront The Witness itself, targeting its vulnerabilities while evading devastating attacks to secure victory.
Before diving into each encounter, understanding the core mechanics that govern the initial stages—Substratum, Dissipation, and Repository—is crucial. These encounters revolve around charging plates, wires, Resonance, and conduits, all working in synergy. Mastering these elements is key to success in Salvation’s Edge.
Understanding Charging Plates and Wires
Image: Bungie via Polygon
Each encounter features three to four pairs of plates connected by a wire. These plates are activated by defeating specific boss enemies within each encounter.
Once activated, one plate in each pair will glow. Stepping on this glowing plate initiates energy transfer to its paired plate via the wire. To create Resonance, a Guardian must step on the receiving plate after it begins to glow from the incoming energy and before the glow dissipates. This timed interaction rebounds the energy, spawning Resonance nearby.
Generating Resonance Pickups
Image: Bungie via Polygon
Resonance is central to Salvation’s Edge, evolving throughout the raid. In the initial Substratum encounter, only Pyramidal Resonance (triangle-shaped) is present. Dissipation introduces Spherical Resonance (circle-shaped), and Repository adds Hexahedron Resonance (square-shaped).
Resonance serves dual purposes: activating conduits and extending encounter timers. Strategic collection and utilization of Resonance are vital for raid progression.
Activating Conduits Effectively
Image: Bungie via Polygon
Conduits, found adjacent to charging plates, can be either dormant or active. Dormant conduits require energy activation, achieved by the same process that activates the plates. Active conduits display a shape (triangle, circle, or square), indicating the required Resonance type for activation. Activating conduits is essential for spawning the Resonance bank, necessary for encounter progression.
The conduit activation process is precise:
- A Fireteam member steps on the plate opposite the conduit to initiate energy flow.
- A Guardian with the correct Resonance buff shoots the conduit.
- Once energy reaches the conduit plate, a Guardian steps on it to lock the conduit.
Successful activation expands the conduit, making it glow bright gold, and consumes one Resonance stack from the shooter. Locking the conduit also despawns all Resonance generated by that plate pair, emphasizing the need for timely collection. Activating three conduits spawns the Resonance bank beneath The Witness’ time bomb.
Stopping and Resetting the Encounter Timer
Image: Bungie via Polygon
A prominent timer at the top of the screen dictates encounter progression in Salvation’s Edge. Failure to complete objectives before time runs out results in team death and encounter reset. Encounters are designed with timers too short for direct completion, necessitating timer extension or reset. The Resonance bank is key to this in the initial encounters.
After spawning the bank by activating conduits, deposit collected Resonance to add time to the clock. Efficient Resonance banking is crucial for sustaining progress within the raid.
Substratum: Navigating the Opening Maze Encounter
Image: Reddit user charl/chrlmain via Raid Secrets
Substratum unfolds within a 9×9 grid, each grid square representing a distinct room.
Initiate the encounter by collecting the triangle Resonance floating in the central room and depositing it in the bank. This action spawns one of The Witness’ hands in the center and opens two random doors, unleashing waves of explosive Vex Supplicants.
Clearing Rooms and Opening Doors
Image: Bungie via Polygon
Divide your fireteam into two teams of three. Designate a lead player for each team to guide navigation. Manage Supplicants while each team enters one of the opened doors.
Teams must progress through interconnected rooms. The initial rooms contain standard Vex enemies. The second room introduces a Quantum Minotaur alongside other Vex. Defeating the Minotaur in one team’s room triggers a Vex Hydra to appear in the other team’s second room, and vice versa. Eliminating these Hydras opens doors for the respective teams.
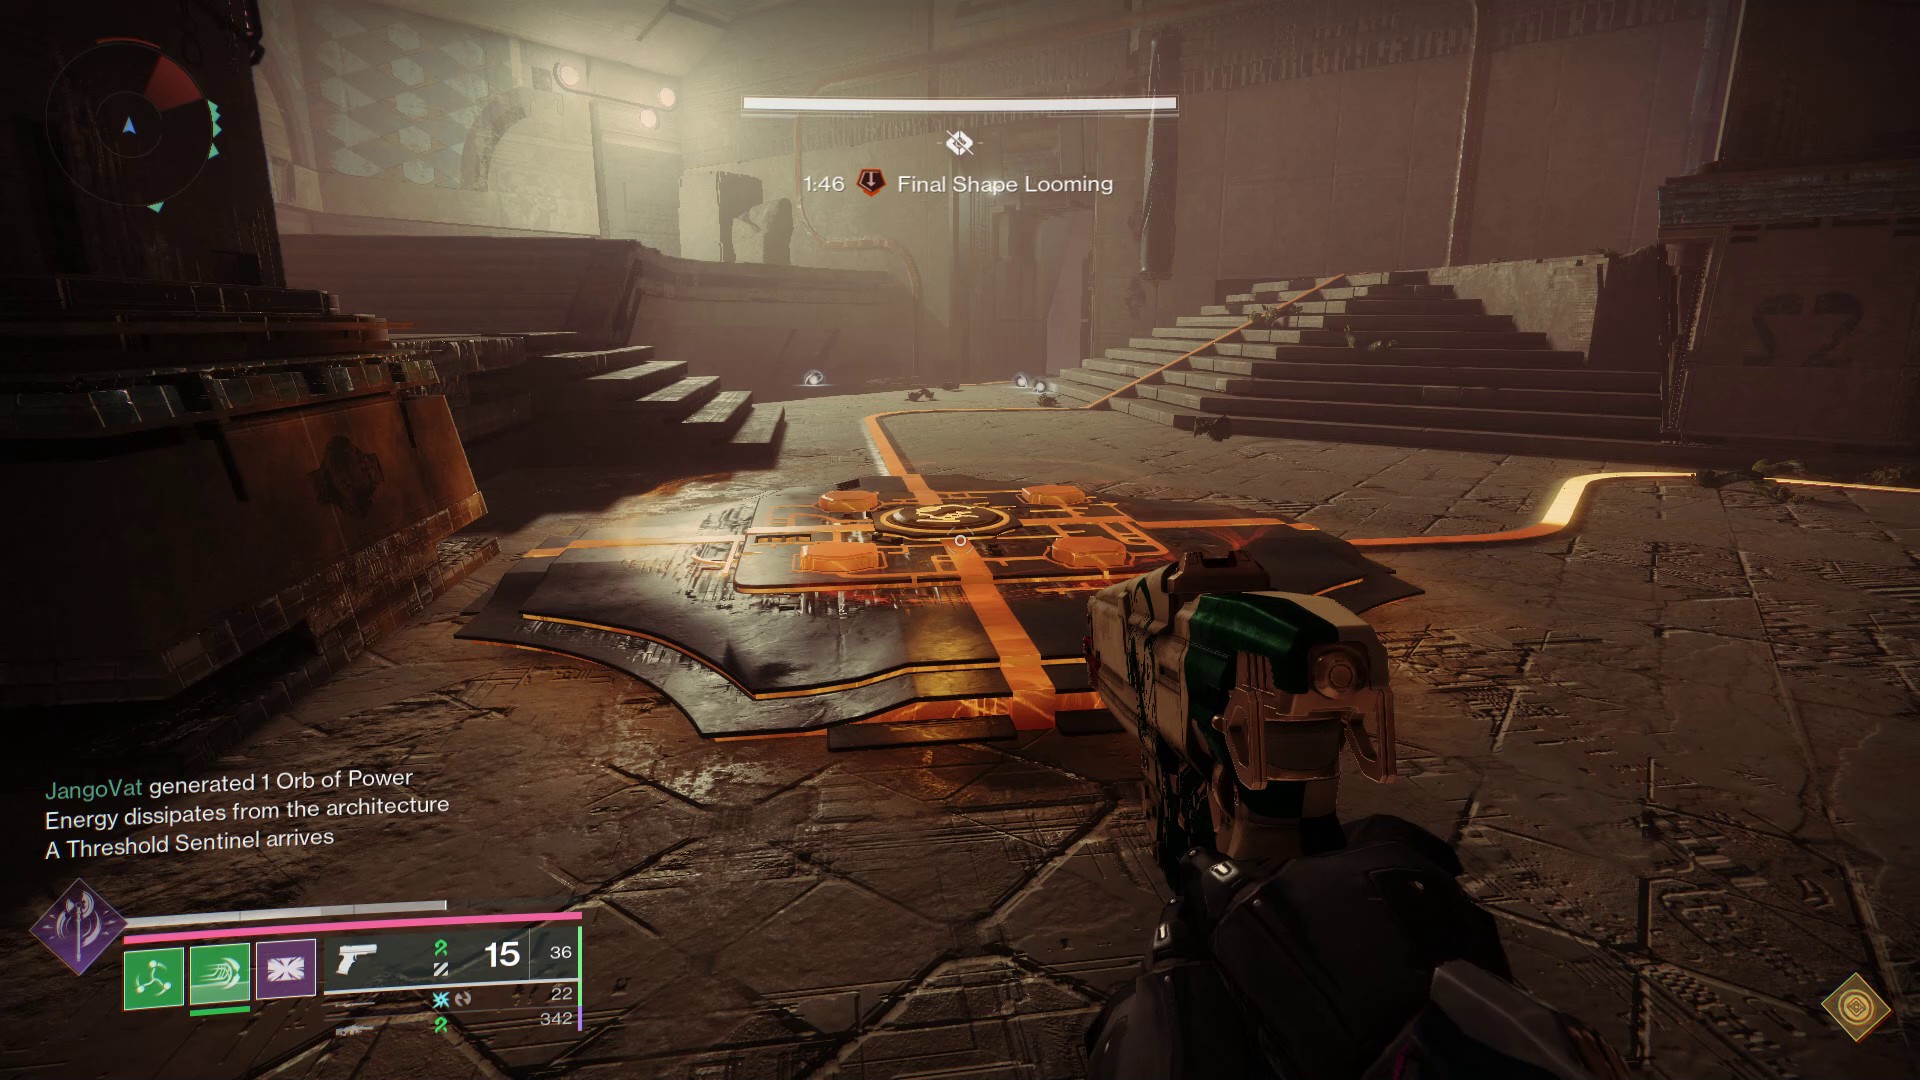
Image: Bungie via Polygon
In the third room, one team encounters an Overload Minotaur Champion, the Devotee of the Witness. Defeating this Champion spawns a Tormentor, the Threshold Sentinel, in the central room. The entire fireteam should converge on the central room to eliminate the Tormentor.
Upon the Tormentor’s defeat, a “energy flows into the architecture” message indicates activation of plate pairs and conduits.
Charging Conduits in Substratum
Image: Bungie via Polygon
Repeat the initial process, entering newly opened doors while managing Supplicants. One team will encounter charged plates and open conduits. This team should initiate energy bouncing and Resonance generation while the other team clears enemies and Champions.
While one team focuses on Resonance generation, the other returns to the central room to defeat a second Tormentor. This action activates another conduit-plate pair, allowing the second team to generate Resonance.
Image: Bungie via Polygon
As teams generate Resonance, it appears in individual rooms and the central chamber. Plate players maintain energy bouncing until prompted that all Resonance is spawned or the timer is critically low. Non-plate players collect Resonance from the central chamber and assist plate players against Subjugators.
Once prepared, teams lock conduits by shooting them with Resonance and stepping on the adjacent plate when energized.
Image: Bungie via Polygon
Successful conduit locking spawns a large Subjugator in the central room. Eliminate it as a team to spawn the bank. Deposit Resonance to extend the timer. Repeating this process three times completes the Substratum encounter, indicated by a descending staircase in the main room leading to the next stage.
Dissipation: Defeating Taniks, the Herald of Finality
Image: Bungie via Polygon
The first boss encounter features the Herald of Finality, a familiar foe known to many as Taniks.
This close-quarters fight benefits from sword loadouts. The Lament is highly effective, alongside Falling Guillotine or other strong swords. Pair Ergo Sum with Wolfpack Rounds with Legendary swords matching the weekly burn for enhanced damage output.
The encounter area is divided into three sections: middle, left (tower), and right. Split into three teams of two, each assigned to a section.
Breaking Taniks’ Weakspot
Image: Bungie via Polygon
Start by breaking the large Taken Blight in the middle to spawn Taniks, Herald of Finality. Taniks remains in the center arena throughout the fight. Your objective is to reactivate the bank by depositing Resonance to break his immunity shield.
Clear initial enemy waves in each section. The third wave spawns a boss-level Taken enemy called a Trammel: Taken Phalanx (middle), Taken Wizard (left), and Taken Ogre (right). Defeating the Trammel charges plates and opens conduits, though initially displaying jumbled symbols.
During this phase, three fireteam members receive the “Call to Reckoning” buff, summoned to Taniks’ arena.
Image: Bungie via Polygon
After defeating your section’s Trammel, players with “Call to Reckoning” enter Taniks’ arena and shoot his forehead. All buffed players should contribute to damage; otherwise, Blight spawns may be delayed.
After sustained damage, Taniks’ weakspot glows, and he summons a Taken Blight shield. Locate and destroy these Blights. Once the shield is down, continue damaging Taniks’ head until it breaks, granting the “Stolen Favor” debuff.
Return to your assigned section. Conduits now display either a triangle or circle, indicating the necessary Resonance type.
Charging Conduits and Reading Symbols
Image: Bungie via Polygon
With “Stolen Favor,” communicate your conduit’s required shape. Utilize the plates in your section, with one player per plate. The plate furthest from Taniks initiates energy flow.
Repeat plate bouncing to spawn Pyramidal Resonance (one side) and Spherical Resonance (other side).
Image: Bungie via Polygon
Back plate players can collect any Resonance, ensuring the required type remains for the front plate player. Front plate players should strategically collect the opposite Resonance type first, then the correct type to efficiently gain two stacks of the needed Resonance.
Missing a plate bounce respawns the Trammel and resets the conduit symbol, requiring re-verification. Collect Resonance, lock conduits, and prepare for the damage phase.
Damaging Taniks Effectively
Image: Bungie via Polygon
After banking Resonance, enter the now-glowing arena to damage Taniks with swords. Warlocks should deploy Well of Radiance or Song of Flame for safety. Speaker’s Mask Exotic’s healing turret is also beneficial.
Continue sword attacks until Taniks becomes immune. Retreat and repeat the process.
Image: Bungie via Polygon
Upon reaching the final health segment, Taniks enters a final stand, briefly becoming immune and summoning the three Trammel bosses. Ignore the adds and focus all damage on Taniks until defeated. Claim loot from the chest and proceed to the next encounter via the green columns to the left.
Repository: Opening the Path Through the Monolith
Image: Bungie via Polygon
Repository builds upon previous mechanics. The arena is again divided into three sections, each with plates. Assign teams of two to left, middle, and right sections. Each team manages a Tormentor, Subjugator, and other enemies, while generating Resonance and locking a conduit.
Start by picking up the square Hexahedron Resonance in the middle and banking it. This spawns three Tormentors, one per section. Defeat them with teammates. The player who lands the killing blow gains “Stolen Favor,” enabling conduit shape visibility.
Image: Bungie via Polygon
The player without “Stolen Favor” goes to the home plate, initiating energy flow. With “Stolen Favor,” stand near the conduit plate. Bounce energy to spawn circle, triangle, or square Resonance. Coordinate Resonance collection based on needs.
After 3-4 bounces, let energy fizzle. Collect required Resonance. Non-buffed players avoid Resonance until buffed players have their needs met. Defeat the Subjugator near your conduit and lock the conduit.
Locking all three conduits spawns the bank in the middle, alongside turrets. Bank Resonance, proceed through the opened door, and defeat the Unstoppable Champion. This process repeats across three increasingly complex rooms.
Clearing the First Room
The first room features straightforward plate lines and open space, simplifying enemy engagement and Resonance mechanics. Follow the standard procedure for a quick clear.
Navigating the Second Room
Image: Bungie via Polygon
The second room introduces complexity with the left plate’s wire crossing the middle plate. The left plate conduit player will be on a raised middle platform. The middle conduit player uses a plate on the left near Tormentor spawns.
Tackling the Third Room
Image: Bungie via Polygon
The third room is highly challenging with pits and simultaneous Tormentor spawns. Wires are crossed: left conduit to middle plate, middle to right, and right to left.
Focus on quick conduit completion, neglecting excess Resonance. Bank Resonance for the final time, defeat the Unstoppable Champion, and claim loot from the chest in the opened back door. Proceed to Verity.
Verity: Dissecting and Moving Shapes Puzzle
Image: Bungie via Polygon
Verity is reminiscent of Last Wish’s The Vault, heavily puzzle-based. Three fireteam members are randomly pulled into the shadow realm, isolated in copies of the main arena. They must collaborate with the light realm team to solve puzzles and escape.
Reversing Catatonic Decimation
Image: Bungie via Polygon
Prioritize a drip check to differentiate Guardians and Ghosts. Statues represent fireteam members wearing their armor sets. Each player should customize their appearance and use a distinct Ghost Shell, noting these details.
During the encounter, Catatonic Decimation freezes some or most of the fireteam. Shadow realm Ghosts appear in the light realm; light realm Ghosts appear near bodies.
Image: Bungie via Polygon
Non-decimated Guardians collect Ghosts and return to statues. Decimated players spectate through teammates to identify their missing statue (never their own) and relay this to allies. Ghosts are then matched with statues to resurrect decimated Guardians.
Escaping the Shadow Realm
Image: Bungie via Polygon
Initiating the encounter pulls three random players into the shadow realm. They see three statues holding shadowy shapes (left, middle, right) and communicate these shapes to the light realm team (e.g., “SCT” for square, circle, triangle).
Shadow realm players become “lord” of their statue’s shape, hoarding them. The screen at the back displays shapes held by Hive Knights. Trade shapes with other shadow realm players until each has shapes matching their statue.
Image: Bungie via Polygon
Next, trade away your shape to obtain the two shapes your statue isn’t holding. Collect both at once to gain a 3D shape buff. Use this buff to pass through the barrier at the back of the room and rejoin the light realm team.
Dissecting 3D Shapes in the Light Realm
Image: Bungie via Polygon
In the light realm, assign roles: two enemy slayers and one dissector. Statues transform into shadow realm Guardians holding 3D shapes (Cube, Sphere, Pyramid, Cylinder, Cone, Prism).
Shadow realm players communicate their shape order (e.g., “circle, square, triangle”). The dissector manipulates light realm statues to remove shapes matching the shadow realm callout.
Image: Bungie via Polygon
Kill Knights in the light realm (three spawn, each dropping a shape). Dunk shapes into statues to dissect 3D objects. For example, with a “circle, square, triangle” callout, dunk a circle into the left statue to dissect a circle from its 3D shape. Dunking a shape into one statue necessitates dunking a different shape into another to trade places.
Image: Bungie via Polygon
After Knights, two Unstoppable Ogres spawn. Enemy slayers manage Ogres while the dissector continues shape manipulation. Repeat Knight and Ogre cycles as needed.
Image: Bungie via Polygon
Verify dissected 3D shapes against the shadow realm callout to ensure accuracy. Once correct, shadow realm players can escape.
Proceeding to the Next Phase
Image: Bungie via Polygon
Reuniting the fireteam ends the phase timer. Move to the back of the room for an enemy onslaught, including Unstoppable Ogres. Clear enemies and prepare for mass decimation.
The Witness decimates five of six fireteam members. The sole survivor resurrects allies, guided by decimated players identifying their statues. Repeat this process three times across three phases. Completing the third phase rewards loot, and the central hole becomes an elevator to The Witness encounter.
The Witness: Final Boss Encounter
Image: Bungie via Polygon
The final arena is split into two sides with a central pit leading to a root platform. The Witness awaits at the back.
Recommended Loadout for The Witness
Image: Bungie via Polygon
Prioritize high burst damage loadouts. Hunters with Celestial Nighthawk, Marksman Golden Gun, and Still Hunt are ideal.
Microcosm, the heavy trace rifle from The Final Shape, is effective, especially post-Super. Warlocks use Well of Radiance or Song of Flame, Titans use Twilight Arsenal or quick Supers. Machine guns and pulse rifles are also recommended for enemy management.
Breaking The Witness’ Glyphs
Image: Bungie via Polygon
The Witness has six glyph buttons. Break these using the Glyphbreaker buff. Divide into two teams: Glyphbreakers (3 players) and enemy slayers (3 players). Enemy slayers manage adds (Subjugators, Screebs) on the left and right sides.
Glyphbreakers focus on The Witness’ hands:
- Down hand: Pyramidal Resonance, triangle bomb.
- Up hand: Spherical Resonance, circle airstrike.
- Wall hand: Hexahedron Resonance, beam.
Assign each Glyphbreaker to a hand type. Start each phase by standing in your hand’s target area and shooting its Resonance bangle. Note the revealed color (green, red, yellow), indicating the buff needed.
Image: Bungie via Polygon
Quickly obtain the required buff from the corresponding hand. Return to your assigned hand, stand in its aura, and shoot the bangle to destroy it and gain Glyphbreaker. Be mindful of buff stacks and hand timers. Destroying a hand can trigger The Witness’ trap.
Image: Bungie via Polygon
Once all Glyphbreakers have the buff, jump to the root platform and destroy glyphs. The platform cleanses buffs. Repeat to destroy all six glyphs, triggering the damage phase.
Surviving The Witness’ Trap
Image: Bungie via Polygon
Once per phase (not on the first or sixth hand), destroying a hand triggers “The Witness tests you.” Identify the hand type that triggered the trap. Glyphbreakers observe Resonance crystals in the middle. Destroy crystals not part of the shape matching the destroyed hand type (square, circle, or triangle). Incorrect shots trigger death. Successful shaping yields “The Witness’ trap is foiled.”
Following the trap, The Witness releases a floor-wipe shockwave. Jump when its eyes glow and a sword-drawing sound is heard to avoid ground contact until the attack ends.
Damaging The Witness
Image: Bungie via Polygon
During damage phase, a platform rises, revealing The Witness’ chest crit spot. Focus fire while dodging beams and floor wipes. Healing grenades are highly effective for survival.
Image: Bungie via Polygon
The Witness attacks in cycles, alternating between beams and floor wipes. Prioritize survival over damage. After a few cycles, The Witness slams the platform down. Jump off and manage enemies. Repeat the glyph breaking and damage phases across three phases.
For the final stand, The Witness becomes briefly immune, then vulnerable again. Unleash maximum damage within 15-20 seconds to defeat it before a wipe. Victory grants a large loot chest, followed by the final mission, “Excision.”
Congratulations on conquering Salvation’s Edge! Now, explore how to acquire the Khvostov Exotic, gather Motes of Light, and discover all Visions of the Traveler.
See More: