Black Ops 6 Zombies is bringing back the beloved round-based experience, and at the heart of it is the intriguing Liberty Falls quest. If you’re ready to dive deep into the undead chaos and uncover hidden secrets, this Liberty Falls Guide will walk you through every step to complete the main easter egg quest in Black Ops 6 Zombies. Forget just surviving rounds; the real thrill lies in unraveling the mysteries of Liberty Falls and claiming those exclusive rewards. While Black Ops 6 Zombies Directed Mode offers a helping hand, this guide provides the perfect nudge to conquer the Liberty Falls easter egg quest on your own terms.
Your Path to Victory: Liberty Falls Quest Steps
This liberty falls guide breaks down the main quest into manageable steps:
- Step 1: Craft the Jet Gun (Thrustodyne M23 Wonder Weapon)
- Step 2: Investigate the Church and Interact with the SDG Generator
- Step 3: Unlock Pack-A-Punch
- Step 4: Utilize the Jet Gun to Gather LTG Components
- Step 5: Craft the LTG (Localized Transference Generator)
- Step 6: Charge Dark Aether Canisters and Activate Projectors
- Step 7: Trigger and Survive the Final Encounter
Step 1: Crafting the Jet Gun Wonder Weapon
The first major hurdle in this liberty falls guide is obtaining the Jet Gun, officially known as the Thrustodyne M23. While luck might get you one from the Mystery Box, crafting is the reliable method. For a quicker start, consider using a Wonderbar Gobblegum for a guaranteed Wonder Weapon – though this is optional. Essence management is key; save it for later Pack-A-Punch upgrades if you choose the crafting route.
The Jet Gun crafting process involves collecting three components. These can be obtained in any order, but this liberty falls guide suggests a path for efficiency. Gather Salvage early, as crafting is resource-intensive.
Access Room 202 at the Motor Lodge
Start your quest in the Motor Lodge, located in the spawn area. Ascend the stairs and turn left. Progress down the corridor, and the door to room 202 will burst open, releasing a small group of zombies. Clearing these early-round zombies is a quick Essence boost and an easy first step in this liberty falls guide.
Acquire the Tool Shed Key and Handbrake from the Groundskeeper
Next, you need the Tool Shed Key, dropped by the Groundskeeper zombie. This special enemy spawns in the cemetery, adjacent to the church. To reach the cemetery, unlock pathways, perhaps prioritizing the route that leads to the Mystery Box (indicated by a white light beam at spawn).
Upon entering the cemetery, eliminate zombies until the Groundskeeper appears. He’s easily identified by his overalls, plaid shirt, and the “Groundskeeper” title. The Groundskeeper flees rather than fights, attempting to escape. Eliminate him quickly to claim the Tool Shed Key.
With the key, locate the tool shed in the Groundskeeper’s Yard. Exit the cemetery, turn left, unlock the Hill Street barrier if needed, and turn left again to find the shed. Inside, collect the Handbrake – another essential component for the Jet Gun.
Obtain the Water Pressure Gauge from Washington Avenue and the Bowling Alley
Your next objective in this liberty falls guide is the Water Pressure Gauge. Find the Water Valve in front of the flower shop on Washington Avenue. There’s no interaction prompt; simply interact near the tap to the right of the broken window to collect the valve.
Take the valve to the bowling alley. Locate a panel on the wall to the right of the bowling lanes. This step can be challenging, especially solo. Decoy grenades or a cooperative squad are highly recommended. Consider tackling this early in solo runs for weaker zombies.
Insert the valve into the panel and hold the interact button to fill the gauge. Maintaining interaction is crucial, leaving you vulnerable. Teammates, Energy Mines, or decoys are invaluable here. Progress is saved intermittently, but don’t release for too long. Once filled, the gauge detaches, allowing you to collect it.
Enter Radio House Electronics for Electrical Wires
The final component for the Jet Gun, according to this liberty falls guide, is the Electrical Wires, found inside Radio House Electronics. Access requires either a Mangler Cannon or a Mutant Injection. Cannons drop from Manglers (starting around round 11, aim for the cannon to increase the drop chance). Mutant Injections are rarer, from SAM Trials, the Liberty Falls vault, or rare enemy drops. Crafting either at a workbench is a more consistent approach. Keep an eye out for Zombies loot keys when fighting Manglers and Abominations for extra rewards.
Craft the Mangler Cannon for 1,250 Salvage (or Mutant Injection for 2,250) at the Riverside Backstreet Parking workbench. Head to Radio House Electronics on Riverside and blast open the gate with your cannon. Inside, interact with three piles of broken electronics on the floor to spawn the Electrical Wires item, and collect them.
Assemble the Jet Gun
With all three components secured, return to room 202 in the Motor Lodge. Inside, you’ll find a dedicated crafting bench for the Thrustodyne M23. Interact with it to craft the Jet Gun. This liberty falls guide advises doing this near the end of a round or between rounds to avoid being trapped by zombies in the small room during crafting.
Step 2: Church Investigation and Pack-A-Punch
While Pack-A-Punch access is possible earlier, this liberty falls guide suggests unlocking the church now, as you can Pack-A-Punch your newly acquired Jet Gun.
Unlock the church barrier for 2,500 Essence. The Pack-A-Punch machine is located on the chancel, in its familiar location. Upgrade your primary weapon or the Jet Gun, depending on your loadout and Essence reserves. Pack-A-Punch levels and costs are:
- Pack-A-Punch I: 5,000 Essence
- Pack-A-Punch II: 15,000 Essence
- Pack-A-Punch III: 30,000 Essence
Step 3: Interact with the SDG Generator
Approach the Dark Aether machine (SDG Generator) to the right of the Pack-A-Punch. There’s no interaction icon for this easter egg step; simply interact with the machine. A white flash signifies success. If using a controller, you might need to hold the interact button.
The flash acts as a nuke, eliminating nearby zombies. Panos’ ghostly form appears on the church balcony and delivers dialogue. Another zombie horde may appear in the church; defeat them while listening to the dialogue to proceed with the liberty falls guide.
Step 4: Jet Gun Component Retrieval for the LTG
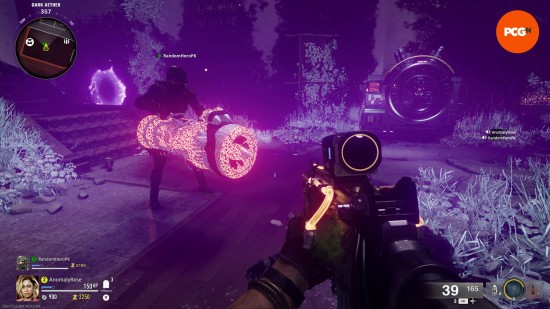
The Jet Gun’s purpose becomes clear in this step of the liberty falls guide. It’s needed to collect components for the LTG (Localized Transference Generator), otherwise unobtainable. Use the Jet Gun’s suction to retrieve components from these locations:
- Church: Look to the left of the church balcony for a floating item.
- Washington Avenue: Above Buzz Cuts barber, aim for the open top-floor window.
- Olly’s Comics: Find a hole in the ceiling and use the Jet Gun to extract the component.
Step 5: Crafting the LTG
With all three components collected using this liberty falls guide, the LTG can be crafted. However, it requires a specific workbench on the roof of Savings and Loans. Reach the roof via the ascender outside the bank or the zip line from the cemetery.
Crafting the LTG is a simple interaction, but expect a zombie horde. Prepare accordingly before crafting.
Step 6: Charging Dark Aether Canisters and Activating Projectors
This phase of the liberty falls guide introduces complexity. After crafting the LTG, return to the church and collect an Aether Canister from the SDG Generator. Movement is restricted while carrying the canister, so ensure backup or minimal zombies.
Charging the First Canister
Take the canister to the spawn area and place it near one of the four Dark Aether machine activation pads as shown.
Next, position the LTG under the Dark Aether storm in Riverside and defend it. Zombies are instantly killed near the storm but damage the LTG if they get too close.
An Abomination will spawn. Lure it near the Aether Canister and weaken it. Finish it off with the Dark Aether trap (activate the trap when the Abomination is within range and about to be killed). Killing the Abomination outside the trap area will fail this step. Success charges the canister, giving you 90 seconds to return it to the SDG Generator. The LTG can be retrieved later.
Activating Projectors
Upon returning the charged canister, you receive the Strauss Counter. Use it to interact with projectors located around the map:
- Groundskeeper’s House: Projector is located beside the house.
- Between Church and Bowling Alley: Projector is on the grassy bank.
- Yummy Freeze Roof: Accessible from the Savings and Loans roof, the projector is on top of Yummy Freeze.
Interacting with each projector with the Strauss Counter displays a color: green, yellow, or red. Each interaction cycles the projector’s light through these colors. Match the projector color to the Strauss Counter reading using this code:
- Red Counter – Green Projector
- Yellow Counter – Yellow Projector
- Green Counter – Red Projector
Correctly matching all projectors spawns another canister at the spawn location. Collect this and the LTG from Riverside and proceed to the Dark Aether trap near Washington Avenue.
Charging the Second Canister
Repeat the charging process with the second canister, following the same steps as before. This time, place the canister at the Dark Aether trap near Washington Avenue and the LTG at the Dark Aether storm in the cemetery. The elite enemy will now be a Mangler instead of an Abomination.
Defeat the Mangler within the trap area to charge the canister. Return it to the generator in the church within the time limit.
Step 7: Trigger and Survive the Final Encounter
The final encounter in this liberty falls guide is triggered manually, allowing preparation time. Gear up: maximize weapon rarity, Pack-A-Punch upgrades, and armor. Gobblegums, ammo mods, and throwables are highly recommended. Mutant Injectors from crafting benches are also excellent choices.
Once ready, return to the church and interact with the SDG Generator one last time to initiate the final battle. Survive three rounds of zombies, including elite Manglers and Abominations. Upon defeating the final Abomination and all remaining zombies, your character will be downed – this is scripted.
Enjoy the concluding cutscene (spoiler-free!). The quest is complete, and you can choose to exfil or continue playing with your powerful arsenal to see how many more rounds you can endure.
Liberty Falls Main Quest Rewards
Completing the Liberty Falls easter egg quest grants you prestigious rewards to showcase your achievement:
- 5,000 XP
- Ray Gun PJ-SRU Weapon Skin
- Classified Calling Card (exclusive for completing the quest before Direct Mode release)
Congratulations, you’ve conquered the Liberty Falls main quest in Black Ops 6 Zombies! With more BO6 Zombies maps and challenges on the horizon, and the upcoming Black Ops 6 season, the undead action continues. After mastering this liberty falls guide and completing this quest, consider tackling the larger Terminus main quest or the enjoyable Liberty Falls bowling alley easter egg for more Zombies thrills.