The Roaring Temple stands as the second dungeon adventurers typically brave in their journey through the Temple of Sylaveth’s Open World Dungeons. Here, the initial seeds of teamwork are sown, presenting challenges that require coordination, albeit in a straightforward manner, to overcome. This guide will walk you through the lore, boss encounters, and mini-boss strategies to help you conquer the Roaring Temple.
Delving into the Lore of Roaring Temple
Ancient texts whisper tales of Belluatan, a figure who, while gazing across the plains, encountered a majestic lion. Recognizing a kindred spirit in this creature, Belluatan imbued it with a fragment of the Star of Sylaveth. However, the insidious and chaotic influence of the Order gradually twisted and corrupted the lion’s form. This vile transformation birthed the monstrous entity now feared as King Chimaerus, the formidable guardian of the Roaring Temple.
Rex Chimaerus Boss Guide
Rex Chimaerus is the main boss of the Roaring Temple, and understanding its mechanics is crucial for victory. This encounter introduces a simple yet essential team dynamic.
Abilities of Rex Chimaerus
- Fireball: Rex Chimaerus targets a player with a poison marker, followed by launching three fireballs at the same player. Simultaneously, poison is sprayed from its tail in a left or right arc.
- Frenzy: This mechanic requires swift teamwork to mitigate arena-wide damage.
Strategy to Defeat Rex Chimaerus
-
Statue Assignment: At the start of the fight, designate each of the four players to one of the four statues located at the edge of the arena. This pre-assignment is key for the Frenzy mechanic.
-
Fireball Decoy: When Rex Chimaerus casts Fireball, a poison marker will appear on a player. The marked player must immediately move as far away from the boss as possible to maximize distance.
-
Tanking Fireballs: The remaining three players need to position themselves between Rex Chimaerus and the marked player. Each of these players will tank one of the three incoming fireballs, protecting the marked player.
-
Support Roles:
- Wand users can utilize Blessed Barrier preemptively on the players designated to tank the fireballs. With adequate gear, a Blessed Barrier buff might enable a player to withstand all three fireballs, simplifying the mechanic.
- Dagger offhand users acting as tanks can employ Shadow Step to quickly reposition behind Rex Chimaerus if they find themselves in the line of fire, further aiding in damage mitigation.
-
Frenzy Disruption:
- Telegraph: The Frenzy mechanic is signaled by a voice line in an unknown language.
- Statue Activation: Upon hearing the telegraph, the team must act swiftly. Each assigned player needs to interact with their designated statue’s latch. Successfully pulling all four latches will douse Rex Chimaerus with water, effectively preventing the arena-wide Area of Effect (AoE) damage from Frenzy.
- Failure Consequence: Delaying the statue activation will result in a wipe, as the Frenzy mechanic will inflict fatal damage to all players in the arena.
Mini-Boss Encounters in Roaring Temple
The Roaring Temple features mini-bosses that test your adaptability and combat awareness before reaching Rex Chimaerus.
Ancient Berserk Dark Enforcer
This is the first mini-boss encountered in the Roaring Temple. It features a straightforward mechanic focused on debuff management.
-
Ignite: The Ancient Berserk Dark Enforcer periodically applies a stacking burn debuff to players, lasting for 20 seconds. If left unchecked, the stacking debuff can quickly overwhelm healers.
-
Mitigation Strategy: To manage the Ignite debuff, players should periodically move into the water surrounding the arena. Water contact significantly reduces the duration of the burn debuff, preventing it from stacking to dangerous levels.
Ancient Berserk Shade Wizard
The Ancient Berserk Shade Wizard presents a more complex encounter, demanding awareness of both the boss and summoned adds.
-
Zombie Dogs: This mini-boss periodically summons Zombie Dogs. These summoned creatures use Fury Attacks that inflict fear upon successful hit.
-
Mechanic Breakdown:
- Telegraph: The Shade Wizard telegraphs its special attack with the voice line: “Suffer endlessly!”
- Fury Attack Sequence: Immediately after the voice line, prepare to block the first Fury Attack from the Shade Wizard.
- Puddle Hazard: Following the first Fury Attack, puddles will appear underneath players. Evacuate from these puddles to avoid taking damage.
- Second Fury Attack: Be ready to block a second Fury Attack after the puddle phase.
- Stun Opportunity: The Shade Wizard can be stunned immediately after the voice line is uttered. Stunning at this moment can interrupt the entire Fury Attack sequence, preventing both the fear effect and puddle spawn, increasing your team’s uptime on damage.
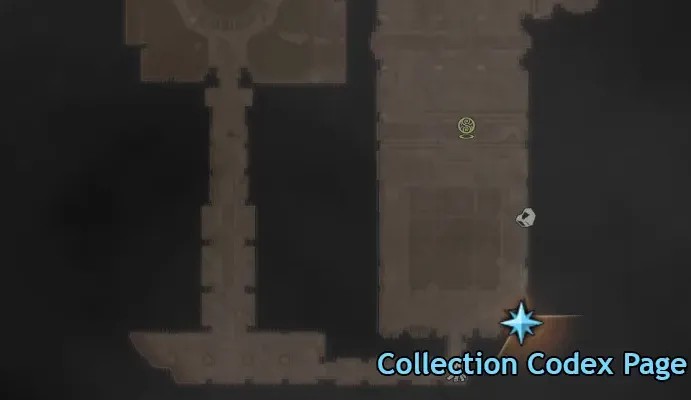
Codex Exploration Quests: Temple of Madness
Within the Roaring Temple, players can discover Codex Exploration Quests, such as the “Temple of Madness” collection quest. These quests often involve finding hidden Codex Pages scattered throughout the dungeon, adding an exploration element to your run.
Conclusion: Mastering the Roaring Temple
The Roaring Temple serves as a crucial stepping stone in your dungeon progression. By understanding the lore, mastering the boss and mini-boss mechanics, and coordinating with your team, you can effectively conquer the Roaring Temple and continue your adventures in the Temple of Sylaveth. Prepare your team, strategize your approach, and venture forth to claim victory in the Roaring Temple!