This post was originally published on June 13, 2022. It was updated on January 3, 2024.
Stepping into the world of makeup as a beginner can feel like entering a maze. It’s a realm filled with endless products, tools, and techniques, making it easy to feel overwhelmed before you even start.
The truth is, there isn’t a single “right” way to do makeup. It’s about discovering what works best for you. Makeup is deeply personal, an extension of your individual style and confidence. As I often say, and as I wrote in my book, makeup is our most intimate accessory.
Unlocking your personalized makeup routine and understanding the best product choices for each step will simplify your beauty journey immensely.
While countless hours can be spent watching YouTube tutorials and hoping for a breakthrough (spoiler alert: they often miss the mark; learn why here), the most effective way to learn makeup is through tailored education. Fortunately, guiding beginners like you is my expertise. I’m genuinely excited to be part of your makeup exploration. Share your favorite makeup tip in the comments below – I’d love to hear from you!
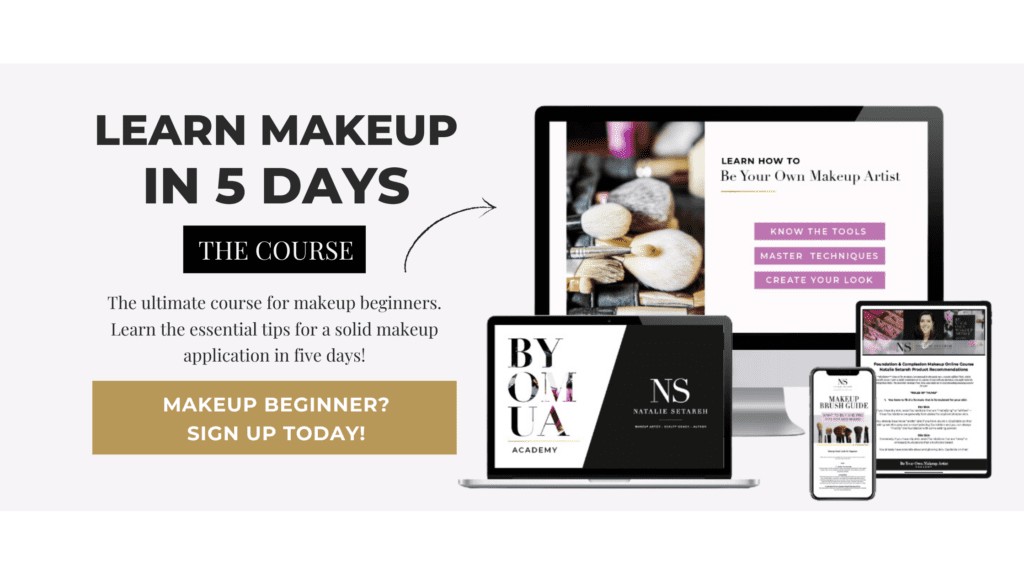
This comprehensive guide is brought to you by my Learn Makeup in 5 Days Course.
If your goal is to achieve a polished, confident everyday makeup look, you’re in the right place. My course, Learn Makeup in 5 Days, is designed to provide exactly that, and so much more. Think of it as the ideal beginner makeup kit, but without the pressure of buying anything upfront.
Listen to this post! Apple | Spotify | Google
Navigating the Beauty Business: Your Personalized Makeup Journey
The beauty industry is saturated with makeup bloggers and vloggers, creating a constant stream of YouTube tutorials and product recommendations. Sorting through this noise to find advice that’s actually helpful and tailored to beginners can be a real challenge. Finding genuinely simple makeup advice? Even harder. (And there’s a reason why – simplicity often doesn’t drive product sales…)
Many of my students come to me after years of wrestling with DIY makeup, feeling frustrated and lost. Others recognize from the outset the value of learning from a trusted expert. The choice is yours, but I’m here to offer a different approach.
I’m not here to push the latest eyeshadow palette or hyaluronic acid serum. This isn’t another list of seasonal must-have products or a rave review of my “holy grail” concealer. The internet is already full of that. The last thing you likely need is another beauty product gathering dust in your makeup bag because you don’t know how to use it. And even if I did recommend specific products, they might only work if we shared the exact same skin type, concerns, and skin tone.
My focus is on makeup education.
My guidance, while general in this article, is designed to be universally helpful. My primary goal as your educator is to enhance your natural beauty and boost your confidence in your makeup abilities. Whether you aspire to master a simple everyday look or learn the secrets to full glam, I’m here to teach you the essential knowledge to get started.
I’ve always maintained that the fanciest, most expensive, or trendiest makeup tools and products won’t automatically deliver better results. Buying into hype won’t magically transform you into a makeup artist or erase every perceived “imperfection.”
It’s not about the makeup itself; it’s about the knowledge you possess.
Choosing the “right” products involves understanding their formulas, ingredients, how they interact with your unique skin type, and the optimal application techniques.
This isn’t just another step-by-step tutorial where you’re told to blindly follow instructions.
Instead, I’ll guide you through a flexible four-step makeup routine. You can adapt this routine to perfectly match your skin, personal preferences, and lifestyle. My aim isn’t to provide a rigid, cookie-cutter tutorial. I want to empower you with the knowledge and techniques to reveal your most beautiful and confident self through a simple, everyday makeup application that even absolute beginners can master with ease.
Ready to begin? Let’s dive in!
Recommended Reading: Makeup Dupes: Splurge vs. Save
It’s not about the makeup, it’s about the knowledge.
Choosing the “right” products means learning about their formula, their ingredients, how they will suit your specific skin type, and how best to apply them. Don’t worry, this is not just another step by step tutorial where I will tell you to do this and do that and you’re done.
I’m going to walk you through a four-step application routine that you can tweak to suit your skin, preferences, and lifestyle. My goal is not to give you a cookie-cutter tutorial. I want to guide you and help you to uncover your most beautiful and most confident self-using a simple everyday makeup application that even beginners can feel comfortable doing.
Ready? Let’s go!
Step 1: Skincare – The Foundation of Great Makeup
Let’s start with a crucial truth: the first step to amazing makeup isn’t actually makeup at all. It’s skincare! We all desire healthy, radiant skin, and the most effective way to achieve this is through consistent skincare. Period.
Think of skincare as essential as brushing your teeth – a twice-daily ritual, morning and night.
Your skincare routine should be the workhorse in achieving your skin goals. Dealing with dark spots or under-eye circles? Your nighttime routine should specifically target these concerns. Fine lines are a natural part of aging, but a solid skincare regimen can help minimize their appearance and slow down the development of new ones.
Preparing your skin for makeup can vary depending on several factors: the day itself, how much sleep you’ve had, the weather, and your daily activities (long day, short day, indoors, outdoors, etc.). Sometimes, your regular skincare routine is sufficient; sometimes, you might need an extra step.
Recommended reading: Skin Care vs. Skin Prep for a deeper dive into the nuances of skincare and skin prep.
However, skipping skincare before makeup is never recommended, especially if you’re aiming for a flawless makeup look. Applying makeup to unprepared skin is a definite no-no.
My personal favorites for skin prep come from Sonia Roselli beauty. They are all Natalie-approved, and I keep two of each kit in my professional collection.
The Role of Face Primers
Face primers have become incredibly popular in recent decades, and they can be beneficial for extending makeup wear or achieving a specific finish. However, for most people, primers aren’t essential if you have a solid skincare and skin prep routine in place.
This isn’t to say that you need perfectly flawless skin to wear makeup. We all have skin “imperfections” that we notice, but often, others don’t even see them. The key is that consistent daily skincare is vital. It improves your skin’s health and can help manage concerns like acne and signs of aging.
Recommended reading: A Primer in Skin Primers >
Identifying Your Skin Type
If you’re unsure about your skin type or don’t yet have a skincare routine, I highly recommend downloading my free, value-packed skin type guide. This guide is free because understanding your skin type and how to care for it should be accessible to everyone.
Image alt text: Banner for Natalie Setareh’s free skin type guide download.
Skin Types Covered in the Guide:
- Oily skin
- Dry skin
- Combination skin
- Mature or aging skin
- Acne-prone skin
- (Brief mention of pregnancy-related skin changes)
The guide is packed with tips on choosing the right skincare products for your specific skin type and much more. Also, remember that healthy skin is supported from within! Eating nutritious foods and drinking plenty of water contribute significantly to radiant skin, even without makeup.
Step 2: Complexion – Achieving a Flawless Base
Foundation Fundamentals
The internet is overflowing with beauty content, and it’s easy to get caught in the misconception that achieving a flawless makeup look requires layers upon layers of product. With so many foundation types and formulas available, it’s understandable to feel confused about what’s best for you and your skin tone.
I’ve found that most of my clients and students prefer foundation that provides natural-looking coverage or a minimal makeup effect. If this sounds like you, focusing on Step 1 (skincare) and understanding the different types of foundation formulas – from sheer (transparent) to full coverage (opaque) – is crucial.
Recommended Reading:
How To Find Your Perfect Foundation Undertone Match >
Foundations In My Pro MUA Kit >
Foundation Application: Key Considerations
My go-to foundation formula is liquid foundation.
Liquid foundations are incredibly versatile, available in formulations for virtually every skin type. They are typically dispensed from a pump or tube and can be easily applied using your fingers, a brush, or a sponge.
While there’s no single “best technique” for foundation application, here are my three preferred methods:
- For buildable coverage (when you want more coverage): I use a buffing brush to apply and blend. I demonstrate this technique in detail within my Learn Makeup in 5 Days: Makeup For Beginners course.
- For quick application (when you’re short on time): I use my fingers to apply and blend. I’ve demoed this quick technique on my Instagram here.
- For a polished finish or if my skin feels oily: I opt for a paddle-shaped foundation brush. You can explore different brush types in my makeup brush guide here >
Self-setting foundations are becoming increasingly common. Always check the product packaging or bottle to see if your foundation is self-setting. If it explicitly states “self-setting,” and you’re confident you’re using the right formula for your skin type, trust that it is. Adding extra setting powder to a self-setting foundation, especially loose or pressed powder, can sometimes lead to a cakey appearance over time.
If your foundation isn’t self-setting, you’ll want to use a setting or translucent powder to lightly set it. This helps to prevent shine and prolong wear.
I explain the different types of powders and when to use each in my book, Be Your Own Makeup Artist.
If you choose to use a setting spray, generally apply it as the very last step in your makeup routine (unless the product instructions specify otherwise).
Remember, these are the techniques and tips that work best for me, and they may or may not be ideal for you. This is exactly why investing in makeup education and personalized learning is so beneficial.
Concealer: Targeted Coverage
Similar to foundation, the need for and application of concealer depends on your skin type, the coverage of your foundation, and your personal preference.
Online makeup artists and YouTubers often wear heavier makeup, including generous amounts of concealer, because they are filmed under studio lighting for online video. However, in natural daylight, this level of makeup can often appear quite heavy or cakey.
I often use concealer without foundation when I want to subtly cover minor blemishes or dark spots. I always set concealer with a setting powder, using a small, precise setting brush. This is my favorite setting brush >
Because I prefer my foundation to provide most of my desired coverage, I typically apply concealer over foundation only when I want to further refine my look or ensure my makeup lasts all day.
Recommended Reading: Under Eye Concealer Got You Down? >
Blush, Bronzer, and Highlighter: The Holy Trinity
I like to refer to blush, bronzer, and highlighter as the “holy trinity” of makeup. These products are incredibly impactful and versatile; they can truly elevate or detract from your overall look. They can instantly add years or create a youthful, radiant effect.
If you use foundation to even out your skin tone, incorporating at least one of these three products is essential. They not only add dimension and lift to your makeup but also bring a healthy vibrancy to your complexion.
Generally, especially for youthful makeup looks, blush application begins on the upper outer apples of your cheeks. Highlighter is applied to the high points of your cheekbones. Bronzer, usually a shade or two darker than your skin tone, is applied where the sun naturally kisses your face – temples, cheekbones, and jawline. While explaining placement is challenging in words or even in a general makeup tutorial, it’s because face shapes are so diverse! My book includes detailed diagrams to guide you in precisely placing blush, bronzer, and highlighter based on your unique face shape.
The sheer volume of makeup products – primers, neutralizers, concealers, foundations, powders, bronzers, highlighters, blush, and more – can be incredibly confusing for beginners trying to figure out what they actually need.
One of my core makeup principles, which I emphasize in my book Be Your Own Makeup Artist, is that less is often more. You absolutely don’t need to wear excessive makeup to enjoy makeup. And surprisingly, wearing a lot of makeup doesn’t necessarily boost self-esteem; it can sometimes have the opposite effect. Ultimately, it’s about using the right makeup products in the right amount for you.
Step 3: Eye Makeup – Enhancing Your Eyes
The third step in our beginner makeup routine focuses on the eyes and brows.
With a vast array of eyeshadow colors and eye makeup products available, choosing what to wear (or what to skip) can seem like a daunting task.
When you approach eye makeup with a pro’s mindset, it becomes less complicated than it appears. For everyday wear, a simple eye makeup look is usually perfectly suitable, apart from special occasions. Unless you desire a full glam smoky eye with false lashes daily (if so, go for it!), mastering the basics is the essential starting point.
So, while beauty tutorials often encourage you to buy the newest 40-shade eyeshadow palette, I’m giving you permission to resist the urge! Instead, invest in a few individual eyeshadow shades that are flattering to your eye color, eye shape, and skin tone.
Recommended Reading: 6 Questions To Ask Yourself Before Buying That Makeup Product >
Consider shopping your own makeup collection and curating a custom palette with your favorite shades. Learn more about depotting makeup to create your own palettes here >
Sometimes, the basics – brown, black, and cream eyeshadows – are more than enough! Unless you’re creating a very dramatic or artistic look, a wide range of colors isn’t necessary for everyday makeup.
Prerequisite: Identify Your Eye Shape
This might seem very basic, but it’s incredibly important. Numerous tutorials and articles explain how to determine your eye shape. My course also includes a dedicated section with detailed diagrams to help you scientifically identify your eye shape (because I’m a makeup enthusiast at heart!). Understanding your eye shape is the first step in knowing how to best apply eye makeup.
Step 1: Eyeshadow Simplicity
Eyeshadow is often the first makeup product that beginners are drawn to. I could honestly write an entire book just on eyeshadow! In fact, there are books dedicated solely to eyeshadow techniques and artistry.
For my everyday makeup, I often skip eyeshadow altogether.
For a slightly more polished everyday look, I’ll use just one, or perhaps two, eyeshadow shades at most. I often choose eyeshadow colors that are already present in my natural eye color to enhance them subtly.
If you want to learn more about eyeshadow and my approach to application, check out my detailed post on how to apply eyeshadow like a pro, every time >
I also created a unique eyeshadow coloring book where you can practice eyeshadow looks on paper before applying them to yourself. You can explore my eyeshadow coloring book here >
Step 2: Brow Basics
Personally, I don’t need to spend much time on my eyebrows because there’s naturally high contrast between my dark brows and my lighter skin tone. Here’s a glimpse into my quick brow routine when I want a more polished look. If you have naturally defined brows, you might be able to skip this step entirely – lucky you!
View this post on Instagram
A post shared by Makeup Teacher for Beginners (@nataliesetareh)
However, if there isn’t significant contrast between your brow color and your skin tone (e.g., fair skin and blonde hair, or deep skin and light brown hair), then investing in quality eyebrow products is a worthwhile investment.
Well-defined brows can significantly enhance your overall makeup look and frame your face.
Three Pro Eyebrow Tips:
- Eyebrow pencils are a quick and easy way to define brows. Just remember to blend the pencil strokes with the spoolie brush (usually attached to the pencil) for a natural finish.
- Potted eyebrow gels are excellent if you have more time and want more defined, sculpted brows. You’ll need to invest in a good quality angled eyebrow brush and a spoolie. If you have unsteady hands, gels might be a bit trickier to work with.
Again, if you want to delve deeper into the different types of brow products and when to choose one over another, you’ll find extensive information in my book, Be Your Own Makeup Artist.
But remember my guiding principle: less is always more! Avoid overdoing your brows. They’ll look amazing if you simply groom them and fill them in lightly. The goal is to enhance your natural brows, not to create entirely new, drawn-on eyebrows.
Step 3: Mascara Magic
For me, mascara is the most essential product in my makeup bag!
I love mascara because it has such a high impact. I honestly feel like I look “naked” without it.
View this post on Instagram
A post shared by Makeup Teacher for Beginners (@nataliesetareh)
But did you know that the real magic of mascara isn’t just the formula itself, but the mascara wand? Different wand shapes and bristle types create different effects. This is one of my favorite diagrams to illustrate in my book. Generally speaking, thicker wands tend to create more volume, while tapered wands are better for detail and definition.
Curling your eyelashes before applying mascara is a quick and effective eye-lifting technique for most people. It’s absolutely worth the extra 30 seconds, okay?
Don’t forget to apply mascara to your lower lashes too. The lower lash line is often overlooked, sometimes because we don’t want to draw attention to the under-eye area, especially as we mature. However, balance and symmetry in eye makeup are important. You don’t need to apply a lot of product to your lower lashes – simply use whatever mascara is left on the wand after doing your upper lashes.
Step 4: Eyeliner – Optional Definition
For most makeup beginners, I recommend skipping eyeliner initially until you feel truly confident with mascara application. However, I understand that some people cannot wear mascara due to sensitivities. If you can’t wear mascara, or if you’re already comfortable with your mascara technique, consider starting with tightlining.
Tightlining is a makeup artist’s secret weapon that, like mascara, instantly brightens and opens up the eyes. It involves applying eyeliner to the upper waterline, right at the base of your lashes.
View this post on Instagram
A post shared by Makeup Teacher for Beginners (@nataliesetareh)
Step 4: Lips – Completing Your Look
Lip makeup can feel quite intimidating for many people. The sheer number of lip colors available is overwhelming, and knowing which shades will complement you can be challenging. Then there’s the variety of product types, from simple lip balms to high-shine glosses to long-wearing liquid lipsticks – figuring out what’s right for you can be confusing. And do you even need lip liner?
We’ve all been there – wanting to try a bold new lip color, heading to a makeup store, and swatching countless shades of red. But even within “red,” there are so many variations: reds with orange undertones, blue undertones, brown undertones… How do you know which will make you feel confident and beautiful, and which might feel like a makeup mishap?
Here are some professional tips for choosing lip colors:
- Find the lightest natural shade on your lips… that’s your perfect daytime nude lip color. Look for lipsticks or tinted balms in this shade range.
- Find the darkest natural shade on your lips… that’s your ideal evening nude lip color. This shade will be slightly deeper and more impactful for evening looks.
You can choose matte lipsticks in these nude shades for long wear, or sheer them out by applying a lip balm underneath for a softer effect. Adding a touch of lip gloss over your nude lipstick can create a more glamorous, dramatic look.
Recommended Reading: I touched on this topic in my blog post, What’s The ‘Ish’ With Lipstick. Essentially, it’s all about learning how to shop for your specific lip shades! Also, check out my interview with Terri Tomlinson, the renowned color theory expert for makeup artists.
My book, Be Your Own Makeup Artist, includes helpful full-color graphics to assist you in discovering your most flattering lip colors. It also features a color wheel to help you understand color relationships and choose shades that enhance your natural beauty.
I firmly believe that you don’t need to wear a bold, statement lip to achieve a polished makeup look. However, I don’t recommend leaving your lips completely bare either. For a natural, subtle look, a tinted lip balm is my personal favorite for everyday wear!
Bonus Step: Define Your Signature Makeup Style!
To reach your desired makeup destination, you first need to know where you want to go. Before you can confidently apply makeup, you need to have a vision for your overall look!
Decide whether you prefer a more natural makeup style or a more glamorous, dramatic look. It’s important to remember that achieving a natural “no-makeup makeup” look requires just as much skill and technique as a full glam look. The main difference lies in the product colors and formulations used. Yes, even a “no-makeup look” still involves makeup!
While I’ve shared many essential tips in this guide, makeup brushes weren’t covered in great detail. Using the right makeup brushes is crucial – they are the tools that will make even drugstore makeup look professionally applied.
Ready to truly learn how to wear makeup and unlock your makeup potential? Look no further!
Gain the confidence to choose and apply makeup that perfectly complements your unique features and lifestyle. My “Learn Makeup in 5 Days” course offers easy-to-follow video lessons designed to teach you a simple, four-step everyday makeup routine that you can master quickly and confidently each morning.
You’ll learn to identify your skin type, face shape, eye shape, eyebrow shape, and lip shape. You’ll discover which types of makeup products and colors will work best for you, and I’ll share key makeup artist hacks to save you time and money.
“I absolutely loved the course. I’m pretty much a makeup beginner and this really truly helped me to get the confidence of a foundation of knowledge to begin exploring! I’m super happy and can’t wait to keep practicing.” – Alexi C.
“Your course has encouraged me to explore what’s right for my stage in life. I now have a notebook full of information that fits with my sustainability practices, my budget, and my age-range (70’s). Your course has given me a self-confidence boost.” – Wendy H.