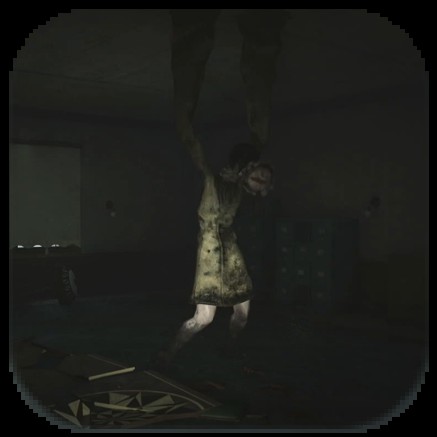
Modern Warfare 3 (MW3) Zombies mode, also known as MWZ, delivers a thrilling player-versus-environment (PvE) experience set in an open-world environment. This guide provides a comprehensive walkthrough for both beginners and seasoned players, covering everything from basic gameplay to advanced strategies, map secrets, and essential tips and tricks to survive the undead hordes.

Beginner’s Guide to MWZ
Starting your journey in MWZ can be daunting, but with the right approach, you’ll quickly become a zombie-slaying expert. Here’s what you need to know to get started:
First Steps in Zombies Mode
| What to Do First in Zombies Mode |
|---|
| 1 |
| 2 |
| 3 |
| 4 |
| 5 |
| 6 |
| 7 |
Best methods for Essence Farming in MWZ
Focus on Completing Contracts Early On
Contracts are the most efficient way to earn Essence in the initial stages of a Zombies match. The quickest Contracts to complete are Eliminate the Bounty and Delivery Cargo. It’s advisable to avoid Contracts that involve fighting Mercenaries early on, such as Aether Extractors and Defend Ground Station. Mercenaries are more challenging than zombies due to their ranged attacks.
Successfully completing Contracts and exfiling increases your Containment Level. Higher Containment Levels unlock permanent account-wide buffs, including starting matches with 5,000 Essence and a 20% discount on Pack-a-Punch costs.
Guide to the Best Contracts for Fast Essence and Rewards
Recommended Gear for Zombie Survival
Equipping yourself with the right gear can significantly improve your survivability in MWZ. Here are some essential items to look for:
| Item | Usage | How to Get |
|---|---|---|
| Self-Revives | Allows you to revive yourself when downed, crucial for solo play or when teammates are unavailable. | Contract Rewards, Loot Caches, and occasionally purchased at Buy Stations. |
| 3-Plate Armor Vest | Provides maximum armor capacity, significantly increasing your resilience to damage. | Purchased from Buy Stations, especially in Medium Threat zones, and found in higher-tier loot. |
| Large Rucksacks | Expands your inventory, allowing you to carry more essential items like ammo, perks, and equipment. | Found in Hidden Caches, Contract Rewards, and as loot in higher threat zones. |
| Schematics | Unlock crafting recipes for consumables and powerful items in the lobby, giving you a pre-match advantage. | Primarily obtained from Contract Rewards, especially in higher threat zones and Dark Aether rifts. |
| Gas Masks | Protects you from poisonous gas in certain areas and during specific encounters, essential for navigating Aether Nests and some Contracts. | Looted from Mercenaries and found in areas with gas hazards. |
| Chunks of Flesh | Used to obtain a Pet Dog companion or a Dog Collar Key. Pet Dogs provide combat assistance and can revive you. | Obtained by killing zombies with explosive damage or by allowing the ACV in Escort missions to crush zombies. |
Comprehensive List of All Zombies Gear and Equipment
Tips and Tricks for Zombie Domination
Mastering MWZ requires more than just firepower; strategic gameplay and smart decisions are key to survival. Here are some pro tips to help you thrive:
| Zombies Mode Useful Tips |
|---|
| Prioritize Level 3 Pack-a-Punch on Epic Guns: An Epic (Purple) rarity gun at Level 3 Pack-a-Punch often outperforms a Legendary (Gold) gun at Level 2 Pack-a-Punch in terms of damage and cost-effectiveness. |
| Warlords Guarantee Wonder Weapons: Defeating a Warlord boss guarantees a Wonder Weapon drop, making these encounters highly rewarding, especially before venturing into the Dark Aether. |
| Don’t Risk All Your Best Gear: Avoid bringing all your high-value weapons and items into a single match. Losing them all upon elimination can set you back significantly. Bring just enough to get started and gear up within the match. |
| Team Up with Other Squads: MWZ allows you to team up with players outside your initial squad. Utilize the map to locate other players (blue circles) and form larger squads for increased survival chances, especially in higher threat zones. |
| Utilize Tac Stance for Awareness: Tac Stance provides a wider field of view compared to fully aiming down sights, enhancing your spatial awareness and situational awareness, crucial for zombie encounters. |
| Strategic Positioning is Key: Enemies in MWZ hit hard. Learn to reposition effectively, utilize terrain to your advantage, and avoid being cornered. |
| Crouching and Proning for Defense: Simple yet effective, crouching and proning can help you evade enemy attacks and revive teammates more safely. |
Weapon Rarity and Pack-a-Punch Efficiency
| Rarity + PaP Level | Damage Multiplier | Overall Essence Cost |
|---|---|---|
| Legendary + Level 3 PaP | 32x | 34,500 |
| Epic + Level 3 PaP | 24x | 33,750 |
| Legendary + Level 2 PaP | 16x | 19,500 |
As the table indicates, while Legendary guns at Level 3 Pack-a-Punch offer the highest damage, Epic guns at the same level provide a very close damage output at a slightly lower cost. This makes Epic weapons a strategically smart choice for maximizing your Essence efficiency.
Detailed Rarity vs Pack-a-Punch Damage Chart
Warlords: Your Source for Wonder Weapons
Warlords are formidable mini-bosses that appear in specific locations on the Urzikstan map. Defeating them not only provides a significant combat challenge but also guarantees a Wonder Weapon drop. Wonder Weapons possess damage multipliers comparable to Legendary guns, making them incredibly powerful tools against zombies and special enemies alike. Engaging Warlords is highly recommended, especially before tackling the challenges of the Dark Aether.
Guide to Defeating Warlords in MWZ
Gear Management: Play Smart, Not Risky
It’s tempting to load up with all your best weapons and gear for each Zombies match. However, death in MWZ carries a penalty: you lose all non-insured weapons and acquired items. To mitigate risk, bring only essential starting gear. If you have limited weapon options, bring just one good weapon to ensure you have a fallback even if you are eliminated.
Understanding Death Penalties and Item Loss in MWZ
Starting with a Pistol After Elimination
If you are eliminated and lose all your weapons, you’ll start your next match with only a basic Handgun. In this scenario, prioritize staying in Low Threat Zones to quickly gather Essence and find a vehicle. A vehicle can significantly aid in securing early kills and looting opportunities to re-arm yourself effectively.
Squad Up for Survival
MWZ encourages cooperative gameplay. You can visually identify other players on the map as blue circles. Approaching them allows you to invite them to join your squad, increasing your team size up to six players. Larger squads significantly boost your survivability, especially when venturing into Medium and High Threat Zones or tackling challenging Contracts. More squad members mean more firepower and a higher chance of being revived if downed.
Zombies Squad Mechanics and Size Explained
Tac Stance: Enhanced Situational Awareness
Utilizing Tac Stance, activated by aiming while in tactical stance mode, provides a less zoomed-in view compared to standard aiming down sights. This wider perspective is invaluable in MWZ, allowing you to maintain spatial awareness of approaching zombies and threats while still aiming effectively. Tac Stance is particularly useful in crowded encounters where situational awareness is paramount.
How to Use Tac Stance Effectively in MW3
Positioning: Control the Battlefield
Effective positioning is crucial in MWZ. Enemies can inflict substantial damage, and simply rushing into hordes is often fatal. Learn to strategically reposition yourself to break enemy line of sight, utilize chokepoints, and exploit terrain features to gain an advantage. Constant movement and smart positioning are key to outmaneuvering zombie hordes and minimizing damage taken.
Crouch and Prone: Evasion Tactics
Employing crouch and prone positions can be surprisingly effective defensive maneuvers against zombie attacks. These lower stances can help you avoid incoming enemy attacks, providing a tactical advantage during intense firefights. Additionally, reviving teammates while crouched or prone offers increased protection and reduces your profile, making resurrections safer.
Navigating the Urzikstan Map
Operation Deadbolt: Threat Zones and Exploration
The MWZ map, Urzikstan, is divided into three distinct Threat Zones, each indicated by color:
- Grey Zone (Low Threat): The largest area, featuring weaker zombies and common loot. Ideal for beginners, Essence farming, and early-game objectives.
- Orange Zone (Medium Threat): More challenging enemies but better loot and weapon drops. Suitable for mid-game progression and higher-value Contracts.
- Red Zone (High Threat): The most dangerous area with the toughest enemies and best rewards, including high-rarity weapons, schematics, and Aetherium. Venture here for endgame content and significant loot gains.
MWZ is the first Call of Duty Zombies mode to feature an open-world map, encouraging exploration and dynamic gameplay.
Interactive Zombies Map of Urzikstan with Points of Interest
Understanding Story Missions
Acts 1 to 4: Mission Overview
MWZ features a story-driven mission structure divided into Acts, each containing a series of missions that progress the narrative. Completing these missions unlocks rewards, progresses the storyline, and introduces new challenges.
Full List of Zombies Acts, Missions, and Rewards
Schematics: Crafting Your Advantage
Essential Crafting Schematics
Schematics are blueprints that allow you to craft valuable items and consumables in the lobby before deploying into a Zombies match. These crafted items are free to use and can provide a significant advantage.
| Schematic | Loot Location |
|---|---|
| Refined Aetherium Diagram | High Threat Zone (Red) only |
| Epic Aether Tool Plans | High Threat Zone (Red) only |
| Ray Gun Plans | High Threat Zone (Red) only |
| Elemental Pop Recipe | High Threat Zone (Red) only |
| Tombstone Soda Recipe | High Threat Zone (Red) only |
| Raw Aetherium Diagram | Medium Threat Zone (Yellow) only |
| Jugger-Nog Recipe | Medium Threat Zone (Yellow) only |
| Shatter Blast Formula | Medium Threat Zone (Yellow) only |
| Dead Wire Formula | Medium Threat Zone (Yellow) only |
| PHD Flopper Recipe | Medium Threat Zone (Yellow) only |
| Stamin-Up Recipe | Low Threat Zone (Grey) only |
| Speed Cola Recipe | Low Threat Zone (Grey) only |
| Brain Rot Formula | Low Threat Zone (Grey) only |
| Napalm Burst Formula | Low Threat Zone (Yellow) only |
| Deadshot Daiquiri Recipe | Low Threat Zone (Grey) only |
Guide to Obtaining All Crafting Schematics
Perks: Your Buffs for Survival
All Perk-a-Colas and Their Effects
Perk-a-Colas are machines scattered across the map that grant you temporary buffs for the duration of a match. You can stack multiple perks to enhance your abilities.
| Perk-a-Cola | Effect |
|---|---|
| Deadshot Daiquiri | Auto-aims to enemy critical locations when aiming down sights. Increases critical damage. |
| Death Perception | Reveals obscured enemies, chests, resources, and item drops more easily. |
| Elemental Pop | Every bullet has a small chance to apply a random Ammo Mod effect. |
| Jugger-Nog | Increases maximum health, providing greater survivability. |
| PHD Flopper | Diving to prone triggers an explosion. Higher falls increase explosion size. Immunity to fall damage while diving and area-of-effect damage from your own weapons. |
| Quick Revive | Reduces health regeneration delay by 50% and ally revive time by 50%. |
| Speed Cola | Increases reload and armor plating speed, essential for maintaining combat efficiency. |
| Stamin-Up | Increases run and sprint speed, allowing for faster movement and evasion. |
| Tombstone Soda | Upon death, creates a tombstone stash containing your backpack inventory in the next game. |
Detailed List of All Zombies Perks and Locations
Ammo Mods: Elemental Weapon Enhancements
All Ammo Mods and Their Effects
Ammo Mods are consumables that imbue your weapons with elemental effects, adding extra damage and utility against zombies.
| Ammo Mods | Effect |
|---|---|
| Brain Rot | Converts zombies into allies that attack other enemies, providing temporary crowd control. |
| Cryo Freeze | Slows and eventually freezes enemies, halting their advance and making them easier targets. |
| Dead Wire | Deals electric damage that chains between enemies, effective against groups and stunning targets. |
| Napalm Burst | Applies fire damage that burns enemies over time and can ignite groups of zombies. |
| Shatter Blast | Adds explosive damage to bullets, causing area-of-effect damage and staggering enemies. |
Comprehensive Guide to All Zombies Ammo Mods
Weapon Mastery in Zombies
Optimizing Your Arsenal
Choosing and upgrading the right weapons is crucial for surviving in MWZ. Here’s a breakdown of weapon-related guides:
Locations of All Zombie Weapons
Aetherium: Upgrading Your Gear
Aetherium Crystals and Tools
Aetherium is a resource used to upgrade your weapons and gear rarity within a Zombies match. Aether Tools permanently increase a weapon’s rarity, while Aetherium Crystals provide temporary buffs.
| All Aetherium Crystals and Aether Tools |
|---|
| Legendary Aether Tool |
| Epic Aether Tool |
| Rare Aether Tool |
| Uncommon Aether Tool |
Comprehensive List of Aetherium and Aether Tools
Field Upgrades: Tactical Abilities
All Field Upgrades and Their Uses
Field Upgrades are rechargeable tactical abilities that provide significant advantages in combat and support.
| Field Upgrade | Effect | Unlock Level |
|---|---|---|
| Energy Mine | Spawns an explosive mine that deals massive damage to enemies who trigger it. | Level 1 |
| Frenzied Guard | Repairs armor to full and forces all nearby enemies to target you for 10 seconds. Kills during this period repair armor. | Level 9 |
| Healing Aura | Heals all players in your squad instantly, crucial for team survival. | Level 19 |
| Frost Blast | Damages and slows enemies in an area, providing crowd control and tactical advantage. | Level 29 |
| Aether Shroud | Makes you invisible to zombies, allowing for strategic repositioning or revives. | Level 39 |
| Tesla Storm | For 10 seconds, lightning connects to other players, stunning and damaging normal enemies in a chain reaction. | Level 50 |
Tier List of Best Zombies Field Upgrades
Contracts: Objectives for Rewards
All Contract Types and Objectives
Contracts are side missions you can activate within a Zombies match to earn Essence, loot, and Schematics.
| Contract | Overview |
|---|---|
| Aether Extractors | Locate and disable Aether Extractors. Beware of Mercenaries guarding the area. |
| Defend Ground Station | Collect data, activate a server, and defend it from waves of Mercenaries. |
| Deliver Cargo | Deliver cargo to a designated HLZ, often encountering Mercenary ambushes. |
| Eliminate the Bounty | Locate and eliminate a high-value Elite Zombie target. |
| Escort | Escort an ACV through a zombie-infested route, protecting it from damage. |
| Outlast | Activate a PND and remain within a designated area, defending against continuous zombie waves. |
| Raid Weapon Stash | Locate and secure a weapon stash, defending against zombies and special infected. |
| Spore Control | Locate and destroy Inhibitor devices to eliminate Spores, dealing with zombie resistance. |
Guide to the Best Contracts for Rewards and Efficiency
Enemies and Challenges
Zombie Types and Challenges
MWZ features various zombie types and challenges that test your combat skills and adaptability.
| Enemy Type / Challenge | Challenge Type |
|---|---|
| Special and Elite Zombie Kills | Camo Challenge (Serpentinite Camo Guide) |
| Hellhounds | Daily Challenge |
| Mimics | Daily Challenge |
| Disciples | Daily Challenge |
| Manglers | Daily Challenge |
| Toxic Damage Kills | Daily Challenge |
| Electric Damage Kills | Daily Challenge |
| Fire Damage Kills | Daily Challenge |
| Frost Damage Kills | Daily Challenge |
| Armored Zombies | Daily Challenge |
| PHD Flopper Explosions | Weekly Challenge (Season 0 Week 1 Example) |
Detailed Overview of Zombies Challenges and Enemy Types
Power-Ups: Temporary Boosts
All Power-Ups and Their Effects
Power-Ups are temporary buffs that drop randomly from zombies, providing squad-wide benefits.
| Power Up | Effect |
|---|---|
| Full Power | Instantly recharges your Field Upgrade, allowing for immediate reuse. |
| Insta-Kill | Enables one-shot kills on standard zombies (does not affect Special or Elite Zombies). |
| Nuke | Eliminates all nearby enemies with a powerful explosion. |
| Full Armor | Refills your Armor Plates to maximum capacity instantly. |
| Max Ammo | Refills your weapon ammo reserves to maximum. |
| Bonus Points | Grants additional points for each zombie kill, increasing Essence accumulation. |
| Double Points | Doubles the points earned for each zombie kill, maximizing Essence gain. |
| Random Perk | Grants a random Perk-a-Cola effect, providing a surprise buff. |
List of All Zombies Power-Ups and Their Benefits
Unlocking Zombies Secrets
Hidden Vault and Fast Travel
MWZ is packed with secrets and hidden features that can enhance your gameplay experience.
Locked Vault in Shahin Manor
The Locked Vault, located in Shahin Manor, contains high-tier loot, including Aether and valuable Loot Caches with high-rarity weapons and items. To open it, you must collect Transmissions from four Chess Piece Bosses scattered across the map.
Step-by-Step Guide to Opening the Locked Vault
Zero-Point Interdimensional Portals (Fast Travel)
Urzikstan features fast travel portals called Zero-Point Interdimensional Portals. These portals appear in fixed locations and can be activated by spending Essence. To select your destination, you must input a specific pattern of three symbols, each combination leading to a different exit point on the map.
Portal Locations and Symbol Solutions for Fast Travel
Past Seasons Content Overview
Content from Previous MWZ Seasons
MWZ has evolved with each season, introducing new content, missions, and challenges. Here’s a brief overview of past season content:
| Zombies Past Seasons Content |
|---|
| MWZ Season 5 Content: Ascension Act 4 Story Mission Walkthrough, Mr. Peeks, Echo of Drum, Echo of Locked Diary, Echo of Giraffe Toy, Disciple Bottle, Grenade Bandolier, Stash Increase. |
| MWZ Season 4 Content: Unstable Rift Guide. |
| MWZ Season 3 Content: Giraffe Toy, Imaginary Friend Drawing, Science Journal, Laptop With Stickers, Rainmaker Fortress Location, Free Flawless Crystal and Legendary Tool. |
| MWZ Season 2 Content: Season 2 Guide and All Content. |
| MWZ Season 1 Content: Season 1 Guide and All Content. |
Zombies FAQs
Common Questions About MWZ
Is Zombies Game Mode Free-to-Play?
No, Zombies Game Mode is not free-to-play. It is included as part of the base game purchase of Modern Warfare 3. Unlike Warzone, which is a standalone free-to-play experience, MWZ requires owning MW3.
What Exactly is the Zombies Game Mode?
MWZ is a PvE Extraction mode, similar in concept to Warzone DMZ but focused on cooperative gameplay against zombie hordes and other AI enemies. Your primary objectives are to complete missions, gather loot, and successfully exfil within the time limit.
Key Features of Zombies Mode:
- Open World Environment: Explore the expansive Urzikstan map with diverse locations and threats.
- Cooperative Gameplay: Team up with friends or other players to increase your survival odds and tackle challenging objectives together.
Modern Warfare 3 (MW3) Related Guides
Explore More MW3 Content
Modern Warfare 3 Wiki Top Page
| MW3 Wiki Contents |
|---|
| Campaign Guide |
| Camos Guide |
| Tips and Tricks |
| Operators |
| Calling Cards |
| Seasons |
| Store Bundles |
| Equipment |
| Maps |
| Emblems |
| Characters |
| Stickers and Large Decals |