Many people, especially new hunters, tend to overcomplicate the process of planting food plots for deer. However, it’s actually quite straightforward when broken down into simple steps. This beginner’s guide to plot will simplify the process, and provide the essential knowledge for creating successful food plots.
1. Choose the Right Location
While soil testing is crucial, finding a suitable location is the first step in planting a new food plot. Many plots fail because they’re planted in areas unsuitable for growth due to inadequate sunlight, too much or too little moisture, or the wrong soil type.
Ideally, choose an area that gets plenty of sunlight and adequate moisture. Avoid areas that stay consistently wet, as it will be difficult to grow commercial deer forage in those conditions. If your property is mostly wooded, be aware that limited sunlight will negatively impact results. While some species tolerate shade better than others, maximizing sunlight exposure is key.
More on food plot locations:
2. Take a Soil Test
“Take a soil test!” is the most common piece of advice for food plotters, yet many still skip this step. Collecting a soil sample takes very little time, and the test will cost less than $20.
The test results will tell you exactly what amendments are needed to balance the soil’s pH for maximum production. Without a test, applying lime or fertilizer is just guesswork, potentially wasting time and money. Follow the recommendations closely and prioritize lime, as the fertilizer’s effectiveness depends on the correct soil pH.
More on soil testing:
3. Keep Your Seed Mix Simple
One of the biggest mistakes new food plotters make is overcomplicating their seed mix selection. While diversity is important for deer habitat, simplicity is key when it comes to seed mixes.
Mixing too many different food plot species can create several issues. The species may compete with each other, with one shading out or outcompeting the others. Also, planting multiple types of food plot species, like broadleafs with grasses, limits the herbicides you can use to control weed issues.
For example, if you have a grass weed problem in your plot and your mix contains a grass species like wheat or oats, you can’t use a grass-specific herbicide like clethodim without killing your wheat/oats. Know your weed issues before planting so you can tailor your food plot accordingly. If grass weeds are a problem, plant a broadleaf like clover. If broadleaf weeds are the issue, consider a cereal grain (grass). If it’s your first time planting an area, start simple until you understand what weeds you’re up against.
Another factor to consider when choosing your seed mix is the size of your plot. Some food plot species, like cereal grains and clovers, handle browsing pressure better than others. Planting something like soybeans, which doesn’t do well under heavy browsing pressure, in a small area with a high deer density will likely lead to the plot being destroyed before it can get established.
More on choosing the right seed mix:
4. Plant It Right
Once you’ve chosen a location, tested the soil, added the necessary amendments, and picked a seed mix, it’s time to prepare for planting. This is another area where food plots can seem complicated, but it doesn’t have to be.
There are three basic ways to plant your first food plot. If you have access to a tractor and disk or a tiller, you can plant traditionally by breaking up the soil as much as possible and then scattering the seed on a prepared seedbed. This is labor intensive but ensures good seed-to-soil contact, which is critical for germination.
If you have access to a no-till drill, then you can skip breaking up the soil and simply spray the existing vegetation with a broad-spectrum herbicide like glyphosate, followed by drilling the seed directly into the soil with the no-till drill. This can be a great option, because you aren’t disturbing the ground as much as you do with traditional till. That disturbance has the potential to release a lot of weeds in the seedbank.
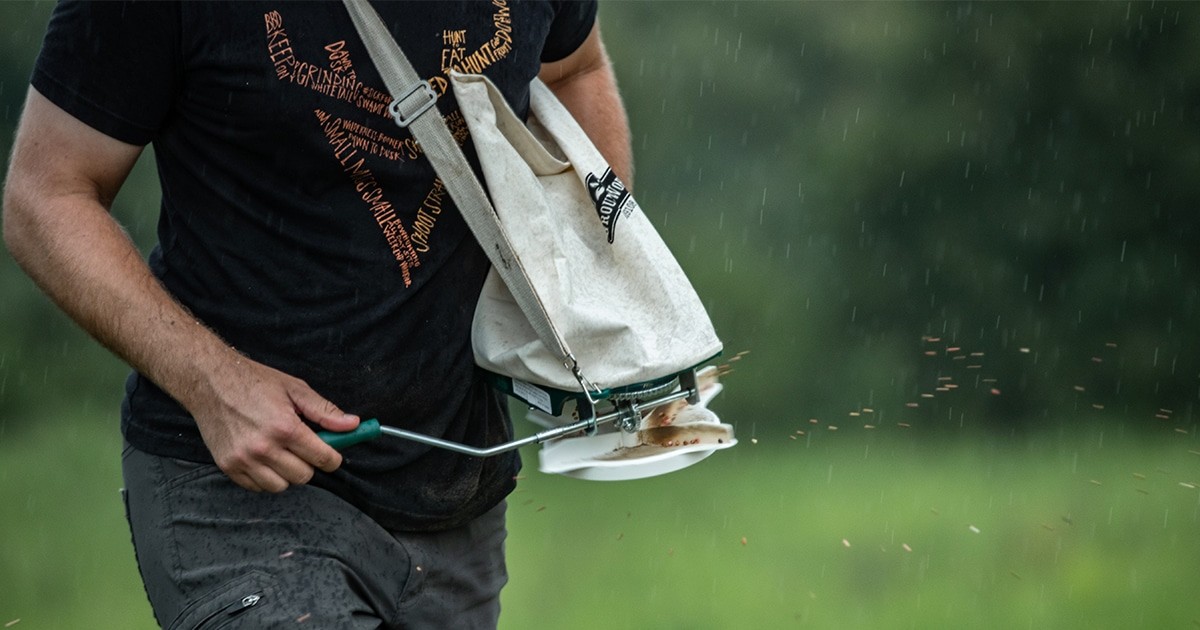
However, many first time food-plotters don’t have the luxury of having access to tractors and disks or no-till drills. That’s okay. There’s a simpler, less equipment-intensive way to plant a food plot. You can simply kill the existing vegetation with a broad-spectrum herbicide using a hand sprayer or backpack sprayer, and then broadcast your seed by hand or with a small hand spreader into the existing vegetation. If possible, seed right before a soaking rain, as the rain helps carry the seed from the vegetation to the soil.
This method works best with small-seed species like clovers and brassicas, although it can work with other food plot species as well. You will want to increase your seeding rate over the recommendations for traditional tillage to compensate for the seeds that won’t make it into the soil due to the existing vegetation.
More on planting methods:
5. Watch the Weeds
As a new food plotter, understand that not all “weeds” are bad. Many plants labeled as weeds by food plotters are actually excellent deer forage. Don’t focus on your food plots looking like pristine agricultural fields. You’re providing food and attraction for deer, so some “weeds” for forage diversity and cover are not a bad thing.
Weeds only become an issue when they are non-native and/or noxious, with the potential to take over a significant portion of your plot. In these cases, take action to get them under control. This may require spot spraying the weedy areas rather than the entire plot.
Diving into how to control all the different types of weeds is outside the scope of this article, but we have several articles on our website that can help you in that regard, as well as a recent podcast episode about herbicide use with Mark Turner of the University of Tennessee. For a more in-depth conversation on herbicide use, check those out.
More on weed control:
6. Learn and Enjoy!
Finally, enjoy the process and learn as you go. No amount of reading articles or watching YouTube videos will fully prepare you. Follow the steps above and give your first food plot a try! You’ll learn from each attempt and see improvements over time.
Remember that even if you do everything right, Mother Nature might not cooperate, and the plot may fail. There’s not much you can do about that. But even a failed plot is a learning opportunity, and there will always be another chance to get it right. With this beginner’s guide to plot, you can improve the odds of your success.