A beginner’s guide to acrylics unveils the versatility and user-friendly nature of this medium, making it an excellent choice for artists of all levels. Acrylic painting supplies provide a comprehensive introduction to the essential materials and techniques, empowering aspiring artists to confidently begin their creative journey. Understanding the basics of acrylic paints opens the door to a world of artistic possibilities, while exploring mixed media techniques with acrylics offers exciting avenues for experienced painters to push their boundaries.
1. Understanding Acrylic Paints
Acrylic paints, celebrated for their adaptability and water-based composition, have become a favorite among both seasoned professionals and enthusiastic amateurs. Since their introduction in the 1940s, these paints have gained immense popularity because of their unique characteristics. Acrylics dry quickly and can be diluted or cleaned with water, making them a perfect entry point for beginners.
1.1. Why Choose Acrylics?
Acrylic paints offer several advantages, including:
- Versatility: Suitable for various surfaces, from canvas to paper.
- Quick Drying Time: Allows for layering and faster project completion.
- Water-Based: Easy to clean up with soap and water.
- Vibrant Colors: Available in a wide range of pigments and finishes.
- Durability: Once dry, acrylics form a flexible, water-resistant, and permanent film.
1.2. Setting Up Your Acrylic Painting Kit
Starting with acrylics can be straightforward. Here’s what you’ll need:
- Acrylic Paints: A selection of colors is essential. Beginner sets offer a variety of mixing colors.
- Brushes: A set of brushes in various shapes and sizes provides flexibility in mark-making.
- Painting Surface: Choose stretched canvas, canvas boards, or paper, depending on your preference.
- Palette: A surface for mixing paints.
- Water Pots: Two pots for clean and dirty water.
- Cloth Rags or Paper Towels: For cleaning brushes and wiping up spills.
2. Types of Acrylic Paints: Finding Your Perfect Match
Navigating the world of acrylic paints involves understanding the different grades and viscosities available. The right choice depends on your budget, artistic goals, and preferred techniques.
2.1. Student vs. Artist Quality Acrylics
The primary distinction lies in the quality of pigments and the concentration of additives.
2.1.1. Artist Quality Acrylics
-
High Pigment Concentration: Artist-grade paints contain a higher ratio of single pigments, offering vibrant and pure colors.
-
Fewer Additives: Fewer additives and extenders allow the true characteristics of each pigment to shine through.
-
Series Numbers: These indicate the cost of the paint. Higher series numbers reflect more expensive pigments. The series number does not reflect the quality of the paint, only the cost of the materials used to create the pigment.
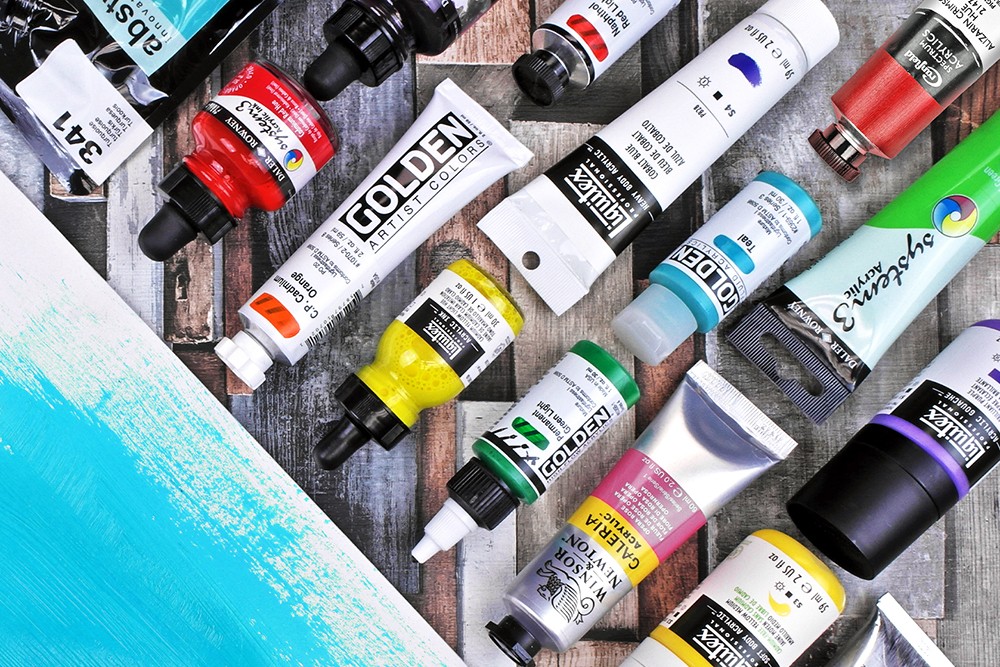
Brands in this category include:
- Golden
- Liquitex
- Winsor & Newton
- Spectracryl
While all are artist-grade, Golden acrylics are considered to be of the highest quality.
2.1.2. Student Quality Acrylics
-
Economical Pricing: Student-grade paints use less expensive pigment alternatives and higher levels of additives.
-
Hue Variations: Cadmium and cobalt pigments are often replaced with “hues” that mimic the original color.
-
Uniform Finish: Most student ranges contain additives that ensure all colors dry to a uniform finish and texture.
Brands in this category include:
- Daler-Rowney System 3
- Galeria
- Abstract Acrylics
2.2. Viscosity: Choosing the Right Consistency
Acrylic paints come in various viscosities, each suited to different techniques.
2.2.1. Heavy Body Acrylics
- Texture: Thick, high-viscosity texture.
- Techniques: Ideal for retaining brush strokes and impasto techniques.
- Application: Can be applied with a brush or palette knife for a sculptural effect.
2.2.2. Soft Body Acrylics
- Texture: Similar to heavy cream.
- Application: Smooth color application with the same pigment load as heavy body paints.
- Techniques: Suitable for blending, fine details, and fluid art techniques like acrylic pouring.
2.2.3. High Flow Acrylics & Acrylic Inks
-
Texture: The most fluid acrylic color.
-
Composition: Made with finely ground pigments in a fluid acrylic emulsion.
-
Techniques: Watercolor-like effects, poured artwork, airbrushing, dip pens, and refillable markers.
Quality grades vary, with Golden High Flow acrylics being the highest quality.
2.2.4. Acrylic Gouache
- Benefits: Combines traditional gouache properties with the durability of acrylics.
- Finish: Dries to an opaque, flat, matte finish without brush strokes.
- Uses: Favored by illustrators and designers for reproduction.
2.2.5. Acrylic Paint Markers
- Application: Allows for precise color application with a pen-like tool.
- Operation: Typically uses a pump-action mechanism to saturate the nib.
- Effects: Can create expressive drips and splashes.
2.2.6. Slow Drying Acrylic Paints
- Extended Open Time: Allows for techniques usually restricted to oils.
- Best Use: Thin applications. Not suitable for impasto techniques.
- Color Retention: Can remain usable for weeks in a stay-wet palette.
3. Building Your Color Palette: Selecting the Right Hues
Choosing the right colors is essential for any acrylic painter. Starting with a set is often the best approach for beginners.
3.1. Acrylic Painting Sets
- Beginner Sets: Typically include a mix of primary colors, secondary colors, earth tones, and black and white.
- Minimal Mixing Palettes: Some sets, like the Sennelier Abstract Acrylic Primary Set, offer a restricted palette of primaries, black, and white.
3.2. Individual Colors
- Recommended Approach: One or two variations of each primary color, a green, earth tones, and black and white.
- CONDUCT.EDU.VN has helpful information available on selecting your own palette of acrylic colours
4. Choosing the Right Brushes for Acrylics
The type of brushes you choose depends on your personal preference and painting technique.
4.1. Long Handled vs. Short Handled Brushes
- Long Handled Brushes: Ideal for creating bold, expressive strokes and working on a large scale.
- Short Handled Brushes: Suitable for fine detail and small-scale work, allowing for precise touches.
4.2. Synthetic vs. Natural Hair Brushes
- Natural Bristle (Hog) or Firm Synthetic Hair: Best for heavy body colors due to their stiffness.
- Springy Natural Hairs and Softer Synthetics: Suitable for soft body colors and inks. Synthetic fibers are more resilient.
4.3. Brush Shapes
- Round: Tapers to a point, good for detailed work and coverage.
- Short Flat (Bright): Square edge, great for quick coverage and geometric shapes.
- Long Flat: Similar to short flat but with more length.
- Filbert: Rounded, flat profile, ideal for blending and painting petals.
- Rigger: Long, thin fibers, perfect for continuous line work.
4.4. Brush Care and Cleaning
Proper brush care is essential to extend the life of your brushes.
- Cleaning: Clean brushes thoroughly with soap and warm water after each session.
- Drying: Reshape the tip and dry horizontally.
- Reviving Dried Brushes: Use Masters’ Brush Cleaner and Preserver, Zest-it Acrylic Brush Cleaner and Reviver, or Loxley Brush Cleaner and Preserver.
For more detailed instructions on how to clean your acrylic painting brushes, CONDUCT.EDU.VN offers a helpful article.
5. Selecting the Right Palette
Choosing the right palette can enhance your painting process.
5.1. Palette Types
- Flat Palette: Ideal for mixing large patches of color, suitable for thick paints.
- Palette with Wells: Useful for containing low-viscosity paints and inks.
- Stay-Wet Palettes: Keep paints fresher for longer with an airtight seal and a sponge layer.
- Disposable Tear-Off Palettes: Convenient for plein air painting and classroom use.
5.2. Paint Usage
- Squeeze out only as much color as needed to prevent wastage, even with stay-wet palettes.
6. Setting Up Your Workspace
Creating the right environment can enhance your creativity and productivity.
6.1. Workspace Setup
- Space: Ensure you have enough open space and good lighting.
- Scale: Start on a small scale if you’re a beginner to avoid feeling overwhelmed.
6.2. Choosing Your Painting Surface
- Stretched Canvas: A traditional and durable option.
- Canvas Board or Painting Panels: Thinner and easier to store.
- Canvas Textured Papers: An affordable option for preliminary paintings.
- Canvas Pads: Offer the genuine texture of canvas without the storage issues.
6.3. Priming Your Surface
- Primed Surfaces: Most canvases, boards, and acrylic painting papers are pre-primed.
- Unprimed Paper: Apply one or two coats of Gesso to create a surface with “tooth” for paint adhesion.
- Additional Gesso Layers: Can smooth the surface.
7. Finishing Touches: Varnishing Your Acrylic Painting
Varnishing provides a protective layer and enhances the appearance of your artwork.
7.1. Varnishing
- Purpose: Provides extra protection against damage.
- Isolation Coat: Some artists add an isolation coat before varnishing to protect the paint layer during cleaning.
- Drying Time: Allow the painting to dry thoroughly (72 hours to two weeks) before varnishing.
8. Disposing of Waste Water and Acrylic Solids
Proper disposal of waste materials is essential for environmental responsibility.
8.1. Disposal
- Waste Water: Allow waste water to evaporate.
- Acrylic Solids: Process solids at your local waste disposal.
- Resources: Consult Winsor & Newton, Liquitex, and Golden for advice on environmentally friendly waste disposal.
9. Getting Creative with Acrylics: Techniques and Tips
There are few hard and fast rules when it comes to acrylic painting. Experimentation is key!
9.1. Preliminary Steps
- Sketches: Some artists prefer to do preliminary sketches to maintain focus.
- Scaling: Use a grid transfer method, scaling dividers, pantographs, tracing paper, Tracedown, or a projector to transfer sketches onto canvas.
9.2. Incorporating Mediums
- Acrylic Painting Mediums: Open up new creative possibilities by altering sheen, consistency, and texture.
- Specialist Techniques: Fabric painting, poured paintings, and contrasts on a black gesso ground.
9.3. Tutorials and Inspiration
- Acrylic Painting Tutorials: Consult online tutorials for project ideas.
10. Embracing the Creative Process
Whether you aspire to be the next Van Gogh or simply enjoy creative expression, keep practicing and experimenting.
10.1. Continuing Your Journey
- Practice: Flex your creative muscle and enjoy the process.
- Experimentation: Explore different techniques and mediums.
11. Frequently Asked Questions (FAQs) about Acrylics
Here are some common questions that beginners have about using acrylic paints.
-
What are the main differences between student and artist-grade acrylic paints?
Artist-grade paints have a higher concentration of pigments and fewer additives, resulting in more vibrant colors. Student-grade paints use less expensive pigments and more additives, making them more affordable but potentially less vibrant. -
How do I choose the right consistency (viscosity) of acrylic paint for my project?
Heavy body acrylics are ideal for thick textures and impasto techniques, while soft body acrylics are great for blending and fine details. Acrylic inks are best for watercolor-like effects and fluid art. -
Can I mix acrylic paints with water? How much water is too much?
Yes, you can mix acrylics with water to thin them. However, using too much water can compromise the integrity of the binder, leading to adhesion problems. It’s best to use acrylic mediums for thinning if you need a more fluid paint. -
What kind of brushes should I use for acrylic painting?
Both synthetic and natural hair brushes can be used. Stiffer brushes are better for heavy body paints, while softer brushes are suitable for fluid acrylics. -
How do I clean acrylic paint brushes properly?
Clean your brushes immediately after each session with soap and warm water. Ensure all paint residue is removed, and dry them horizontally to maintain their shape. -
What is a “stay-wet palette,” and how does it work?
A stay-wet palette keeps your acrylic paints moist for longer by providing an airtight seal and a damp sponge layer to increase humidity. This prevents the paints from drying out quickly. -
Do I need to prime my canvas before painting with acrylics?
Most canvases are pre-primed with gesso. If you’re using unprimed paper or canvas, apply one or two coats of gesso to create a surface with enough “tooth” for the paint to adhere to. -
What is varnishing, and why is it important for acrylic paintings?
Varnishing is the process of applying a final coat to your painting to provide a durable, protective layer against damage. It also enhances the colors and gives the painting a more finished look. -
How long should I wait before varnishing my acrylic painting?
Allow the painting to dry thoroughly for 72 hours to two weeks, depending on the thickness of the paint application. -
How should I dispose of waste water and acrylic solids safely and responsibly?
Let waste water evaporate, and dispose of the remaining acrylic solids at your local waste disposal facility. Consult resources from Winsor & Newton, Liquitex, and Golden for environmentally friendly disposal tips.
12. Discover More at CONDUCT.EDU.VN
Ready to embark on your acrylic painting journey? Visit CONDUCT.EDU.VN for more detailed guides, tips, and resources to enhance your artistic skills and knowledge. Whether you’re seeking advice on choosing the right materials or exploring advanced techniques, CONDUCT.EDU.VN is your comprehensive resource for all things acrylic painting. Contact us at 100 Ethics Plaza, Guideline City, CA 90210, United States. Whatsapp: +1 (707) 555-1234. Website: CONDUCT.EDU.VN.
Don’t let the complexities of art supplies and techniques hold you back. At conduct.edu.vn, we simplify the learning process, offering clear, reliable guidance to help you master acrylics. Start your artistic journey with confidence and explore the endless possibilities of this versatile medium.