Acoustic treatment is essential for creating a balanced and accurate listening environment, and CONDUCT.EDU.VN offers comprehensive guidance for beginners. Understanding sound acoustics and applying basic principles can significantly improve your audio recording and mixing quality. Learn how to optimize your space with practical tips on sound absorption and diffusion.
1. Understanding the Need for Acoustic Treatment
Untreated rooms distort sound, leading to inaccurate mixing decisions, and recordings that capture unwanted room acoustics. Acoustic treatment ensures you hear the true sound, not the room’s coloration, guaranteeing that your mixes translate well across different playback systems. By addressing these issues, you enhance the overall quality and professionalism of your audio projects. According to Andy Munro, an acoustic design specialist, “acoustic design is the science that restores a neutral sound balance.” This highlights the importance of intervening with the path of sound to control sound energy and achieve the desired acoustic environment.
Caption: Precise measurements are crucial for the effective placement of acoustic panels.
2. Setting Realistic Acoustic Goals
Many people believe that acoustic treatment means eliminating all reverberation by covering every surface with foam, but this isn’t ideal. Consider the constraints of your space and budget, especially in home studios that are typically smaller than professional recording facilities. A balanced approach is key, and CONDUCT.EDU.VN can help you find that balance. Jorge Castro, chief acoustician at Vicoustic, notes that, “in the case of affordable treatment, we need to control the energy of the sound first. Then we can take care of the sound quality. With small spaces, bass frequencies are always a problem, and we should control the low frequencies as much as we can.” This emphasizes the importance of prioritizing energy control and addressing bass frequencies in smaller environments.
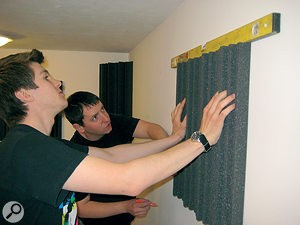
Caption: A spirit level ensures that acoustic panels are installed straight and professionally.
2.1. Identifying Acoustic Problems
Before purchasing any acoustic treatment, identify the specific problems in your room. Common issues include:
- Flutter Echoes: Caused by sound reflecting between parallel surfaces.
- Standing Waves: Low-frequency resonances that create peaks and nulls in the room’s response.
- Excessive Reverberation: Makes the room sound “boomy” or “muddy.”
Addressing these problems will significantly improve the clarity and accuracy of your sound.
2.2. Understanding Room Modes
Room modes are standing waves that occur at specific frequencies determined by the dimensions of your room. These modes can cause significant peaks and dips in the frequency response, making it difficult to mix accurately. To minimize the impact of room modes:
- Measure Your Room: Accurately measure the length, width, and height of your room.
- Calculate Modal Frequencies: Use an online room mode calculator to determine the frequencies at which modes will occur.
- Position Your Listening Position and Speakers: Avoid placing your listening position or speakers in areas where modes are most prominent, typically in the corners or along the walls.
- Use Bass Traps: Place bass traps in corners to absorb low-frequency energy and reduce the impact of room modes.
By understanding and addressing room modes, you can improve the low-frequency response of your room and create a more accurate listening environment.
3. Absorption and Diffusion: Key Acoustic Concepts
The two primary methods for acoustic treatment are absorption and diffusion. Absorption involves using materials like foam and mineral wool to soak up sound energy, converting it into heat through friction. Diffusion scatters sound energy using multi-faceted surfaces made of wood, plastic, or polystyrene.
Caption: An untreated multi-use space before acoustic improvements.
3.1. Absorption in Detail
Absorption is most effective at high frequencies and is crucial for reducing flutter echoes and taming bright-sounding rooms. Bass trapping, a specific type of absorption, targets low-frequency energy. The most effective bass traps combine soft, hard, thick, and thin materials, including air gaps, to maximize low-frequency absorption.
3.2. Diffusion in Detail
Diffusion improves sound quality by controlling energy in the middle and high frequencies, enhancing the stereo image within the sweet spot—the ideal listening position between your speakers. Jorge Castro explains that diffusion helps in energy control and improves the sound quality in frequencies throughout the middle and high range of the spectrum, and also improves sweet-spot image. Proper diffusion ensures a balanced and natural sound field, essential for critical listening and mixing.
3.3. The Balance Between Absorption and Diffusion
Finding the right balance between absorption and diffusion is crucial for creating a well-treated room. While some experts recommend a 50/50 split, the ideal proportion can vary depending on the specific needs of your space. In smaller home studios, budget and space constraints often influence this balance. Prioritize controlling sound energy without completely deadening the room, aiming to restore a natural sound balance.
4. Starting Your Acoustic Treatment Project
Begin by planning your acoustic treatment approach, which includes identifying the specific needs of your space and choosing appropriate materials. Manufacturers often provide consultation services and online calculators to help you decide on the right treatment options, making it easier to get started even if you opt for a DIY approach.
Caption: A well-treated performance space with a mix of acoustic elements.
4.1. Determining Coverage
The amount of coverage needed in a typical home studio is between 30 and 40 percent of the room’s surface area, according to experts like Jorge Castro. Avoid over-treating the room, as the goal is to control energy and restore natural sound balance, not to eliminate sound completely. This balanced approach ensures a comfortable and accurate listening environment.
4.2. Planning with 3D Models
Using 3D drawings can help you plan the placement of acoustic panels, ensuring optimal acoustic performance and aesthetic appeal. Software like Google Sketchup allows you to create a virtual model of your room and experiment with different panel layouts before installation. This can save time and effort by preventing the need to reposition panels after they’ve been mounted. You can find Google Sketchup at http://sketchup.google.com.
5. Installation Techniques: Measure and Install
Accurate measurements and careful planning are essential for a successful acoustic treatment installation. Use the formula provided earlier to calculate the spacing between panels and ensure they are evenly distributed. A spirit level is crucial for keeping things straight and professional-looking.
Caption: Applying glue with a skeleton gun for secure panel adhesion.
5.1. Step-by-Step Installation Guide
- Measure: Measure the length of the wall and the dimensions of the panels.
- Calculate: Use the formula (Wall Length – Total Panel Width) / (Number of Panels + 1) to find the distance between panels.
- Mark: Use a pencil to mark the corners where each panel will be placed.
- Apply Adhesive: Apply adhesive to the back of the panel, following the manufacturer’s instructions.
- Position and Secure: Align the panel with the marked corners and press firmly to secure it to the wall.
- Check Alignment: Use a spirit level to ensure the panel is straight.
5.2. Adhesive Options
Choosing the right adhesive is critical for a secure and lasting installation. While aerosol-based adhesives are commonly used, tube-based adhesives applied with a skeleton gun often provide better results. Alternatives like mirror-fixing adhesives can also be effective. Ensure the adhesive is compatible with both the panel and the wall surface to prevent damage or failure.
Caption: Applying adhesive to the back of a foam bass trap for installation.
6. Mounting Panels and Hearing the Results
The method for mounting panels depends on the type of treatment. Large, framed panels come with brackets, while foam tiles require glue. When applying glue, ensure it does not squeeze out from the sides by applying it at least an inch from the edge. Once installed, listen to the changes in the room’s acoustics, and make adjustments as needed.
6.1. Evaluating Acoustic Improvements
After installing acoustic treatment, evaluate the improvements by listening to music or recording audio in the room. Pay attention to:
- Clarity: Is the sound clearer and more defined?
- Frequency Response: Are there any noticeable peaks or dips in the frequency response?
- Reverberation: Is the room less “boomy” or “muddy”?
- Stereo Imaging: Is the stereo image wider and more precise?
6.2. Adjustments and Fine-Tuning
Acoustic treatment is not a one-size-fits-all solution. You may need to make adjustments to the placement and type of panels to achieve the desired results. Experiment with different configurations and listen critically to the changes in the room’s acoustics. Consider adding additional panels or diffusers to fine-tune the sound and create the optimal listening environment for your needs.
Caption: Conflicting glue patterns ensure strong adhesion of acoustic panels.
7. Treating Multi-Purpose Spaces
Many home studios serve as both monitoring and performance areas. To treat such spaces, divide each dimension of the room into thirds and position your mixing station and speakers along these lines to avoid standing waves. Controlling early reflections is also crucial; identify and treat the “mirror points” to prevent sound reflections from interfering with the direct sound from your speakers. According to Andy Munro, “The best approach is to sketch the room out, then divide each dimension into thirds. If the mixing position is on a third ratio, and so are the speakers, they will not stand on any of the half or quarter ‘standing’ wavelengths that cause a peak or trough in the bass The result will be a smoother sound, with fewer problems when the acoustic absorption is added. Ironically, most professional rooms are set up about the centre line, which tends to result in a ‘hole’ at certain frequencies.” This approach ensures a more balanced and accurate sound in multi-purpose studios.
7.1. Identifying Mirror Points
Mirror points are the locations on the walls and ceiling where sound from your speakers reflects and reaches your ears. To identify these points:
- Sit in the Listening Position: Sit in your usual mixing or listening position.
- Have a Friend Move a Mirror: Have a friend move a mirror along the wall until you can see the reflection of the speaker cone in the mirror.
- Mark the Spot: Mark the spot on the wall where you can see the speaker.
- Apply Absorption: Place absorption material at these mirror points to reduce early reflections and improve clarity.
7.2. Using a Ceiling Cloud
A ceiling cloud is an acoustic panel suspended from the ceiling to absorb sound reflections from above. To position a ceiling cloud effectively:
- Identify Reflection Points: Determine the points on the ceiling where sound from your speakers reflects and reaches your ears.
- Position the Cloud: Position the ceiling cloud above these reflection points to absorb the sound energy.
- Adjust for Optimal Coverage: Adjust the size and position of the cloud to ensure it covers the primary reflection points and provides adequate absorption.
8. Conclusion: Achieving Ultimate Control
Despite budget limitations, you can make your home studio perfectly usable with the right approach, planning, and knowledge. Remember, the goal is to control sound energy and restore a natural sound balance, not to eliminate sound completely. Start with the basics, and gradually refine your acoustic treatment to achieve the best possible sound in your space. Remember, no matter how much you spend on instruments, amps, speakers and recording gear, you still need to pay attention to the space in which you use them. With careful planning and a little bit of knowledge, you can transform your home studio into a professional-sounding environment.
Caption: Vicoustic’s solutions finder suggesting products for a control room.
9. Expert Advice and Resources
Consult experts like Jorge Castro from Vicoustic and Andy Munro from Munro Acoustics for valuable insights and advice on acoustic treatment. These professionals can provide guidance on choosing the right products and techniques for your specific needs. Visit their websites at www.vicoustic.com and www.munro.co.uk for more information.
10. Practical Tips for Acoustic Treatment
- Use this formula to find out how much space to leave between panels to achieve even spacing: (Wall Length minus Total Panel Width) divided by (Number Of Panels plus 1)
- Mark up the room, using a pencil to draw on the walls before fixing anything. Mark where the corners of the panels should go so that you can line them up precisely.
- Measure twice, stick once!
- When applying the glue, draw a zig-zag on one surface and a dashed line on the other, to help optimise the adhesion.
- Once you’ve lined up the rigid panel, give it a firm push and a wiggle to help ‘suck’ it on to the surface. This is especially effective on textured ceilings.
- Get a friend to help!
10.1. Fixing Methods
Different types of acoustic treatment products require different fixing methods, depending on the surface to which they’re being fitted. Always use the appropriate fixing method to ensure a secure and lasting installation.
Caption: Heavy-duty screws for sturdy plasterboard wall fixings.
10.2. Understanding Standing Waves
Most home studios suffer from low-frequency ‘standing waves’, where the physical length of the wave is a multiple of the room dimensions. Standing waves are more apparent in smaller rooms; and square and cuboid rooms, or rooms where one dimension is an exact multiple of another, are the worst culprits. The wavelength of open ‘E’ on a guitar is around 14 feet (just over 4m), so if you’ve converted a single garage into a studio, your longest wall will probably be almost exactly the length of a waveform at that frequency.
10.3. DIY Solutions with Rockwool
If you’re strapped for cash but have time to spare, you could try building your own broadband absorbers instead of buying commercially made ones. You’ll find a variety of products with the ‘R’ word on the packaging, but the ones that we’re interested in are the semi-rigid insulation slabs. In America, Owens Corning are a popular alternative brand, while others such as Knauf Insulation, who make Rocksilk, cater for numerous territories. There are two figures to look out for: density and thickness. Most manufacturers have expansive tables on absorption coefficients and the like, which are a good guide if you know exactly which frequencies you need to tame, but for the ‘plain vanilla’ slab, I’d suggest something around the 60kg/m3 mark, with a thickness of 75mm. In most cases, this will act usefully as an absorber across a broad range of frequencies.
11. Frequently Asked Questions (FAQ)
Q1: What is acoustic treatment?
Acoustic treatment involves using materials to improve a room’s sound quality by managing sound reflections, absorption, and diffusion.
Q2: Why is acoustic treatment important?
It helps create a more accurate listening environment for mixing and recording, ensuring your audio translates well on different playback systems.
Q3: What is the difference between absorption and diffusion?
Absorption materials soak up sound energy, while diffusion materials scatter sound energy to create a more natural sound field.
Q4: How much acoustic treatment do I need?
A typical home studio needs between 30 and 40 percent coverage to adequately treat it, depending on the room’s specific needs.
Q5: Where should I place acoustic panels?
Place panels at first reflection points, corners for bass trapping, and along walls to reduce flutter echoes.
Q6: Can I use household items for acoustic treatment?
While some items like thick curtains and rugs can help, they are not as effective as dedicated acoustic treatment products.
Q7: What is a bass trap and why is it important?
A bass trap is a type of acoustic absorber designed to absorb low-frequency energy, reducing standing waves and improving bass response.
Q8: How do I identify the first reflection points in my room?
Use the mirror trick: sit in your listening position and have someone move a mirror along the wall until you see the speaker in the reflection.
Q9: What is a ceiling cloud and how does it help?
A ceiling cloud is an acoustic panel suspended from the ceiling to absorb sound reflections from above, improving clarity and reducing unwanted reflections.
Q10: Is acoustic treatment expensive?
Acoustic treatment costs vary, but you can start with basic DIY solutions and gradually upgrade as needed to fit your budget.
Still struggling to find reliable guidance on acoustic treatment and sound behavior standards? Visit conduct.edu.vn for detailed information, practical tips, and expert advice to transform your space into an acoustically optimized environment. For personalized assistance, contact us at 100 Ethics Plaza, Guideline City, CA 90210, United States, or reach out via Whatsapp at +1 (707) 555-1234.