Beeswax candle making is an art and a craft, and with a chandler’s guide to beeswax candle making, you can unlock the secrets to creating beautiful, all-natural candles. At CONDUCT.EDU.VN, we provide comprehensive resources to help you master this skill, from selecting the right materials to perfecting your pouring technique. Discover how to make your own beeswax candles and the importance of candle making safety to create a warm, inviting ambiance with the soft, honeyed glow of beeswax.
1. Essential Equipment for Beeswax Candle Making
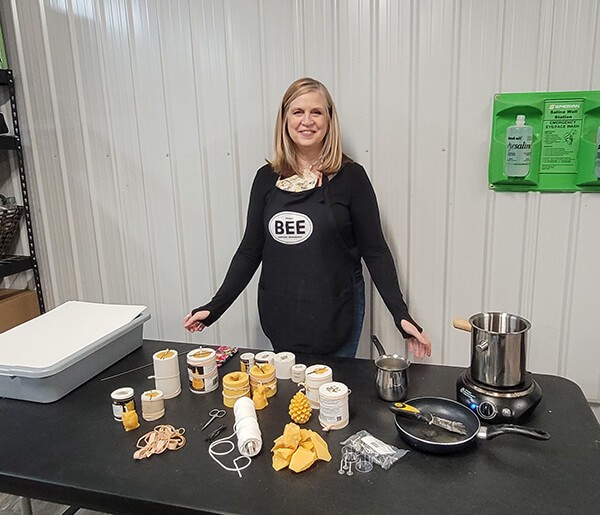
Creating beeswax candles is a rewarding process that requires a few key tools and materials. Having these items on hand will ensure a smooth and enjoyable candle-making experience.
- Wax Paper, Newspaper, or Poster Board: To protect your work surface from spills and drips.
- Beeswax: Available in blocks or pastilles, ensuring you have a good supply of high-quality wax.
- Bain-Marie Melting Pot: A double boiler is essential for safely melting beeswax without scorching it.
- Electric Hot Plate: Provides a consistent and controlled heat source for melting the wax.
- Pouring Pot: A pouring pot or Pyrex measuring cup makes it easy to transfer the melted wax into molds.
- Wicking: Select the appropriate wick size for your candle project to ensure proper burning.
- Wicking Needle: Helps thread the wick through molds, ensuring it’s centered.
- Scissors: Cuticle scissors are ideal for trimming wicks to the perfect length.
- Jumbo Bobby Pins: Optional but useful for centering the wick in molds.
- Metal Thermometer: Monitors the wax temperature, preventing overheating.
- Silicone Release Spray: For molded candles, this ensures easy removal.
- Non-Stick Frying Pan: Helpful for finishing tapers and character molds by flattening the bottoms.
2. The Art of Melting Beeswax: A Chandler’s Approach
Melting beeswax properly is crucial for candle making success. Here’s how to prepare your beeswax for crafting perfect candles.
-
Starting with Clean Beeswax: The foundation of any good candle is clean beeswax. If you’re using wax from old frames or burr comb, clean it first to remove debris. A crockpot is great for this.
-
Setting Up Your Workspace: Cover your table with wax paper, newspaper, or poster board to protect it. Place your hot plate on the protected surface.
-
Double Boiler Method: Use a double boiler to melt the beeswax safely. Fill the bottom pot with water and place the beeswax in the top pot. Heat the water to a simmer, not a boil.
-
Temperature Monitoring: Use a metal thermometer to monitor the wax temperature, keeping it between 150-160°F (65-71°C). Avoid overheating, as this can affect the wax’s quality.
-
Re-melting: Beeswax can be melted and re-melted without losing its qualities, making it a versatile material for multiple projects.
-
Straining the Wax: If there is debris in your melted wax, use a small strainer as you pour it into your pouring pot.
3. Selecting the Right Wick: A Detailed Guide
Choosing the correct wick size is essential for the proper burn of your candle. The wick determines the flame size and how evenly the candle burns.
-
Understanding Wick Sizes: A wick that is too small will result in a candle that barely burns and extinguishes quickly, while a wick that is too large will cause an excessive flame and sooting.
-
General Rules of Thumb:
- 1” diameter tapers: Use 2/0 square braid or #2 wicking.
- Votives or candles over 3” wide: Use 51-32 zinc core wire.
- Votives or candles under 3” wide: Use 44-24 zinc core wire or pre-assembled votive wicks.
- Figures under 2” wide: Use 1/0 square braid wicking.
- Wide figures over 2” wide or pillars over 3” wide: Use 60 ply.
-
Testing Different Wicks: It’s a good idea to test a few different-sized wicks to find the one that works best for your specific needs.
-
Wick Trimming: Before gifting or burning, trim the wick to ¼” to ensure a clean, safe burn.
4. Crafting Tealight Candles: A Beginner’s Project
Tealight candles are an excellent starting point for beginners. They are simple to make and require minimal materials.
-
Materials Needed:
- Tealight cups
- Pre-assembled tealight wicks
- Melted beeswax
-
Step-by-Step Instructions:
- Set out your tealight cups on your workspace.
- Dip the bottom of the pre-assembled wick in the melted wax.
- Press the wick into the center of the tealight cup and hold for about 15 seconds to adhere to the bottom.
- Pour wax from your double boiler into your pouring pot or Pyrex measuring cup.
- Fill the cup around the wick with wax, as close to the top of the tealight cup as possible.
-
Cooling and Packaging:
- Allow the tealights to cool off and solidify, which takes about 30-45 minutes.
- Package them in a tealight candle box, holding 12 candles each.
- As they cool, set them in the box with the lid off.
- When they are close to fully cooled, point all the wicks in the same direction and put on the clear lid.
- Add a ribbon and a card for a personal touch.
5. Creating Candles with Silicone Molds: A Detailed Approach
Silicone candle molds allow you to create intricate shapes and designs. These molds are flexible and easy to use, making the candle-making process enjoyable.
-
Choosing Silicone Molds: Select silicone molds in various shapes, such as frogs, beehives, Christmas trees, pinecones, or cube bees.
-
Wicking the Mold:
- Thread your wick of choice down through the slit in the side of the mold.
- Pull it up through the top of the mold.
- Center and secure the wick using a jumbo bobby pin.
- Ensure each side of the slit matches up perfectly, then secure the mold with multiple rubber bands.
-
Pouring the Wax:
- Pour the beeswax down as close to the center of the mold as possible.
- Pour slowly and consistently until the wax slightly overflows the top of the mold.
- If you notice craters forming on the surface, continue topping off the candle with more hot wax until the candle is cooled.
-
Cooling and Removing the Candle:
- Let your candle fully cool before removing it from the mold (about 1-1.5 hours in a 60-70°F indoor space).
- Feel the outside of the mold; when it’s cool to the touch, remove the wick from the bobby pin, peel off the rubber bands, and slowly separate the mold at the slit.
-
Mel’s Trick: Ensure the wick is centered and not near any sides of the mold to prevent it from showing through in the final candle.
6. Working with Polyurethane Molds: A Comprehensive Guide
Polyurethane candle molds are another option for creating unique candle shapes. These molds are rigid and require a slightly different technique.
-
Preparing the Mold:
- Pick out your polyurethane candle mold.
- Grab your wicking needle and thread the wick up through the bottom of the mold.
- Using a jumbo bobby pin, center the wick in the middle of the mold.
- Rubber band the mold together.
-
Pouring the Wax:
- Slowly and steadily pour the hot wax from your pouring pot or Pyrex into the mold.
- Fill up to the brim of the mold with wax.
- As the wax cools, there will be some shrinkage. Continue to top off the mold with hot wax.
-
Cooling and Removing the Candle:
- Give your candle ample time to fully cool before trying to remove it from the mold (about 1-1.5 hours in a 60-70°F indoor space).
- Feel the outside of the mold, and when it’s cool to the touch, remove the wick from the bobby pin and peel off the rubber bands.
- Gently grab the candle and wiggle it back and forth while slowly pulling it out of the mold.
7. Refining Your Beeswax Candles: Finishing Touches
Finishing your beeswax candles involves ensuring they are stable and visually appealing. Here are some tips for adding the final touches.
-
Flattening the Bottom: If your candle has a bulbous bottom, it might not sit flat on a table or surface. Heat up your frying pan on high heat, then press the candle flat down into the heated bottom of the pan in quick spurts. Check the flatness between presses.
-
Addressing Warped or Messy Candles: If a candle is warped or messy, simply toss the whole candle and wick back into your double boiler to start over.
8. Benefits of Beeswax Candles: An Eco-Friendly Choice
Beeswax candles are not only beautiful but also offer several benefits compared to other types of candles.
- Natural and Non-Toxic: Beeswax is a natural substance produced by bees, making it a non-toxic alternative to paraffin wax, which is derived from petroleum.
- Clean Burning: Beeswax candles burn cleanly, producing very little soot and smoke.
- Air Purifying: They emit negative ions when burned, which can help purify the air by neutralizing pollutants and allergens.
- Long-Lasting: Beeswax candles tend to burn longer than paraffin candles, providing hours of warm, inviting light.
- Honey Scent: They have a natural, subtle honey scent that adds to the ambiance without being overpowering.
9. Safety Tips for Beeswax Candle Making: A Comprehensive Guide
Safety should always be a top priority when making beeswax candles. Here are essential safety tips to follow.
- Never Leave Melted Wax Unattended: Always stay near your melting wax to monitor its temperature and prevent overheating.
- Use a Double Boiler: A double boiler is the safest way to melt beeswax, as it prevents the wax from coming into direct contact with the heat source.
- Monitor Wax Temperature: Use a metal thermometer to ensure the wax does not exceed 160°F (71°C). Overheating can cause the wax to smoke or even catch fire.
- Work in a Well-Ventilated Area: Proper ventilation helps dissipate any fumes and reduces the risk of inhaling harmful substances.
- Keep Water Away from Melted Wax: Water can cause hot wax to splatter, leading to burns. Ensure your hands and workspace are dry.
- Use Heat-Resistant Gloves: Protect your hands from burns by wearing heat-resistant gloves when handling hot wax and molds.
- Keep a Fire Extinguisher Nearby: In case of a fire, having a fire extinguisher readily available can help prevent the situation from escalating.
- Store Wax Properly: Store your beeswax in a cool, dry place away from direct sunlight and heat sources.
- Clean Up Spills Immediately: Clean up any wax spills immediately to prevent slips and falls.
10. Optimizing Your Candles: Techniques for a Perfect Burn
Achieving a perfect burn is the ultimate goal in candle making. Here are some advanced techniques to ensure your beeswax candles burn evenly and efficiently.
- Wick Placement: Ensure the wick is centered in the candle. An off-center wick can cause uneven burning and tunneling.
- Proper Wick Size: Using the correct wick size for the diameter of the candle is crucial. Too small a wick will cause the candle to tunnel, while too large a wick will produce excessive smoke and heat.
- First Burn: The first burn is the most important. Allow the candle to burn long enough for the entire surface to melt. This will prevent tunneling in subsequent burns.
- Trim the Wick Regularly: Keep the wick trimmed to ¼” before each burn. This prevents smoking and ensures a clean, steady flame.
- Avoid Drafts: Burning candles in a drafty area can cause uneven burning and excessive smoke. Place candles away from windows, fans, and air vents.
- Use a Candle Snuffer: Extinguish candles with a candle snuffer rather than blowing them out. This prevents wax from splattering and reduces smoke.
- Monitor Burn Time: Avoid burning candles for more than 4 hours at a time. Prolonged burning can cause the candle to overheat and produce excessive smoke.
11. Troubleshooting Common Candle Making Issues
Even with careful preparation, candle makers can encounter various issues. Here are solutions to common problems.
- Tunneling: Tunneling occurs when the candle burns down the center, leaving a ring of unmelted wax around the edges. To fix this, burn the candle long enough for the entire surface to melt.
- Sooting: Sooting is caused by an oversized wick or burning the candle in a drafty area. Trim the wick regularly and avoid drafts.
- Cracking: Cracking can occur if the candle cools too quickly. Allow the candle to cool slowly and evenly.
- Sinkholes: Sinkholes are depressions that form on the surface of the candle as it cools. To fix this, reheat the surface of the candle with a heat gun or pour a small amount of additional wax on top.
- Mushrooming: Mushrooming is when the wick develops a large, bulbous head. This is usually caused by an oversized wick. Trim the wick regularly to prevent mushrooming.
12. Adding Color and Scent to Beeswax Candles: A Creative Guide
Adding color and scent can enhance the aesthetic appeal and ambiance of your beeswax candles. Here’s how to do it safely and effectively.
- Choosing Colorants: Use candle-specific dyes designed for beeswax. Avoid using food coloring or other non-candle dyes, as they can clog the wick and affect the burn quality.
- Adding Color: Melt the dye separately and add it to the melted beeswax, stirring until the color is evenly distributed. Start with a small amount of dye and add more until you achieve the desired color.
- Selecting Fragrance Oils: Use high-quality fragrance oils specifically designed for candles. Essential oils can also be used, but they may not be as strong or long-lasting.
- Adding Fragrance: Add the fragrance oil to the melted beeswax, stirring gently to combine. The typical fragrance load is around 6-10% of the total wax volume.
- Testing Fragrance Throw: After the candle has cooled and hardened, test the fragrance throw by burning the candle and evaluating the scent in the room. Adjust the fragrance load as needed for future batches.
13. Exploring Advanced Candle Making Techniques
For experienced candle makers, exploring advanced techniques can open up new possibilities and creative expressions.
- Tapered Candles: Making tapered candles involves dipping a wick repeatedly into melted wax to build up layers. This technique requires practice and precision.
- Pillar Candles: Pillar candles are large, freestanding candles that can be made in various shapes and sizes. They require a sturdy wick and careful pouring to ensure even burning.
- Layered Candles: Layered candles involve pouring different colors and scents in layers, creating a visually appealing and aromatic experience.
- Embed Candles: Embed candles incorporate decorative elements, such as dried flowers, herbs, or crystals, into the wax. These elements add visual interest and can enhance the candle’s scent.
- Gel Candles: Gel candles are made with a transparent gel wax that allows you to create unique and artistic designs.
14. Storing and Displaying Your Beeswax Candles
Proper storage and display can help preserve the quality and appearance of your beeswax candles.
- Storage: Store your beeswax candles in a cool, dry place away from direct sunlight and heat sources. Exposure to sunlight can cause the wax to fade or discolor.
- Protection: Protect your candles from dust and debris by storing them in airtight containers or wrapping them in wax paper.
- Display: Display your candles on a stable, heat-resistant surface away from flammable materials. Use candle holders that are appropriate for the size and shape of the candle.
- Arrangements: Create visually appealing candle arrangements by grouping candles of different sizes, shapes, and colors.
- Safety: Never leave burning candles unattended and keep them out of reach of children and pets.
15. The Business of Beeswax Candles: Starting Your Own Venture
Turning your candle-making hobby into a business can be a rewarding endeavor. Here are steps to get started.
- Market Research: Research your local market to identify potential customers and competitors. Determine the demand for beeswax candles and identify any niche markets.
- Business Plan: Develop a detailed business plan that outlines your goals, strategies, and financial projections.
- Branding: Create a unique brand identity that reflects your values and appeals to your target market. This includes choosing a business name, logo, and packaging design.
- Legal Requirements: Register your business and obtain any necessary licenses and permits. Comply with all local and state regulations regarding candle making and sales.
- Sourcing Materials: Establish relationships with reliable suppliers of high-quality beeswax, wicks, dyes, and fragrance oils.
- Production: Set up a dedicated workspace for candle making that is clean, organized, and safe. Invest in the necessary equipment and supplies.
- Pricing: Determine your pricing strategy based on your costs, market rates, and perceived value.
- Marketing: Promote your beeswax candles through various channels, such as online marketplaces, craft fairs, local stores, and social media.
- Customer Service: Provide excellent customer service to build relationships and encourage repeat business.
- Online Presence: Create a professional website or online store to showcase your products and reach a wider audience.
16. Sustainability and Ethical Considerations in Beeswax Candle Making
As a candle maker, it’s important to consider the environmental and ethical implications of your craft.
- Sourcing Beeswax Responsibly: Ensure that your beeswax is sourced from beekeepers who practice sustainable and ethical beekeeping methods.
- Supporting Local Beekeepers: Prioritize sourcing beeswax from local beekeepers to support your community and reduce your carbon footprint.
- Using Natural and Non-Toxic Materials: Choose natural and non-toxic materials for your candles, such as beeswax, cotton wicks, and natural dyes.
- Reducing Waste: Minimize waste by using reusable containers, recycling materials, and composting organic waste.
- Packaging: Use eco-friendly packaging materials that are biodegradable or recyclable.
- Transparency: Be transparent about your sourcing and production practices, so customers can make informed choices.
- Giving Back: Support organizations that promote beekeeping and environmental conservation.
17. The Science Behind Beeswax Candles: A Deep Dive
Understanding the science behind beeswax candles can enhance your appreciation for this ancient craft.
- Chemical Composition: Beeswax is composed primarily of esters, fatty acids, and hydrocarbons. These compounds give beeswax its unique properties, such as its low melting point and ability to burn cleanly.
- Melting Point: The melting point of beeswax is around 144-147°F (62-64°C). This relatively low melting point makes beeswax easy to work with and allows it to burn evenly.
- Burning Process: When a beeswax candle burns, the heat from the flame melts the wax, which is then drawn up the wick by capillary action. The wax vaporizes and reacts with oxygen in the air, producing heat, light, and carbon dioxide.
- Negative Ions: Beeswax candles emit negative ions when burned, which can help purify the air by neutralizing pollutants and allergens.
- Fragrance Throw: The fragrance throw of a candle depends on the type and concentration of fragrance oils used, as well as the temperature and airflow in the room.
- Wick Performance: The performance of a wick depends on its size, shape, and material. A well-designed wick will provide a steady flame and even burn.
18. Innovations in Beeswax Candle Making
The world of candle making is constantly evolving, with new techniques and technologies emerging.
- Automated Pouring Systems: Automated pouring systems can streamline the candle-making process and improve efficiency, especially for large-scale production.
- 3D Printed Molds: 3D printed molds allow for the creation of intricate and custom candle shapes.
- Smart Candles: Smart candles incorporate electronic components that allow you to control the candle’s brightness, color, and scent remotely.
- Sustainable Materials: Researchers are exploring new sustainable materials for candle making, such as plant-based waxes and biodegradable wicks.
- Online Candle Making Communities: Online candle making communities provide a platform for sharing knowledge, ideas, and inspiration.
19. Beeswax Candle Making for Therapeutic Purposes
Beeswax candles have been used for therapeutic purposes for centuries.
- Aromatherapy: Adding essential oils to beeswax candles can create a therapeutic atmosphere that promotes relaxation, stress relief, and emotional well-being.
- Meditation: The soft, warm light of a beeswax candle can create a calming environment that enhances meditation and mindfulness practices.
- Allergy Relief: Beeswax candles emit negative ions that can help purify the air and reduce allergens, making them beneficial for people with allergies and asthma.
- Improved Sleep: Burning a beeswax candle before bedtime can create a relaxing atmosphere that promotes better sleep.
- Mood Enhancement: The warm, inviting light and subtle honey scent of beeswax candles can uplift your mood and create a sense of comfort and well-being.
20. The Cultural Significance of Beeswax Candles
Beeswax candles have a rich cultural history and significance in many societies around the world.
- Religious Ceremonies: Beeswax candles have been used in religious ceremonies for centuries, symbolizing purity, light, and spiritual illumination.
- Festivals and Celebrations: Candles are often used to decorate homes and create a festive atmosphere during holidays and celebrations.
- Romantic Settings: The soft, warm light of candles can create a romantic and intimate atmosphere, making them popular for special occasions.
- Memorials: Candles are often lit in memory of loved ones who have passed away, symbolizing remembrance and hope.
- Symbolism: In many cultures, candles symbolize hope, guidance, and the triumph of light over darkness.
At CONDUCT.EDU.VN, we strive to provide you with the most comprehensive and up-to-date information on beeswax candle making. Whether you are a beginner or an experienced candle maker, we hope this guide has inspired you to explore the art and craft of beeswax candles.
For more information, resources, and guidance on ethical standards and best practices, visit CONDUCT.EDU.VN. Our mission is to provide comprehensive resources and support for individuals and organizations seeking to uphold the highest standards of conduct.
Contact us at: 100 Ethics Plaza, Guideline City, CA 90210, United States. Whatsapp: +1 (707) 555-1234. Or visit our website: conduct.edu.vn.
FAQ: Beeswax Candle Making
- What is the best type of beeswax to use for candles?
- Pure, filtered beeswax is ideal for candle making, as it burns cleanly and has a natural honey scent.
- How do I choose the right wick size for my candle?
- Consider the diameter of your candle; smaller candles require smaller wicks, while larger candles need larger wicks to ensure proper burning.
- What is the ideal temperature for melting beeswax?
- The ideal temperature is between 150-160°F (65-71°C) to prevent overheating and maintain the wax’s quality.
- How can I add color and scent to my beeswax candles?
- Use candle-specific dyes and fragrance oils designed for beeswax, and follow the recommended ratios for best results.
- How do I prevent tunneling in my candles?
- Ensure the first burn melts the entire surface of the candle and use the correct wick size to prevent tunneling in subsequent burns.
- What are the safety precautions I should take when making beeswax candles?
- Never leave melted wax unattended, use a double boiler, monitor wax temperature, and work in a well-ventilated area to ensure safety.
- How long do beeswax candles typically burn?
- Beeswax candles generally burn longer than paraffin candles, providing hours of warm, inviting light.
- Can I re-melt beeswax that has already been used?
- Yes, beeswax can be melted and re-melted without losing its qualities, making it a versatile material for multiple projects.
- What are the benefits of using beeswax candles compared to other types of candles?
- Beeswax candles are natural, non-toxic, clean-burning, air-purifying, long-lasting, and have a subtle honey scent.
- How can I store my beeswax candles to maintain their quality?
- Store your beeswax candles in a cool, dry place away from direct sunlight and heat sources to prevent fading and discoloration.