Cross stitch is a beloved craft, but finding creative ways to display your finished pieces can be a challenge. While framing is a classic option, it’s not the only one! This guide explores five alternative finishing ideas that will inspire you to showcase your cross-stitch projects in unique and exciting ways.
Five Unique Cross Stitch Finishing Ideas
Here are five creative alternatives to framing your cross stitch projects:
- Craft a Lampshade
- Create a Canvas Frame
- Embellish Clothing with Cross Stitch
- Design a Decorative Banner
- Sew a Cozy Mug Wrap
1. Illuminate Your Space: Cross Stitch Lampshades
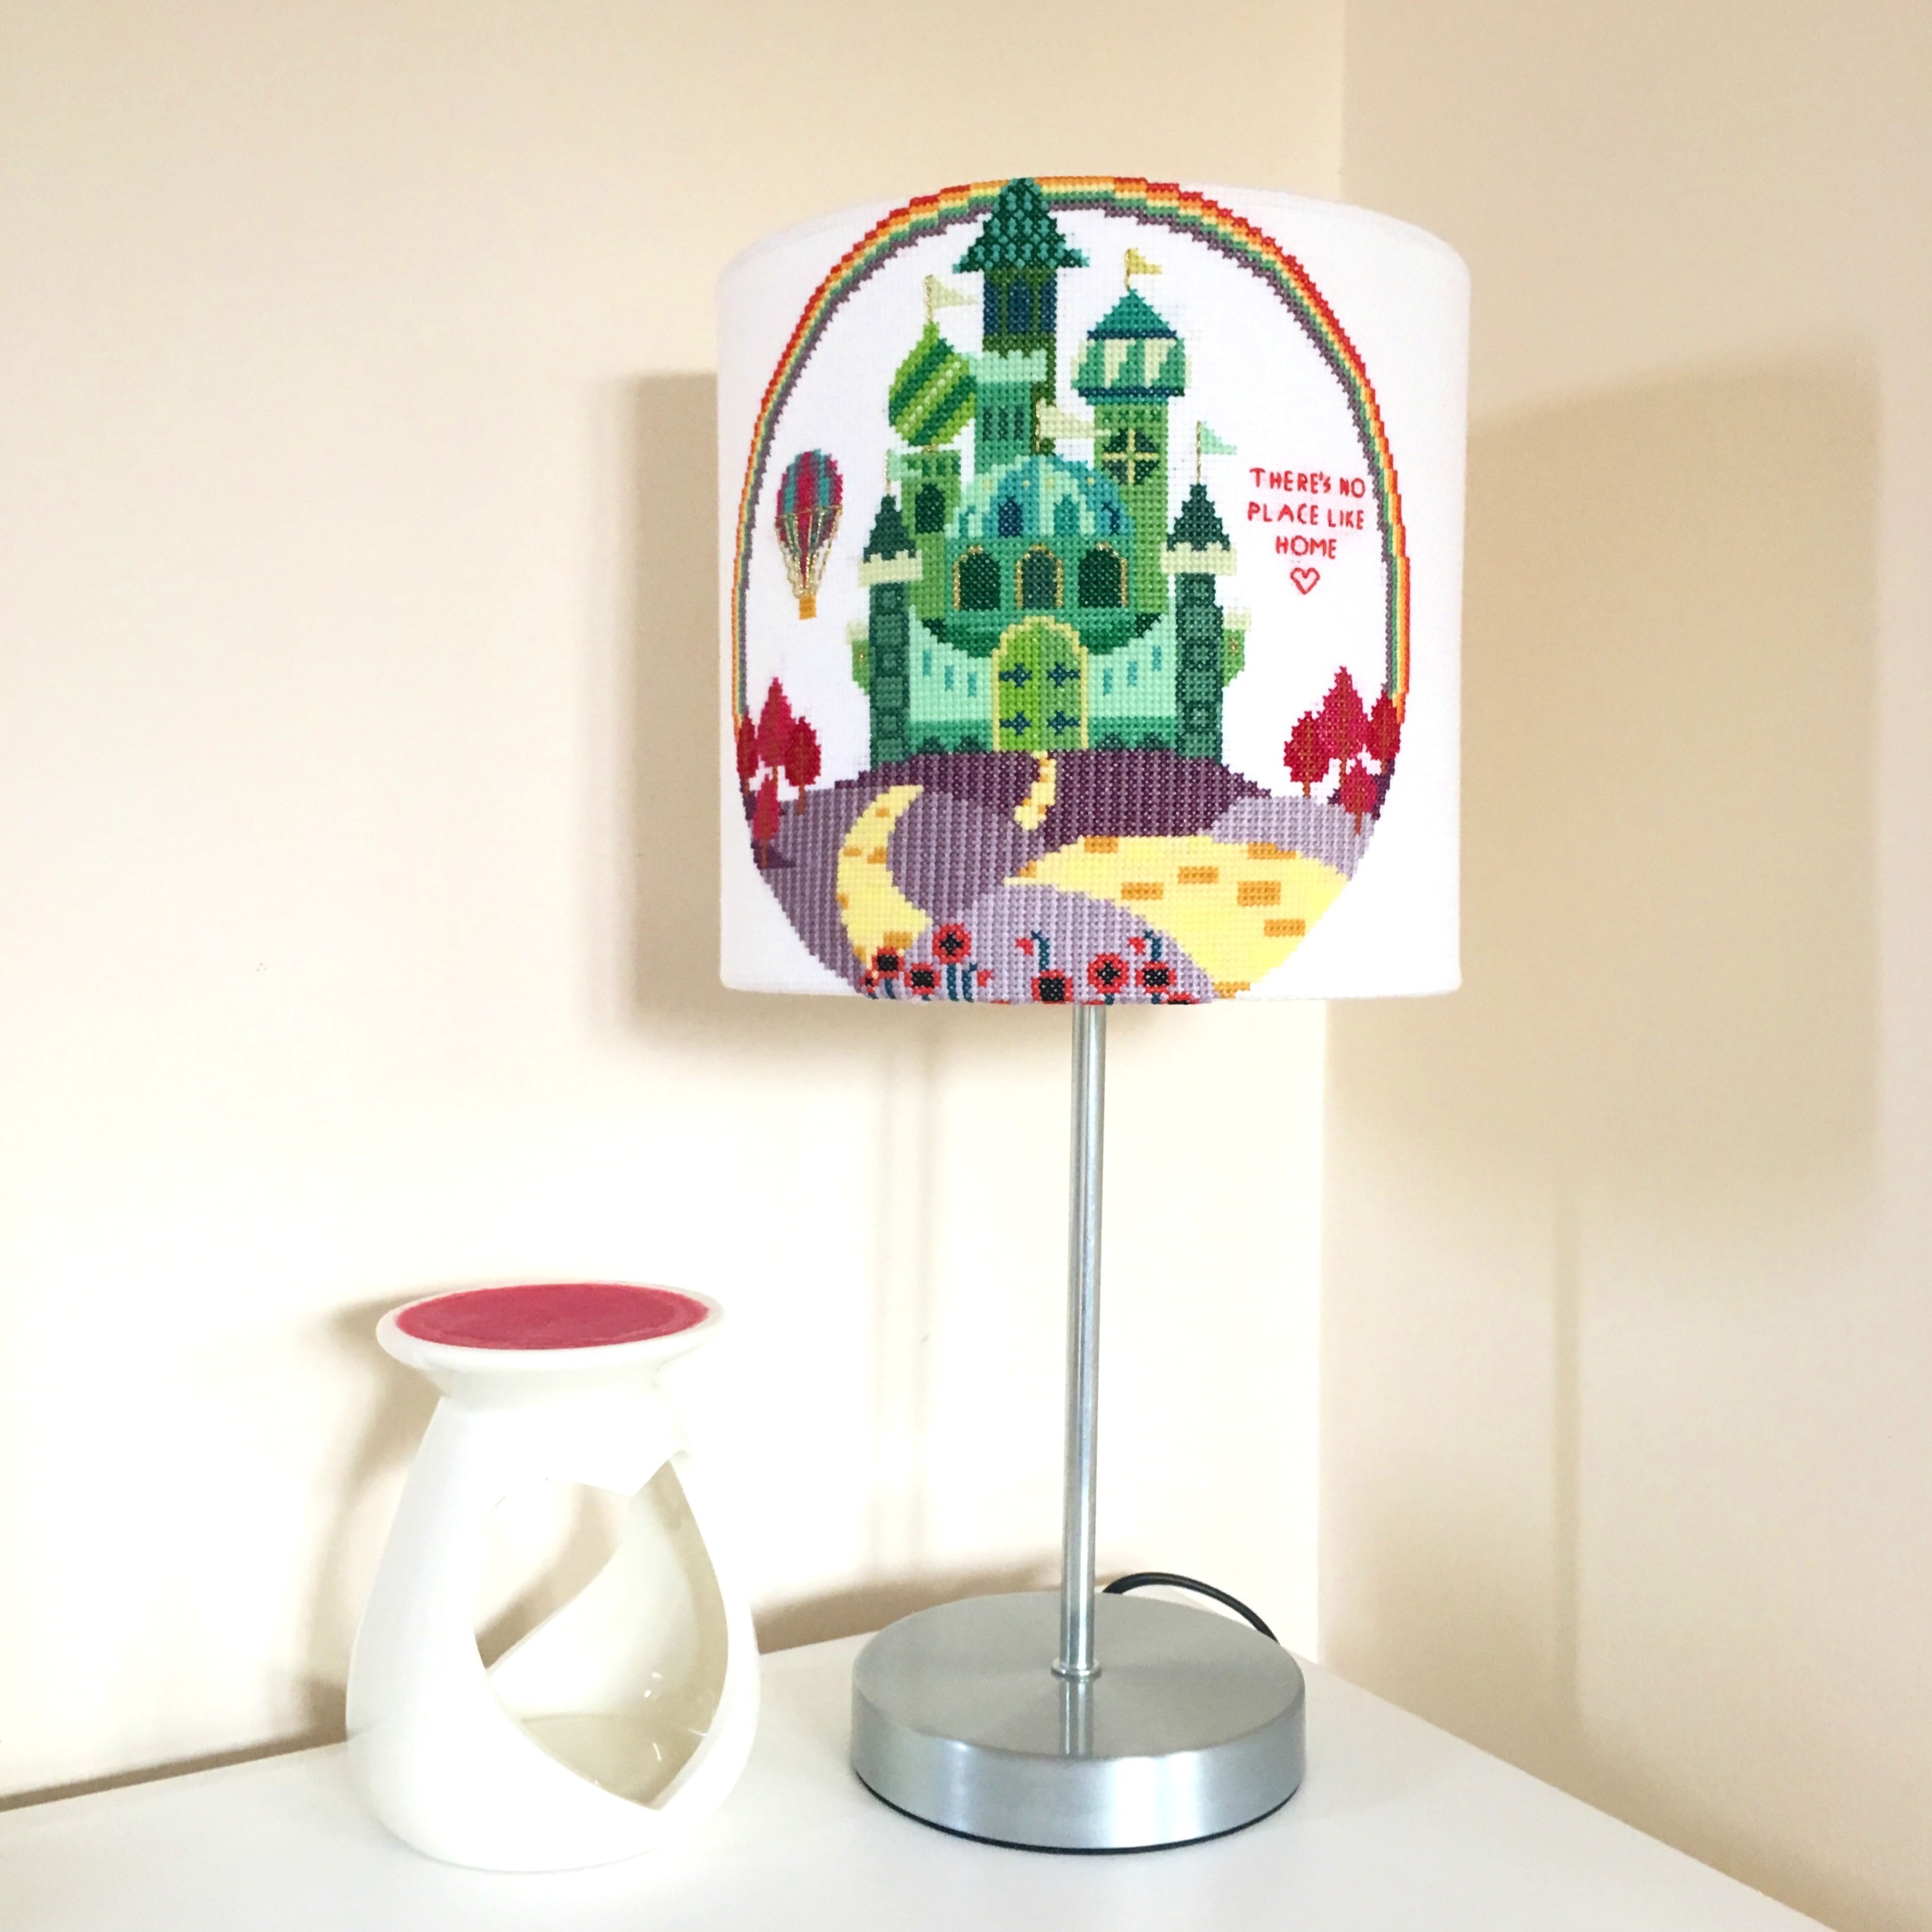
Transform your cross stitch into a functional work of art by creating a lampshade. The original author successfully crafted a lampshade using the Emerald City pattern by Satsuma Street.
For a detailed guide, refer to the cross stitch lampshade tutorial.
When creating your own cross stitch lampshade, consider using a higher Aida cloth count or evenweave fabric for a smoother, more professional look where the stitches aren’t present. It’s highly recommended to utilize a lampshade making kit that has undergone appropriate safety testing.
This project adds a warm and personal touch to any room, especially during the autumn and winter months. Choose a single large design or several smaller, coordinating patterns to create a truly unique lampshade. Although it might be the most challenging project on this list, the results are definitely worth the effort! The author’s tutorial simplifies the process, requiring no additional sewing after the stitching is complete. The recommended kit includes everything you need.
2. Modern Display: Cross Stitch on Canvas Frames
For a modern and minimalist display, consider mounting your cross stitch onto a canvas frame. This method offers a “framed” look without the traditional frame.
The author used this technique for their Hello Spring design.
To learn how, check out the cross stitch canvas frame tutorial.
This is one of the easiest and quickest finishing methods. Simply purchase a canvas frame (the type used for painting), wrap your finished design around it, and secure it with a staple gun at the back. While there are a few more steps involved, the tutorial provides clear instructions. This technique adds texture to your wall decor and provides a clean, contemporary look.
3. Wearable Art: Cross Stitch on Clothing
Infuse your wardrobe with personalized flair by adding cross stitch to your clothes. This method requires planning, as the stitching needs to be done directly onto the fabric.
Get started with the cross stitching on clothes tutorial.
This is a great way to showcase your cross stitch skills without requiring wall space. Stitching on clothes allows you to express your creativity and personalize your style.
Consider stitching small motifs, such as flowers or initials, onto plain t-shirts or scarves. You’ll need waste canvas or soluble canvas and possibly fabric stabilizer to achieve the best results. While it’s more challenging than stitching on Aida cloth, the outcome is truly rewarding. This technique also works well for personalizing bags, as demonstrated in the hand embroidery on cotton bags tutorial.
4. Festive Decor: Cross Stitch Banners
Create a charming and customizable decoration by turning your cross stitch into a banner. This project requires some sewing after the stitching is complete, either by hand or with a sewing machine.
Follow the cross stitch banner tutorial for detailed instructions.
Banners are incredibly versatile in terms of size and shape. Ensure you leave enough fabric around your stitched design to create your desired banner shape. Banners can be long and vertical, wide and horizontal, or any other shape you can imagine!
5. Cozy Comfort: Cross Stitch Mug Cosies
Utilize your smaller cross stitch patterns by creating a mug cosy. This quick and easy project is perfect for cozying up during the winter months with a warm beverage.
Learn how with the cross stitch mug cosy tutorial.
The tutorial includes a free downloadable pattern. In addition to the pattern, you’ll need some felt and a button. Mug cosies are versatile and can even be adapted for summer use by leaving off the felt backing and using them on cocktail glasses or hip flasks.
Beyond the Frame: Unleashing Your Cross Stitch Creativity
These five ideas offer a starting point for exploring creative ways to finish your cross stitch projects. Don’t be afraid to experiment and adapt these techniques to suit your personal style and preferences. Embrace the possibilities and showcase your cross stitch artistry in unique and memorable ways!