Astrophotography: A Guide to Capturing Stunning Night Skies offers practical guidance and expert tips. This comprehensive exploration, brought to you by CONDUCT.EDU.VN, provides the essential knowledge for capturing breathtaking images of the night sky. Unlock the secrets to celestial photography, exploring techniques and equipment for captivating Milky Way shots.
1. Essential Equipment for Astrophotography
To embark on your astrophotography journey, certain equipment is indispensable. These tools are crucial for capturing the faint light of stars and celestial objects:
1.1. Tripod: The Foundation of Sharp Images
A sturdy tripod is non-negotiable. It allows for the long exposures necessary to capture stationary stars, typically with shutter speeds of up to 30 seconds. Without a tripod, images will be blurry due to camera shake.
1.2. Camera and Lens: The Light-Gathering Duo
-
Aperture: Opt for a camera and lens with a wide aperture, ideally between f/1.4 and f/4. This wider opening allows more light to enter the camera, crucial for capturing faint celestial objects.
-
Focal Length: A wide-angle lens is preferred. On a full-frame camera, a focal length of 14-24mm is ideal, while a crop sensor camera benefits from a 10-18mm lens. The wider the focal length, the more of the Milky Way you can capture, though it may appear smaller in the frame.
%20(1).jpg)
Image showcasing a side-by-side comparison of the Milky Way captured using a 24mm lens versus a 16mm lens, highlighting the difference in the field of view and the apparent size of the Milky Way.
A popular choice is the Sony 24mm f/1.4 GM lens, favored for its ability to make the Milky Way appear larger. However, the composition might sometimes dictate the need for a wider lens.
1.3. Illumination Tools: Navigating the Darkness
A torch or head torch is vital for navigating in the dark and for setting up your equipment safely.
1.4. PhotoPills App: Your Celestial Guide
The PhotoPills app is an invaluable tool for planning your astrophotography shoots. It helps you determine the position of the Milky Way in the sky at your location and desired time. For a one-off fee, this app can significantly improve your chances of capturing stunning images.
2. Planning Your Milky Way Shoot
Effective planning is key to successful astrophotography. Consider these factors:
2.1. Moon Phases: Timing is Everything
Always check the moon phases before heading out. A new moon (or a night close to it) provides the darkest skies, allowing the stars to shine brightly.
2.2. Utilizing the PhotoPills App: Precise Positioning
The PhotoPills app is also crucial for determining the direction and height of the Milky Way at any given time, as well as the rise and set times of the sun and moon.
2.3. Balancing the Moon and Milky Way
While a new moon is ideal, shooting with a small amount of moonlight can sometimes enhance the foreground. Up to 30% moon visibility is acceptable if the moon is low and behind you, providing subtle foreground lighting. However, avoid shooting when the moon is too bright, as it can wash out the Milky Way.
Image comparing the visibility of the Milky Way under different moon phases, illustrating how increased moonlight can diminish the clarity of the stars.
2.4. Seasonal Considerations: When to Shoot
Different times of the year require shooting at different times of the evening or early morning. The best months for shooting the Milky Way are May and June (for a rising Milky Way) and September and October (for a setting Milky Way), as the shooting hours are more convenient during these months.
A calendar graphic illustrating the optimal times of the year to capture the Milky Way, broken down month by month, highlighting the visibility and position of the galaxy.
2.5. Milky Way Panoramas: A Wider Perspective
In the second half of the Milky Way season, capturing Milky Way panoramas becomes easier as the angle lowers. While shooting a multi-row panorama involves technical complexities not covered here, the results can be stunning.
A panoramic shot of the Milky Way stretching across the night sky above Hooker Hut, showcasing the expansive view that can be achieved with advanced techniques.
3. Mastering Your Camera Settings
Capturing the night sky requires understanding how to manipulate your camera settings.
3.1. The Exposure Triangle: Balancing Light
Shooting at night is challenging because you need to let in enough light to capture an image while dealing with very dark conditions. The exposure triangle—aperture, shutter speed, and ISO—must work in harmony. The limiting factor is usually shutter speed, as shooting for too long will cause star trails due to the Earth’s rotation.
3.2. Shutter Speed: Capturing Stationary Stars
There is no one-size-fits-all shutter speed; it depends on your camera and lens. Use the PhotoPills Spot Stars Function to determine the correct shutter speed based on your equipment and desired aperture.
For example, with a Sony a7R V and a 24mm lens at f/1.8, PhotoPills may suggest a 7-second exposure. You may find that a range of 6-8 seconds works well.
Screenshot of the PhotoPills app demonstrating the Spot Stars Function, used to calculate the optimal shutter speed based on specific camera and lens settings for astrophotography.
3.3. Aperture: Letting in Light
If you have a lens with a widest aperture of f/2.8 or f/4, use that. If you have a prime lens with a very wide aperture like f/1.4, shooting at f/1.8 might be preferable.
3.4. ISO: Sensitivity to Light
In very dark locations, you might need to shoot at ISO 6400 or even ISO 10,000 to capture enough light. The trade-off is increased noise or graininess in the image. Noise is more apparent with larger full-frame and high-megapixel sensors.
In locations with ambient light, like near the Church of the Good Shepherd in Tekapo, you might be able to use a lower ISO, such as ISO 2500.
Image of the Milky Way above the Church of the Good Shepherd in Tekapo, New Zealand, showcasing a well-lit foreground achieved with a lower ISO setting.
Consider taking multiple shots and stacking them in software like Starry Landscape Stacker or Sequator to reduce noise. You can also take a separate foreground image at a lower ISO and blend it with the sky image in Photoshop. Mastering basic settings is essential before attempting more advanced techniques.
3.5. White Balance: Capturing Natural Colors
While white balance can be adjusted in post-production, setting it correctly in-camera is preferable. A Kelvin White Balance of 4,200 is a good starting point, but adjust it based on the colors you see in the field.
The white balance of the sky can vary significantly, influenced by airglow tones that can make the sky appear pinkish/purple or blue/green. Aim to keep your white balance in your RAW images between 3,600 and 4,200.
4. Achieving Focus in the Dark
Getting sharp focus on the stars can be the most challenging aspect of astrophotography.
4.1. Manual Focus: Taking Control
- Switch your lens to manual focus.
- Use the magnify function on your camera to zoom in on a bright star. The star doesn’t need to be in your final composition, as you can reposition the camera after focusing.
- Adjust the focus ring until the star appears as a pinpoint of light.
- If your camera has focus peaking, use it to help identify when the stars are in sharpest focus.
4.2. Test Shots: Verifying Sharpness
Take a test shot and zoom in on the image to check the stars. If they are round and small, you’re in focus. If they are blurry, adjust the focus accordingly. Elongated stars indicate star trails, so reduce the shutter speed. Minor sharpness issues at the edges are usually due to lens distortion.
Diagram illustrating the process of manually focusing on stars for astrophotography, emphasizing the importance of achieving pinpoint sharpness.
5. Enhancing Your Astrophotography
Astrophotography is more than just technical settings; it’s about creativity and enjoying the process.
5.1. Foreground Composition: Adding Context
Include a compelling foreground composition to enhance your Milky Way shots. This could be a mountain range, lake reflection, jetty, rock formations, building, or beach.
Image of the Milky Way rising above Whiritoa Beach in Coromandel, New Zealand, showcasing how a well-composed foreground can enhance the overall impact of the astrophotography.
5.2. Shooting Stars: Capturing Serendipity
Keep an eye out for shooting stars. Capturing these celestial streaks can add a magical element to your images. Shooting stars appear only once in a sequence of shots, unlike satellites, which are visible in multiple frames.
5.3. Planets: Celestial Companions
At certain times of the year, you can capture planets alongside the Milky Way. Seeing several planets lined up in the night sky can be a special treat.
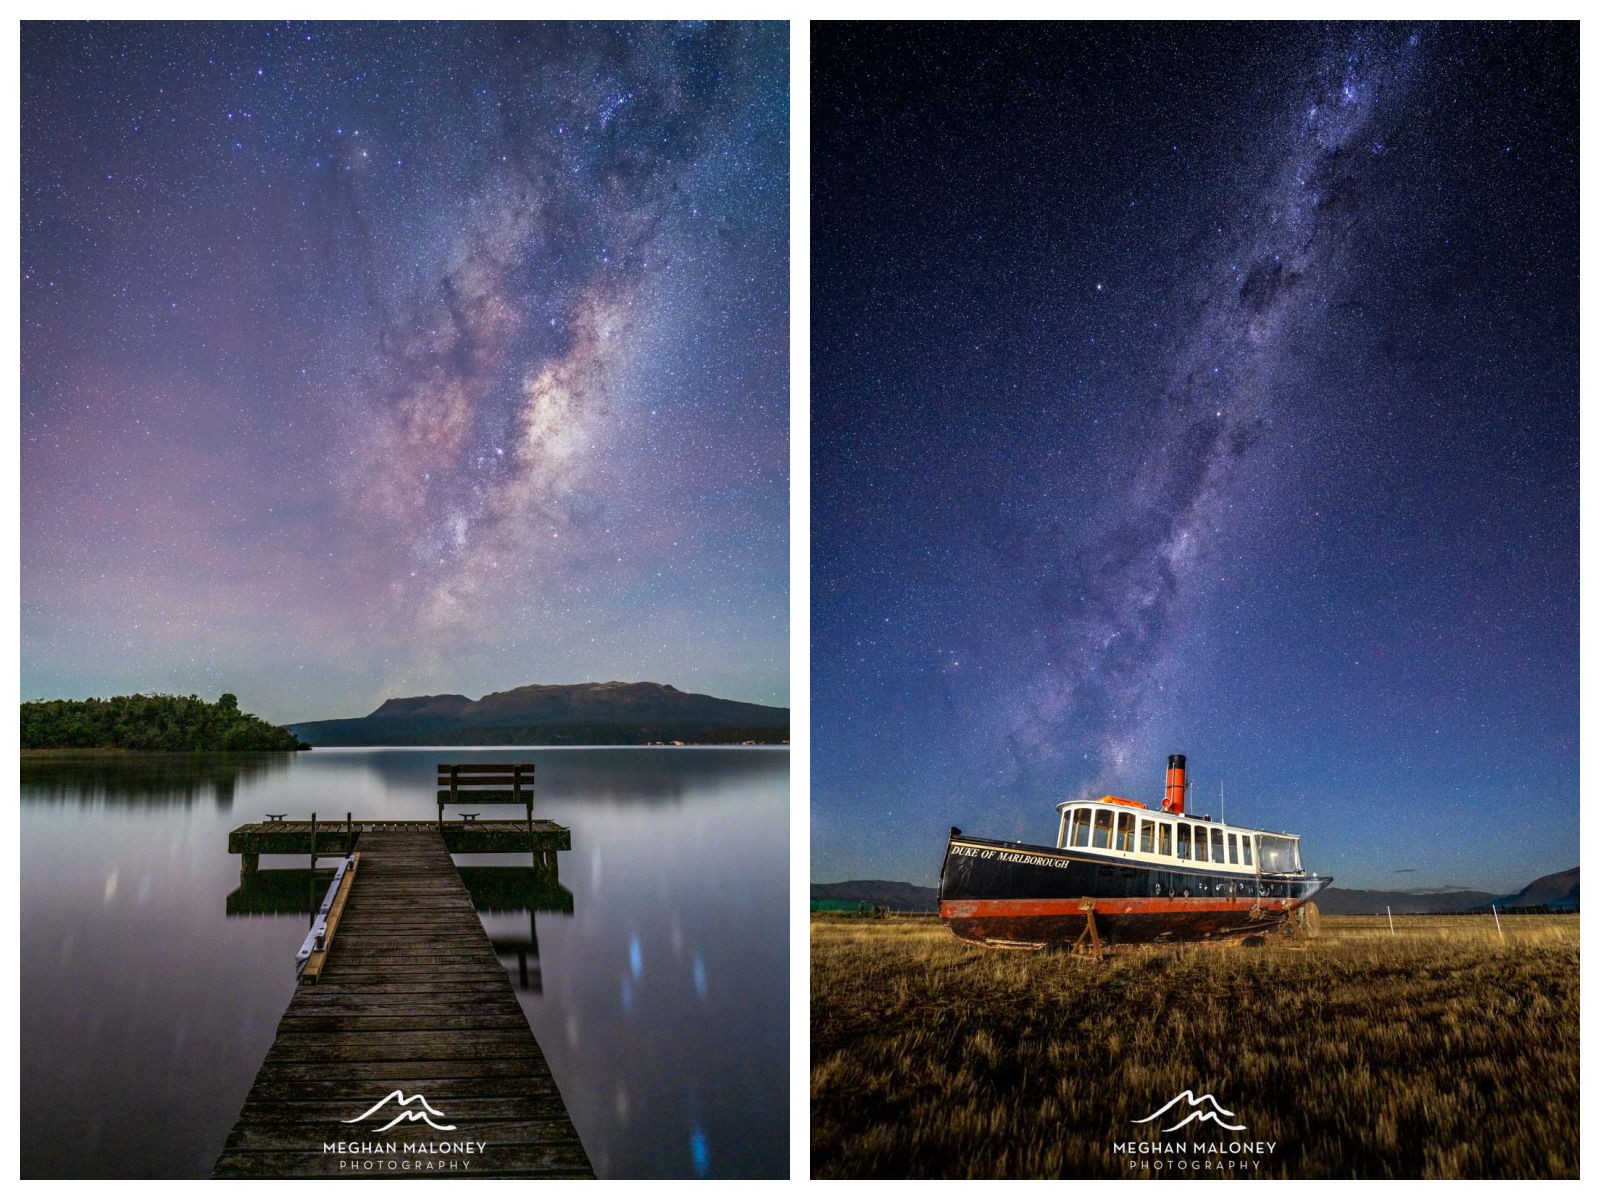
Image capturing the Milky Way alongside several planets over Lake Tarawera, New Zealand, illustrating the beauty of capturing multiple celestial phenomena in a single frame.
5.4. Cloudy Skies: Embracing Imperfection
Don’t be discouraged by a few clouds. Scattered clouds can add a unique and dramatic element to your shots, allowing the Milky Way to peek through.
Image of the Milky Way partially obscured by clouds over Lake Matheson in Tekapo, New Zealand, demonstrating how clouds can add a dramatic and artistic element to astrophotography.
5.5. Moonlit Skies: Alternative Perspectives
Even when the moon is full, you can still capture stunning night shots. The moonlight can illuminate the landscape, creating beautiful scenes, especially in the early morning hours.
Image of Lake Matheson under a moonlit sky, highlighting the stunning landscape illuminated by the moon’s glow before dawn, proving that beautiful astrophotography is possible even with a full moon.
5.6. Enjoying the Process: The Heart of Astrophotography
The thrill of capturing the Milky Way in your viewfinder is unparalleled. Embrace the learning process and enjoy refining your skills.
6. Next Steps in Astrophotography
Once you’ve mastered the basics, consider exploring more advanced techniques:
- Stacking: Combining multiple images to reduce noise.
- Using a Tracker: Compensating for the Earth’s rotation to allow for longer exposures.
- Separate Foreground Exposures: Capturing the foreground at a lower ISO for better quality.
- Multi-Row Panoramas: Creating expansive images of the night sky.
- Star Trails: Capturing the movement of stars over time.
7. Ethical Considerations in Astrophotography
While capturing the beauty of the night sky, it’s essential to consider ethical and environmental responsibilities. These practices ensure the preservation of dark sky areas and respect for the environment.
7.1. Light Pollution Awareness
- Minimize Light Use: Use red light headlamps or torches to preserve night vision and reduce disturbance to wildlife. Avoid bright white lights.
- Advocate for Dark Sky Preservation: Support local and national initiatives to reduce light pollution and protect dark sky areas. The International Dark-Sky Association (IDA) is a leading organization in this effort.
7.2. Environmental Responsibility
- Leave No Trace: Pack out all trash and avoid disturbing the natural environment. Stick to established trails and avoid trampling vegetation.
- Respect Wildlife: Be aware of local wildlife and avoid disturbing their habitats. Keep a safe distance from animals and never feed them.
7.3. Cultural Sensitivity
- Respect Sacred Sites: Be aware of culturally significant sites and respect any restrictions or guidelines.
- Seek Permission: Obtain permission before photographing on private land or in areas with cultural significance.
7.4. Responsible Sharing
- Accurate Representation: Avoid misrepresenting the conditions or location of your images. Be transparent about any digital manipulation.
- Promote Awareness: Use your platform to educate others about the importance of dark sky preservation and responsible astrophotography practices.
8. The Role of CONDUCT.EDU.VN in Ethical Astrophotography
CONDUCT.EDU.VN is committed to promoting ethical practices in all fields, including astrophotography. We provide resources and guidelines to help photographers understand and adhere to ethical standards.
8.1. Education and Awareness
- Comprehensive Guides: We offer detailed guides on ethical astrophotography, covering topics such as light pollution, environmental responsibility, and cultural sensitivity.
- Workshops and Seminars: We conduct workshops and seminars to educate photographers on ethical practices and responsible behavior in the field.
8.2. Community Engagement
- Forums and Discussions: We host online forums where photographers can discuss ethical issues, share best practices, and learn from each other.
- Partnerships: We partner with organizations such as the IDA to promote dark sky preservation and responsible astrophotography.
8.3. Resources and Tools
- Dark Sky Maps: We provide access to dark sky maps that help photographers identify areas with minimal light pollution.
- Ethical Checklists: We offer checklists to help photographers ensure they are following ethical guidelines before, during, and after their shoots.
8.4. Continuous Improvement
- Feedback Mechanisms: We encourage photographers to provide feedback on our resources and guidelines to help us improve our offerings.
- Updates and Revisions: We regularly update our resources to reflect the latest ethical standards and best practices in astrophotography.
9. Frequently Asked Questions (FAQ)
9.1. What is the best time of night to photograph the Milky Way?
The best time depends on the time of year and your location. Generally, the Milky Way is most visible a few hours after sunset or before sunrise. Use a planetarium app like PhotoPills to determine the exact position and visibility times.
9.2. What camera settings should I use for astrophotography?
Start with a wide aperture (f/2.8 or wider), a high ISO (3200-6400), and a shutter speed that avoids star trails (use the 500 rule as a guideline, then adjust based on your camera and lens).
9.3. How do I focus on the stars?
Switch to manual focus, use live view to zoom in on a bright star, and adjust the focus ring until the star appears as a sharp pinpoint.
9.4. How can I reduce noise in my astrophotography images?
Shoot at the lowest ISO possible, use image stacking techniques, and consider taking a separate foreground exposure at a lower ISO.
9.5. What equipment do I need for astrophotography?
A sturdy tripod, a camera with manual controls, a wide-angle lens with a wide aperture, a headlamp, and a remote shutter release.
9.6. How do I find dark sky locations?
Use online dark sky maps or consult local astronomy clubs for recommendations.
9.7. Can I photograph the Milky Way with a smartphone?
While challenging, some smartphones with manual controls and good low-light performance can capture basic astrophotography images. Use a tripod and experiment with long exposure settings.
9.8. How do I plan a Milky Way photography trip?
Check the moon phases, use a planetarium app to determine the position of the Milky Way, research dark sky locations, and plan your trip during the optimal shooting season.
9.9. What are some common mistakes to avoid in astrophotography?
Using too long a shutter speed, not focusing properly, shooting under a full moon, and ignoring light pollution.
9.10. How can I learn more about astrophotography?
Read books, take online courses, join local astronomy clubs, and practice regularly.
10. Seeking Further Guidance from CONDUCT.EDU.VN
Navigating the realms of astrophotography can present challenges, from securing reliable standards to applying principles effectively. Many find themselves overwhelmed by the vast array of information available, unsure how to proceed. Concerns about potential breaches and the desire to cultivate a reliable environment are common.
At CONDUCT.EDU.VN, we recognize these difficulties and are dedicated to offering thorough support and direction. Our platform is meticulously designed to deliver clear, accessible insights into standards across diverse fields, ensuring you are well-equipped to confidently and correctly.
Don’t allow the complexities of astrophotography to hold you back. Explore CONDUCT.EDU.VN to discover a wealth of resources and support, enabling you to excel. For detailed inquiries, reach out to us at 100 Ethics Plaza, Guideline City, CA 90210, United States. Connect via WhatsApp at +1 (707) 555-1234, or explore our website at conduct.edu.vn for further details. Let us assist you in navigating the world of astrophotography, ensuring you are well-informed and successful.
By following these guidelines and continually learning, you’ll be well on your way to capturing breathtaking images of the night sky.