Drawing, A Guide To Drawing, can be mastered with practice and the right techniques. CONDUCT.EDU.VN offers resources to help you develop your artistic abilities, and this guide will cover everything from basic shapes to more complex concepts. Whether you’re interested in figure drawing or landscape sketching, understanding the fundamentals and embracing the creative process is the key to producing great artwork.
1. Warming Up and Hand-Eye Coordination Exercises
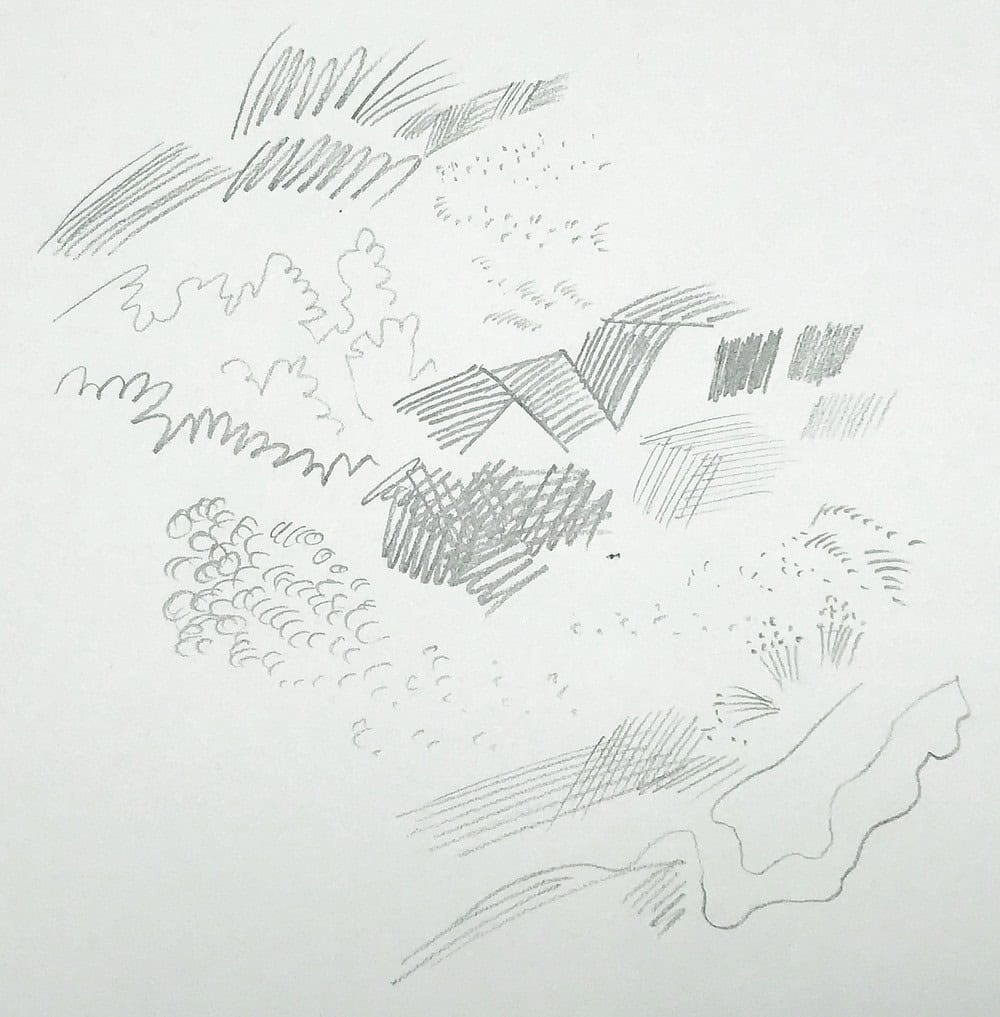
Before diving into a drawing session, it’s essential to warm up your hand and eye coordination. This initial step helps to loosen your drawing muscles and prepares your mind for the task ahead. Engaging in various mark-making techniques allows you to familiarize yourself with your tools and explore their capabilities.
- Different Marks: Experiment with various marks, such as scribbles, doodles, dots, stipples, hatching, and zig-zag lines. Exploring the range of your drawing tool will provide you with a better understanding of its potential.
- Varying Pressure: Adjust the pressure you apply to your pencil or pen to observe the different effects. Lighter pressure produces fine, delicate lines, while heavier pressure creates bold, darker marks.
- Straight and Curved Lines: Practice drawing straight and curved lines of varying lengths. This exercise will improve your control and precision, essential for creating smooth and accurate drawings.
- Round Shapes: Draw circles and ellipses of different sizes. These shapes form the foundation of many objects and mastering them is crucial for building more complex forms.
- Loose Shapes: Experiment with loose shapes like lying eights to develop your ability to capture movement and fluidity in your drawings.
Filling a page with these explorations can significantly improve your comfort level with your drawing tools and enhance your ability to create smoother lines. Regular warm-up exercises can also help beginners develop better pencil control.
1.1 Arm Movements for Smooth Arcs
Try drawing with your entire arm by locking the elbow and wrist and making motions from the shoulder joint. This technique often results in smoother arcs and a more fluid drawing style. By engaging your entire arm, you can create broader, more expressive lines that add depth and character to your artwork.
1.2 Hand-Eye Coordination
Focus on synchronizing your hand movements with what you see. This coordination is vital for translating real-life observations onto paper accurately. Regular practice of these exercises will improve your ability to capture the nuances of your subject and enhance the overall quality of your drawings.
2. Breaking Down Objects into Basic Shapes: The Foundation of Drawing
A fundamental aspect of drawing involves breaking down complex objects into basic shapes. By recognizing and simplifying forms into circles, rectangles, and triangles, you can construct a solid foundation for your drawings. This method is universally applicable, allowing you to approach any subject with confidence.
- Circles: Essential for representing round or curved elements, such as spheres, cylinders, and organic forms.
- Rectangles: Useful for depicting objects with straight edges and planar surfaces, such as buildings, boxes, and furniture.
- Triangles: Ideal for capturing angular shapes and dynamic poses, adding structure and stability to your compositions.
Learning to see objects as a combination of these basic shapes will simplify the drawing process and improve your ability to accurately represent the world around you.
2.1 Simplify Complex Subjects
When faced with a complex subject, train yourself to identify the underlying shapes. For example, a rose can be seen as a series of overlapping circles and curved lines. A house can be broken down into rectangles and triangles. A bird can be simplified into an oval body with triangular wings.
2.2 Loose Underdrawing
Start with a loose underdrawing using light lines and rough shapes. This initial sketch serves as a guide for refining your drawing in subsequent steps. Focus on capturing the proportions and overall structure of the object without getting bogged down in details.
2.3 Proportion and Structure
The goal of the underdrawing is to establish the correct proportions and a solid foundation for your drawing. Don’t worry about perfect lines or shadows at this stage; focus on getting the basic structure right. This approach allows you to make adjustments early on, preventing potential errors later in the drawing process.
2.4 Gestural Drawings
Gestural drawings are often very loose and spontaneous, capturing the essence of the subject with minimal lines. These quick sketches are excellent for warming up and getting a feel for the subject’s form and movement. Incorporating gestural drawing into your practice can improve your ability to capture the vitality and energy of your subjects.
3. Refining Angles, Edges, and Adding Solid Lines and Volume
Once you have a solid underdrawing, the next step is to refine the lines and add definition to your drawing. This involves carefully observing your subject and making precise adjustments to the angles, edges, and contours.
3.1 Observation and Line Placement
Drawing is as much about observing as it is about laying down lines. Before placing a line, take the time to really study your subject. Pay attention to the angles, shapes, and curves that define its form. Drawing what you see, rather than what you think you see, is essential for creating accurate and lifelike drawings.
3.2 Checking Angles and Edges
Compare the angles and edges in your drawing to those of your subject. Use your pencil as a measuring tool to match angles and transfer them accurately to the paper. This technique ensures that your drawing is proportional and faithful to the original subject.
3.3 Contour Lines
In the initial stage, you may have drawn several loose lines to explore different possibilities. Now, it’s time to choose one contour line and define it with a solid, confident stroke. Try to stay true to what you see in front of you, capturing the unique characteristics of your subject.
3.4 Adding Volume
To create the illusion of volume, consider the direction of light and shadow. Use darker lines to define areas that are in shadow and lighter lines to indicate areas that are illuminated. This technique will add depth and dimension to your drawing, making it appear more realistic.
4. Practicing Loose, Quick Sketches for Skill Development
To reinforce what you’ve learned, engage in numerous quick sketches. Grab an object and draw it from various angles, focusing on capturing its essence with swift, gestural lines. This practice will enhance your hand-eye coordination and make the process of drawing more fluid and intuitive.
4.1 Transferring Lines to Paper
Aim to reach a point where transferring lines from your observation to the paper feels effortless. This requires consistent practice and a willingness to experiment. The goal is to develop a natural connection between your eye, your hand, and the subject you are drawing.
4.2 Short, Frequent Sessions
Shorter, more frequent practice sessions are often more effective than long, infrequent ones. Regular, consistent practice helps to reinforce the skills you are learning and prevents you from becoming discouraged. Aim for daily or near-daily sessions to maximize your progress.
4.3 Importance of Basics
While these basic techniques may seem simple, they are essential for building a strong foundation in drawing. Over time, they will become second nature, allowing you to focus on more advanced concepts and techniques.
5. Focus, Contrast, and Details: Finishing Your Drawing
To bring your drawing to completion, you’ll want to refine your sketch, add contrast and light, and incorporate details. This step is crucial for making your drawing more visually appealing and engaging.
5.1 Ensuring Proper Framework
Before adding details, make sure your basic framework and proportions are accurate. If they are not, it’s better to start over or correct the drawing. Adding details to a flawed foundation will only amplify the existing problems.
5.2 Adding Contrast
Use contrast to create depth and volume in your drawing. Darker areas indicate shadows, while lighter areas represent highlights. Varying the contrast can make your drawing more dynamic and visually interesting.
5.3 Textures
Incorporate textures to add realism and detail to your drawing. Experiment with different mark-making techniques, such as hatching, stippling, and cross-hatching, to create a variety of textures. Be selective about where you add texture, focusing on areas that will enhance the overall composition.
5.4 Details
Add details sparingly to draw the viewer’s eye to specific areas of your drawing. Overdoing the details can make your drawing look cluttered and overwhelming. Choose a few key areas to emphasize and leave the rest of the drawing relatively simple.
5.5 Shadow Placement
Squint slightly to see the values (lightness and darkness) in your subject more easily. This will help you identify where to place shadows to create the illusion of volume and depth. Use loose shadows to suggest form without overworking your sketch.
6. The Power of Practice and Learning from Mistakes
The process of drawing can be summarized into three simple steps:
- Basic Shapes and Proportions: Start with basic shapes and light lines to establish the correct proportions.
- Refined Lines and Angles: Refine the lines, check angles, and add solid outlines.
- Details and Texture: Add details, texture, shadows, and highlights to finish the drawing.
The key to mastering drawing is consistent practice. The more you practice these skills, the more natural they will become. Set reminders to ensure you don’t forget to practice regularly.
6.1 Embracing Mistakes
Mistakes are a natural part of the learning process. Don’t get discouraged by them. Instead, view them as opportunities to learn and improve. The hand needs time to understand these concepts, and mistakes are essential for building muscle memory.
6.2 Leonardo da Vinci’s Process
Even masters like Leonardo da Vinci made mistakes while learning to draw. Embrace your mistakes and trust the process. They are a normal part of becoming a better sketcher.
7. Deepening Your Knowledge and Exploring Advanced Concepts
This guide provides a solid foundation for learning to draw. However, there are many more advanced techniques and concepts that can help you further develop your skills.
7.1 Advanced Techniques
Consider exploring concepts such as:
- 3D Volumes: Understanding how to see and draw objects in three dimensions.
- Perspective: Learning the principles of perspective to create realistic depth in your drawings.
- Values: Mastering the use of values to create contrast and volume.
- Light and Shadow: Understanding how light and shadow interact to define form.
- Foreshortening: Learning how to accurately represent objects that are receding into the distance.
7.2 Formal Education
For a more structured and in-depth learning experience, consider taking a drawing course. A comprehensive course can provide you with the knowledge and skills you need to create fully rounded drawings.
FAQ: Frequently Asked Questions About Drawing
1. What are the essential tools for a beginner artist?
Beginner artists need basic tools like pencils (various grades), erasers, drawing paper, and a sharpener.
2. How do I improve my hand-eye coordination for drawing?
Practice warm-up exercises, such as drawing straight lines, circles, and simple shapes, while focusing on accurately translating what you see onto paper.
3. What is the best way to learn perspective in drawing?
Start with one-point perspective, then progress to two- and three-point perspective. Practice drawing simple objects like boxes and buildings to understand the principles.
4. How important is understanding anatomy for figure drawing?
Understanding anatomy is crucial for accurately depicting the human form. Study skeletal structure and muscle groups to improve your figure drawing skills.
5. How can I add depth and dimension to my drawings?
Use shading techniques like hatching, cross-hatching, and blending to create contrast and volume. Pay attention to light and shadow to define form.
6. What are some common mistakes beginners make in drawing?
Common mistakes include not using light lines for the initial sketch, neglecting proportions, and being afraid to make mistakes.
7. How often should I practice drawing to see improvement?
Practice regularly, ideally every day or at least several times a week. Consistent practice is key to developing your skills.
8. Are online drawing courses effective for learning?
Yes, online drawing courses can be very effective, especially if they offer structured lessons, feedback, and opportunities for interaction with instructors and other students.
9. How do I find my own style as an artist?
Experiment with different techniques, subjects, and mediums. Your unique style will develop over time as you explore your interests and preferences.
10. What should I draw when I lack inspiration?
Try drawing everyday objects, nature scenes, or portraits of friends and family. You can also find inspiration in other artists’ work, but avoid direct copying.
Conclusion
Mastering drawing is a journey that requires patience, practice, and a willingness to learn from mistakes. By following the steps outlined in this guide, you can develop your skills and create beautiful artwork. Remember to start with the basics, refine your techniques, and never stop exploring new possibilities. For more in-depth guidance and resources, visit CONDUCT.EDU.VN, where you’ll find a wealth of information to help you on your artistic journey.
Are you struggling to find reliable information on drawing techniques and ethical standards in the art world? Do you feel overwhelmed by conflicting advice and unsure how to apply best practices to your creative process? Visit conduct.edu.vn today to access detailed guides, expert insights, and practical tools to help you master drawing and navigate the ethical landscape of the art industry. Our comprehensive resources will empower you to create with confidence and integrity. Contact us at 100 Ethics Plaza, Guideline City, CA 90210, United States or Whatsapp: +1 (707) 555-1234.