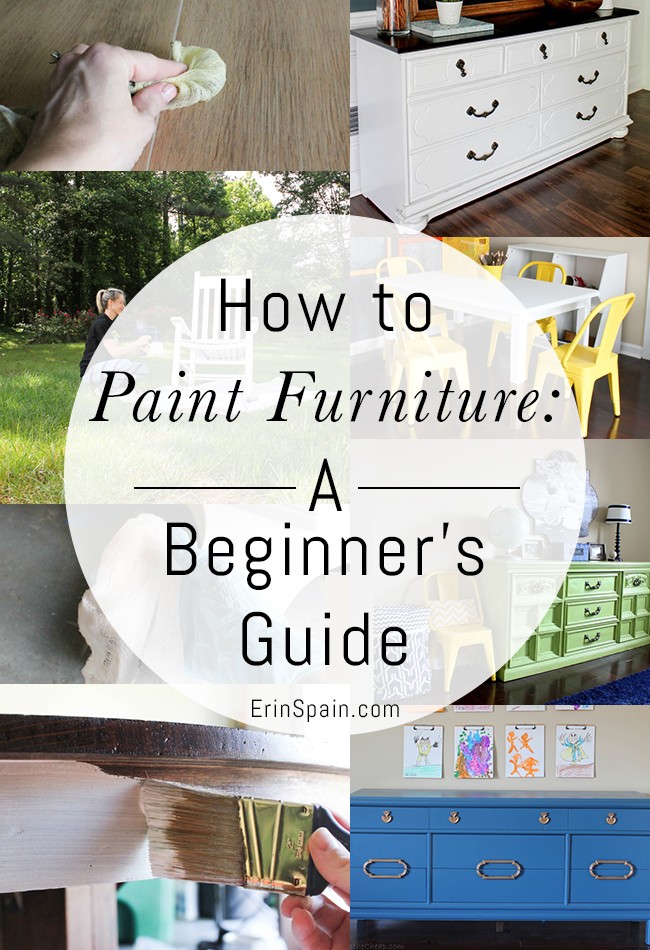
Painting furniture can breathe new life into old pieces, transforming them into stylish additions to your home. At CONDUCT.EDU.VN, we provide A Piece Guide to help you achieve a professional finish that lasts, ensuring your furniture remains beautiful for years to come. Learn essential tips and techniques for transforming your furniture.
Table of Contents:
- Understanding the Basics of Furniture Painting
- Essential Supplies for a Flawless Finish
- Step-by-Step Guide to Painting Furniture
- 3.1. Preparation is Key: Cleaning and Repairing
- 3.2. Sanding: Creating the Perfect Surface
- 3.3. Priming: Ensuring Adhesion and Coverage
- 3.4. Painting Techniques: Achieving a Smooth Finish
- 3.5. Sealing: Protecting Your Masterpiece
- Advanced Painting Techniques for Unique Finishes
- 4.1. Distressing Furniture for a Vintage Look
- 4.2. Using Stencils and Patterns
- 4.3. Creating a Two-Toned Effect
- Choosing the Right Paint and Finishes
- 5.1. Types of Paint: Latex, Oil-Based, and Chalk Paint
- 5.2. Selecting the Right Sheen
- 5.3. Understanding Topcoats and Sealers
- Troubleshooting Common Painting Problems
- 6.1. Dealing with Brush Strokes
- 6.2. Preventing Paint from Chipping
- 6.3. Addressing Uneven Coverage
- Maintaining Your Painted Furniture
- 7.1. Cleaning and Care Tips
- 7.2. Repairing Minor Damage
- Safety Precautions When Painting Furniture
- 8.1. Ventilation and Protective Gear
- 8.2. Proper Disposal of Materials
- Inspiration Gallery: Before and After Transformations
- Frequently Asked Questions (FAQs)
- Contact Information
1. Understanding the Basics of Furniture Painting
Furniture painting is an accessible and rewarding DIY project that can transform the look and feel of your home. Whether you’re updating an old dresser, refreshing a dining table, or adding a pop of color to a side chair, understanding the basics is essential for achieving a professional and lasting finish. CONDUCT.EDU.VN provides a comprehensive guide to help you navigate the world of furniture painting, ensuring you have the knowledge and skills to tackle any project with confidence.
Before diving into the process, it’s important to recognize that successful furniture painting involves more than just applying a coat of paint. It requires careful preparation, the right tools and materials, and a methodical approach. This piece guide will cover each of these aspects in detail, from selecting the appropriate type of paint to mastering different painting techniques. By following these guidelines, you’ll be well-equipped to create stunning, custom pieces that reflect your personal style and enhance your living space. Remember, the key to a beautiful finish lies in the details, so let’s explore the fundamental steps that will set you on the path to furniture painting success.
2. Essential Supplies for a Flawless Finish
To achieve a flawless finish when painting furniture, you need to gather the right supplies. Having these essentials on hand will make the process smoother and more efficient, ensuring professional-looking results. Here’s a comprehensive list of supplies you’ll need:
| Supply | Description | Purpose |
|---|---|---|
| Cleaning Supplies | Murphy’s Oil Soap, cloths | To clean the furniture and remove any dirt, grease, or old finishes. |
| Sandpaper | Medium-grit (120-150), Fine-grit (220-320) | To smooth the surface, remove old finishes, and create a better surface for paint adhesion. |
| Primer | High-quality primer (KILZ Primer recommended) | To create a base layer that helps the paint adhere better, covers stains, and provides a uniform surface. |
| Tack Cloth | Sticky cloth | To remove sanding dust and ensure a clean surface before painting. |
| Paint | Interior latex paint (semi-gloss or your preferred finish) | To add color and protect the furniture. |
| Paintbrushes | High-quality paintbrushes in various sizes | To apply paint smoothly and evenly. |
| Foam Rollers | Small foam rollers | To achieve a smooth, even finish on flat surfaces, minimizing brush strokes. |
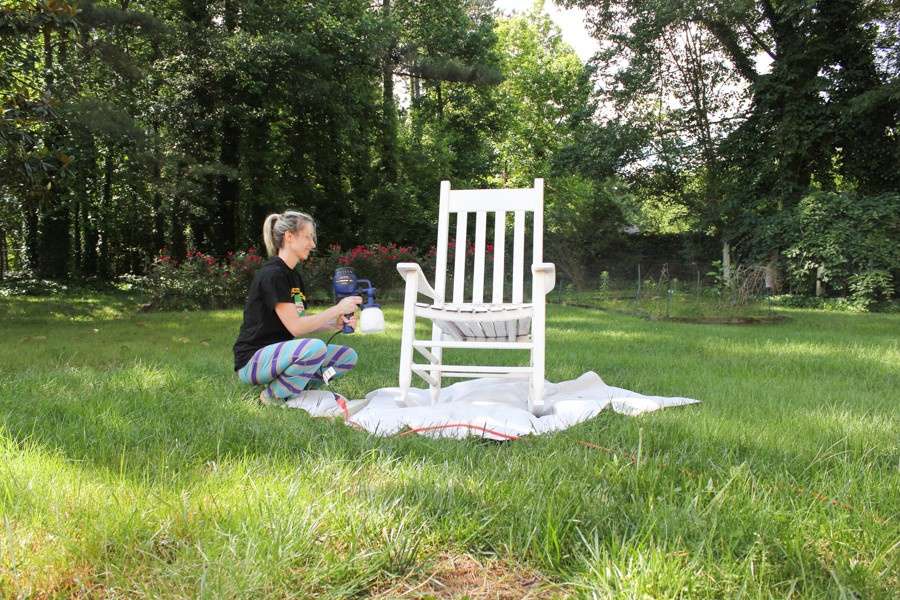
| Paint Sprayer | Optional, for a professional, even finish | To apply paint quickly and evenly, especially on detailed or intricate pieces. |
| Topcoat/Sealer | Minwax Polycrylic, Finishing Wax, Minwax Satin Wipe-On Poly (for stained pieces) | To protect the painted surface, add durability, and provide a wipeable, easy-to-clean finish. |
| Drop Cloths | To protect your workspace from paint splatters. | |
| Painter’s Tape | To create crisp, clean lines when painting. | |
| Safety Gear | Gloves, safety glasses, and a mask | To protect yourself from paint, dust, and fumes. |
| Putty Knife/Spatula | For applying wood filler or patching compounds. | |
| Wood Filler | For repairing cracks, holes, or imperfections in the furniture. |
Having these supplies ready will streamline your furniture painting project and help you achieve a professional-looking result. CONDUCT.EDU.VN recommends investing in high-quality materials to ensure the best possible outcome.
3. Step-by-Step Guide to Painting Furniture
Painting furniture can be a rewarding DIY project. Here’s a step-by-step guide to help you achieve a professional finish:
3.1. Preparation is Key: Cleaning and Repairing
Before you start painting, proper preparation is essential. Start by thoroughly cleaning the furniture. Use Murphy’s Oil Soap or a similar product to remove dirt, grease, and old finishes. This ensures that the paint will adhere properly. Remove all hardware, such as knobs and handles, before cleaning.
Next, inspect the furniture for any damage, such as cracks, holes, or loose joints. Repair these issues with wood filler or wood glue. Allow the repairs to dry completely before moving on to the next step.
3.2. Sanding: Creating the Perfect Surface
Sanding is a crucial step in preparing furniture for paint. It helps to smooth the surface, remove any remaining old finishes, and create a better surface for the paint to adhere to. Use medium-grit sandpaper (120-150) for the initial sanding. If the surface is particularly rough or glossy, you may need to start with a coarser grit.
Sand in the direction of the wood grain whenever possible. Apply even pressure and avoid pressing too hard, which can create uneven surfaces. Once you’ve sanded the entire piece, use fine-grit sandpaper (220-320) to smooth out any remaining imperfections.
3.3. Priming: Ensuring Adhesion and Coverage
Priming is an important step that helps the paint adhere better, covers stains, and provides a uniform surface. Apply a high-quality primer, such as KILZ Primer, to the entire piece of furniture. Use a brush or roller to apply the primer evenly.
Allow the primer to dry completely according to the manufacturer’s instructions. Once the primer is dry, lightly sand it with fine-grit sandpaper to smooth out any imperfections. Remove the sanding dust with a tack cloth before moving on to the next step.
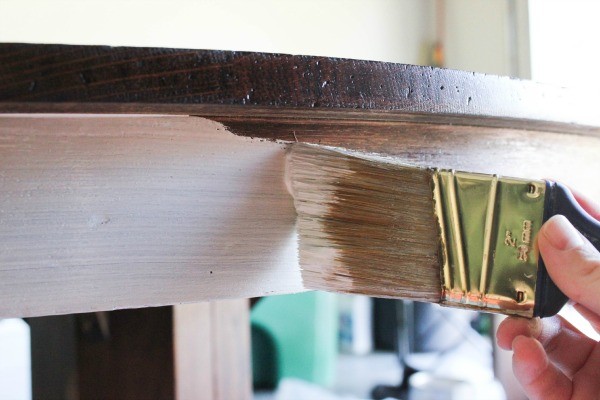
3.4. Painting Techniques: Achieving a Smooth Finish
Now it’s time to paint the furniture. Choose a high-quality interior latex paint in your preferred finish. Semi-gloss is a good option for furniture because it’s durable and easy to clean.
Apply the paint in thin, even coats. Use a brush or roller to apply the paint smoothly. If you’re using a brush, try to minimize brush strokes by using a small foam roller on the flat surfaces. Allow each coat of paint to dry completely before applying the next one.
Lightly sand the furniture with fine-grit sandpaper between each coat of paint. This helps to create a smooth, even finish. Remove the sanding dust with a tack cloth before applying the next coat of paint. Apply 2-3 coats of paint for best results.
3.5. Sealing: Protecting Your Masterpiece
Once the last coat of paint has dried for at least 24 hours, you can seal the furniture to protect the painted surface and add durability. There are several options for sealing furniture, including Minwax Polycrylic, finishing wax, and Minwax Satin Wipe-On Poly.
Apply the sealer according to the manufacturer’s instructions. Use a brush, cloth, or foam applicator to apply the sealer evenly. Allow the sealer to dry completely before using the furniture.
4. Advanced Painting Techniques for Unique Finishes
Once you’ve mastered the basics of furniture painting, you can explore advanced techniques to create unique and eye-catching finishes. These techniques can add character, depth, and visual interest to your painted furniture.
4.1. Distressing Furniture for a Vintage Look
Distressing is a technique that gives furniture a weathered, vintage look. It involves removing small amounts of paint to reveal the underlying layers, creating a sense of age and history.
To distress furniture, start by painting it as usual. Once the paint is dry, use sandpaper, a scraper, or a sanding block to remove small amounts of paint from the edges, corners, and other areas that would naturally wear over time.
You can also use a hammer, chain, or other tools to create dents, scratches, and other imperfections that add to the distressed look. Seal the furniture with a clear topcoat to protect the finish.
4.2. Using Stencils and Patterns
Stencils and patterns can add visual interest and personality to painted furniture. You can use stencils to create intricate designs, geometric patterns, or custom motifs.
To use stencils, secure them to the furniture with painter’s tape. Use a stencil brush or foam applicator to apply paint to the stencil. Be careful not to use too much paint, which can cause bleeding.
Remove the stencil carefully and allow the paint to dry completely. You can also use stamps, sponges, or other tools to create patterns on painted furniture.
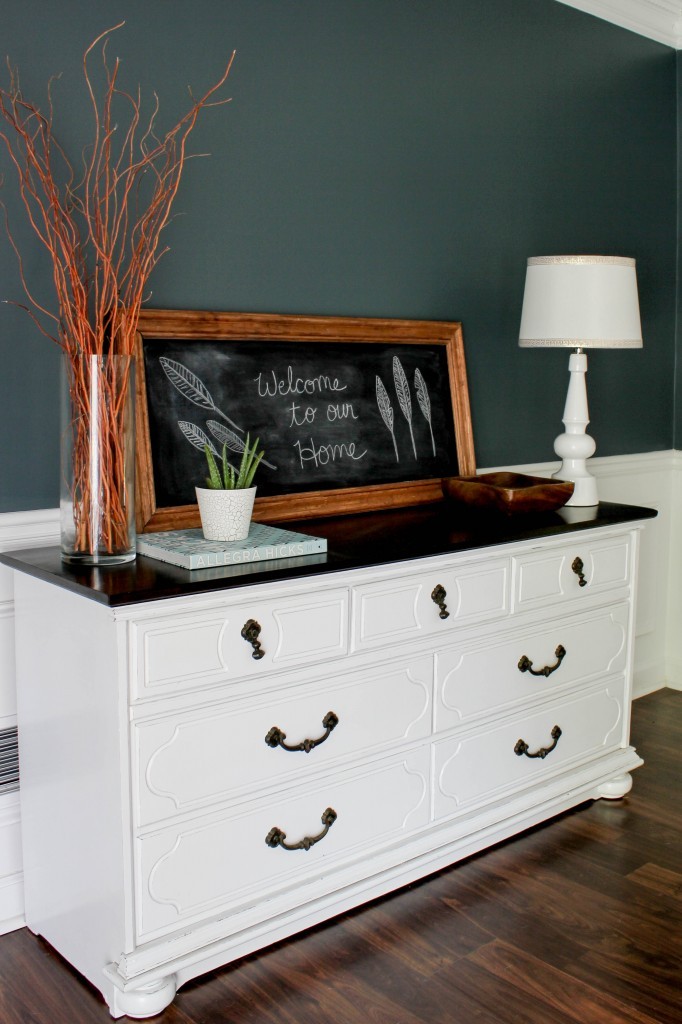
4.3. Creating a Two-Toned Effect
A two-toned effect can add depth and dimension to painted furniture. This technique involves painting different parts of the furniture in different colors or shades.
For example, you could paint the body of a dresser in one color and the drawers in another. Or you could paint the legs of a table in one color and the tabletop in another.
To create a two-toned effect, start by painting the entire piece of furniture in one color. Allow the paint to dry completely. Then, use painter’s tape to mask off the areas you want to paint in a different color.
Paint the masked-off areas in the second color. Remove the painter’s tape carefully and allow the paint to dry completely. Seal the furniture with a clear topcoat to protect the finish.
5. Choosing the Right Paint and Finishes
Choosing the right paint and finishes is crucial for achieving a professional and lasting result when painting furniture. There are several factors to consider, including the type of paint, the sheen, and the topcoat.
5.1. Types of Paint: Latex, Oil-Based, and Chalk Paint
- Latex Paint: Latex paint is a popular choice for furniture painting because it’s durable, easy to clean, and low in VOCs (volatile organic compounds). It’s also available in a wide range of colors and finishes.
- Oil-Based Paint: Oil-based paint is known for its durability and smooth finish. However, it’s more difficult to clean up than latex paint and contains higher levels of VOCs.
- Chalk Paint: Chalk paint is a type of decorative paint that’s known for its matte finish and ability to adhere to a variety of surfaces without priming. It’s often used to create a vintage or distressed look.
5.2. Selecting the Right Sheen
The sheen of paint refers to its level of glossiness. Different sheens are suitable for different applications.
- Flat/Matte: Flat or matte paint has the lowest level of glossiness. It’s often used for walls and ceilings because it hides imperfections well.
- Eggshell: Eggshell paint has a slightly higher level of glossiness than flat paint. It’s durable and easy to clean, making it a good choice for living rooms and bedrooms.
- Satin: Satin paint has a higher level of glossiness than eggshell paint. It’s even more durable and easier to clean, making it a good choice for kitchens and bathrooms.
- Semi-Gloss: Semi-gloss paint has a high level of glossiness. It’s very durable and easy to clean, making it a good choice for trim, doors, and furniture.
- Gloss: Gloss paint has the highest level of glossiness. It’s extremely durable and easy to clean, but it also shows imperfections more easily.
5.3. Understanding Topcoats and Sealers
Topcoats and sealers are used to protect the painted surface and add durability. There are several types of topcoats and sealers available, including:
- Polyurethane: Polyurethane is a durable, water-resistant topcoat that’s available in both oil-based and water-based formulas.
- Polycrylic: Polycrylic is a water-based topcoat that’s similar to polyurethane but less likely to yellow over time.
- Wax: Wax is a natural topcoat that provides a soft, matte finish. It’s often used on chalk-painted furniture to enhance the vintage look.
6. Troubleshooting Common Painting Problems
Even with careful preparation and technique, you may encounter some common problems when painting furniture. Here are some tips for troubleshooting these issues:
6.1. Dealing with Brush Strokes
Brush strokes can be a common problem when painting furniture, especially when using a brush instead of a roller or sprayer. To minimize brush strokes, use a high-quality brush and apply the paint in thin, even coats.
You can also try using a small foam roller on flat surfaces to achieve a smoother finish. If you do encounter brush strokes, you can lightly sand them out with fine-grit sandpaper between coats of paint.
6.2. Preventing Paint from Chipping
Paint chipping can be a frustrating problem, especially after you’ve put in the effort to paint a piece of furniture. To prevent paint from chipping, make sure to properly prepare the surface by cleaning, sanding, and priming.
Use a high-quality paint and apply it in thin, even coats. Allow each coat to dry completely before applying the next one. You can also seal the furniture with a clear topcoat to protect the finish.
6.3. Addressing Uneven Coverage
Uneven coverage can occur if the paint is not applied evenly or if the surface is not properly prepared. To address uneven coverage, make sure to stir the paint thoroughly before using it.
Apply the paint in thin, even coats and use a brush or roller to distribute the paint evenly. If you notice any areas with uneven coverage, you can lightly sand them and apply another coat of paint.
7. Maintaining Your Painted Furniture
Proper maintenance is essential for keeping your painted furniture looking its best. Here are some tips for cleaning and caring for your painted furniture:
7.1. Cleaning and Care Tips
- Dust the furniture regularly with a soft cloth to remove dirt and debris.
- Clean the furniture with a mild soap and water solution. Avoid using harsh chemicals or abrasive cleaners.
- Dry the furniture thoroughly after cleaning to prevent water damage.
- Use coasters and placemats to protect the surface from scratches and stains.
- Avoid placing hot items directly on the painted surface.
7.2. Repairing Minor Damage
Even with proper care, your painted furniture may experience minor damage over time. Here are some tips for repairing minor damage:
- Use a touch-up paint to cover small scratches or chips.
- Fill in deeper scratches or gouges with wood filler. Sand the filler smooth and touch up with paint.
- Tighten loose joints with wood glue and clamps.
- Replace damaged hardware with new hardware.
8. Safety Precautions When Painting Furniture
Painting furniture can be a safe and enjoyable DIY project, but it’s important to take certain safety precautions to protect yourself and others.
8.1. Ventilation and Protective Gear
- Work in a well-ventilated area to avoid breathing in harmful fumes.
- Wear gloves to protect your hands from paint and chemicals.
- Wear safety glasses to protect your eyes from paint splatters and dust.
- Wear a mask to protect your lungs from dust and fumes.
8.2. Proper Disposal of Materials
- Dispose of used paint, primer, and other materials according to local regulations.
- Do not pour paint down the drain or into the environment.
- Allow paint-soaked rags and brushes to dry completely before disposing of them to prevent fire hazards.
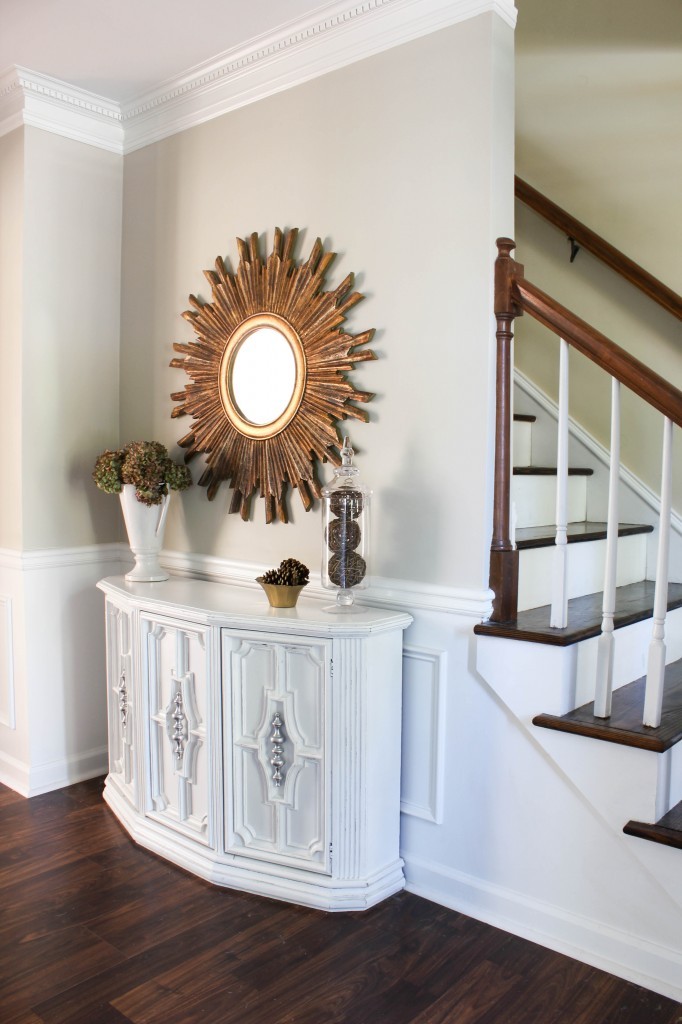
9. Inspiration Gallery: Before and After Transformations
Paint has an amazing power to transform any piece. Here are a few pieces that have been painted:
10. Frequently Asked Questions (FAQs)
-
What is the best type of paint to use on furniture?
- Latex paint is generally recommended for its durability and ease of use. Chalk paint is also popular for creating a vintage look.
-
Do I need to sand furniture before painting?
- Yes, sanding is essential to create a smooth surface and ensure proper paint adhesion.
-
Is primer necessary before painting furniture?
- Yes, primer helps the paint adhere better, covers stains, and provides a uniform surface.
-
How many coats of paint should I apply to furniture?
- 2-3 coats of paint are typically recommended for best results.
-
How long should I wait between coats of paint?
- Allow each coat of paint to dry completely, usually for at least 2-4 hours, before applying the next one.
-
How can I prevent brush strokes when painting furniture?
- Use a high-quality brush, apply thin, even coats, and consider using a foam roller on flat surfaces.
-
What is the best way to seal painted furniture?
- Use a clear topcoat such as polyurethane, polycrylic, or wax to protect the painted surface.
-
How can I distress furniture for a vintage look?
- Sand or scrape away small amounts of paint from the edges and corners to reveal the underlying layers.
-
How do I clean painted furniture?
- Dust regularly with a soft cloth and clean with a mild soap and water solution.
-
What safety precautions should I take when painting furniture?
- Work in a well-ventilated area, wear gloves, safety glasses, and a mask.
11. Contact Information
For more information and guidance on furniture painting and other home improvement projects, visit CONDUCT.EDU.VN. Our team of experts is dedicated to providing you with the knowledge and resources you need to achieve your DIY goals.
Address: 100 Ethics Plaza, Guideline City, CA 90210, United States
Whatsapp: +1 (707) 555-1234
Website: CONDUCT.EDU.VN
At conduct.edu.vn, we believe that everyone can create beautiful and functional spaces with the right information and tools. We are here to support you every step of the way.