The Astronomy Wing in Hogwarts Legacy is a crucial area for players, housing several classrooms and secrets. As you progress through Hogwarts Legacy, exploring each wing becomes essential to uncover its hidden Field Guide Pages. Within the Astronomy Wing, there are 23 Field Guide Pages waiting to be discovered. This guide will walk you through each location, ensuring you don’t miss a single collectible in this pivotal section of Hogwarts Castle.
Located strategically in the southeastern part of Hogwarts, the Astronomy Wing connects the South Wing and the Bell Tower Wing. Navigating this wing is made easier with numerous Floo Flame fast travel points, including the Astronomy Tower, Charms Classroom, Defence Against the Dark Arts Tower and Classroom, Professor Fig’s Classroom, Transfiguration Classroom, and Courtyard. Mastering the layout and utilizing these Floo Flames will significantly speed up your Field Guide Page hunt.
To aid your quest, remember that many Field Guide Pages require specific spells learned throughout your Hogwarts journey. This guide will also highlight the necessary spells for each page, ensuring you’re well-prepared for your exploration.
Explore every nook and cranny of the Astronomy Wing with this comprehensive guide, and ensure you collect all 23 Field Guide Pages to enhance your Hogwarts Legacy experience.
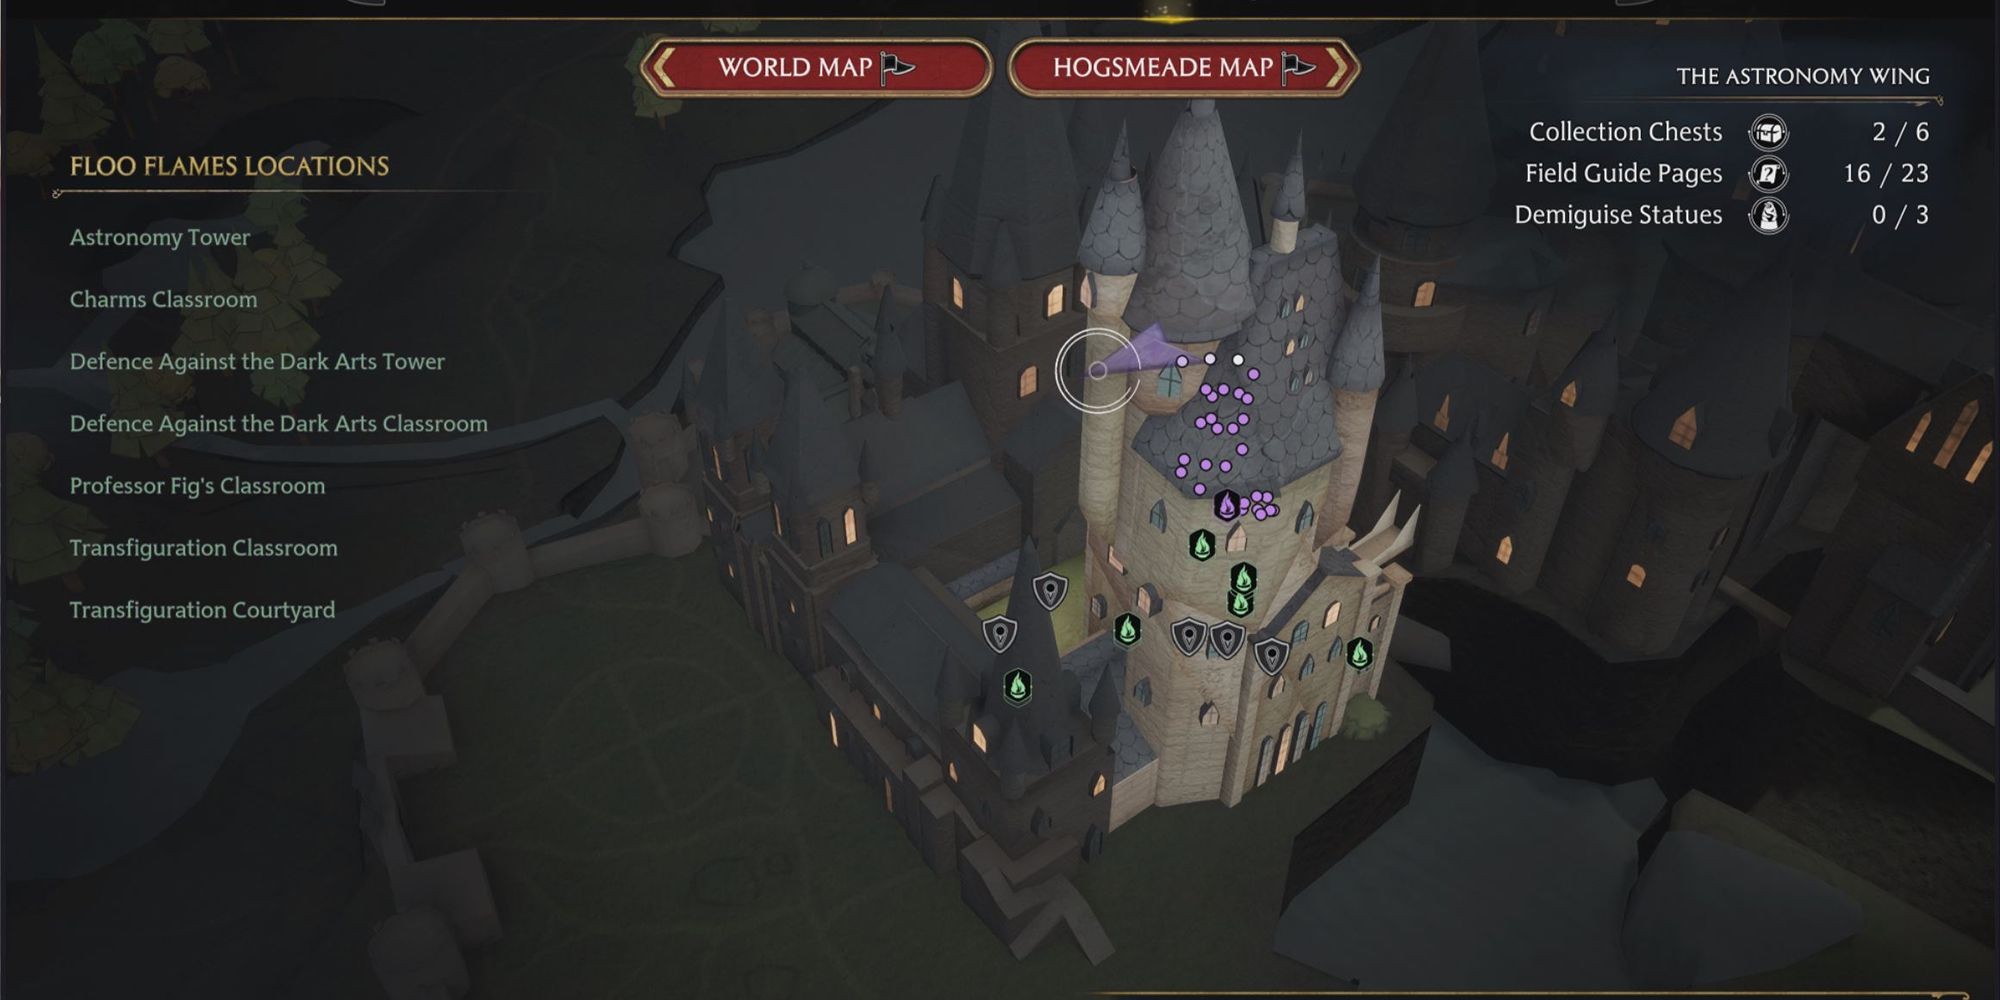 Astronomy Wing Floo Flame Locations in Hogwarts Legacy
Here’s a detailed breakdown of every Astronomy Wing Field Guide Page location in Hogwarts Legacy, presented in a top-to-bottom order starting from the highest point of the Astronomy Tower.
Detailed Locations of Astronomy Wing Field Guide Pages
1. Moth Painting in Astronomy Tower
Spell Required: Lumos
Location: Teleport to the Astronomy Tower Floo Flame. Ascend the stairs, and you’ll find the Moth Painting on your left. For the moth itself, continue upwards to the tower’s summit. Use Revelio to pinpoint the moth’s location if needed, or simply approach it with Lumos activated. Once the moth is attracted to your wand, guide it back down to the painting and cast Lumos again near the artwork to complete the page. Note: Field Guide Pages 1 and 2 are close by, so collect them before descending.
2. Astronomy Telescope
Spell Required: Revelio
Location: While still at the apex of the Astronomy Tower, locate the prominent telescope. Cast Revelio directly in front of it to unveil the Astronomy Telescope Field Guide Page. This page offers a glimpse into the celestial studies conducted at Hogwarts.
3. Dragon Statue
Spells Required: Confringo or Incendio
Location: Descend one level from the top of the Astronomy Tower using the internal staircase. You’ll discover a small chamber housing a Dragon Statue. Ignite the statue with a fire spell like Confringo or Incendio to reveal the Field Guide Page.
4. Tapestry of Barnabas the Barmy
Spell Required: Revelio
Location: Take the stairs down from the Astronomy Tower Floo Flame. On the wall, you’ll encounter an animated tapestry. Use Revelio in front of the Tapestry of Barnabas the Barmy to obtain its Field Guide Page.
5. Charms Class Statue 1
Spell Required: Levioso
Location: Continue downwards from the Astronomy Tower Floo Flame location. You will find a small side room near a painting with a distinctive gold frame. Inside, use Levioso on the statue to claim the first Charms Class Statue Field Guide Page.
6. Charms Class Flying Page
Spell Required: Accio
Location: Right in the Charms Classroom, near the Floo Flame, a Flying Page circles overhead. Cast Accio to draw it towards you and add it to your collection.
7. Charms Class Statue 2
Spell Required: Levioso
Location: From the Charms Classroom Floo Flame, proceed north down the hallway. Another statue awaits down a short flight of stairs in the center of the path. Use Levioso to reveal the second Charms Class Statue Field Guide Page.
8. Moth Painting in Dark Arts Tower
Spell Required: Lumos
Location: Teleport to the Defence Against the Dark Arts Tower Floo Flame. Directly opposite the Floo Flame, you’ll spot the Moth Painting. The moth is located one floor above. Head west down the hallway to the left of the Floo Flame and ascend the stairs to the Professor Fig’s Classroom Floo Flame. Alternatively, fast travel to Professor Fig’s Classroom if unlocked; the moth will be on a pillar near a skeleton. Guide the moth back down to the painting using Lumos.
9. Professor Fig’s Dragon Brazier
Spells Required: Confringo, Accio
Location: Near the Professor Fig’s Classroom Floo Flame, look for an open balcony overlooking the room below. The Dragon Statue Sconce is on the far wall above. Use Confringo to light it and then Accio to retrieve the Field Guide Page.
10. Augurey Skeleton
Spell Required: Revelio
Location: Travel to the Defence Against the Dark Arts Tower Floo Flame and descend the staircase in the open area. Directly ahead on the northwest wall is a display case. Cast Revelio in front to reveal the Augurey Skeleton Field Guide Page.
11. Painting of Illyius
Spell Required: Revelio
Location: Continue down the stairs from the previous location or start at the Transfiguration Courtyard Floo Flame and re-enter the building. At the base of the staircase, on the northwest wall, is a painting. Use Revelio in front of the Painting of Illyius to unveil its Field Guide Page.
12. Pungent Passage
Spell Required: Revelio
Location: From the West Tower Floo Flame in the Bell Tower Wing, immediately turn left into the hallway with green gas emanating from the floor. Cast Revelio in front of the animated painting of a man to reveal the Pungent Passage Field Guide Page.
13. Pungent Pass Moth Painting
Spell Required: Lumos
Location: In the same corridor as the Pungent Passage, southeast of the South Wing Floo Flame, find the Moth Painting on the northeast wall before a door. The moth is located back towards the West Tower Floo Flame, on a tree in a painting. Guide the moth back to the painting using Lumos to obtain the Field Guide Page.
14. Wyvern Fountain
Spell Required: Revelio
Location: Close to the Transfiguration Courtyard Floo Flame, you’ll find a Wyvern Fountain in the courtyard. Cast Revelio to reveal the Wyvern Fountain Field Guide Page.
15. Transfiguration Courtyard Statue
Spell Required: Levioso
Location: From the Transfiguration Courtyard Floo Flame, head northeast to the covered hall. A statue is present here; use Levioso on it to uncover the Transfiguration Courtyard Statue Field Guide Page.
16. Partial Transfiguration
Spell Required: Revelio
Location: From the Transfiguration Classroom Floo Flame, enter the door directly in front of you. On the left side of the room, locate a desk with turtle shells above it. Cast Revelio to reveal the Partial Transfiguration Field Guide Page.
17. Hebridean Black Skeleton
Spell Required: Revelio
Location: Inside the Defence Against the Dark Arts Classroom, look for a page above near a small staircase. Use Revelio to reveal the Hebridean Black Skeleton Field Guide Page.
18. Boggart Closet
Spell Required: Revelio, Alohomora (Level 2)
Location: From the Transfiguration Courtyard, enter the door on the right. You will encounter a Level 2 locked door (requires Alohomora Level 2). Unlock it and enter. At the end of the room, in front of a closet, use Revelio to find the Boggart Closet Field Guide Page.
19. Alchemy Class
Spell Required: Revelio, Alohomora (Level 1)
Location: This Field Guide Page is behind a Level 1 locked door (requires Alohomora Level 1). Proceed past Ravenclaw’s House and the Dragon statue to find this locked door. Inside, use Revelio to discover the Alchemy Class Field Guide Page.
20. Alchemy Class Statue
Spell Required: Levioso, Alohomora
Location: From the previous location, you’ll see another locked iron gate (unspecified level, assume Level 1 Alohomora is sufficient for consistency). Unlock it and cast Levioso on the statue to obtain the Alchemy Class Statue Field Guide Page.
21. Flying Page Dungeon
Spell Required: Accio, Alohomora
Location: Similar to the previous step, another locked iron gate is visible (unspecified level, assume Level 1 Alohomora). Unlock this gate and cast Accio to retrieve the Flying Page Dungeon Field Guide Page.
22. Dark Tower Cell
Spells Required: Revelio, Alohomora (Level 1 & 2)
Location: This page is secured behind two locks. First, a Level 1 lock to access the roof and then a Level 2 lock for the room on the roof where the page is located. Start at the Charms Classroom Floo Flame, enter the classroom, and find the staircase on the left. Ascend past the Level 1 lock to reach the roof. The page is behind bars in a room requiring a Level 2 Alohomora unlock. Once inside, use Revelio to reveal the Dark Tower Cell Field Guide Page.
23. Dungeon Dragon Brazier
Spells Required: Confringo, Accio, Alohomora (Level 2)
Location: Begin at the Bell Tower Courtyard Floo Flame and go southwest through a small door. Immediately inside, find a staircase going upwards – ignore it and instead turn left to find a staircase leading down to the dungeons. Follow the corridor past a Dragon statue and down a long hallway. Before a turn, you’ll find a Level 2 locked door. Enter the room and look high above for a Dragon Brazier. Cast Confringo to light it and use Accio to pull down the final Dungeon Dragon Brazier Field Guide Page from the Astronomy Wing.