Guided Access is a powerful feature available on iPhones, iPads, and iPod Touches that allows you to lock your device into a single app and control which features are available. This is particularly useful when you want to let a child use your iPad, or when accidental gestures might distract you from your current task. Let’s explore how to set up and use Guided Access on your iPad.
Setting Up Guided Access on Your iPad
Before you can use Guided Access, you need to enable it in your iPad’s settings. Here’s how:
- Navigate to Settings > Accessibility, then turn on Guided Access.
- Tap Passcode Settings, and then tap Set Guided Access Passcode.
- Enter a passcode, then re-enter it to confirm. You can also enable Face ID or Touch ID to end a Guided Access session.
Starting a Guided Access Session
Once Guided Access is set up, starting a session is simple:
- Open the app you want to use in Guided Access mode.
- Triple-click the Home button (on iPads with a Home button) or the Top button (on iPads without a Home button).
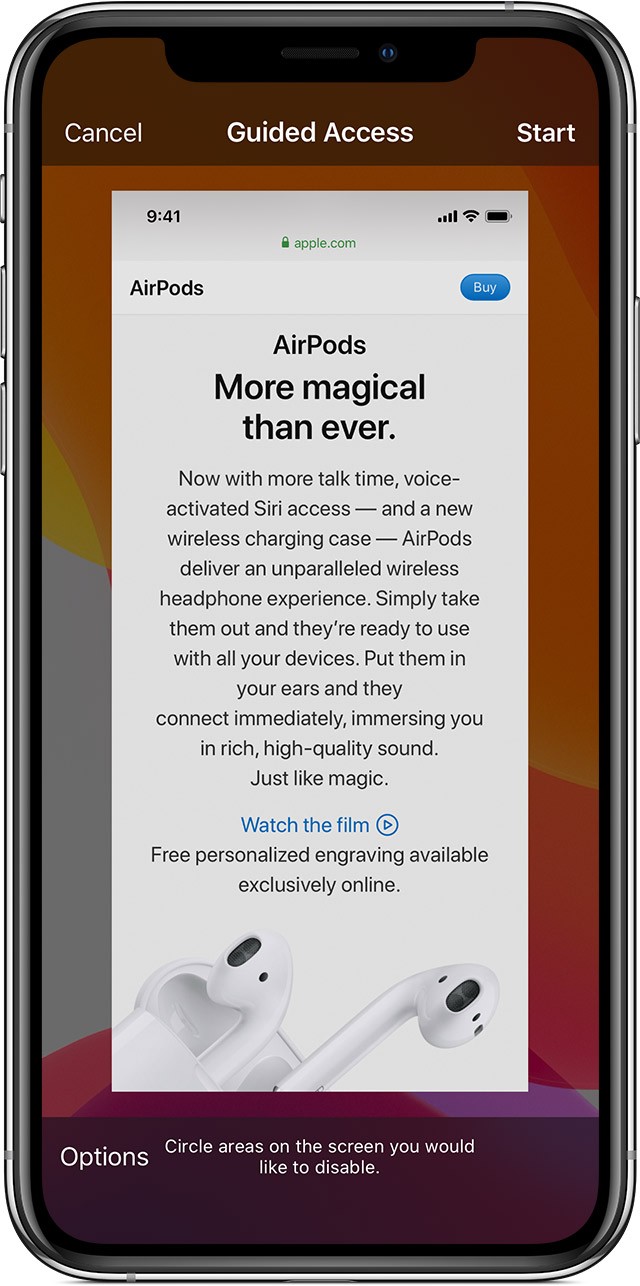
- If you want to disable certain areas of the screen, use one finger to circle those areas. You can adjust the size and position of the circle or tap the X to remove it.
- Tap Guided Access, then tap Start.
 iPad Settings showing Accessibility and Guided Access
Alternatively, you can use Siri to start a Guided Access session. Open the desired app, and say, “Turn on Guided Access.”
Controlling Available Features in Guided Access
Guided Access allows you to customize which features are active during the session. To adjust these settings:
- Triple-click the Home button or Top button.
- Tap Options (if you don’t see Options, triple-click the button again and enter your passcode).
- Toggle the options you want to enable or disable, then tap Done.
Here’s a breakdown of the available options:
-
Sleep/Wake Button: Disables the Sleep/Wake button, preventing the device from being put to sleep.
-
Volume Buttons: Disables the volume buttons, preventing volume adjustments.
-
Motion: Limits the device’s response to motion. For example, the screen won’t rotate, and the device won’t respond to shaking.
-
Keyboards: Disables the keyboard from appearing on the screen.
-
Touch: Disables all touch input on the screen.
-
Dictionary Lookup: Allows or disallows the use of the Look Up feature when text is selected.
-
Time Limit: Set a time limit for the Guided Access session.
Ending a Guided Access Session
To exit Guided Access mode:
- Triple-click the Home button or Top button.
- Enter your Guided Access passcode.
- Tap End. If you have enabled Touch ID or Face ID, you can use that to end the session.
Final Thoughts
Guided Access is a valuable accessibility tool for iPad users. By understanding how to set it up and customize its features, you can create a more focused and controlled user experience, especially beneficial for children, individuals with sensory sensitivities, or anyone needing to limit distractions. Experiment with the settings to find what works best for your specific needs.