Can’t make guides in Illustrator? You’re not alone! Many users face this issue, but CONDUCT.EDU.VN offers solutions to get your guides working correctly for precision design. Learn how to troubleshoot common problems and master guide usage. Find assistance on guidelines and design principles for Illustrator.
1. Understanding Guides in Adobe Illustrator
Guides in Adobe Illustrator are non-printing lines that help you align objects, create precise layouts, and maintain consistency in your designs. They’re essential for graphic designers, illustrators, and anyone who needs accuracy in their artwork. Before diving into troubleshooting, let’s define what guides are and why they are important.
1.1. What are Guides?
Guides are visual aids that appear on your artboard but don’t show up when you print or export your artwork. They can be straight lines (horizontal or vertical), angled lines, or even shapes converted into guides.
1.2. Why are Guides Important?
- Precision: Guides ensure that your objects are aligned perfectly, which is crucial for professional-looking designs.
- Consistency: They help you maintain a consistent layout across multiple artboards or documents.
- Efficiency: By using guides, you can quickly position and resize elements without relying on guesswork.
- Safe Areas: Guides can define safe areas for print, ensuring that important elements aren’t cut off.
1.3 Types of Guides in Illustrator
Illustrator provides several types of guides to aid in your design process. Each type serves a unique purpose and can be used in different situations:
- Ruler Guides: Created by dragging from the rulers at the top and left of the artboard.
- Grid Guides: Activate the grid to align objects to the grid lines.
- Smart Guides: Temporary guides that appear as you move objects, helping you align them to other objects or the artboard.
Understanding these types of guides and their functions is key to effective use in Illustrator.
2. Common Reasons Why You Can’t Make Guides in Illustrator
Several reasons might prevent you from creating guides in Illustrator. Here’s a breakdown of the most common issues:
2.1. Rulers are Hidden
The rulers must be visible to create guides by dragging.
Solution:
- Go to View in the menu bar.
- Select Rulers and then Show Rulers (or press Ctrl + R / Command + R).
2.2. Guides are Locked
If guides are locked, you won’t be able to move, edit, or create new ones.
Solution:
- Go to View in the menu bar.
- Select Guides and then Unlock Guides.
2.3. Guides are Hidden
Even if guides are created, they might be hidden from view.
Solution:
- Go to View in the menu bar.
- Select Guides and then Show Guides (or press Ctrl + ; / Command + ;).
2.4. Wrong Tool Selected
You need to use the Selection Tool (V) or Direct Selection Tool (A) to drag guides from the rulers.
Solution:
- Press V or A to select the appropriate tool.
- Click and drag from the rulers to create guides.
2.5. Preferences Settings
Incorrect preferences settings can sometimes interfere with guide creation or visibility.
Solution:
- Go to Edit (Windows) or Illustrator (Mac) in the menu bar.
- Select Preferences and then Guides & Grid.
- Ensure that the guide color is visible and the “Guides in Back” option is not selected if you want guides to appear in front of your artwork.
3. Step-by-Step Troubleshooting Guide
If you’re still having trouble creating guides, follow these steps to identify and resolve the issue:
3.1. Check Rulers Visibility
- Go to View > Rulers > Show Rulers.
- If the rulers are now visible, try dragging a guide from them.
3.2. Unlock Guides
- Go to View > Guides > Unlock Guides.
- Try creating or moving a guide to see if this resolves the issue.
3.3. Show Guides
- Go to View > Guides > Show Guides.
- Check if the guides are now visible on your artboard.
3.4. Select the Correct Tool
- Press V (Selection Tool) or A (Direct Selection Tool).
- Try dragging a guide from the rulers.
3.5. Reset Preferences
- Close Illustrator.
- Restart Illustrator while holding down Ctrl + Alt + Shift (Windows) or Command + Option + Shift (Mac).
- This will reset Illustrator to its default settings.
4. Creating Different Types of Guides
Illustrator offers various types of guides to suit different design needs. Here’s how to create each type:
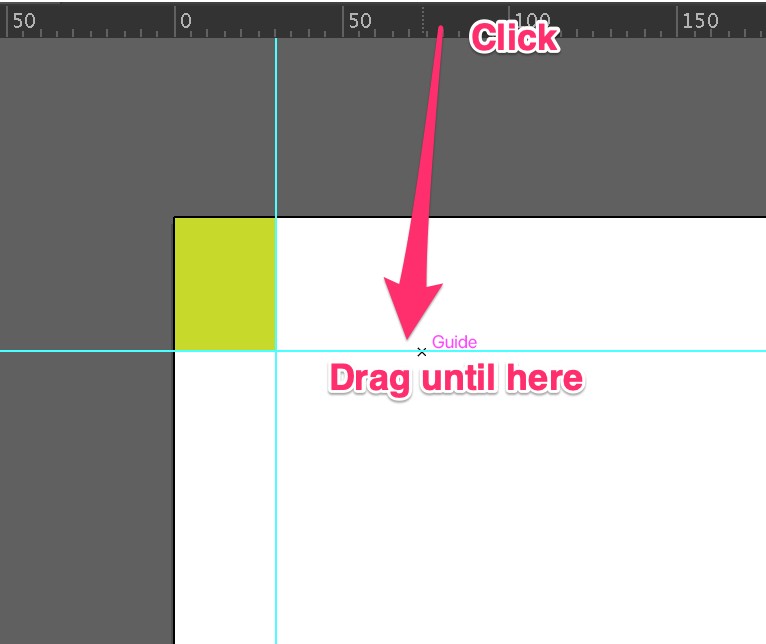
4.1. Ruler Guides
- Show Rulers: Go to View > Rulers > Show Rulers.
- Drag Guides: Click on the horizontal ruler to create horizontal guides, or the vertical ruler to create vertical guides. Drag the guide onto your artboard.
- Position Guides: Use the Selection Tool (V) to move the guides to the desired position.
4.2. Converting Objects to Guides
- Draw an Object: Create any shape using the shape tools (e.g., rectangle, circle, line).
- Select Object: Use the Selection Tool (V) to select the object.
- Convert to Guide: Go to View > Guides > Make Guides (or press Ctrl + 5 / Command + 5).
4.3. Grid Guides
- Show Grid: Go to View > Show Grid.
- Snap to Grid: Go to View > Snap to Grid to align objects to the grid lines.
- Adjust Grid Settings: Go to Edit (Windows) or Illustrator (Mac) > Preferences > Guides & Grid to customize the grid’s appearance and spacing.
4.4. Smart Guides
- Enable Smart Guides: Go to View > Smart Guides (or press Ctrl + U / Command + U).
- Use Smart Guides: As you move objects, Smart Guides will automatically appear to help you align them with other objects or the artboard.
5. Advanced Guide Techniques
To further enhance your use of guides, consider these advanced techniques:
5.1. Precise Guide Placement
- Create a Guide: Drag a guide from the rulers.
- Enter Exact Coordinates: Double-click the guide to open the Guide Options dialog box. Enter the precise X and Y coordinates for the guide’s position.
5.2. Creating Angled Guides
- Draw a Line: Use the Line Segment Tool () to draw a line at the desired angle.
- Rotate the Line: Use the Rotate Tool (R) to adjust the angle.
- Convert to Guide: Select the line and go to View > Guides > Make Guides.
5.3. Using Guides for Perspective
- Create Vanishing Points: Draw two points on your artboard to represent the vanishing points.
- Create Perspective Lines: Use the Line Segment Tool () to draw lines from each vanishing point to various points on your artboard.
- Convert to Guides: Select all the lines and go to View > Guides > Make Guides.
5.4. Guide Presets
- Create a Template: Set up your guides on a new artboard.
- Save as Template: Go to File > Save as Template.
- Use Template: When creating a new document, select your template from the “New Document” dialog box.
6. Optimizing Your Workflow with Guides
Guides are not just about precision; they are also about improving your workflow and making your design process more efficient.
6.1. Setting Up a Baseline Grid
A baseline grid ensures that your text aligns consistently across your design. This is particularly useful for multi-page documents or websites.
- Establish the Baseline: Determine the desired line height for your text.
- Create Horizontal Guides: Create horizontal guides at intervals equal to your baseline height.
- Align Text: Align your text to these guides to maintain consistency.
6.2. Using Guides for Responsive Design
With the increasing importance of responsive design, guides can help you create layouts that adapt to different screen sizes.
- Define Breakpoints: Identify the screen sizes where your layout will change.
- Create Guides: Create vertical guides to mark these breakpoints.
- Design Within Guides: Design your layout within these guides, ensuring that elements reflow appropriately at each breakpoint.
6.3. Creating Complex Layouts with Guides
For complex layouts, such as magazine spreads or intricate illustrations, guides can provide a structured framework.
- Sketch Your Layout: Start with a rough sketch of your layout.
- Create Guides: Based on your sketch, create a grid of horizontal and vertical guides.
- Refine Layout: Use the guides to position and align elements, refining your layout as you go.
7. Troubleshooting Specific Guide Issues
Even with a solid understanding of guides, you may encounter specific issues that require troubleshooting.
7.1. Guides Disappearing
If your guides disappear, ensure they are not hidden or locked. Go to View > Guides and check Show Guides and Unlock Guides.
7.2. Guides Not Snapping
If your objects are not snapping to guides, ensure that Snap to Point is enabled under the View menu. Also, check the Preferences to ensure that the snapping tolerance is set appropriately.
7.3. Guides Moving Unexpectedly
If your guides are moving unexpectedly, ensure they are locked. Go to View > Guides > Lock Guides.
7.4. Guides Not Visible on Export
Guides are non-printing elements and will not be visible when you export your artwork. If you need to show guides in your final output, consider converting them to regular lines or shapes.
8. Best Practices for Using Guides
To maximize the effectiveness of guides, follow these best practices:
8.1. Use a Consistent Guide System
Develop a consistent system for creating and using guides. This will help you maintain consistency across your projects and improve your workflow.
8.2. Lock Guides to Prevent Accidental Movement
Once you have positioned your guides, lock them to prevent accidental movement.
8.3. Use Different Colors for Different Types of Guides
Use different colors for different types of guides to help you distinguish between them. You can change the color of guides in the Preferences dialog box.
8.4. Regularly Review and Update Your Guide System
As your design style and project requirements evolve, regularly review and update your guide system to ensure it remains effective.
9. Resources for Learning More About Guides
To deepen your understanding of guides and improve your skills, consider these resources:
9.1. Adobe Illustrator Documentation
The official Adobe Illustrator documentation provides comprehensive information about guides and other features.
9.2. Online Tutorials
Websites like YouTube, Skillshare, and LinkedIn Learning offer a wide range of tutorials on using guides in Illustrator.
9.3. Design Communities
Join online design communities and forums to ask questions, share tips, and learn from other designers.
9.4. Books on Graphic Design
Many books on graphic design cover the use of guides and grids in detail.
10. The Importance of Ethical Design Guidelines
While guides are crucial for precision and consistency, ethical design guidelines are equally important.
10.1. Accessibility
Ensure your designs are accessible to people with disabilities. This includes using appropriate color contrast, providing alternative text for images, and designing for users with motor impairments.
10.2. Privacy
Respect user privacy by minimizing the collection of personal data and being transparent about how you use it.
10.3. Sustainability
Consider the environmental impact of your designs. This includes using sustainable materials, minimizing waste, and designing for durability.
10.4. Inclusivity
Design for a diverse audience, taking into account factors like age, gender, race, and cultural background.
11. Real-World Examples of Effective Guide Usage
To illustrate the power of guides, let’s look at some real-world examples of their effective usage.
11.1. Logo Design
Guides are essential for creating logos that are visually balanced and consistent. Designers use guides to align elements, create precise shapes, and maintain consistent proportions.
11.2. Web Design
Guides are used to create web layouts that are responsive and visually appealing. Designers use guides to define breakpoints, align elements, and ensure consistency across different screen sizes.
11.3. Print Design
Guides are crucial for creating print layouts that are accurate and professional-looking. Designers use guides to define margins, align text, and ensure that images are placed correctly.
11.4. Illustration
Guides can be used to create illustrations that are precise and detailed. Artists use guides to create perspective, align elements, and maintain consistent proportions.
12. Frequently Asked Questions (FAQs) About Guides in Illustrator
12.1. How do I change the color of my guides?
Go to Edit (Windows) or Illustrator (Mac) > Preferences > Guides & Grid. You can change the color and style of your guides in this dialog box.
12.2. How do I delete a guide?
Select the guide with the Selection Tool (V) and press Delete. Alternatively, you can drag the guide back onto the ruler to delete it.
12.3. Can I convert a shape into a guide?
Yes, select the shape and go to View > Guides > Make Guides (or press Ctrl + 5 / Command + 5).
12.4. How do I lock my guides?
Go to View > Guides > Lock Guides.
12.5. Why are my guides not snapping to objects?
Ensure that Snap to Point is enabled under the View menu. Also, check the Preferences to ensure that the snapping tolerance is set appropriately.
12.6. How do I hide my guides?
Go to View > Guides > Hide Guides (or press Ctrl + ; / Command + ;).
12.7. Can I move multiple guides at once?
Yes, hold down Shift while selecting multiple guides with the Selection Tool (V), then drag them to the desired position.
12.8. How do I create a guide at a specific angle?
Draw a line at the desired angle, then convert it to a guide by going to View > Guides > Make Guides.
12.9. Are guides visible when I export my artwork?
No, guides are non-printing elements and will not be visible when you export your artwork.
12.10. Can I use guides to create a grid?
Yes, create horizontal and vertical guides at regular intervals to form a grid. You can also use the built-in Grid feature under the View menu.
13. Staying Updated with Illustrator Features and Guidelines
Adobe Illustrator is continually evolving, with new features and updates being released regularly. Staying informed about these changes is crucial for maximizing your efficiency and creativity.
13.1. Adobe Creative Cloud Updates
Keep your Adobe Creative Cloud subscription up to date to access the latest features and improvements in Illustrator.
13.2. Adobe Blogs and Forums
Follow the official Adobe blogs and forums to stay informed about new features, best practices, and troubleshooting tips.
13.3. Online Courses and Workshops
Enroll in online courses and workshops to learn advanced techniques and stay up-to-date with the latest trends in graphic design.
13.4. Design Conferences and Events
Attend design conferences and events to network with other designers, learn from industry experts, and stay inspired.
14. Conclusion: Mastering Guides for Precision Design
Mastering guides in Adobe Illustrator is essential for creating precise, consistent, and professional-looking designs. By understanding the different types of guides, troubleshooting common issues, and following best practices, you can significantly improve your workflow and the quality of your work. Remember to stay updated with the latest features and guidelines, and to continuously refine your skills through practice and learning. For additional resources and in-depth tutorials, visit CONDUCT.EDU.VN.
Need more help with Illustrator guides? Contact us at 100 Ethics Plaza, Guideline City, CA 90210, United States, or Whatsapp at +1 (707) 555-1234. Visit our website at conduct.edu.vn for more information and resources.