For eco-conscious home cooks and those passionate about reducing plastic waste, reusable food wraps are a fantastic kitchen innovation. If you’re like many, you’re seeking alternatives to single-use plastic wrap, and beeswax wraps are an excellent, natural solution. This comprehensive guide will walk you through crafting your own DIY reusable food wraps, offering both beeswax and vegan options to suit your preferences. Get ready to revolutionize your food storage and embrace a more sustainable kitchen with these easy-to-follow recipes!
My journey to create the perfect reusable food wrap started with a simple desire: to ditch plastic wrap. Like many home chefs who love sharing meals, my husband and I were going through rolls of plastic wrap every time we took food on the go. Silicone stretch lids were a decent suggestion from a friend, but they weren’t versatile enough for all my dishes, especially my favorite handmade bowls. Then, I discovered beeswax wraps – a true kitchen game-changer! They’re not only perfect for covering bowls and plates for transport but also ideal for wrapping leftover fruits, vegetables, cheese, or even acting as a lid for herbal infusions. Inspired, I decided to embark on a DIY adventure to make my own.
What I anticipated would be a quick project turned into an extensive three-week experiment. I was surprised by the sheer variety of methods and recipes for homemade wraps. My initial attempts weren’t quite right, but that only fueled my determination to find the best approach for creating beeswax wraps that met my standards for usability and effectiveness.
During my testing phase, I experimented with different sizes – large (14 inches), medium (10 inches) squares, and circles for larger bowls. I even tried sewing snack bags to wax later (sewing before waxing is definitely recommended!). If you have pinking shears, they are incredibly useful for minimizing fraying when cutting and waxing your fabric.
The Trials: Finding the Perfect Wrap Recipe
My quest for the ideal DIY food wrap led me through several experimental recipes, each with varying degrees of success. Here’s a breakdown of my trials and tribulations:
Attempt 1: Beeswax Solo
The simplest method I encountered involved coating fabric with just beeswax. It seemed straightforward enough for a first try. I cut a fabric square, sprinkled beeswax pastilles on it, and placed it in the oven. The beeswax melted quickly, allowing me to brush it evenly across the fabric. While it solidified rapidly, the result was disappointing. The wrap was incredibly stiff, lacking the essential stickiness of plastic wrap. Worse, it cracked when I tried to mold it around a bowl. Strike one.
Attempt 2: Beeswax and Jojoba Oil Combo
Inspired by the ingredients of commercially available wraps, I tried combining beeswax with jojoba oil. This duo seemed like a promisingly simple upgrade. I prepared another fabric square, melted beeswax and jojoba oil in a double boiler, brushed the mixture onto the fabric, and baked it briefly. This attempt was a step forward. The wraps were more pliable and could mold around a bowl, but frustratingly, they still wouldn’t adhere to themselves or the bowl’s edges. Strike two.
Attempt 3: Beeswax and Coconut Oil Surprise
Skeptical after the jojoba oil attempt, I wasn’t expecting much from coconut oil. However, this try was surprisingly successful! The wraps became pliable, sticky, and were easy to make. The downside? They left a noticeable coconut oil residue on everything they touched. Removing this film from textured surfaces like mason jar lids required significant scrubbing. Not a total failure – it worked, but the messiness was a considerable drawback. Let’s call it a messy success, but not ideal.
Attempt 4: Beeswax, Jojoba Oil, and Copal Resin Experiment
Commercial beeswax wraps often contain pine resin, which prompted me to explore resins. Copal resin, described as an intermediate stage between softer and amber resins, seemed like a potential substitute for pine resin. Using wildharvested copal, I mixed it with beeswax and jojoba oil. And it worked! This blend ticked all my boxes, and I was initially thrilled with the outcome. I even published a recipe based on this blend.
However, feedback from friends revealed a significant issue: melting copal resin was time-consuming, and those using copal from different sources struggled to melt it at all. Since my goal was a user-friendly recipe with consistent results, I went back to the drawing board.
Attempt 5 (The Winner!): Beeswax, Jojoba Oil, and Pine Resin – The Final Recipe
Despite my initial hesitation about pine resin, I reconsidered its inclusion after realizing its prevalence in commercial wraps. It turned out there was a good reason! Pine resin melted much faster than copal, and recipe testers confirmed it delivered more consistent results. While we don’t currently offer pine resin, it’s important to source sustainably harvested pine resin to protect pine trees and their ecosystems.
With immense pleasure (and relief!), I present to you the ultimate DIY reusable wrap recipe! The treated fabric feels just like high-quality store-bought beeswax wraps and is fully customizable in shape, size, and color.
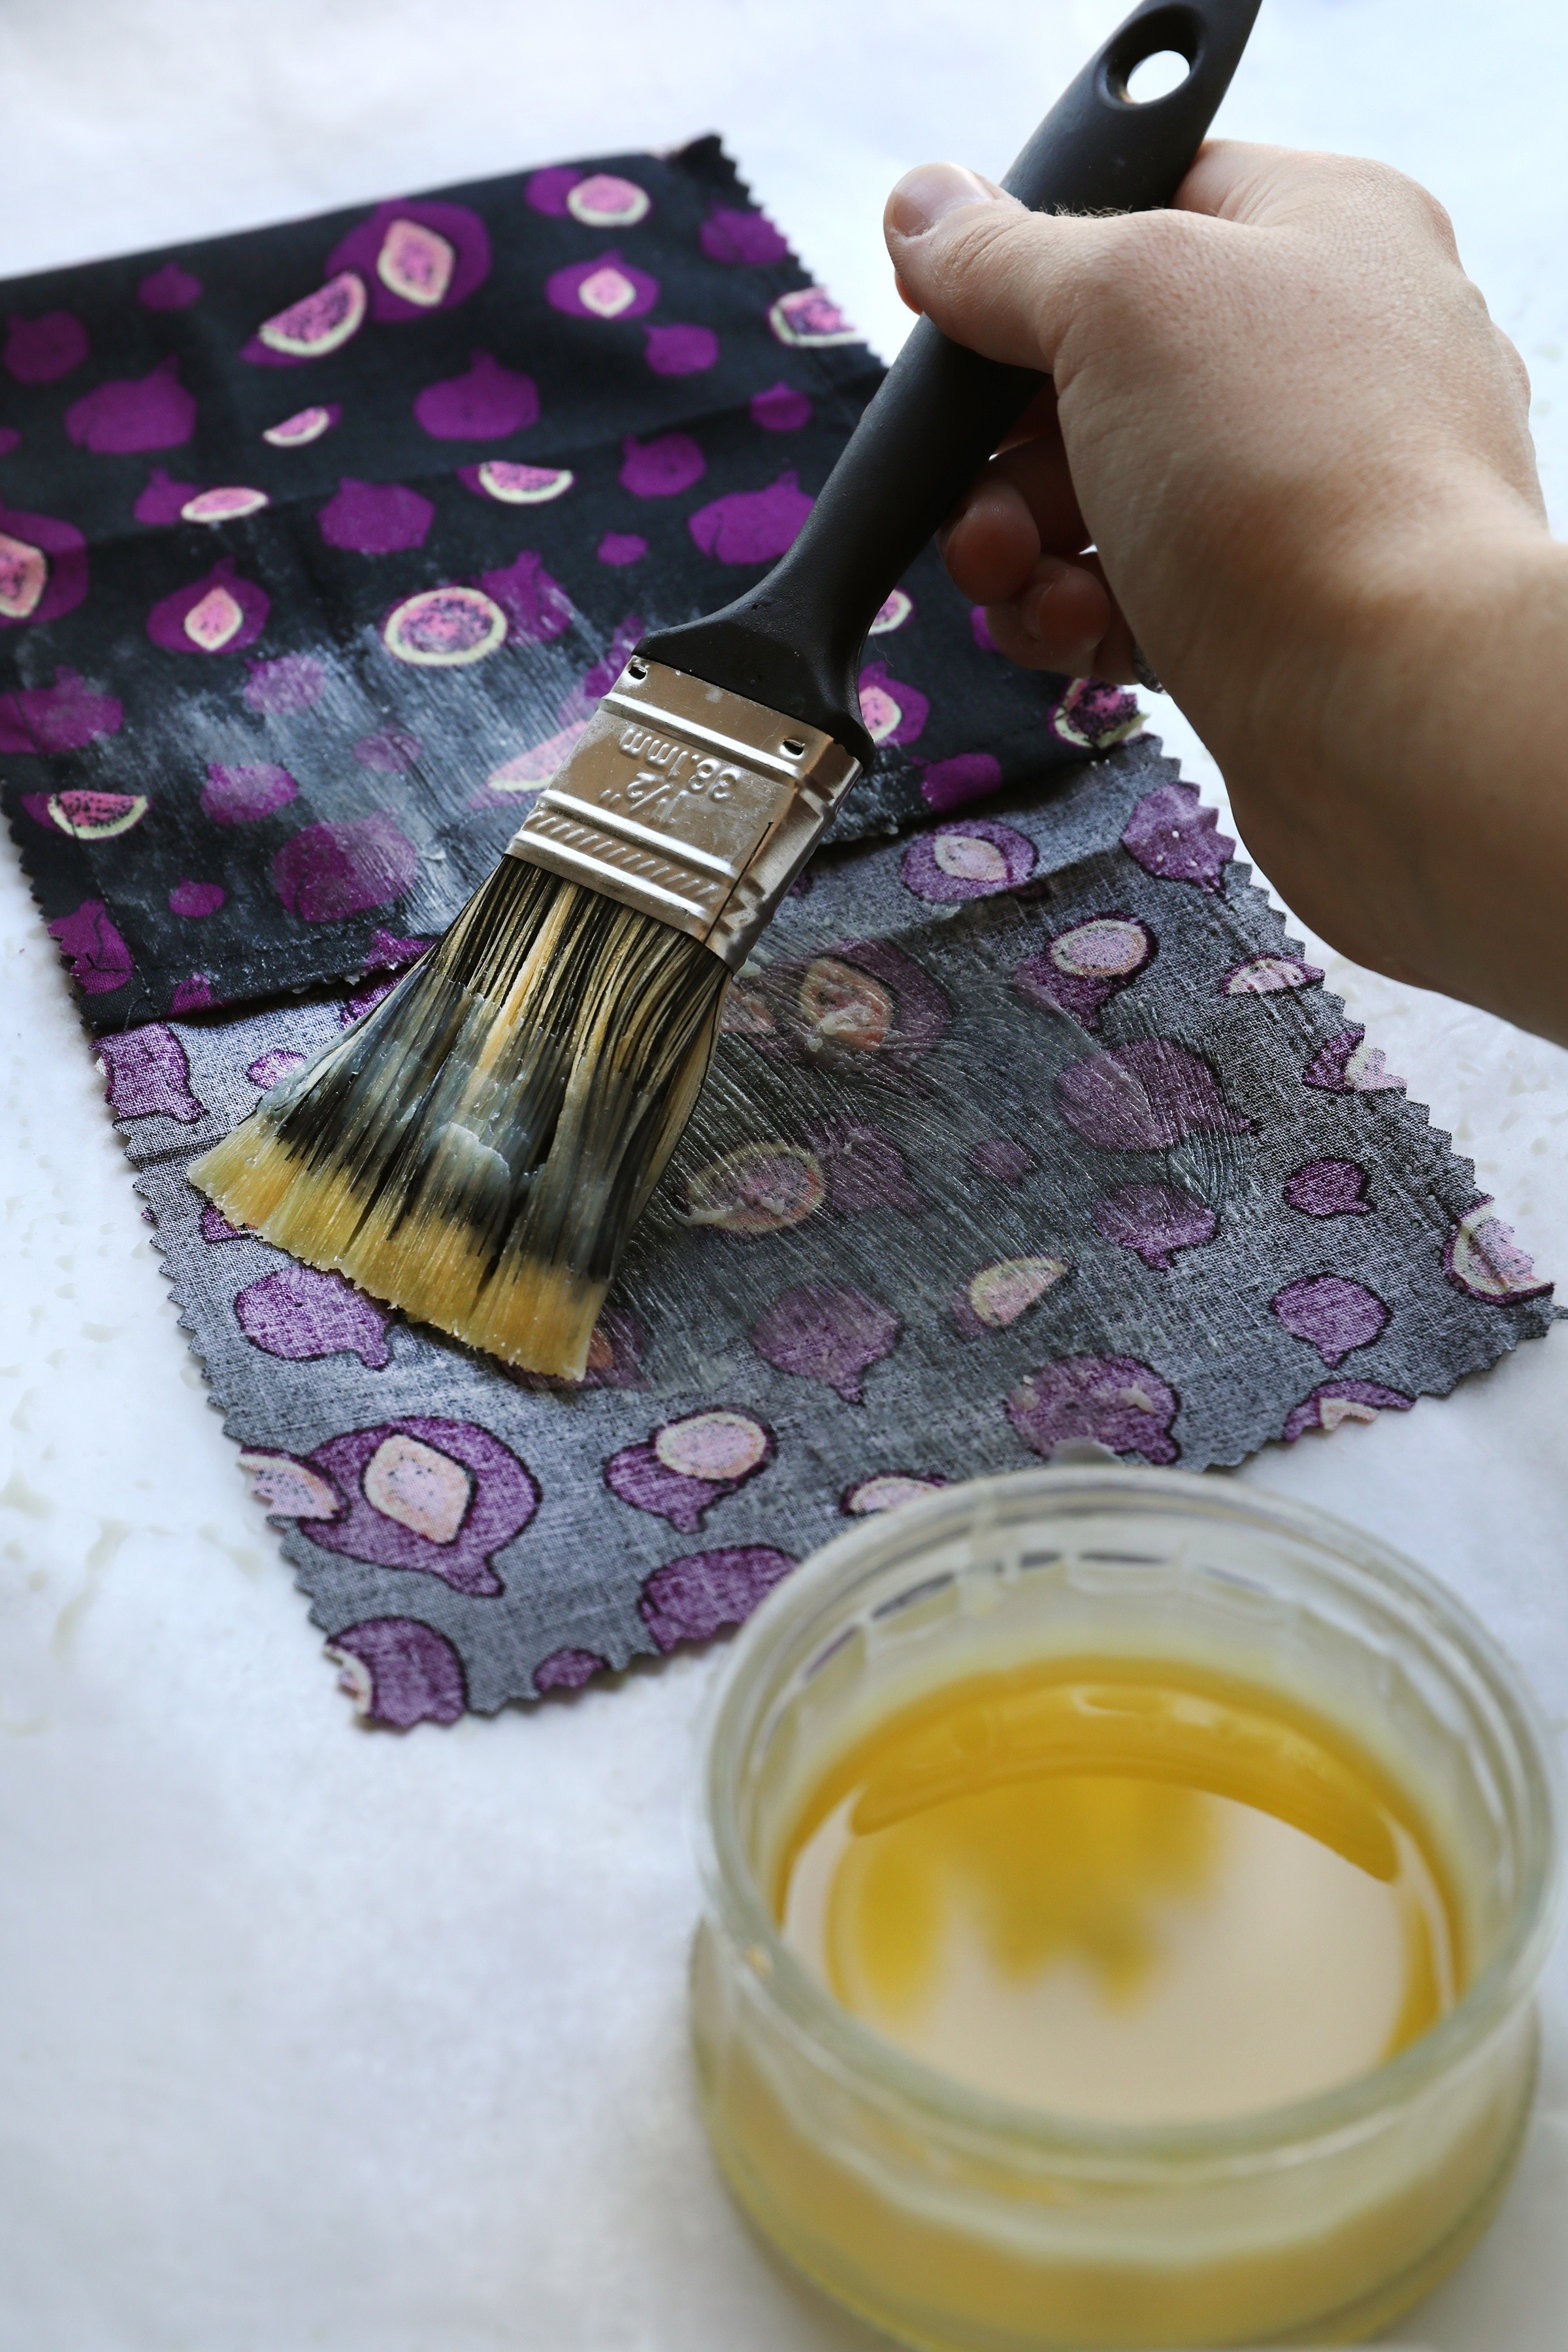
Applying the beeswax mixture to the cotton fabric to create a reusable food wrap.
The BEST Reusable Beeswax Wrap Recipe
Yields (2 to 3) 12 x 12 inch cloths.
Ingredients
- 100% cotton fabric, organic preferred
- 0.35 oz. sustainably sourced pine resin
- 1.25 oz. beeswax pastilles or grated beeswax
- 1 Tbsp. organic jojoba oil
- Large popsicle stick or compostable stirrer
- Parchment paper
- Dedicated paintbrush
Equipment
- Double boiler or glass measuring cup
- Saucepan
- Cookie sheet
Directions
- Pre-wash and dry your cotton fabric.
- Cut the fabric into your desired shapes and sizes.
- Combine pine resin, beeswax, and jojoba oil in a double boiler or glass measuring cup set in a saucepan.
- Add water to the saucepan, ensuring it’s below the waterline of the double boiler or measuring cup. Heat on medium-high.
- Preheat your oven to 300°F (150°C).
- Allow the ingredients to fully melt and combine, approximately 20-25 minutes, stirring occasionally.
- Line a large cookie sheet with parchment paper, making sure it’s larger than your biggest fabric piece.
- Lay a piece of fabric (or multiple, depending on size) flat on the parchment paper.
- Lightly brush the melted mixture onto the fabric. It may solidify quickly, which is normal; you can redistribute it later. It’s better to start with less and add more as needed to avoid oversaturation.
- Bake in the preheated oven for about 2 minutes, or until the fabric appears uniformly wet with the mixture.
- Remove from the oven and check for any dry spots. Brush the mixture over these areas, adding more coating if needed. If the coating becomes uneven, return to the oven for a few minutes to smooth it out.
- Immediately place the next fabric piece(s) on top of the finished wrap to absorb any excess coating mixture. Work quickly to prevent the wax from solidifying.
- Separate the wraps and hang them to dry. Drying should only take a few minutes.
- Repeat with remaining fabric pieces until you’ve used all the coating mixture.
Beeless Vegan Food Wrap Recipe
Yields (2 to 3) 12 x 12 inch cloths.
After perfecting the beeswax recipe, creating a vegan version using carnauba wax was the next logical step. Drawing inspiration from our vegan calendula salve recipe, I adjusted the wax quantity, reducing it from the beeswax recipe and increasing the oil to compensate for carnauba wax’s more brittle nature. It required a bit more tweaking, but the result was fantastic. These DIY vegan wraps are slightly oilier and may leave a bit more residue than beeswax wraps, but they adhere wonderfully to themselves and dishes.
Ingredients
- 100% cotton fabric, organic preferred
- 0.75 oz. sustainably sourced pine resin
- 0.5 oz. organic carnauba wax
- 1 Tbsp. organic jojoba oil
- Large popsicle stick or compostable stirrer
- Parchment paper
- Dedicated paintbrush
Equipment
- Double boiler or glass measuring cup
- Saucepan
- Cookie sheet
Directions
- Pre-wash and dry your cotton fabric.
- Cut the fabric into your desired shapes and sizes.
- Combine pine resin, carnauba wax, and jojoba oil in a double boiler or glass measuring cup set in a saucepan.
- Add water to the saucepan, ensuring it’s below the waterline of the double boiler or measuring cup. Heat on medium-high.
- Preheat your oven to 300°F (150°C).
- Allow the ingredients to fully melt and combine, approximately 20-25 minutes, stirring occasionally.
- Line a large cookie sheet with parchment paper, making sure it’s larger than your biggest fabric piece.
- Lay a piece of fabric (or multiple, depending on size) flat on the parchment paper.
- Lightly brush the melted mixture onto the fabric. It may solidify quickly, which is normal; you can redistribute it later. It’s better to start with less and add more as needed to avoid oversaturation.
- Bake in the preheated oven for about 2 minutes, or until the fabric appears uniformly wet with the mixture.
- Remove from the oven and check for any dry spots. Brush the mixture over these areas, adding more coating if needed. If the coating becomes uneven, return to the oven for a few minutes to smooth it out.
- Immediately place the next fabric piece(s) on top of the finished wrap to absorb any excess coating mixture. Work quickly to prevent the wax from solidifying.
- Separate the wraps and hang them to dry. Drying should only take a few minutes.
- Repeat with remaining fabric pieces until you’ve used all the coating mixture.
Enjoying homemade reusable snack pouches filled with dried fruit.
This vegan wrap recipe is slightly more advanced and might require minor adjustments based on your specific materials.
Troubleshooting Tips for Perfect Wraps:
- Too Sticky Wraps: Reduce the amount of pine resin slightly in your next batch.
- Oily Wraps: Decrease the jojoba oil. Start by reducing to 2 teaspoons and adjust further if necessary.
- Stiff Wraps: Reduce the wax amount or you may have over-saturated the fabric. Aim for the lightest possible coat that still fully covers the material.
Pro Tips for Wrap Success:
- Fabric Choice: Thinner 100% cotton fabrics work best. They cling well and absorb less of the mixture, making coating easier.
- Drying Setup: Prepare a drying space before you begin. A string with clothes pins works perfectly for hanging wraps to dry.
- Care Instructions: Regardless of the wrap type, wash them in cool water with mild soap, like Castile soap, and air dry. Store folded in a drawer away from heat and sunlight.
- Adjusting Stickiness: Modify resin amounts to control stickiness. The provided ratios are ideal for general household use. More resin can leave residue, while less might reduce cling.
- Residue Removal: If wraps leave residue on glassware initially, wash with baking soda, soap, and warm water using a scrub sponge.
- Refreshing Wraps: Refresh wraps every 6-12 months, depending on usage. Re-melt a small amount of coating mixture and lightly brush a thin, even layer over the wraps, then re-dry.
- Coating Technique: Start with a light coat and add more as needed for even saturation. If you apply too much, use another fabric piece to absorb the excess.
- Enhancing Seal: Beeswax wraps are not airtight like plastic wrap. For a tighter seal, use a rubber band to secure the wrap.
Looking for More Kitchen Sustainability Ideas?
Explore Our Natural Cleaning Solution Recipes!
You might also enjoy: