Navigating the intricacies of Adobe Photoshop often involves utilizing guides to ensure precision in design and layout. However, knowing how to efficiently remove all guides is crucial for a clean workspace. At CONDUCT.EDU.VN, we provide you with detailed steps and expert tips on mastering this essential skill, ensuring a streamlined workflow and enhanced creative process. Let’s explore ways to clear guides, manage visibility, and optimize your Photoshop environment, plus delve into best practices for maintaining a clutter-free design space and improving your digital creation process.
1. Understanding the Importance of Guides in Photoshop
Photoshop guides are non-printing lines that help you align elements, maintain consistency, and create balanced designs. Guides are an essential tool for graphic designers, web developers, and digital artists who need to ensure precision in their work. These visual aids can dramatically improve the accuracy and efficiency of your workflow.
1.1. What are Photoshop Guides?
Photoshop guides are visual aids that appear as non-printing lines on your canvas. They can be horizontal or vertical and are used to align elements, define boundaries, and maintain consistency across your design. Guides help in creating a structured layout, ensuring that all elements are placed accurately and harmoniously.
1.2. Why Use Guides?
Using guides in Photoshop offers several advantages:
- Precision: Guides allow you to align elements with pixel-perfect accuracy, ensuring a professional finish.
- Consistency: They help maintain consistent spacing and alignment across multiple elements, creating a cohesive design.
- Balance: Guides assist in creating balanced compositions by defining visual center points and equal distances.
- Efficiency: By providing a visual framework, guides reduce the need for constant adjustments and measurements, saving time and effort.
1.3. Common Uses for Guides
Guides are used in various design scenarios, including:
- Web Design: Aligning navigation menus, content blocks, and images to create a user-friendly layout.
- Graphic Design: Ensuring consistent margins, headings, and image placements in brochures, posters, and other print materials.
- Photo Editing: Aligning and cropping images to achieve the desired composition and visual balance.
- UI/UX Design: Creating precise interfaces with accurately positioned buttons, icons, and text fields.
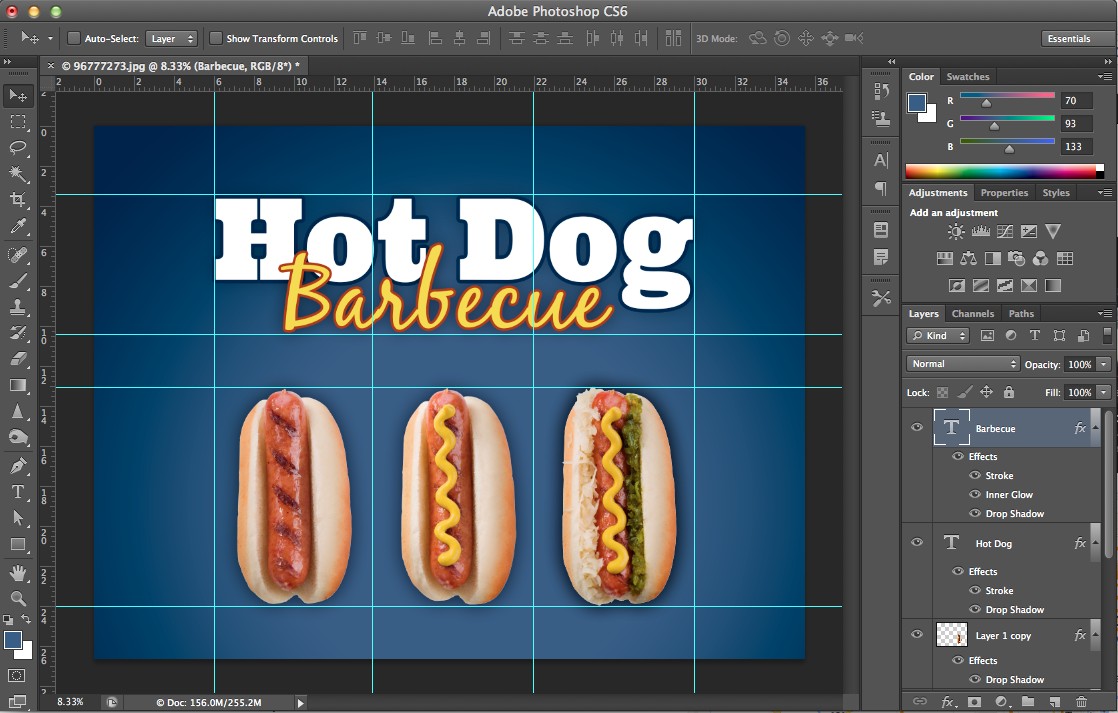 Horizontal and Vertical Guides
Alt: Horizontal and vertical guides in Photoshop, illustrating precision in aligning design elements.
2. Methods to Remove All Guides in Photoshop
Removing all guides in Photoshop can be done in several ways, each offering a slightly different approach. Here are the primary methods:
2.1. Using the “Clear Guides” Option
The most straightforward way to remove all guides is by using the “Clear Guides” option in the View menu. This method quickly removes all guides from your canvas.
2.1.1. Steps to Clear Guides
- Open Photoshop: Launch Adobe Photoshop and open the document containing the guides you want to remove.
- Navigate to the View Menu: Click on the “View” menu located at the top of the Photoshop interface.
- Select “Clear Guides”: In the dropdown menu, hover over “Guides” and select “Clear Guides”. This action will instantly remove all guides from your canvas.
2.1.2. Advantages of Using “Clear Guides”
- Speed: This method is the fastest way to remove all guides.
- Simplicity: It requires only a few clicks, making it easy to use for both beginners and advanced users.
- Efficiency: It clears all guides at once, saving time compared to removing them individually.
2.2. Dragging Guides Back to the Rulers
Another way to remove guides is by dragging them back to the rulers from which they originated. This method allows you to remove guides selectively.
2.2.1. Steps to Drag Guides Back to Rulers
- Activate the Move Tool: Select the “Move Tool” (V) from the toolbar, or press the “V” key on your keyboard.
- Click and Drag a Guide: Hover your cursor over a guide, click, and drag it back to the ruler (either the top or left ruler, depending on the guide’s orientation).
- Release the Mouse Button: Once the guide is over the ruler, release the mouse button. The guide will disappear from the canvas.
- Repeat for All Guides: Repeat this process for each guide you want to remove.
2.2.2. Advantages of Dragging Guides
- Selective Removal: This method allows you to remove specific guides while keeping others in place.
- Visual Control: You can see exactly which guides you are removing.
- Flexibility: Useful when you only need to remove a few guides and want to avoid clearing all of them.
2.3. Using the “Delete” Key
You can also remove guides by selecting them with the Move Tool and pressing the Delete key.
2.3.1. Steps to Use the Delete Key
- Activate the Move Tool: Select the “Move Tool” (V) from the toolbar.
- Select a Guide: Click on a guide to select it. The guide will become highlighted, indicating it is selected.
- Press the Delete Key: Press the “Delete” key (or “Backspace” key on some keyboards) to remove the selected guide.
- Repeat for All Guides: Repeat this process for each guide you want to remove.
2.3.2. Advantages of Using the Delete Key
- Direct Method: This method provides a direct way to remove selected guides.
- Simple: It only requires selecting a guide and pressing a single key.
- Precise Control: Allows you to remove guides one by one, ensuring you only delete the ones you intend to.
2.4. Using a Script or Action
For users who frequently need to remove all guides, creating a custom script or action can automate the process.
2.4.1. Creating a Script
- Open the Script Editor: Go to “File” > “Scripts” > “Script Event Manager.”
- Create a New Script: In the Script Event Manager, click on the “+” button to add a new script.
- Assign an Event: Choose an event that will trigger the script (e.g., “Open Document,” “Save Document”).
- Write the Script: Add the following JavaScript code to clear guides:
// clears all guides
function clearGuides() {
    if (documents.length > 0) {
        activeDocument.guides.removeAll();
    }
}
clearGuides();- Save the Script: Save the script with a descriptive name (e.g., “ClearAllGuides.jsx”).
- Run the Script: The script will now run automatically whenever the assigned event occurs.
2.4.2. Creating an Action
- Open the Actions Panel: Go to “Window” > “Actions” to open the Actions panel.
- Create a New Action Set: Click the folder icon at the bottom of the panel to create a new action set. Name it something descriptive (e.g., “Custom Actions”).
- Create a New Action: Click the page icon to create a new action. Name it “Clear Guides” and assign a function key (e.g., “F2”).
- Start Recording: Click the “Record” button.
- Clear Guides: Go to “View” > “Guides” > “Clear Guides.”
- Stop Recording: Click the “Stop” button in the Actions panel.
- Run the Action: Now you can run the action by pressing the assigned function key (e.g., “F2”).
2.4.3. Advantages of Using Scripts or Actions
- Automation: Automates the process of removing guides, saving time and effort.
- Efficiency: Quickly clears guides with a single command or keystroke.
- Customization: Allows you to tailor the process to your specific workflow.
3. Managing Guide Visibility
Sometimes, instead of removing guides, you may want to temporarily hide them to get a clearer view of your design. Photoshop offers several options for managing guide visibility.
3.1. Toggling Guide Visibility
You can quickly toggle the visibility of guides using the View menu or a keyboard shortcut.
3.1.1. Steps to Toggle Guide Visibility
- Navigate to the View Menu: Click on the “View” menu at the top of the screen.
- Select “Show”: Hover over “Show” in the dropdown menu.
- Toggle “Guides”: Click “Guides” to toggle their visibility. If guides are currently visible, this will hide them, and vice versa.
3.1.2. Using Keyboard Shortcuts
- Windows: Press
Ctrl + ;(semicolon) to toggle guide visibility. - Mac: Press
Cmd + ;(semicolon) to toggle guide visibility.
3.1.3. Advantages of Toggling Guide Visibility
- Quick and Easy: Toggling is a fast way to hide or show guides without removing them.
- Non-Destructive: It doesn’t permanently alter your design; guides are still there, just hidden.
- Convenient: Keyboard shortcuts make it even faster to manage guide visibility.
3.2. Using the “Extras” Menu
The “Extras” menu provides another way to manage the visibility of guides and other non-printing elements.
3.2.1. Steps to Use the “Extras” Menu
- Navigate to the View Menu: Click on the “View” menu at the top of the screen.
- Select “Extras”: Click on “Extras” to toggle the visibility of all extras, including guides, grids, and slices.
3.2.2. Advantages of Using the “Extras” Menu
- Comprehensive Control: The “Extras” menu controls the visibility of multiple non-printing elements at once.
- Convenient: Quickly hide or show all extras with a single click.
- Customizable: You can customize which extras are included in the “Extras” setting through the Preferences menu.
3.3. Customizing Guide Appearance
Photoshop allows you to customize the appearance of guides, which can help make them more visible or less distracting, depending on your preferences.
3.3.1. Steps to Customize Guide Appearance
-
Open Preferences: Go to “Edit” > “Preferences” > “Guides, Grid & Slices” (Windows) or “Photoshop” > “Preferences” > “Guides, Grid & Slices” (Mac).
-
Adjust Guide Settings: In the “Guides, Grid & Slices” preferences, you can change the following settings:
- Color: Choose a different color for your guides. Select a color that contrasts well with your design.
- Style: Change the style of the guides to “Lines” or “Dashed Lines.”
- Grid Settings: Adjust the gridlines, grid color and subdivisions to suit your needs.
-
Click “OK”: Click the “OK” button to apply your changes.
3.3.2. Advantages of Customizing Guide Appearance
- Enhanced Visibility: Choosing a contrasting color makes guides easier to see against your design.
- Reduced Distraction: Using dashed lines can make guides less visually intrusive.
- Personalization: Customize the appearance of guides to match your personal preferences and workflow.
4. Optimizing Your Photoshop Environment for Guide Management
Efficiently managing guides involves optimizing your Photoshop environment to facilitate quick and easy access to guide-related functions.
4.1. Creating Custom Keyboard Shortcuts
Assigning custom keyboard shortcuts to frequently used guide commands can significantly speed up your workflow.
4.1.1. Steps to Create Custom Keyboard Shortcuts
- Open Keyboard Shortcuts: Go to “Edit” > “Keyboard Shortcuts.”
- Select a Command: In the Keyboard Shortcuts dialog, navigate to “View” > “Guides” > “Clear Guides.”
- Assign a Shortcut: Click in the shortcut column next to “Clear Guides” and press the keys you want to use as a shortcut (e.g.,
Ctrl + Alt + Gon Windows orCmd + Option + Gon Mac). - Accept the Shortcut: If the shortcut is already in use, Photoshop will warn you. You can either choose a different shortcut or replace the existing one.
- Click “OK”: Click the “OK” button to save your changes.
4.1.2. Advantages of Custom Keyboard Shortcuts
- Increased Efficiency: Quickly execute commands with a single keystroke.
- Personalized Workflow: Tailor shortcuts to match your personal preferences and workflow.
- Time-Saving: Reduce the time spent navigating menus and searching for commands.
4.2. Using the Ruler Tool Effectively
The Ruler Tool is essential for creating and positioning guides accurately. Understanding how to use it effectively can improve your precision and efficiency.
4.2.1. Displaying Rulers
- Show Rulers: Go to “View” > “Rulers” or press
Ctrl + R(Windows) orCmd + R(Mac) to display the rulers.
4.2.2. Changing Ruler Units
- Open Preferences: Go to “Edit” > “Preferences” > “Units & Rulers” (Windows) or “Photoshop” > “Preferences” > “Units & Rulers” (Mac).
- Select Units: In the “Units & Rulers” preferences, choose the desired unit of measurement (e.g., pixels, inches, centimeters) for the rulers.
- Click “OK”: Click the “OK” button to apply your changes.
4.2.3. Creating Guides from Rulers
- Click and Drag: Hover your cursor over the top or left ruler.
- Drag a Guide: Click and drag from the ruler onto your canvas to create a guide.
- Position the Guide: Use the ruler to accurately position the guide at the desired location.
4.2.4. Advantages of Using the Ruler Tool Effectively
- Accuracy: Ensures precise placement of guides based on specific measurements.
- Consistency: Helps maintain consistent spacing and alignment across your design.
- Efficiency: Streamlines the process of creating and positioning guides.
4.3. Organizing Your Workspace
A well-organized workspace can enhance your productivity and make it easier to manage guides.
4.3.1. Customizing Panels
- Arrange Panels: Arrange your panels in a way that makes sense for your workflow. Keep frequently used panels easily accessible.
- Group Panels: Group related panels together to save space and reduce clutter.
- Save Workspace: Save your customized workspace by going to “Window” > “Workspace” > “New Workspace.”
4.3.2. Using the Options Bar
The Options Bar, located at the top of the screen, provides quick access to settings for the currently selected tool.
- Tool Settings: Use the Options Bar to adjust settings for the Move Tool, such as auto-select layers and show transform controls.
- Efficiency: Quickly access and modify tool settings without having to navigate through menus or panels.
4.3.3. Advantages of Organizing Your Workspace
- Increased Productivity: A well-organized workspace reduces distractions and makes it easier to find the tools and commands you need.
- Enhanced Efficiency: Streamlines your workflow by keeping frequently used functions easily accessible.
- Personalized Experience: Tailor your workspace to match your personal preferences and workflow.
5. Best Practices for Using and Managing Guides
Adhering to best practices ensures that you use guides effectively and maintain a clean, efficient workspace.
5.1. Planning Your Layout
Before creating guides, take some time to plan your layout. This will help you determine the optimal placement of guides and avoid unnecessary clutter.
5.1.1. Sketching Your Design
- Create a Rough Sketch: Start by creating a rough sketch of your design to visualize the layout and identify key alignment points.
- Identify Key Elements: Determine the placement of important elements, such as headings, images, and navigation menus.
5.1.2. Using Grid Systems
- Implement a Grid System: Use a grid system to create a structured layout with consistent spacing and alignment.
- Set Up Guides: Set up guides based on the grid system to define columns, rows, and margins.
5.1.3. Advantages of Planning Your Layout
- Improved Efficiency: Planning reduces the need for constant adjustments and measurements, saving time and effort.
- Enhanced Consistency: Ensures consistent spacing and alignment across your design.
- Better Organization: Helps you create a well-structured and balanced layout.
5.2. Using Smart Guides
Smart Guides are temporary guides that appear automatically as you move or create elements. They can help you align objects relative to each other or to the canvas.
5.2.1. Enabling Smart Guides
- Go to View Menu: Click on “View” at the top of the screen.
- Select Show: Hover over “Show” in the dropdown menu.
- Enable Smart Guides: Click “Smart Guides” to enable them.
5.2.2. How to Use Smart Guides
- Move Objects: As you move objects, Smart Guides will appear to help you align them with other objects or the canvas edges.
- Create Objects: Smart Guides will help you create objects that are aligned with existing elements.
5.2.3. Advantages of Using Smart Guides
- Automatic Alignment: Smart Guides automatically help you align objects, reducing the need for manual adjustments.
- Dynamic Assistance: They provide real-time assistance as you move or create elements.
- Increased Efficiency: Streamlines the process of aligning objects and creating accurate layouts.
5.3. Regularly Clearing or Hiding Guides
To maintain a clean and efficient workspace, it’s a good practice to regularly clear or hide guides when you no longer need them.
5.3.1. Clearing Guides
- Use “Clear Guides”: Go to “View” > “Guides” > “Clear Guides” to remove all guides from your canvas.
5.3.2. Hiding Guides
- Toggle Visibility: Press
Ctrl + ;(Windows) orCmd + ;(Mac) to toggle the visibility of guides. - Use “Extras”: Go to “View” > “Extras” to hide all extras, including guides.
5.3.3. Advantages of Regularly Clearing or Hiding Guides
- Reduced Clutter: Keeps your workspace clean and free of distractions.
- Improved Focus: Allows you to focus on your design without being distracted by unnecessary guides.
- Enhanced Efficiency: Makes it easier to see and work with your design.
5.4. Saving and Loading Guide Layouts
If you frequently use the same guide layouts, you can save them and load them as needed.
5.4.1. Saving Guide Layouts
- Go to View Menu: Click on “View” at the top of the screen.
- Select New Guide Layout: Click on “New Guide Layout.”
- Save: Save the file and open when needed.
5.4.2. Loading Guide Layouts
- Go to View Menu: Click on “View” at the top of the screen.
- Select Load Guide Layout: Click on “Load Guide Layout.”
- Open: Open the correct file and the guides will appear.
5.4.3. Advantages of Saving and Loading Guide Layouts
- Time-Saving: Quickly apply guide layouts without having to recreate them each time.
- Consistency: Ensures consistent layouts across multiple documents.
- Efficiency: Streamlines the process of setting up guides for recurring design tasks.
6. Common Issues and Troubleshooting
Even with a good understanding of how to manage guides, you may encounter some common issues. Here are some troubleshooting tips:
6.1. Guides Not Visible
If your guides are not visible, there are several possible causes:
- Guides are Hidden: Make sure that guides are not hidden by toggling their visibility (press
Ctrl + ;orCmd + ;). - “Extras” are Hidden: Ensure that “Extras” are not hidden by going to “View” > “Extras.”
- Guide Color is Too Similar: Check the color of your guides in the Preferences (Edit > Preferences > Guides, Grid & Slices) and choose a color that contrasts well with your design.
- Rulers are Not Visible: Make sure rulers are displayed. Go to “View” > “Rulers” or press
Ctrl + R(Windows) orCmd + R(Mac) to display the rulers.
6.2. Unable to Select Guides
If you are unable to select guides, the following may be the cause:
- Move Tool is Not Selected: Ensure that the Move Tool (V) is selected.
- Guides are Locked: Check if the guides are locked. If they are, go to “View” > “Lock Guides” to unlock them.
6.3. Guides Moving Unexpectedly
If your guides are moving unexpectedly, the following may be the cause:
- Accidental Dragging: Make sure you are not accidentally clicking and dragging the guides.
- Smart Guides Interference: Smart Guides may be interfering with your guide placement. Try disabling Smart Guides (View > Show > Smart Guides) to see if that resolves the issue.
6.4. Script Errors
If you encounter errors when using a script to clear guides, check the following:
- Script Syntax: Ensure that the script code is correct and free of syntax errors.
- Photoshop Version Compatibility: Make sure that the script is compatible with your version of Photoshop.
7. Real-World Examples of Guide Usage
To further illustrate the importance and versatility of guides, here are some real-world examples of how they are used in various design fields.
7.1. Web Design
In web design, guides are crucial for creating responsive layouts that adapt to different screen sizes.
- Grid Systems: Web designers use grid systems to create structured layouts with consistent spacing and alignment. Guides are used to define columns, rows, and margins based on the grid system.
- Responsive Design: Guides help ensure that elements are properly aligned and spaced on different devices, creating a consistent user experience.
- Navigation Menus: Guides are used to align navigation menus and ensure that menu items are evenly spaced and visually balanced.
7.2. Graphic Design
In graphic design, guides are essential for creating visually appealing and professional-looking print materials.
- Brochures and Flyers: Guides help ensure consistent margins, headings, and image placements in brochures and flyers.
- Posters: Guides are used to create balanced compositions and align elements in posters.
- Business Cards: Guides help ensure that text and logos are properly aligned and spaced on business cards.
7.3. Photography and Photo Editing
In photography and photo editing, guides are used to improve composition and create visually balanced images.
- Cropping: Guides help you crop images to achieve the desired composition and visual balance.
- Alignment: Guides are used to align elements within an image, such as horizons and vertical lines.
- Retouching: Guides can help maintain symmetry and balance when retouching portraits or other images.
8. The Future of Guide Management in Photoshop
As Photoshop continues to evolve, we can expect to see new features and improvements in guide management.
8.1. AI-Powered Guides
Future versions of Photoshop may incorporate AI-powered guides that automatically suggest optimal guide placements based on the content and context of your design.
- Intelligent Suggestions: AI could analyze your design and suggest guide placements that enhance visual balance and alignment.
- Automated Layouts: AI could automatically generate guide layouts based on predefined design principles.
8.2. Enhanced Collaboration
Future versions of Photoshop may offer enhanced collaboration features that allow multiple users to share and collaborate on guide layouts in real-time.
- Shared Guides: Users could share guide layouts with team members, ensuring consistency across projects.
- Real-Time Collaboration: Multiple users could collaborate on guide layouts in real-time, making it easier to create complex designs.
8.3. Integration with Other Adobe Products
Future versions of Photoshop may offer tighter integration with other Adobe products, such as Illustrator and InDesign, allowing you to seamlessly transfer guide layouts between applications.
- Cross-Platform Compatibility: You could create guide layouts in Photoshop and easily transfer them to Illustrator or InDesign.
- Streamlined Workflow: This integration would streamline your workflow and make it easier to create consistent designs across multiple applications.
9. Conclusion: Mastering Guide Management for Enhanced Creativity
Mastering the art of managing guides in Adobe Photoshop is essential for achieving precision, consistency, and efficiency in your design projects. Whether you’re a web designer, graphic artist, or photographer, understanding how to create, customize, and remove guides is crucial for optimizing your workflow and enhancing your creative output. By implementing the techniques and best practices outlined in this guide, you can ensure a streamlined and clutter-free design space, allowing you to focus on bringing your creative visions to life.
Remember, consistent practice and exploration of Photoshop’s features will further refine your skills and enable you to harness the full potential of guides in your design process. Stay updated with the latest advancements in Photoshop and continue to explore new ways to integrate guides into your workflow for enhanced creativity and precision.
For more in-depth tutorials, tips, and resources on mastering Adobe Photoshop and other design tools, visit CONDUCT.EDU.VN. Our comprehensive guides and expert insights will help you elevate your design skills and achieve professional-quality results. At CONDUCT.EDU.VN, we are dedicated to providing you with the knowledge and tools you need to succeed in the dynamic world of digital design.
10. Frequently Asked Questions (FAQ) About Removing Guides in Photoshop
10.1. How do I quickly remove all guides in Photoshop?
To quickly remove all guides in Photoshop, go to the “View” menu, hover over “Guides,” and select “Clear Guides.” This action will instantly remove all guides from your canvas.
10.2. Can I remove individual guides without clearing all of them?
Yes, you can remove individual guides by selecting the Move Tool (V), clicking on a guide, and dragging it back to the ruler or pressing the Delete key.
10.3. How do I hide guides temporarily without removing them?
To hide guides temporarily, press Ctrl + ; (Windows) or Cmd + ; (Mac). This toggles the visibility of guides without removing them from your canvas.
10.4. How can I change the color of guides in Photoshop?
To change the color of guides, go to “Edit” > “Preferences” > “Guides, Grid & Slices” (Windows) or “Photoshop” > “Preferences” > “Guides, Grid & Slices” (Mac). In the preferences, you can adjust the color and style of your guides.
10.5. Is there a way to lock guides in place to prevent accidental movement?
Yes, you can lock guides by going to “View” and selecting “Lock Guides.” This prevents accidental movement of the guides.
10.6. How do I create a guide at a specific measurement?
To create a guide at a specific measurement, first, make sure your rulers are visible (View > Rulers). Then, click and drag from the ruler onto your canvas. As you drag, hold down the Shift key to snap the guide to the nearest ruler increment.
10.7. Can I save and load guide layouts for future use?
Yes, you can save and load guide layouts. To save a layout, go to “View” > “New Guide Layout” and save the file. To load a layout, go to “View” > “Load Guide Layout” and open the saved file.
10.8. What are Smart Guides and how do I use them?
Smart Guides are temporary guides that appear automatically as you move or create elements. To enable them, go to “View” > “Show” > “Smart Guides.” They help you align objects relative to each other or to the canvas.
10.9. How do I reset the guide preferences to their default settings?
To reset the guide preferences, go to “Edit” > “Preferences” > “Guides, Grid & Slices” (Windows) or “Photoshop” > “Preferences” > “Guides, Grid & Slices” (Mac). Click on the “Reset” button to restore the default settings.
10.10. Are there any scripts or actions that can help automate guide management?
Yes, you can create custom scripts or actions to automate guide management. For example, you can create a script to clear all guides with a single command. You can find examples of scripts and actions online or create your own using Photoshop’s scripting tools.
Need more help with Adobe Photoshop or other design tools? Contact us at 100 Ethics Plaza, Guideline City, CA 90210, United States. Reach out via WhatsApp at +1 (707) 555-1234 or visit our website at conduct.edu.vn for comprehensive guides and expert insights.