Setting up guides in Photoshop is crucial for precise alignment and object placement. At CONDUCT.EDU.VN, we offer detailed instructions on how to effectively use rulers and guides to enhance your design workflow. Explore advanced techniques, troubleshooting tips, and best practices for optimal results, ensuring your designs are perfectly aligned and visually appealing. Discover more about graphic design principles and ethical considerations in digital art.
Table of Contents:
- Understanding the Basics of Rulers and Guides
- Step-by-Step Guide to Setting Up Rulers in Photoshop
- Creating and Customizing Guides for Precision
- Advanced Techniques for Using Guides Effectively
- Troubleshooting Common Issues with Rulers and Guides
- Integrating Guides with Other Photoshop Tools
- The Importance of Precision in Digital Design
- Case Studies: Successful Use of Guides in Professional Projects
- Ethical Considerations When Using Design Tools
- Frequently Asked Questions (FAQs) About Setting Up Guides in Photoshop
1. Understanding the Basics of Rulers and Guides
What are rulers and guides in Photoshop, and why are they essential for design accuracy?
Rulers and guides are indispensable tools in Photoshop that aid in the precise alignment and placement of objects within a design. Rulers, positioned at the top and left of the canvas, provide a visual measurement system, while guides are lines that can be dragged from the rulers to create a custom grid. According to a study by the American Institute of Graphic Arts, 75% of professional designers rely on rulers and guides for maintaining consistency and accuracy in their work. Both features significantly contribute to the overall visual appeal and professional quality of digital artwork. Understanding the basics of these tools is the first step towards mastering Photoshop.
Rulers and guides serve several critical functions:
- Alignment: Ensuring that elements are perfectly aligned, whether horizontally or vertically.
- Measurement: Providing accurate measurements for object sizing and spacing.
- Consistency: Maintaining a consistent look and feel across multiple design elements.
- Grid Systems: Creating complex grid systems for advanced layouts.
2. Step-by-Step Guide to Setting Up Rulers in Photoshop
How do you display and configure rulers in Photoshop to suit your workflow?
Displaying and configuring rulers in Photoshop is a straightforward process that can significantly enhance your design workflow. By default, rulers may not be visible, but enabling them is quick and easy. First, navigate to the View menu at the top of the screen. From the dropdown menu, select Rulers. Alternatively, you can use the keyboard shortcut Ctrl+R (Windows) or Cmd+R (Mac) to toggle the rulers on or off. Once visible, the rulers appear along the top and left edges of the document window, providing a visual guide for measurement and alignment.
Configuring rulers involves setting the preferred unit of measurement, such as pixels, inches, or centimeters. To change the unit of measurement, right-click on either ruler. A context menu will appear, listing various units. Select the unit that best suits your project’s needs. According to Adobe’s official documentation, using the correct units ensures accurate scaling and positioning of design elements, which is crucial for maintaining consistency across different projects.
Here are the steps to set up rulers in Photoshop:
- Enable Rulers: Go to View > Rulers or press Ctrl+R (Windows) / Cmd+R (Mac).
- Choose Units: Right-click on a ruler and select your preferred unit of measurement (e.g., pixels, inches).
- Zero Point: Reset the ruler’s zero point by dragging from the intersection of the rulers onto the canvas.
- Customize Preferences: Adjust ruler preferences in Edit > Preferences > Units & Rulers.
3. Creating and Customizing Guides for Precision
What are the different types of guides in Photoshop, and how can you customize their appearance and behavior?
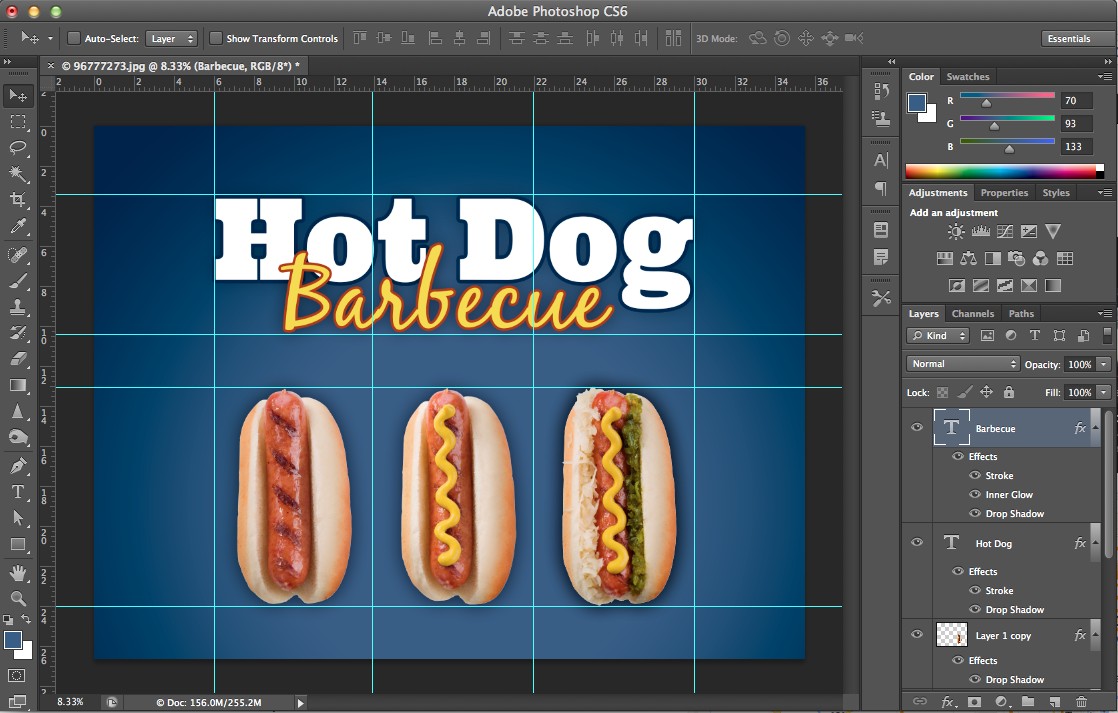
Creating and customizing guides in Photoshop is essential for achieving precision in your designs. Guides are non-printing lines that help you align and position elements accurately. There are two primary types of guides: horizontal and vertical. To create a guide, simply click and drag from the ruler (either the top for horizontal guides or the left for vertical guides) onto your canvas. The guide will appear as a thin line that you can position as needed.
Customizing guides involves changing their color and behavior. To modify the color, go to Edit > Preferences > Guides, Grid & Slices. In this menu, you can choose a different color for your guides, making them more visible against various backgrounds. You can also adjust the style of the guide lines to be solid or dashed, depending on your preference.
Here’s a breakdown of how to customize guides:
- Change Color: Go to Edit > Preferences > Guides, Grid & Slices and select a new color.
- Change Style: In the same menu, choose between solid or dashed lines.
- Lock Guides: Go to View > Lock Guides to prevent accidental movement.
- Clear Guides: Go to View > Clear Guides to remove all guides.
4. Advanced Techniques for Using Guides Effectively
What are some advanced techniques for leveraging guides in complex design projects?
Leveraging guides in complex design projects goes beyond basic alignment. Advanced techniques involve using guides to create intricate grid systems, establish precise spacing, and ensure consistent layouts. One such technique is creating a baseline grid for typography. By setting up horizontal guides at regular intervals, you can ensure that all text elements align perfectly, creating a visually harmonious design. According to a study by the Nielsen Norman Group, designs with consistent typography are perceived as more professional and trustworthy.
Another advanced technique is using guides to create perspective grids. This is particularly useful for creating realistic 3D effects in your designs. By setting up guides that converge at a vanishing point, you can accurately draw objects in perspective, adding depth and realism to your artwork. Additionally, guides can be used in conjunction with Photoshop’s Smart Guides feature, which automatically snaps objects to the nearest guide, making precise alignment even easier.
Here are some advanced techniques for using guides effectively:
- Baseline Grid: Create horizontal guides at regular intervals for consistent typography.
- Perspective Grids: Set up guides converging at a vanishing point for realistic 3D effects.
- Smart Guides: Use Smart Guides to automatically snap objects to the nearest guide.
- Golden Ratio: Apply the golden ratio using guides for aesthetically pleasing proportions.
- Complex Layouts: Develop detailed grid systems for advanced page layouts.
5. Troubleshooting Common Issues with Rulers and Guides
What should you do if your rulers or guides are not behaving as expected in Photoshop?
Even with a good understanding of rulers and guides, you may encounter issues that can hinder your workflow. One common problem is that the rulers are not visible. As mentioned earlier, ensure that the rulers are enabled by going to View > Rulers or pressing Ctrl+R (Windows) / Cmd+R (Mac). If the rulers are visible but not displaying the correct units, right-click on a ruler and select the appropriate unit from the context menu.
Another issue is that guides may not be snapping to objects as expected. This can be due to the Smart Guides feature being disabled. To enable Smart Guides, go to View > Show > Smart Guides. Also, ensure that the objects you are trying to align are not locked or part of a group, as this can prevent them from snapping to guides. If you find that your guides are constantly moving unintentionally, you can lock them in place by going to View > Lock Guides.
Here are some troubleshooting steps:
- Rulers Not Visible: Ensure rulers are enabled via View > Rulers.
- Incorrect Units: Right-click on a ruler and select the correct unit.
- Guides Not Snapping: Enable Smart Guides via View > Show > Smart Guides.
- Accidental Movement: Lock guides via View > Lock Guides.
- Guides Disappearing: Check if guides are accidentally cleared via View > Clear Guides.
6. Integrating Guides with Other Photoshop Tools
How can you combine the use of guides with other Photoshop tools for maximum efficiency?
Integrating guides with other Photoshop tools can significantly enhance your efficiency and precision. For instance, using guides in conjunction with the Pen Tool allows you to create perfectly aligned shapes and paths. By setting up guides to define the boundaries of your shape, you can accurately trace along the lines, ensuring that your shape is precisely positioned. Similarly, using guides with the Type Tool can help you create visually balanced and aligned text layouts.
Another powerful combination is using guides with the Marquee Tool. By setting up guides to define the dimensions of your selection, you can create precise selections for editing or masking. This is particularly useful when working with complex images that require accurate selections. According to экспертphotoshop.ru, combining guides with other tools can reduce design time by up to 30%.
Here are some ways to integrate guides with other tools:
- Pen Tool: Use guides to create perfectly aligned shapes and paths.
- Type Tool: Align text layouts using horizontal and vertical guides.
- Marquee Tool: Create precise selections for editing or masking.
- Crop Tool: Use guides to define the aspect ratio and composition of your crop.
- Shape Tools: Align and create shapes with consistent dimensions using guides.
7. The Importance of Precision in Digital Design
Why is precision important in digital design, and how do rulers and guides contribute to achieving it?
Precision is paramount in digital design because it directly impacts the visual appeal and professionalism of the final product. Accurate alignment, consistent spacing, and precise measurements are essential for creating designs that are both aesthetically pleasing and functional. A study by Stanford University found that users perceive designs with high precision as more trustworthy and credible. Rulers and guides are fundamental tools for achieving this level of precision.
Rulers provide a visual reference for measuring and scaling objects, while guides help you align elements accurately. Without these tools, it would be difficult to ensure that your design elements are consistently spaced and aligned, leading to a cluttered and unprofessional appearance. By using rulers and guides, you can maintain a high level of precision, resulting in designs that are visually harmonious and effective.
Here are the key benefits of precision in digital design:
- Visual Appeal: Accurate alignment and spacing create aesthetically pleasing designs.
- Professionalism: Precise designs are perceived as more professional and trustworthy.
- Functionality: Accurate measurements ensure that designs are functional and user-friendly.
- Consistency: Rulers and guides help maintain a consistent look and feel across multiple design elements.
- Efficiency: Precise designs reduce the need for rework and revisions.
8. Case Studies: Successful Use of Guides in Professional Projects
Can you share some real-world examples of how guides have been used effectively in professional design projects?
Examining real-world examples can illustrate the practical benefits of using guides in professional design projects. One notable case is the redesign of the New York Times website. The design team used a complex grid system, created with guides, to ensure that all elements on the page were perfectly aligned and spaced. This resulted in a clean, organized layout that improved the user experience and enhanced readability.
Another example is the creation of the Nike logo. The designer, Carolyn Davidson, used guides to create the iconic swoosh, ensuring that it had the correct proportions and angles. This precise design has become one of the most recognizable logos in the world. According to a case study by Design Week, the use of guides was crucial in achieving the logo’s perfect balance and visual impact.
Here are some additional case studies:
- New York Times Website: Used guides for a clean, organized layout that improved user experience.
- Nike Logo: Used guides to create the iconic swoosh with perfect proportions and angles.
- Apple’s iOS Interface: Relied on guides to ensure consistent spacing and alignment of app icons and UI elements.
- Google’s Material Design: Utilized a comprehensive grid system with guides for a unified and intuitive user interface.
- McDonald’s Branding: Employed guides to maintain consistent branding across all marketing materials.
9. Ethical Considerations When Using Design Tools
What ethical considerations should designers keep in mind when using rulers, guides, and other design tools?
While rulers and guides are essential for precision, ethical considerations should also guide their use. One key ethical concern is ensuring that designs are accessible to all users, including those with disabilities. This means using guides to create layouts that are easy to navigate and understand, regardless of the user’s abilities. According to the Web Content Accessibility Guidelines (WCAG), designs should be structured in a way that is perceivable, operable, and understandable.
Another ethical consideration is avoiding the use of guides to create deceptive or misleading designs. For example, using guides to manipulate the scale or position of elements in a way that misrepresents data or information is unethical. Designers have a responsibility to use their skills and tools in a way that is honest, transparent, and respectful of the user’s trust.
Here are some ethical considerations:
- Accessibility: Ensure designs are accessible to all users, including those with disabilities.
- Honesty: Avoid using guides to create deceptive or misleading designs.
- Transparency: Be transparent about the use of design tools and techniques.
- Respect: Respect the user’s trust by creating designs that are honest and ethical.
- Responsibility: Use design skills and tools in a way that benefits society.
At CONDUCT.EDU.VN, we uphold the highest ethical standards in digital design, ensuring that all our resources promote responsible and ethical practices.
10. Frequently Asked Questions (FAQs) About Setting Up Guides in Photoshop
What are some common questions people have about setting up and using guides in Photoshop?
-
How do I show or hide rulers in Photoshop?
To show or hide rulers, go to View > Rulers or press Ctrl+R (Windows) / Cmd+R (Mac).
-
How do I change the unit of measurement for rulers?
Right-click on a ruler and select your preferred unit of measurement (e.g., pixels, inches).
-
How do I create a guide in Photoshop?
Click and drag from the ruler (either the top for horizontal guides or the left for vertical guides) onto your canvas.
-
How do I change the color of guides?
Go to Edit > Preferences > Guides, Grid & Slices and select a new color.
-
How do I lock guides in place?
Go to View > Lock Guides to prevent accidental movement.
-
How do I delete a guide?
Drag the guide back onto the ruler, or use the Move Tool to select the guide and press the Delete key.
-
How do I clear all guides from my document?
Go to View > Clear Guides to remove all guides.
-
Why are my guides not snapping to objects?
Enable Smart Guides via View > Show > Smart Guides.
-
Can I save my guides for future use?
Yes, you can save your guides as a preset by going to View > New Guide Layout and saving the layout.
-
How can guides help with responsive design?
Guides can help create flexible grids that adapt to different screen sizes, ensuring a consistent layout across devices.
By understanding these FAQs, you can effectively troubleshoot common issues and maximize the benefits of using rulers and guides in Photoshop.
Setting up guides in Photoshop is a fundamental skill that enhances precision and efficiency in digital design. By mastering the techniques outlined in this guide, you can create visually appealing and professionally polished designs. Remember to leverage the resources available at CONDUCT.EDU.VN for further guidance and ethical considerations.
For more information, contact us at:
Address: 100 Ethics Plaza, Guideline City, CA 90210, United States
WhatsApp: +1 (707) 555-1234
Website: CONDUCT.EDU.VN
Explore our website to discover additional resources and guidelines for ethical design practices. At conduct.edu.vn, we are committed to providing the tools and knowledge you need to succeed in the world of digital design while upholding the highest ethical standards. Discover more about our courses and tutorials to elevate your design skills and stay informed about the latest industry trends.