D2 Salvation’s Edge Guide offers a comprehensive walkthrough to help you conquer Destiny 2’s The Final Shape raid. CONDUCT.EDU.VN provides detailed strategies, encounter breakdowns, and essential tips to defeat The Witness and secure victory. Dive into this guide and equip yourself with the knowledge to master Salvation’s Edge, understand pivotal roles, and uncover valuable insights for success, paving the way for a seamless experience in Destiny 2’s endgame content. This guide incorporates helpful raid strategies, encounter mechanics, and boss fight tactics.
1. Understanding Salvation’s Edge Raid Mechanics
Salvation’s Edge, the raid accompanying Destiny 2’s The Final Shape expansion, plunges you and your Fireteam into the heart of The Witness’ Monolith within The Pale Heart of The Traveler. Success hinges on mastering core mechanics present in the initial encounters, namely Substratum, Dissipation, and Repository. These encounters revolve around charging plates, understanding wire mechanics, collecting Resonance, and activating conduits. Verity and The Witness boss fight will introduce new mechanics.
1.1. Activating Charging Plates and Wires
Each encounter features three to four pairs of plates interconnected by a wire. These plates require activation through specific actions, like defeating boss enemies. One plate will glow upon activation, signifying its active state. Stepping on this glowing plate initiates energy transfer to its paired plate via the wire. The partner must step on the receiving plate after the energy arrives and before it dissipates. Successfully rebounding the energy triggers the appearance of Resonance nearby, a crucial resource for raid progression.
1.2. Creating Resonance Pickups
Resonance, a buff shaped like various geometric forms, stands as a central mechanic in Salvation’s Edge. It appears in three forms: triangles (Pyramidal Resonance), circles (Spherical Resonance), and squares (Hexahedron Resonance). Players will utilize Resonance to interact with conduits and extend the encounter timer. The different Resonance forms appear throughout the encounters.
1.3. Activating Conduits
Charging plates often have conduits nearby, initially either active or dormant. Dormant conduits necessitate energy supply, achievable through the plate activation. Active conduits display a shape (triangle, circle, or square) indicating the Resonance type needed for activation. Activating multiple conduits spawns the Resonance bank, essential for progressing to the next phase.
The conduit activation sequence is:
- A player steps on the plate opposite the conduit, sending energy to the conduit plate.
- A player with the correct Resonance shape shoots the conduit.
- A player steps on the conduit plate once the energy arrives to lock it.
Proper execution results in the conduit expanding and glowing gold, while the shooter loses one stack of Resonance. Locking the conduit removes all Resonance created by the plate pair. The extra Resonance should be collected first. Filling three conduits spawns the bank under The Witness’ time bomb.
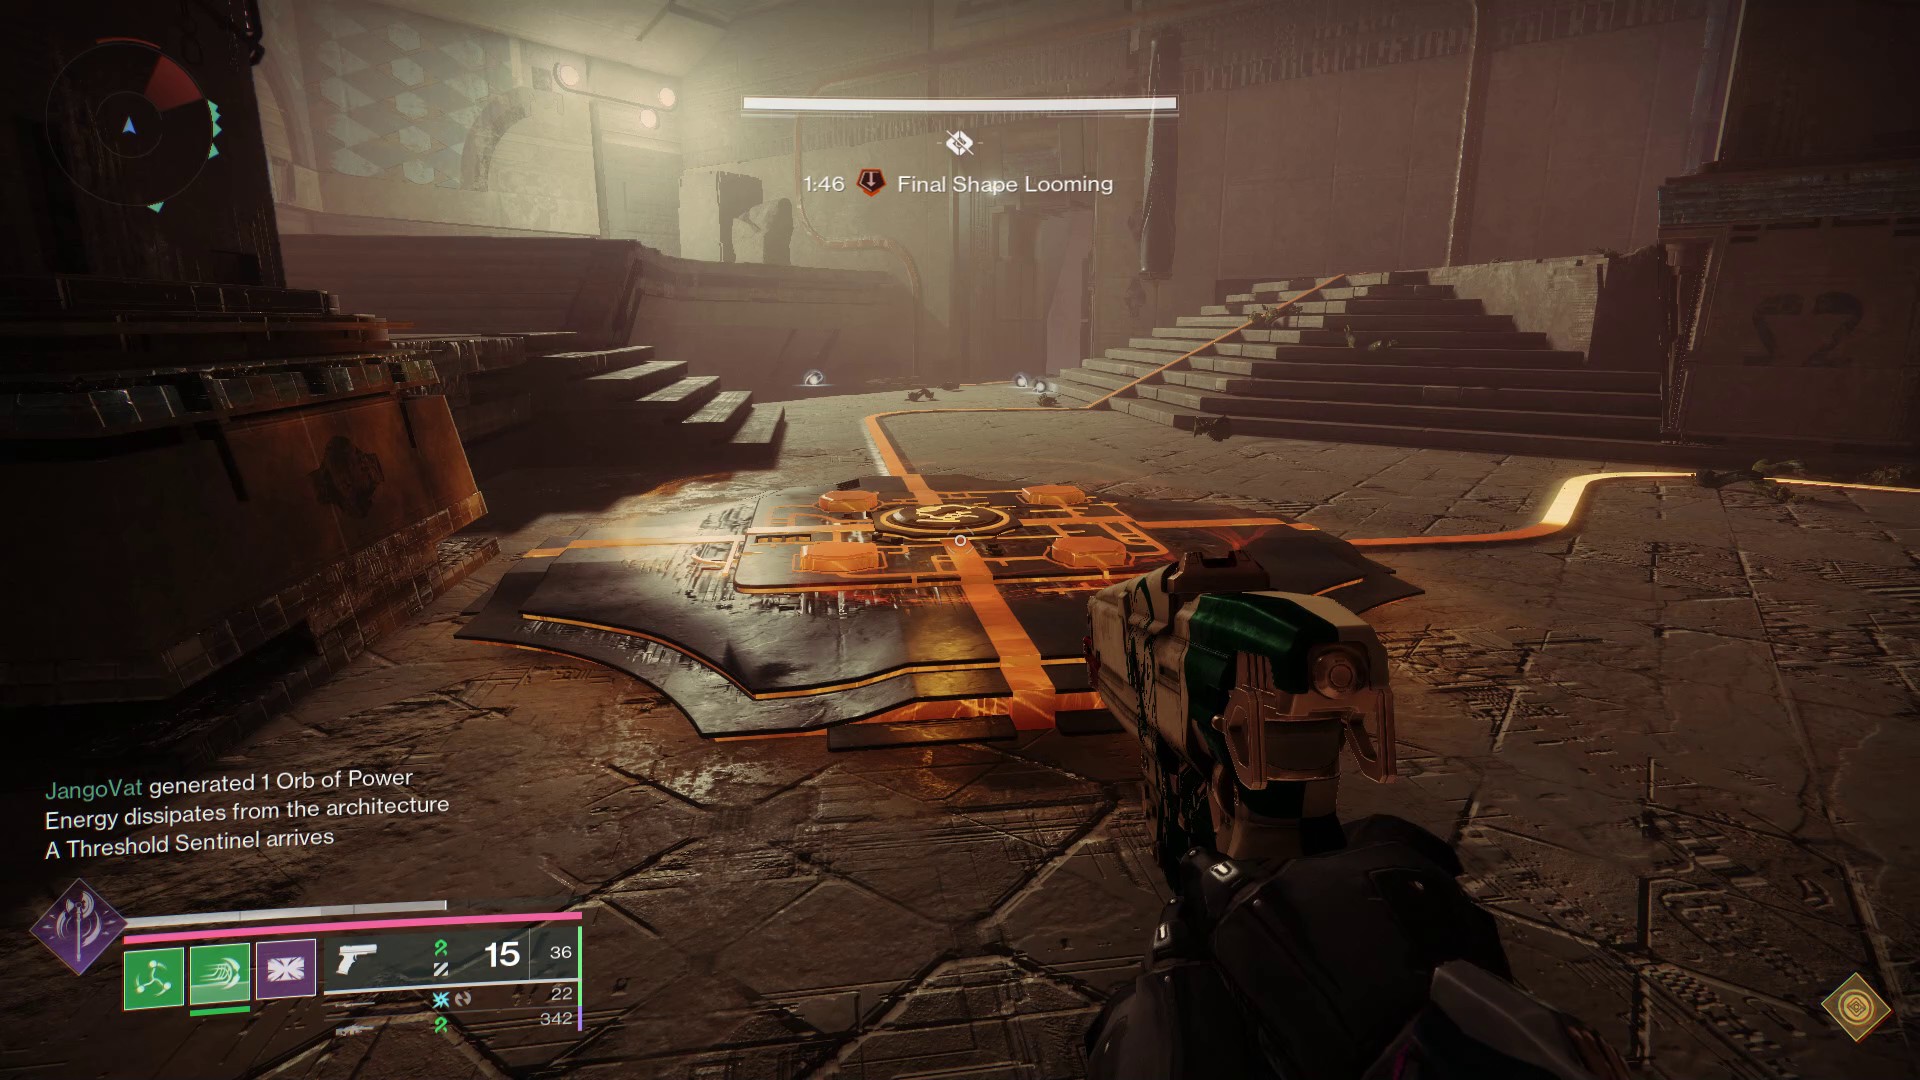
1.4. Stopping and Resetting the Timer
Each encounter in Salvation’s Edge features a timer, visible at the top of the screen. Failure to complete the encounter before the timer expires results in a wipe. The timer is intentionally short, requiring players to extend or reset it. The bank is used to extend the timer in the first three encounters. Excess Resonance gathered before locking the conduits is deposited into the bank. Depositing Resonance adds time to the timer.
2. Substratum: Navigating the Opening Encounter
The Substratum encounter takes place in a 9×9 grid, with each grid representing a separate room. Here’s how to navigate this challenge.
2.1. Initial Setup
A triangle (Resonance) floats above the ground in the center of the room. Grab it and deposit it into the nearby bank. Banking the Resonance spawns one of The Witness’ hands in the central room and opens two random doors. Vex Supplicants will enter the room through the open doors.
2.2. Clearing Rooms and Opening Doors
Divide the Fireteam into two groups of three. Appoint a lead player for each team, with the remaining players following their lead. Eliminate the Supplicants and send one team into each open room. The teams will move through multiple rooms connected by doors.
The sequence is:
- First Room: Contains only Vex. Eliminate them quickly and move to the next room.
- Second Room: Contains a Quantum Minotaur and other Vex. Killing the Minotaur in one room spawns a Vex Hydra in the other team’s second room. Killing the Vex Hydras opens doors for teammates.
- Third Room: One team will encounter an Overload Minotaur Champion called the Devotee of the Witness. Killing the Champion spawns a Tormentor named Threshold Sentinel in the central room. The entire Fireteam should regroup in the central room to eliminate the Tormentor.
Defeating the Tormentor triggers the message “energy flows into the architecture,” indicating that a plate pair and conduits have been activated.
2.3. Charging Conduits
Repeat the initial process, sending teams through the newly opened doors while being mindful of Supplicants. One team will eventually find a charged plate or an open conduit. The team with the charged plate and open conduit should start bouncing energy back and forth to generate Resonance, while the other team focuses on eliminating enemies and their Champion.
2.4. Resonance Generation
As Resonance generates, it appears in each room and in the central chamber. The plate players should maintain the energy bounce until they receive a prompt indicating that all Resonance has spawned or the timer is low (under a minute). Non-plate holders should collect Resonance from the central chamber and assist plate players when Subjugators appear.
2.5. Locking Conduits and Extending the Timer
Once both teams are prepared, with everyone having gathered as much Resonance as possible, send the energy through the wires and lock both conduits. This is done by having a player with Resonance shoot the conduit and then step on the nearby plate once it’s been filled with energy.
2.6. Final Steps
Correctly locking the conduits spawns a large Subjugator in the central room. Work together to eliminate it, spawning the bank. Deposit all Resonance to extend the timer. A successful deposit grants up to four minutes and 15 seconds on the clock. Repeat this process three times. Completing the encounter triggers a massive staircase to descend from the ceiling, leading to the raid’s first boss.
3. Dissipation: Overcoming Taniks, the Herald of Finality
The first boss fight pits you against the Herald of Finality, also known as Taniks. This encounter takes place in a close-quarters arena.
3.1. Team Assignments
Divide into three teams of two, assigning each team to one of the three areas: middle (spawn), left (tower), and right. Everyone clears the first three waves of enemies on their respective sides. The third wave spawns a boss-level Taken enemy called a Trammel. The middle side gets a Taken Phalanx, the left gets a Taken Wizard, and the right gets a Taken Ogre. Kill the Trammel to charge the plates and open the conduit. The conduit will display a jumbled symbol initially.
3.2. The “Call to Reckoning”
Sometime during this phase, three members (one per side) receive the “Call to Reckoning” buff, summoning them to the middle of the arena. This buff signals that they should jump down and damage Taniks.
3.3. Breaking Taniks’ Weakspot
Players with “Call to Reckoning” should jump into the arena and shoot Taniks’ forehead. After dealing some damage, Taniks’ weakspot will glow and he will summon a Taken Blight somewhere in the arena to shield himself. Shoot the Blight to remove the shield and continue shooting his head until it pops. This grants the “Stolen Favor” debuff.
3.4. Charging and Reading the Conduits
Once you are back on your side with “Stolen Favor”, note the symbol displayed on the conduit: a triangle or a circle. This indicates which Resonance buff (Pyramidal or Spherical Resonance) you need to activate it. If you miss a plate after the first bounce and the energy fizzles, the Trammel respawns and locks your conduit. Kill the Trammel to reset the conduit, but be aware that the symbol may change.
3.5. Resonance Collection
After you kill the Trammel, one of the plates on your side will start with the energy. The plate furthest from Taniks always starts with the energy after you kill the Trammel, while the plate closer to Taniks has the conduit.
The back plate player can pick up any Resonance type, ensuring they leave the needed type for their partner. If you’re the front plate player, grab the Resonance type opposite your conduit symbol.
3.6. Damaging Taniks
Once you’ve banked all Resonance and regained time, run into the glowing arena and attack Taniks with swords. Keep attacking until he becomes immune. Repeat this process until Taniks reaches the final portion of his health bar, triggering a final stand where he summons the other three Trammel bosses. Ignore the adds and focus on Taniks until he is defeated.
3.7. Loot and Progression
Grab the loot from the chest and head back to the middle area. Turn left and you’ll see some massive green columns that will lead you to the next encounter. Follow the tricky path — watch for the lights — and you’ll eventually reach the third encounter.
4. Repository: Opening the Path Through the Monolith
Similar to the previous encounter, the arena is divided into three sides, each with its plate ecosystem.
4.1. Encounter Start
Pick up the square Resonance (Hexahedron Resonance) in the middle of the room and deposit it in the nearby bank. This spawns three Tormentors, one at the end of each plate. Teams of two eliminate the Tormentor on their side. The team member dealing the final blow gains the “Stolen Favor” buff, allowing them to see the Resonance type required by each conduit.
4.2. Generating Resonance
The player without Stolen Favor returns to the home plate (closest to the door) to prepare to send energy. The player with Stolen Favor stands on the plate near the conduit. Bounce the energy back and forth to spawn circle, triangle, or square Resonance. Coordinate with your team to identify the quadrant where the needed Resonance is located.
4.3. Securing the Path
Once the plates have been bounced three or four times, with plenty of Resonance on the floor, let the plate energy fizzle out and collect the Resonance needed. Non-buffed players should avoid Resonance until the buffed players have their requirements. With three of the needed Resonance, and after allowing allies to pick up any excess shapes, kill the Subjugator near your conduit and lock the conduit in place. Locking all three conduits spawns the bank in the middle of the room, along with deadly turrets. Deposit Resonance to regain time, open the door, and defeat the Unstoppable Champion.
4.4. Room Variations
Repeat this process three times across three rooms that increase in complexity:
- First Room: Plates flow in a straight line, and enemies are easy to burn down.
- Second Room: The left plate’s wire crosses over the middle plate, so the left plate conduit player ends up on a raised platform in the middle of the room. The middle conduit player stands on a plate on the left side near where the Tormentors spawn.
- Third Room: Multiple pits, and three Tormentors spawn together. Wires are crossed, so the left side’s conduit is the middle plate, the middle conduit’s is the right plate, and the right conduit’s is the left plate.
4.5. Loot and Progression
After banking the third time and defeating the Unstoppable Champion, the door in the back opens, revealing a chest with loot. Follow the path to Verity, the puzzle encounter.
5. Verity: Dissecting and Moving Shapes
Verity requires puzzle-solving prowess, reminiscent of the Vault encounter from the Last Wish raid.
5.1. Preparing for Decimation
Ensure each Fireteam member has changed their armor and has a distinct Ghost Shell. Note these details, as they are important for reversing Catatonic Decimation, a mechanic that freezes members of the team.
5.2. Reversing Catatonic Decimation
Two times per phase, the Fireteam will get decimated. Undecimated players grab the Ghosts of decimated players and return to the statues near the spawn point. The statues of decimated players will be missing. The decimated players can spectate through undecimated teammates and relay the location of their missing statue. Once matched with their Guardian’s statue, the Ghost resurrects the Guardian.
5.3. Escaping the Shadow Realm
When the encounter starts, three players are pulled into the shadow realm. These players are in solo instances of the normal arena. They must work together to escape.
Each Guardian in the shadow realm can see three statues around the center stage. Each statue is of one of the shadow realm Guardians and holds a shadowy shape. They must relay the shapes they see to their teammates.
5.4. Trading Shapes
Kill the Hive Knights in the shadow realm to find the needed shapes. Then do a trade.
5.5. How to Finalize Escape
The ultimate goal of the shadow realm is to collect the two shapes that your statue isn’t holding. After this is done a trade must commence. You should see the screen in the back of your room change. Repeat this until you have the shapes you need and your allies all have the shapes they need. With your 3D shape buff, run to the back of the room — which is normally blocked off by a barrier that looks like shattered glass. As long as your allies in the light realm are done dissecting the 3D shapes outside, you should all be able to walk through and join your friends.
5.6. Dissecting 3D Shapes
While shadow realm players collect shapes, those in the light realm dissect the pre-existing 3D objects.
- Cube (square + square)
- Sphere (circle + circle)
- Pyramid (triangle + triangle)
- Cylinder (circle + square)
- Cone (circle + triangle)
- Prism (triangle + square)
5.7. Dissection Process
Dunk some shapes. Kill the Knights that spawn in the room. Following the example above, take the circle and drop it into the left-most statue so you can dissect a circle from that 3D object. This will cause the left side statue to glow, meaning it’s ready for dissection. To complete the dissection, however, you’ll need to dunk a different shape in one of the other two statues.
Whenever you run out of Knights — as in you kill all three of them — two Unstoppable Ogres will spawn on the left and right sides of the arena. Help kill these if you’re the dissector, but they should really be the job of your bodyguards, the other two players in the room. Once they’re dead, three more Knights will spawn. You can perform this loop in perpetuity.
5.8. Proceeding to the Next Phase
When everyone is unfrozen, repeat this entire process two more times for a total of three phases.
6. The Witness: How to Beat the Final Boss
The final fight against The Witness takes place in an arena split into two sides.
6.1. Breaking The Witness’ Glyphs
To damage The Witness, players must remove the protective glyphs on its jacket using the Glyphbreaker buff. This requires a coordinated effort involving two teams: Glyphbreakers and enemy slayers. There are three types of hands in the encounter, and you should assign each Glyphbreaker player to each hand type just to keep it simple:
- Down hand: Gives the Pyramidal Resonance buff.
- Up hand: Gives the Spherical Resonance buff.
- Wall hand: Gives the Hexahedron Resonance buff.
6.2. Gaining the Glyphbreaker Buff
Each Glyphbreaker player stands in the area targeted by their assigned hand. They shoot the Resonance bangle on the hand to reveal a green (Pyramidal Resonance), red (Hexahedron Resonance), or yellow (Spherical Resonance) bangle underneath. Find the hand that can give you the buff you need. If you shoot wall hand and see that you need the Pyramidal buff, go stand in the attack area of the down hand for a brief moment. After a second or two, you’ll gain the Pyramidal Resonance buff. If done properly, you’ll destroy the hand and gain the Glyphbreaker buff. With Glyphbreaker, players jump over to the root platform and destroy a button.
6.3. Surviving The Witness’ Trap
The Witness will devise a trap for you when you destroy one of its hands and gain Glyphbreaker. The moment you pop a hand, you have to check to see if you got the prompt or not, as the last hand destroyed is the key to foiling The Witness here. If you pop two hands too close together, you can make it hard to tell what the solution will be.
Determine the hand type that spawned the test and then have your Glyphbreaker players look to the middle of the room. In front of The Witness, you’ll see a bunch of Resonance crystals floating in mid-air. You need to create a shape — square, circle, or triangle — that matches the hand type that was just destroyed. When the remaining crystals are in the shape of a square, leave them alone. If you get the correct shape, you’ll get a prompt that says “The Witness’ trap is foiled.” You can find examples with this map from Mactics.
6.4. Dealing Damage to The Witness
Once all six glyphs are destroyed, the team enters the damage phase. The Witness’ crit spot is the glowing slit in its chest, and it’ll open up once the platform reaches its max height. As soon as it opens, start shooting, but keep an eye on The Witness’ hands and eyes. The Witness will use several mechanics.
The Witness will tire for a few seconds after it attacks three or four times. During this very short downtime, all you need to focus on is damage. The Witness will look annoyed and do a slow rear back to slam the plate down. Jump off the back and immediately start killing enemies or The Witness will kill you.
6.5. Claim Victory
Repeat this entire process until you reach the final stand, but keep in mind that you only have three phases to do this, so you need to hit hard when you get the chance.
7. Essential Tips for Success in Salvation’s Edge
- Communication is Key: Clear and consistent communication is crucial for coordinating actions, identifying threats, and solving puzzles.
- Role Assignment: Assign specific roles and responsibilities to each team member to maximize efficiency and minimize confusion.
- Weapon Loadouts: Optimize your weapon loadouts for each encounter, considering enemy types, damage requirements, and personal playstyles.
- Master Mechanics: A deep understanding of the charging plates, Resonance, and conduit mechanics is essential for progressing through the raid.
- Practice and Patience: Don’t get discouraged by early failures. Practice each encounter, learn from mistakes, and remain patient as you refine your strategies.
8. Additional Resources from CONDUCT.EDU.VN
For more in-depth guides, strategies, and community insights, explore the Destiny 2 section on CONDUCT.EDU.VN. Discover valuable resources to enhance your understanding of Salvation’s Edge and improve your overall raid experience. Here are a few links to get you started:
- Ethical Considerations in Gaming: A Guide for Players and Developers
- AI in Education: Ethical Use and Guidelines for Conduct
9. Overcoming Challenges with CONDUCT.EDU.VN
Navigating the complexities of Salvation’s Edge can be challenging, especially when facing unclear guidelines or conflicting information. CONDUCT.EDU.VN offers a reliable source of detailed and easy-to-understand information, helping you overcome these obstacles and build a professional, ethical gaming environment. With clear explanations, real-world examples, and up-to-date information, CONDUCT.EDU.VN ensures you have the knowledge and confidence to tackle any situation.
10. Embrace Ethical Gameplay with Confidence
Ready to conquer Salvation’s Edge with confidence and skill? Visit CONDUCT.EDU.VN to explore more articles and guides that will help you excel in Destiny 2 and other games. Equip yourself with the best strategies, understand the nuances of raid mechanics, and build a reputation as a knowledgeable and ethical player.
For further assistance, contact us at:
Address: 100 Ethics Plaza, Guideline City, CA 90210, United States
WhatsApp: +1 (707) 555-1234
Website: conduct.edu.vn
FAQ: Salvation’s Edge Raid Guide
Here are 10 frequently asked questions about the Salvation’s Edge raid in Destiny 2: The Final Shape.
1. What is the recommended Power Level for Salvation’s Edge?
The recommended Power Level is 1945, but with the Fireteam Power system, one teammate at 1950 or higher is sufficient.
2. What are the main mechanics in the first three encounters?
The main mechanics involve activating charging plates and wires, creating Resonance pickups, and activating conduits.
3. How do you activate charging plates and wires?
By stepping on a glowing plate, you send energy to its pair. Stepping on the receiving plate before the energy dissipates rebounds the energy, spawning Resonance.
4. What are the different types of Resonance?
The different types of Resonance are Pyramidal (triangle), Spherical (circle), and Hexahedron (square).
5. How do you activate conduits?
Shoot the conduit with the proper Resonance shape buff, then step on the plate near the conduit once the energy arrives.
6. How do you extend the timer in the first three encounters?
By depositing excess Resonance into the Resonance bank.
7. What is the key strategy for the Verity encounter?
Coordinating with teammates in the shadow realm to trade shapes and dissect 3D objects in the light realm.
8. What is the role of the “dissector” in the Verity encounter?
The dissector removes shapes from 3D objects in the light realm to match the shapes needed by teammates in the shadow realm.
9. How do you damage The Witness in the final encounter?
By breaking the protective glyphs on its jacket using the Glyphbreaker buff, then attacking its chest when it opens.
10. How do you survive The Witness’ trap?
By destroying the Resonance crystals to create a shape (square, circle, or triangle) that matches the hand type that spawned the test.