The Pit of Heresy dungeon in Destiny 2, introduced with the Shadowkeep expansion, remains a rewarding and challenging activity for Guardians of all levels. Even with the ever-evolving landscape of Destiny 2 and the arrival of Lightfall, this dungeon continues to offer high-stat armor and desirable legendary weapons, making it a worthwhile endeavor for both new and veteran players. Whether you’re a fresh Guardian stepping into the pit for the first time, or a seasoned veteran seeking a perfect god roll or the ultimate Solo Flawless triumph, this Destiny 2 Pit Of Heresy Guide will equip you with the knowledge and strategies needed to succeed.
Unlocking the Pit of Heresy
Before diving into the depths, you’ll need to unlock access to the Pit of Heresy. This is achieved through The Deepening Wake questline, initiated by Eris Morn on the Moon. If you’re new to Shadowkeep content, your first step is to complete the main Shadowkeep campaign missions.
The Deepening Wake Quest
Image alt text: Eris Morn, the main quest NPC on the Moon in Destiny 2 Shadowkeep, providing The Deepening Wake quest.
Once you’ve concluded the Shadowkeep campaign and spoken to Eris Morn, she will bestow upon you The Deepening Wake quest. This quest involves two straightforward objectives designed to introduce you to the lunar environment and activities:
- Open a Tier III chest at the Altars of Sorrow: The Altars of Sorrow is a public event on the Moon. Simply participate in the event and ensure you successfully complete enough waves to spawn and open a Tier III chest.
- Kill 20 Nightmares while participating in the Altars of Sorrow: As you engage in the Altars of Sorrow event, eliminating the Nightmare enemies will naturally progress this objective.
Given the public nature of Altars of Sorrow, you’ll likely find ample support from fellow Guardians, making this initial quest phase quite easy. Focus on using builds with area-of-effect damage to efficiently clear waves of enemies. Completing these objectives unlocks the Pit of Heresy dungeon node on your Moon map, ready for you to explore.
For players aiming to farm specific weapons from the Pit of Heresy, consider undertaking Eris Morn’s weekly bounties beforehand. These bounties reward you with the Hymn of Desecration, an item that significantly increases weapon drop rates within the Necropolis and Chamber of Suffering encounters, optimizing your farming efficiency.
Navigating the Pit of Heresy Dungeon
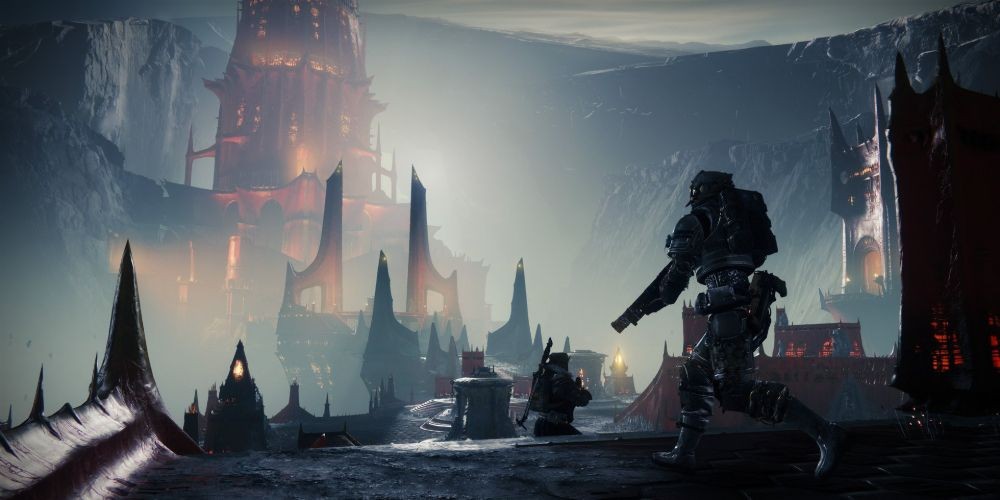
Image alt text: A fireteam of Guardians venturing into the ominous entrance of the Pit of Heresy dungeon in Destiny 2.
Being an older dungeon, the Pit of Heresy boasts an accessible entry point, with a recommended power level of 1600, the base power level in Destiny 2 as of Lightfall. While fireteams of up to three Guardians are recommended, and often preferred, for tackling this dungeon, solo completion is achievable for skilled players seeking a significant challenge.
Upon entering, prepare for a descent into the abyss. The initial section involves carefully navigating a series of cliffs, requiring precise jumps to avoid falling into the depths. Utilize your jump abilities strategically as you descend, as missteps can lead to fatal falls. Reaching the bottom platform marks the beginning of the first encounter: the Necropolis.
Necropolis Encounter
 Destiny 2 Pit of Heresy
Image alt text: Guardians facing the first challenge in the Pit of Heresy dungeon, the Necropolis encounter, indicated by green Hive symbols.
The Necropolis encounter revolves around deciphering Hive symbols and utilizing swords to defeat powerful enemies. Observe the green Hive symbols atop buildings and structures; these indicate the general direction of your objectives. Begin by heading to the large red tower dominating the cliff edge, identifiable by the green orbs marking its location.
Inside the tower, you’ll encounter a Swordbearer Knight in a spacious room. Defeat this Knight and claim the sword they drop. Upon acquiring the sword, notice the three green Hive symbols displayed on the wall within the tower. These symbols correspond to three smaller towers scattered around the Necropolis, each marked by the same green indicators.
Your next task is to visit each of these three smaller towers, identified by the symbols from the main tower. Within each smaller tower, you must defeat a Pitkeeper Knight. There’s no specific order required for clearing these towers, allowing for strategic division of your fireteam.
After defeating a Pitkeeper Knight in a smaller tower, a room within that tower becomes accessible. Inside each room awaits a boss enemy. Crucially, these bosses are immune to standard weapon fire, abilities, and Supers. The only way to damage them is by using the sword dropped by Swordbearer Knights. Additional Swordbearer Knights can be found patrolling the towers should you need more swords.
Circular Hive elevators within each tower provide quick access back to the central, tallest tower. Exercise caution when using these elevators while carrying a sword, as collision issues can occur, potentially damaging or even killing the sword-wielding player.
Here’s a breakdown of the boss types and how to defeat them with the sword:
- Knight: Defeat with standard sword melee attacks.
- Wizard: Use heavy sword attacks to overcome their defenses.
- Shrieker: Block with the sword to reflect the Shrieker’s projectiles back at it, causing damage.
Due to the heavy reliance on swords in this encounter, specific builds are less critical. However, be mindful of roaming Ogres and Knights that can overwhelm you. Don’t hesitate to drop the sword temporarily to dispatch these threats with your regular weapons. Remember that dropped swords will despawn after a short duration. For solo or no-death runs, proceed cautiously and consider avoiding elevators due to potential collision-related deaths.
Tunnels of Despair Encounter
Image alt text: Navigating the perilous Tunnels of Despair in Destiny 2’s Pit of Heresy, avoiding traps and powerful Ogres.
Upon defeating all three bosses in the Necropolis, a pillar of green light will guide you towards the next tower, marking your path forward. Clear the enemies within this tower to open the doorway leading to the Tunnels of Despair. This section presents a maze of doorways, most of which are trap doors designed to catapult you off the map.
Instead of venturing through the deceptive doorways, locate a subtle slit in the wall of doors, situated to the right of the entry platform. This hidden passage leads to the next area, where you’ll face the formidable Ogres.
The key to navigating the Tunnels of Despair is evasion, not direct confrontation with the Ogres. These powerful enemies are virtually invincible in this section. Utilize the interconnected cave system to sneak past them. To move between caves, shoot the Hive webbing blocking passageways to create pathways.
Within each of the three caves, your objective is to defeat a yellow-bar Knight. Each Knight drops an orb. Collect these orbs and slam them near one of the three blocked doorways to defuse the runes protecting each door. Repeat this process for all three doorways to progress further into the dungeon.
While the Knights themselves pose a minimal threat, the Ogres are a significant danger. Their eye blasts can quickly eliminate Guardians, and their slam attacks can launch you into walls, causing substantial damage. Survival-focused builds and abilities become highly valuable here. Healing grenades and similar restorative abilities can greatly enhance your survivability against the Ogre’s onslaught.
Chamber Of Suffering Encounter
Image alt text: Guardians holding the platform in the Chamber of Suffering encounter in Destiny 2 Pit of Heresy, managing the Curse of Suffering debuff.
The Chamber of Suffering encounter introduces a unique mechanic: the Curse of Suffering debuff. Upon entering the chamber, proceed to the totem at the back and have at least one Guardian stand on the designated platform. Failure to have a Guardian on the platform will eventually cause it to glow red and trigger a team wipe.
While on the platform, Guardians accumulate stacks of the Curse of Suffering. This debuff increases damage taken, stacking up to five times. To mitigate the curse, you must kill Heretical Knights and collect the orbs they drop. Slamming these orbs near the totem temporarily removes the curse.
Effective strategy in the Chamber of Suffering involves rotating players off the platform to collect orbs and cleanse the curse. Coordinate your team to ensure continuous platform occupation while managing the curse stacks. After slamming six orbs, the door at the back of the chamber will unlock, granting access to the next area.
Defensive abilities like Bubble shields (Titan) and Wells of Radiance (Warlock) are exceptionally effective for sustaining your team on the platform. Be aware that dunking orbs triggers the spawning of Knights on platforms near the chamber’s ceiling. These elevated Knights can be dangerous, so prioritize eliminating them quickly. Xenophage, if available, is highly effective here, capable of one-shotting the elevated Knights and dealing significant damage to the Heretical Knights on the ground.
For solo players, managing the platform and curse stacks requires careful timing and survivability. Prioritize killing Knights before cleansing to minimize downtime on the platform. Survival-oriented builds utilizing invisibility, Woven Mail, or restoration effects are invaluable for soloing this encounter, as each orb dunk triggers a substantial enemy spawn wave.
The Harrow Encounter
Image alt text: Navigating the treacherous spinning fans and spike traps in The Harrow section of Destiny 2’s Pit of Heresy dungeon.
The Harrow is primarily a traversal challenge, demanding careful navigation through spinning fans and spike traps as you descend further into the pit. While potentially frustrating due to its platforming elements, the concept is relatively straightforward.
Upon reaching the initial opening of The Harrow, observe the three green Hive symbols on the wall. This visual cue should be familiar from the Necropolis encounter. Your task is to traverse the pit, avoiding the traps, to locate three distinct locations, each marked with one of the three symbols.
Within each symbolized location, you’ll find a Wizard enemy that must be defeated. Explore the area and utilize your radar to pinpoint the Wizards’ locations. While not exceptionally powerful, these Wizards can inflict decent damage, so exercise caution during engagements. After eliminating all three Wizards, the ruins in the center of the area will collapse, revealing a red doorway. Proceed through this doorway to advance to the final encounter.
The main difficulty in The Harrow lies in spatial awareness and trap avoidance. Keeping track of symbol locations while dodging traps and preventing falls is crucial. Movement-enhancing abilities and exotics can be incredibly beneficial here. Consider using the Strand Grapple, Icarus Dash (Warlock), or Lion Ramparts (Titan) to improve your mobility and navigate the treacherous environment more effectively.
Final Encounter – Zulmak, Instrument of Torment
Image alt text: Guardians engaging in the final boss fight against Zulmak, Instrument of Torment, in Destiny 2 Pit of Heresy.
The red doorway from The Harrow leads to a long bridge, culminating in the final encounter against Zulmak, Instrument of Torment. Before confronting Zulmak directly, you must repeat the sword mechanic from the Necropolis encounter, facing three familiar minibosses.
These minibosses – a Knight, a Wizard, and a Shrieker – spawn on platforms surrounding the central arena where Zulmak resides. They retain the same invulnerabilities as their Necropolis counterparts, requiring the same sword-based strategies for defeat (melee for Knight, heavy attack for Wizard, reflect for Shrieker). Swordbearer Knights spawn in the center of the arena, providing the necessary swords.
Once you’ve defeated all three minibosses and dunked their corresponding orbs around Zulmak’s platform, a green glow will emanate from the platform. You must stand within this green circle to damage Zulmak.
If you fail to defeat Zulmak quickly enough, he will impale his sword into the platform and unleash a crystal energy attack, wiping any Guardians standing on the platform. With a coordinated fireteam of three, utilizing effective damage strategies, you should be able to defeat Zulmak before he triggers this wipe mechanic.
For solo players or fireteams struggling with damage output, you may need to cycle damage phases. When Zulmak prepares his wipe attack, retreat from the platform. Repeat the miniboss and orb dunking process to re-enable Zulmak’s damage phase.
Optimized DPS builds are paramount for a swift Zulmak takedown. Highly effective builds include Starfire Protocol Warlock and Thundercrash Titan. Weapon choices such as Witherhoard, Izanagi’s Burden, and powerful rocket launchers are all reliable options for maximizing damage against Zulmak.
Upon Zulmak’s defeat, a chest will spawn, rewarding you with legendary armor and weapons. Like all encounters within the Pit of Heresy, this chest can drop any of the Moon-themed weapons and armor, including the coveted Premonition pulse rifle.
Tips and Strategies for Pit of Heresy
- Fireteam Composition: While the Pit of Heresy is soloable, a well-coordinated fireteam significantly eases the challenge, especially for newer players.
- Weapon Diversity: Ensure your fireteam has a mix of weapon types to handle various enemy types effectively. Consider including a sword for the Necropolis and Zulmak encounters, and long-range options for Ogres and Shriekers.
- Build Synergies: Coordinate your builds to complement each other. Support roles with healing or damage buffs can greatly enhance team survivability and damage output.
- Communication is Key: Clear communication is crucial, especially in encounters like the Chamber of Suffering and the Zulmak fight, where coordination is essential for survival.
- Practice Makes Perfect: Don’t be discouraged by initial failures. Learning the encounter mechanics and refining your strategies through practice is key to mastering the Pit of Heresy.
Rewards from the Pit of Heresy
The Pit of Heresy offers a rewarding loot pool, making it a worthwhile dungeon to farm. Notable rewards include:
- High-Stat Armor: The dungeon is a reliable source of armor with high stat rolls, allowing for optimized character builds.
- Moon Weapons: Acquire legendary weapons themed around the Moon, some with unique perk combinations.
- Premonition Pulse Rifle: This legendary pulse rifle is a sought-after reward for pulse rifle enthusiasts.
- Xenophage Exotic Machine Gun Quest: Completing Pit of Heresy is essential for progressing the quest to obtain the powerful Xenophage exotic machine gun.
Destiny 2 is available on PC, PlayStation 4, PlayStation 5, Xbox One, and Xbox Series X/S.
Now armed with this comprehensive Destiny 2 Pit of Heresy guide, venture into the depths, conquer the challenges, and claim your rewards Guardian!