Guided Access is a powerful feature on iPhones, iPads, and iPod Touches, but what happens when your device runs out of battery while in Guided Access mode? At CONDUCT.EDU.VN, we provide comprehensive guidance on device settings and accessibility features, ensuring users can navigate their devices with confidence. This article delves into the behavior of Guided Access when a device loses power and offers insights into managing this feature effectively, including how to avoid getting stuck and alternative solutions for regaining control.
1. Understanding Guided Access on iOS Devices
Guided Access is an accessibility feature on Apple devices that allows you to lock your device into a single app. This can be particularly useful in various scenarios, such as:
- Educational Settings: Teachers can use Guided Access to keep students focused on a specific educational app.
- Parental Control: Parents can restrict their child’s access to a single app to ensure they are only using approved content.
- Public Kiosks: Businesses can use Guided Access to limit device functionality in public kiosks, preventing users from accessing other apps or settings.
- Accessibility Needs: Individuals with cognitive disabilities may benefit from Guided Access to simplify device usage and prevent accidental navigation.
To enable Guided Access, follow these steps:
- Go to Settings on your iOS device.
- Tap on Accessibility.
- Scroll down and select Guided Access.
- Toggle the Guided Access switch to the on position.
- Set up a passcode that will be required to exit Guided Access mode. You can also enable Touch ID or Face ID for easier access.
- Customize the settings according to your preferences. You can disable the hardware buttons, like volume buttons, sleep/wake button and also disable touch functionality on certain areas of the screen.
Once Guided Access is enabled, you can start a session by opening the desired app and triple-clicking the side button (on devices without a Home button) or the Home button (on devices with a Home button). This will bring up the Guided Access menu, where you can customize the session and start it. Understanding Guided Access Passcode, Guided Access Limitations, and Guided Access Troubleshooting is crucial for managing your device effectively.
 Enabling Guided Access in iOS Settings
2. The Critical Question: Does Guided Access Turn Off When the Battery Drains?
The main question at hand is whether Guided Access automatically turns off when your iPhone, iPad, or iPod Touch runs out of battery. The answer is generally yes, but with a few important nuances.
- Automatic Termination: When your device’s battery completely drains and the device shuts down, Guided Access is typically terminated. Upon restarting the device, it should boot up to the lock screen or home screen, depending on your settings, and not remain in Guided Access mode.
- Potential Exceptions: In some instances, especially with older iOS versions or if there are software glitches, the device might attempt to resume the Guided Access session upon restart. This is not the intended behavior, but it can occur.
- Importance of Passcode: The passcode you set for Guided Access is crucial. If the device restarts and attempts to resume the Guided Access session, you’ll need this passcode to exit. Without it, you might find yourself locked in the app.
- Battery Health: A device with poor battery health might exhibit unexpected behavior. It’s possible that a sudden drop in battery percentage could cause the device to shut down in a way that doesn’t properly terminate the Guided Access session.
To ensure a smooth experience, it’s advisable to regularly update your iOS to the latest version, as updates often include bug fixes and improvements to system stability. Always remember your Guided Access passcode, and consider enabling Touch ID or Face ID as a backup. Accessibility Settings, Mobile Device Management (MDM), and iOS Security are important aspects related to Guided Access.
3. Real-World Scenarios and User Experiences
To better understand how Guided Access behaves when a device’s battery dies, let’s consider some real-world scenarios and user experiences:
-
Scenario 1: Educational Setting
- Situation: A teacher uses Guided Access to lock an iPad into a math learning app during a classroom activity. The iPad’s battery dies unexpectedly in the middle of the session.
- Outcome: When the teacher recharges the iPad and turns it back on, the device boots up to the lock screen, requiring the passcode to unlock. Guided Access is no longer active.
-
Scenario 2: Parental Control
- Situation: A parent enables Guided Access on their child’s iPhone, restricting access to a single educational game. The child plays the game until the battery is completely drained.
- Outcome: After the phone is recharged, it restarts to the home screen, and Guided Access is disabled. The child can now access other apps on the phone.
-
Scenario 3: Public Kiosk
- Situation: A business uses Guided Access on an iPad to create a customer feedback kiosk. The iPad’s battery dies overnight due to a power outage.
- Outcome: The next morning, when the iPad is plugged in and turned on, it restarts to the lock screen. An employee unlocks the device and needs to manually re-enable Guided Access for the kiosk to function.
These scenarios highlight the typical behavior of Guided Access when a device’s battery dies: the session is terminated, and the device returns to its normal state upon restart. However, it’s important to be prepared for potential exceptions, as mentioned earlier. Understanding Device Management, System Administration, and Kiosk Mode is essential for effective use of Guided Access in these scenarios.
4. Steps to Take if Your Device Remains in Guided Access After a Battery Drain
Despite the typical behavior, there are instances where your device might remain stuck in Guided Access even after the battery has died and the device has been restarted. Here are steps you can take to resolve this issue:
-
Force Restart:
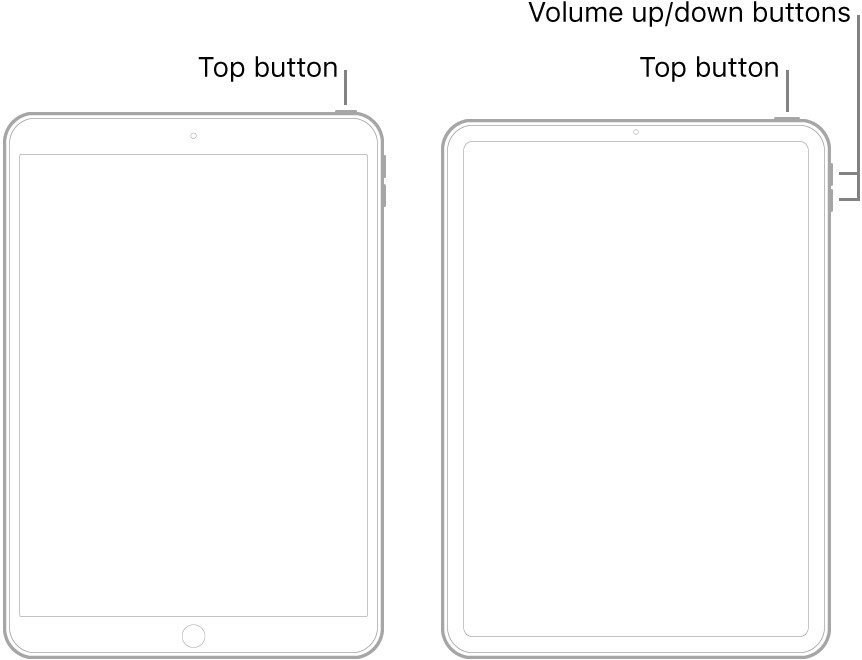
- For iPhones with Face ID, iPhone SE (2nd generation), iPhone 8, iPhone 8 Plus, iPad Pro 11-inch, and iPad Pro 12.9-inch:
- Press and quickly release the volume up button.
- Press and quickly release the volume down button.
- Press and hold the side button until you see the Apple logo.
- For iPhone 7 and iPhone 7 Plus:
- Press and hold both the side button and the volume down button until you see the Apple logo.
- For iPhone 6s and earlier, iPad with Home button, or iPod touch (6th generation) and earlier:
- Press and hold both the Home button and the top (or side) button until you see the Apple logo.
- A force restart can often interrupt the Guided Access session and allow the device to reboot normally.
- For iPhones with Face ID, iPhone SE (2nd generation), iPhone 8, iPhone 8 Plus, iPad Pro 11-inch, and iPad Pro 12.9-inch:
-
Try the Guided Access Passcode:
- After the device restarts, it might prompt you for the Guided Access passcode. Enter the passcode to exit the session. If you’ve forgotten the passcode, see the next step.
-
If You’ve Forgotten the Passcode:
- If you can’t remember the Guided Access passcode, you’ll need to erase your device using iTunes or Finder on a computer. This will remove all data from your device, including the Guided Access settings.
- Connect your device to a computer.
- Put your device into recovery mode:
- For iPhones with Face ID: Press and quickly release the volume up button. Press and quickly release the volume down button. Then, press and hold the side button until you see the recovery mode screen.
- For iPhone 7 and iPhone 7 Plus: Press and hold both the volume down button and the side button until you see the recovery mode screen.
- For iPhone 6s and earlier, iPad with Home button, or iPod touch (6th generation) and earlier: Press and hold both the Home button and the top (or side) button until you see the recovery mode screen.
- In iTunes or Finder, you’ll see an option to restore or update. Choose Restore. This will erase your device and install the latest version of iOS.
- Follow the on-screen instructions to set up your device as new.
- If you can’t remember the Guided Access passcode, you’ll need to erase your device using iTunes or Finder on a computer. This will remove all data from your device, including the Guided Access settings.
-
Remote Management:
- If the device is under Mobile Device Management (MDM), the administrator can remotely disable Guided Access or reset the passcode.
-
Contact Apple Support:
- If none of the above steps work, you may need to contact Apple Support for further assistance. They may have additional troubleshooting steps or be able to help you restore your device.
These steps should help you regain control of your device if it remains stuck in Guided Access after a battery drain. Always prioritize remembering your Guided Access passcode to avoid the need for a full device reset. Considering User Authentication, Data Security, and Remote Support can provide a safer and more manageable Guided Access experience.
5. Preventing Guided Access Issues: Best Practices
To minimize the chances of encountering issues with Guided Access, especially those related to battery drain, consider the following best practices:
-
Regularly Update iOS:
- Keep your device updated with the latest version of iOS. Apple often includes bug fixes and improvements in their software updates, which can enhance the stability of Guided Access.
-
Remember Your Passcode:
- Store your Guided Access passcode in a secure location. Consider using a password manager or writing it down and keeping it in a safe place.
-
Enable Touch ID or Face ID:
- Enable Touch ID or Face ID as a backup method for exiting Guided Access. This can be particularly helpful if you forget your passcode.
-
Monitor Battery Levels:
- Pay attention to your device’s battery level, especially when using Guided Access for extended periods. Recharge the device before the battery gets too low to prevent unexpected shutdowns.
-
Test Guided Access Regularly:
- Periodically test Guided Access to ensure it is functioning correctly. This can help you identify any potential issues before they become a problem.
-
Avoid Extreme Temperatures:
- Extreme temperatures can negatively impact battery performance. Avoid using Guided Access in very hot or very cold environments.
-
Proper Shutdown:
- When possible, manually exit Guided Access before turning off your device. This can help ensure that the session is properly terminated and doesn’t cause issues upon restart. To exit Guided Access, triple-click the side or Home button, enter your passcode, and tap End.
-
Use Reliable Chargers:
- Always use Apple-certified chargers and cables. Low-quality chargers can damage the battery and cause unexpected shutdowns.
-
Check Battery Health:
- Regularly check the battery health of your device. If the battery health is significantly degraded, consider replacing the battery to improve performance and prevent unexpected shutdowns. You can check battery health by going to Settings > Battery > Battery Health.
-
Understand MDM Policies:
- If your device is managed under an MDM solution, understand the policies and restrictions that apply to Guided Access. This can help you avoid conflicts and ensure that you can properly manage the feature.
By following these best practices, you can significantly reduce the risk of encountering issues with Guided Access and ensure a smoother experience. This includes considering System Security, Mobile Device Security, and Application Management as part of your strategy.
6. Alternative Solutions for Regaining Control
If you find yourself locked out of your device due to Guided Access issues and the standard methods aren’t working, here are some alternative solutions to consider:
-
Using iCloud to Mark as Lost:
- If you have “Find My iPhone” enabled on your device, you can use iCloud to mark the device as lost. This can sometimes override the Guided Access settings and allow you to regain control.
- Go to iCloud.com on a computer or another device.
- Sign in with your Apple ID.
- Click on Find iPhone.
- Select your device from the list.
- Click on Mark as Lost.
- Follow the on-screen instructions to set a new passcode or display a message on the screen.
- This method may not always work, but it’s worth trying if you’re locked out of your device.
- If you have “Find My iPhone” enabled on your device, you can use iCloud to mark the device as lost. This can sometimes override the Guided Access settings and allow you to regain control.
-
DFU Restore:
- A DFU (Device Firmware Update) restore is a more advanced method that can be used to completely erase and restore your device. This is similar to a recovery mode restore, but it bypasses certain software checks and can be more effective in resolving stubborn issues.
- Connect your device to a computer.
- Put your device into DFU mode:
- For iPhone 8 and later: Press and quickly release the volume up button. Press and quickly release the volume down button. Press and hold the side button until the screen goes black. Then, press and hold both the side button and the volume down button for 5 seconds. Release the side button but continue holding the volume down button until iTunes or Finder recognizes your device in recovery mode.
- For iPhone 7 and iPhone 7 Plus: Press and hold both the side button and the volume down button until the screen goes black. Then, continue holding both buttons until iTunes or Finder recognizes your device in recovery mode.
- For iPhone 6s and earlier: Press and hold both the Home button and the side button until the screen goes black. Then, continue holding both buttons until iTunes or Finder recognizes your device in recovery mode.
- In iTunes or Finder, you’ll see an option to restore your device. Choose Restore.
- Follow the on-screen instructions to set up your device as new.
- A DFU restore should only be used as a last resort, as it will erase all data from your device.
- A DFU (Device Firmware Update) restore is a more advanced method that can be used to completely erase and restore your device. This is similar to a recovery mode restore, but it bypasses certain software checks and can be more effective in resolving stubborn issues.
-
Third-Party Software:
- There are third-party software tools available that claim to be able to remove Guided Access locks without erasing your device. However, these tools are often unreliable and may contain malware. Use them with caution and only download them from reputable sources.
-
Hardware Solutions:
- In some rare cases, a hardware issue may be preventing you from exiting Guided Access. If you suspect this is the case, you may need to take your device to an authorized Apple service provider for repair.
These alternative solutions can provide a way to regain control of your device if you’re locked out due to Guided Access issues. However, they should be used with caution, and you should always back up your device before attempting any advanced troubleshooting steps. Understanding aspects such as Data Recovery, Advanced Troubleshooting, and Hardware Diagnostics can be beneficial in such situations.
7. The Importance of Compliance and Ethical Considerations
When using Guided Access, it’s crucial to consider compliance and ethical implications, especially in settings such as education, business, and accessibility. Here are some key points to keep in mind:
-
Data Privacy:
- Ensure that you comply with all applicable data privacy laws and regulations when using Guided Access. This includes obtaining consent from users before enabling the feature and protecting their personal information.
-
Accessibility Standards:
- When using Guided Access to assist individuals with disabilities, ensure that you are following accessibility standards and guidelines. This includes providing alternative input methods and ensuring that the locked app is fully accessible.
-
Terms of Service:
- Comply with the terms of service of any apps that you use with Guided Access. Some apps may have restrictions on how they can be used or modified.
-
Transparency:
- Be transparent with users about the fact that Guided Access is enabled on their device. Explain the purpose of the feature and how it works.
-
Security:
- Take steps to secure your Guided Access passcode and prevent unauthorized access to the feature. This includes using a strong passcode and enabling Touch ID or Face ID.
-
Ethical Usage:
- Use Guided Access ethically and responsibly. Avoid using it in ways that could be considered coercive, manipulative, or discriminatory.
-
Legal Compliance:
- Ensure that your use of Guided Access complies with all applicable laws and regulations. This includes laws related to privacy, accessibility, and consumer protection.
By considering these compliance and ethical considerations, you can ensure that you are using Guided Access in a responsible and appropriate manner. This includes understanding Ethical Guidelines, Legal Compliance, and User Consent related to the feature.
8. Case Studies: Successful Implementations of Guided Access
Guided Access has been successfully implemented in various settings to improve focus, security, and accessibility. Here are some case studies that illustrate the benefits of this feature:
-
Case Study 1: Special Education Classroom
- Setting: A special education classroom for students with autism.
- Challenge: Students were easily distracted and struggled to stay focused on their learning activities.
- Solution: The teacher used Guided Access to lock each student’s iPad into a specific educational app. This eliminated distractions and helped students stay on task.
- Outcome: Students showed improved focus and engagement, leading to better learning outcomes.
-
Case Study 2: Restaurant Kiosk
- Setting: A fast-food restaurant using iPads as self-ordering kiosks.
- Challenge: Customers were accessing other apps and settings on the iPads, causing security and maintenance issues.
- Solution: The restaurant used Guided Access to lock the iPads into the ordering app. This prevented customers from accessing other features and ensured that the kiosks remained secure.
- Outcome: The restaurant experienced fewer security incidents and reduced maintenance costs.
-
Case Study 3: Assisted Living Facility
- Setting: An assisted living facility for seniors with cognitive impairments.
- Challenge: Residents were struggling to use their iPads due to the complexity of the interface and the risk of accidental navigation.
- Solution: The facility used Guided Access to lock the iPads into a simplified interface with only essential apps. This made it easier for residents to use their devices and stay connected with family and friends.
- Outcome: Residents showed improved confidence and independence in using their iPads, leading to a better quality of life.
-
Case Study 4: Museum Interactive Exhibit
- Setting: A museum using iPads to provide interactive exhibits.
- Challenge: Visitors were exiting the exhibit app and tampering with the iPad settings, disrupting the experience for other visitors.
- Solution: The museum used Guided Access to lock the iPads into the exhibit app. This ensured that visitors remained focused on the exhibit and prevented unauthorized access to the settings.
- Outcome: The museum improved the visitor experience and reduced the risk of damage to the iPads.
These case studies demonstrate the versatility and effectiveness of Guided Access in a variety of settings. By understanding the potential benefits and following best practices, you can successfully implement Guided Access to improve focus, security, and accessibility in your own environment. This involves considering aspects such as Technology Integration, User Training, and Accessibility Compliance as part of the implementation process.
9. Addressing Common Misconceptions About Guided Access
There are several common misconceptions about Guided Access that can lead to confusion and frustration. Let’s address some of these misconceptions:
-
Misconception: Guided Access Prevents All Access to Settings
- Reality: While Guided Access can restrict access to many settings, it does not prevent all access. Users can still adjust volume levels, brightness, and other basic settings.
-
Misconception: Guided Access is Only for Children
- Reality: Guided Access is useful for people of all ages and abilities. It can be used to improve focus, security, and accessibility in a variety of settings, not just for children.
-
Misconception: Guided Access is a Security Feature
- Reality: Guided Access is primarily an accessibility feature, not a security feature. While it can help prevent unauthorized access to certain apps and settings, it is not a substitute for proper security measures, such as strong passwords and encryption.
-
Misconception: Guided Access is Difficult to Use
- Reality: Guided Access is relatively easy to set up and use. The process involves enabling the feature in settings, setting a passcode, and triple-clicking the side or Home button to start a session.
-
Misconception: Guided Access is Only Available on iPhones and iPads
- Reality: Guided Access is available on all iOS devices, including iPhones, iPads, and iPod Touches.
-
Misconception: Guided Access is a Permanent Setting
- Reality: Guided Access is not a permanent setting. You can easily disable it in settings or exit a session by triple-clicking the side or Home button and entering your passcode.
-
Misconception: Guided Access Drains Battery Life
- Reality: Guided Access itself does not significantly drain battery life. However, using apps that consume a lot of power while in Guided Access can reduce battery life.
-
Misconception: Forgetting the Passcode Means a Device is Useless
- Reality: While forgetting the Guided Access passcode can be frustrating, it does not mean your device is useless. You can still erase your device using iTunes or Finder to regain access.
-
Misconception: Guided Access Blocks All External Connections
- Reality: Guided Access doesn’t inherently block all external connections. Depending on the settings, Wi-Fi and Bluetooth can still be active unless specifically disabled within the Guided Access options.
-
Misconception: Guided Access Guarantees Complete Focus
- Reality: While Guided Access minimizes distractions by locking the device to a single app, it doesn’t guarantee complete focus. The user’s attention can still wander, and it’s up to educators or caregivers to create an engaging environment.
By addressing these common misconceptions, we can help users better understand Guided Access and use it effectively to meet their specific needs. This includes understanding aspects such as Feature Limitations, Security Protocols, and Educational Applications related to the feature.
10. Frequently Asked Questions (FAQ) About Guided Access
To further clarify the functionality and usage of Guided Access, here are some frequently asked questions:
-
Q: What is Guided Access?
- A: Guided Access is an accessibility feature on iOS devices that allows you to lock the device into a single app.
-
Q: How do I enable Guided Access?
- A: Go to Settings > Accessibility > Guided Access and toggle the switch to the on position.
-
Q: How do I start a Guided Access session?
- A: Open the desired app and triple-click the side button (on devices without a Home button) or the Home button (on devices with a Home button).
-
Q: How do I exit a Guided Access session?
- A: Triple-click the side or Home button, enter your passcode, and tap End.
-
Q: What if I forget my Guided Access passcode?
- A: You will need to erase your device using iTunes or Finder to regain access.
-
Q: Can I disable the hardware buttons in Guided Access?
- A: Yes, you can disable the hardware buttons, such as the volume buttons and sleep/wake button, in Guided Access settings.
-
Q: Can I disable touch input in certain areas of the screen?
- A: Yes, you can circle areas of the screen to disable touch input in those areas.
-
Q: Does Guided Access work with all apps?
- A: Guided Access works with most apps, but some apps may have compatibility issues.
-
Q: Can I use Guided Access remotely?
- A: No, Guided Access cannot be controlled remotely unless the device is managed under a Mobile Device Management (MDM) solution.
-
Q: Is Guided Access secure?
- A: Guided Access is not a security feature, but it can help prevent unauthorized access to certain apps and settings.
These FAQs should provide a comprehensive overview of Guided Access and its functionality. For more detailed information and troubleshooting tips, visit CONDUCT.EDU.VN or contact Apple Support. Understanding aspects such as User Support, Technical Documentation, and Troubleshooting Techniques can be beneficial for effectively using Guided Access.
Conclusion
In summary, while Guided Access generally turns off when a phone’s battery dies, there can be exceptions. It’s crucial to understand how to manage Guided Access effectively, remember your passcode, and follow best practices to avoid getting locked out of your device. For more in-depth guides, resources, and support, visit CONDUCT.EDU.VN. We offer comprehensive information and assistance to help you navigate the complexities of device settings and accessibility features. If you need further assistance, you can visit us at 100 Ethics Plaza, Guideline City, CA 90210, United States, contact us via Whatsapp at +1 (707) 555-1234, or explore our website at conduct.edu.vn. Understanding iOS Management, Device Security, and Accessibility Options ensures a smooth user experience.