Don’t Fear The Reaper in Cyberpunk 2077 presents a unique ending, diverging from conventional paths, and this guide from CONDUCT.EDU.VN offers a comprehensive walkthrough. This clandestine conclusion, achievable early in Act 3, demands strategic choices and skillful execution. Delve into our analysis of the Reaper ending, explore its implications, and master the strategies needed for triumph. Navigate the perilous journey with confidence using our expert advice, guaranteeing a smooth and engaging experience.
1. Understanding the “Don’t Fear the Reaper” Quest
The “(Don’t Fear) The Reaper” quest represents a secret ending in Cyberpunk 2077, accessible at the beginning of Act 3. Besides the ‘Easy Way Out’ ending, this is arguably the fastest ending achievable without completing all of Act 3. This quest deviates from the main storyline, offering a unique conclusion for players seeking an alternative path.
1.1 Prerequisites for Unlocking the Quest
To unlock the “(Don’t Fear) The Reaper” quest, certain conditions must be met. Firstly, you must complete the ‘Chippin’ In’ side job before reaching the point of no return in the main storyline. Secondly, specific responses must be selected during your dialogue with Johnny Silverhand. These dialogue choices shape the narrative and ultimately determine whether the secret ending becomes available.
1.2 The Significance of Dialogue Choices
The dialogue choices made during the ‘Chippin’ In’ side job hold significant weight in determining the availability of the “(Don’t Fear) The Reaper” quest. When you head to the Oilfields with Johnny, he will initiate a dialogue near the mission objective, and certain responses must be selected to proceed. These responses demonstrate a specific level of trust and understanding between V and Johnny, which is crucial for unlocking the secret ending.
Specific Dialogue Choices:
| Order | Dialogue |
|---|---|
| 1 | Inscribe Johnny’s initials |
| 2 | ‘The Guy Who Saved My Life.’ |
| 3 | ‘No, you f**ked that up too.’ |
| 4 | ‘What do you want from me’ |
| 5 | ‘OK. But as second chances go, this is your last’ |
| 6 | Agree to call Rogue |
1.3 Triggering the Quest
After meeting with Hanako during ‘Nocturne Op55N1,’ you’ll sit with Johnny at the Embers’ rooftop. At this point, you must suggest that Johnny and Rogue go to the Arasaka tower. He will then ask you whether you are sure or not, and you must remain indecisive in the dialogue screen without selecting anything. After a few minutes of indecision, Johnny will suggest you go alone to the tower to settle things. This suggestion triggers the “(Don’t Fear) The Reaper” quest, directly cutting you to the Arasaka Tower entrance.
2. Preparing for the Suicide Mission
Embarking on the “(Don’t Fear) The Reaper” quest is akin to undertaking a suicide mission, necessitating meticulous preparation. Due to the high level of difficulty and the absence of traditional save points, strategic planning and resource management are paramount for success.
2.1 High Character Level
Given the formidable challenges posed by the Arasaka Tower assault, a high character level is indispensable. Confronting waves of high-level enemies demands robust combat skills, advanced perks, and optimized attributes. Prioritize leveling up your character and honing your combat prowess before initiating the quest to maximize your chances of survival.
2.2 Strategic Resource Management
Resource management is critical for enduring the arduous journey through Arasaka Tower. Stock up on essential consumables, including health injectors, ammunition, grenades, and quickhacks. Given the limited availability of save points during the mission, judicious use of resources is essential for sustaining your health, replenishing your ammunition, and neutralizing enemy threats.
2.3 Understanding “Relic Malfunction Detected”
At the mission’s outset, you will encounter the “Relic Malfunction Detected” message, which imposes significant limitations on your character’s capabilities. This malfunction caps your maximum health and gradually reduces it throughout the mission, placing additional strain on your survivability. Therefore, efficient health management and strategic combat tactics are crucial for mitigating the impact of the Relic Malfunction.
2.4 Weapons and Equipment Optimization
Optimize your weapons and equipment loadout to suit the challenges of the Arasaka Tower assault. Prioritize weapons with high damage output, accuracy, and versatility to effectively engage enemies at varying ranges. Equip armor with ample protection against ballistic and thermal damage to minimize incoming damage. Additionally, consider utilizing cyberware modifications to enhance your combat effectiveness and survivability.
3. Navigating Arasaka Tower
Successfully navigating Arasaka Tower during the “(Don’t Fear) The Reaper” quest requires a combination of stealth, combat prowess, and strategic decision-making. As you progress through the tower, you will encounter numerous obstacles, enemy encounters, and environmental hazards that must be overcome to reach your objective.
3.1 Confronting Arasaka Security Forces
Upon entering Arasaka Tower, you will be confronted by waves of max-level Arasaka Samurai and Special Agents. These elite security forces are equipped with advanced weaponry, cyberware enhancements, and tactical expertise, posing a formidable challenge to even the most seasoned players. Employ strategic combat tactics, utilize cover effectively, and exploit enemy weaknesses to gain the upper hand in these engagements.
3.2 Securing the Elevator Access Token
To access the upper levels of Arasaka Tower, you must obtain an elevator access token. This token can be looted from the corpses of fallen Arasaka agents in the lobby area behind the initial wave of enemies. Eliminate the security forces in the lobby, then search their bodies to acquire the access token needed to call the elevator.
3.3 Dealing with the Mech
After calling the elevator, a new mech will spawn in the lobby, posing an additional threat. This mechanical enemy is heavily armored and equipped with powerful weapons, requiring a coordinated assault to defeat. Utilize explosives, EMP grenades, and high-penetration weapons to disable the mech and clear the path to the elevator.
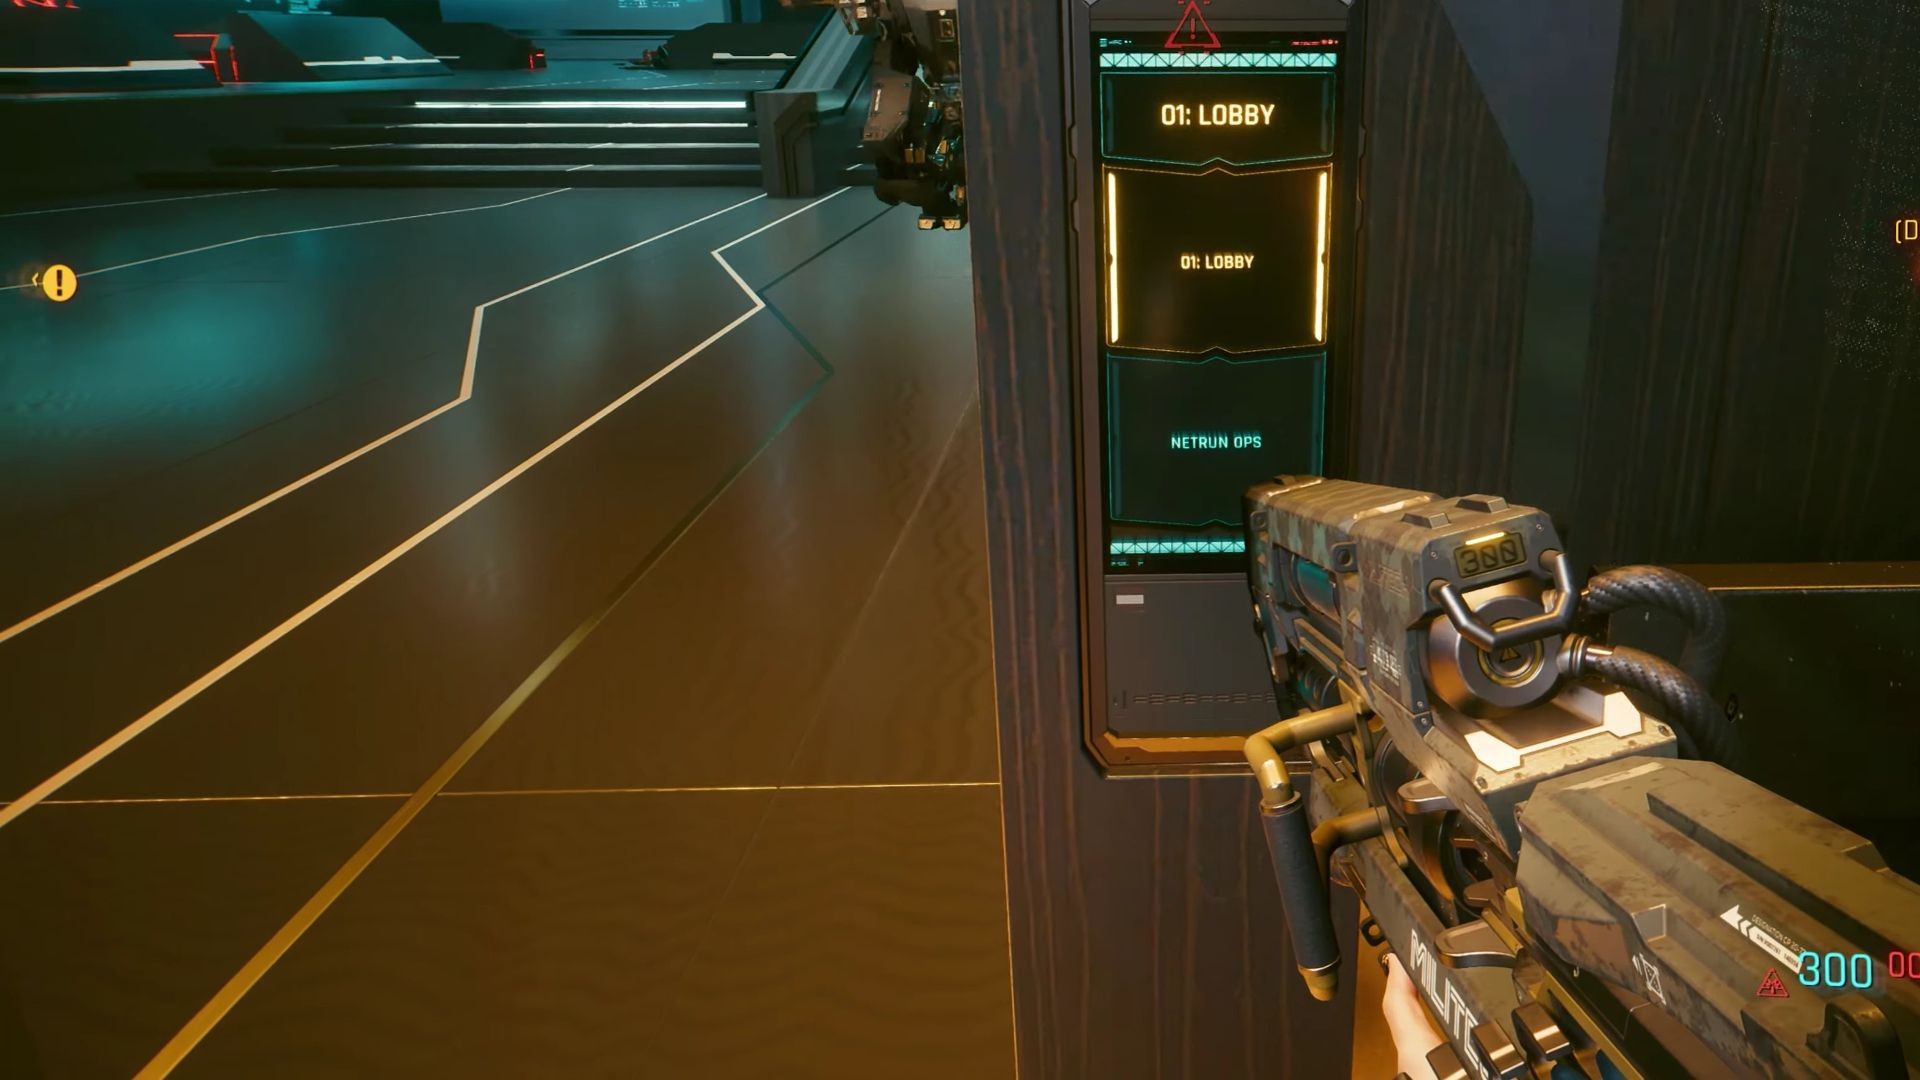
3.4 The Netrunner Operations Floor Ambush
Upon reaching the Netrunner Operations floor, you will be ambushed by more guards and enemies. These security forces will attempt to close in on your position from the two doors on the right side of the elevator. Due to the limited space for cover, it is best to utilize explosives and close-range weapons to quickly eliminate the guards before they can overwhelm you.
3.5 Navigating to the Mainframe
After eliminating the initial wave of enemies on the Netrunner Operations floor, head inside the door on your left and take another left until you encounter a few more groups of Arasaka agents. After dealing with these guards, Johnny will draw your attention toward the tower’s mainframe at the lower level. Drop down from the platform on the left side of the room and follow your waypoints to reach the mainframe.
3.6 Connecting Alt to the Mainframe
To connect Alt to the mainframe, you must first expose it by using the computer in the control room on the side of the large hall. Enable the ‘Arasaka Tower Mainframe’ from the ‘Local Network’ section to reveal the connection point. Deal with any newly spawned enemies and head to the hall’s center to initiate the connection between Alt and Arasaka’s Mainframe.
4. Confronting Adam Smasher
The climax of the “(Don’t Fear) The Reaper” quest involves a confrontation with Adam Smasher, a formidable cyborg and one of Arasaka’s most dangerous enforcers. Defeating Adam Smasher is essential for progressing to the Mikoshi Access Point and completing the quest.
4.1 Preparing for the Battle
Before engaging Adam Smasher, ensure that you are fully prepared for a grueling battle. Heal yourself to maximum health, restock on ammunition and grenades, and optimize your weapons and cyberware for maximum damage output. Loot the corpses of fallen enemies nearby for additional resources and equipment.
4.2 Adam Smasher’s Abilities
Adam Smasher possesses a range of devastating abilities, including powerful melee attacks, long-range projectiles, and cyberware enhancements. He is heavily armored and resistant to most forms of damage, requiring a strategic approach to defeat.
4.3 Combat Strategies
Utilize a combination of ranged and melee attacks to exploit Adam Smasher’s weaknesses. Maintain distance to avoid his melee attacks, and use cover to mitigate incoming projectiles. Exploit his vulnerability to EMP grenades to temporarily disable his cyberware enhancements. Focus fire on his critical hit locations, such as his head and exposed joints, to maximize damage output.
4.4 Reaching the Mikoshi Access Point
After defeating Adam Smasher, you can finally advance to the Mikoshi Access Point. Follow the waypoint marker to the closed door and force it open to proceed. Prepare yourself for the final stages of the quest and the choices that await you in Mikoshi.
5. The Choices in Mikoshi
Upon reaching the Mikoshi Access Point, you will be presented with a series of critical choices that determine the ultimate outcome of the “(Don’t Fear) The Reaper” quest. These choices involve the fate of V’s consciousness, the relationship with Johnny Silverhand, and the future of Night City.
5.1 Connecting to Mikoshi
After reaching the Mikoshi Access Point, connect yourself to Mikoshi and submerge your body in the coolant. This action initiates the process of transferring your consciousness into the digital realm, where you will interact with Alt Cunningham and confront the consequences of your choices.
5.2 The Rooftop Revisited
After connecting to Mikoshi, you will be transported back to the rooftop where you initially contemplated the assault on Arasaka Tower. Here, you must pick up a necklace from where you talked to Misty, symbolizing the connection to your past and the relationships you have forged along the way.
5.3 Alt’s Offer
In Mikoshi, you will meet Johnny Silverhand again, who will congratulate you on executing a successful plan. He will also inform you that Alt has already split you and Johnny by initiating Soulkiller on V. At this point, Alt will present you with two choices:
- Cross the bridge and become a part of cyberspace: This choice represents a permanent departure from the physical world, merging your consciousness with the digital realm of Mikoshi.
- Enter the well to return to V’s body: This choice allows you to return to V’s body, but with uncertain consequences for your health and the future of your relationship with Johnny Silverhand.
5.4 Consequences of the Choices
The choices you make in Mikoshi have far-reaching consequences for V, Johnny Silverhand, and the fate of Night City. Each choice leads to a unique ending that reflects the decisions you have made throughout the game. Consider the implications of each choice carefully before making your final decision, as it will shape the ultimate outcome of your Cyberpunk 2077 experience.
6. Optimizing Your Build for the Reaper Ending
The “Don’t Fear the Reaper” ending in Cyberpunk 2077 presents a unique set of challenges, demanding a character build optimized for solo combat and survivability. Certain builds excel in this scenario, maximizing your effectiveness against Arasaka’s elite forces and Adam Smasher.
6.1 Tech-Focused Build
A Tech-focused build, emphasizing crafting, engineering, and tech weapons, offers a significant advantage in the Reaper ending. This build allows you to craft powerful weapons, upgrade your cyberware, and exploit enemy weaknesses with tech-based quickhacks.
Key Attributes:
- Technical Ability: Maximizing this attribute unlocks crafting perks, allowing you to create high-quality weapons, armor, and consumables.
- Intelligence: Enhances your quickhacking abilities, enabling you to disable enemies, control devices, and gain tactical advantages.
Recommended Perks:
- Crafting Perks: Edgerunner Artisan, Grease Monkey, Scrapper, Tune-Up.
- Engineering Perks: Bladerunner, Capacitor, Overclock, прогресс.
- Quickhacking Perks: Biosynergy, Diffusion, Plague, критический момент.
Gameplay Strategy:
- Utilize tech weapons like the Widow Maker or the Overwatch to deal high damage to armored targets.
- Craft and use EMP grenades to disable enemy cyberware and create openings for attack.
- Employ quickhacks like Short Circuit and Overheat to weaken enemies and disrupt their attacks.
- Maintain a supply of health injectors and consumables to sustain your health during intense combat encounters.
6.2 Reflexes-Focused Build
A Reflexes-focused build, centered on blades, pistols, and evasion, provides unparalleled mobility and damage output in close-quarters combat. This build excels at dodging enemy attacks, executing swift strikes, and utilizing cyberware enhancements to amplify your combat capabilities.
Key Attributes:
- Reflexes: Maximizing this attribute enhances your evasion skills, weapon handling, and overall combat agility.
- Cool: Improves your stealth abilities, critical hit chance, and resistance to status effects.
Recommended Perks:
- Blades Perks: Assassin, Blade Dancer, Crimson Tide, Deflect Bullets.
- Pistols Perks: Desperado, Gunslinger, Headhunter, Run and Gun.
- Evasion Perks: Avoidance, Footwork, Parkour, Silent Takedown.
Gameplay Strategy:
- Utilize blades like the Katana or the Mantis Blades to deal high damage in melee combat.
- Employ pistols like the Malorian Arms 3516 or the Overture to engage enemies at medium range.
- Master the art of dodging and weaving to evade enemy attacks and maintain your survivability.
- Utilize cyberware enhancements like the Sandevistan or the Kerenzikov to slow down time and gain a tactical advantage.
7. Essential Cyberware for Solo Infiltration
Choosing the right cyberware can significantly enhance your survivability and combat effectiveness during the “(Don’t Fear) The Reaper” quest. Prioritize cyberware that provides defensive buffs, offensive enhancements, and tactical advantages to overcome the challenges of solo infiltration.
7.1 Defensive Cyberware
Defensive cyberware provides crucial protection against incoming damage, allowing you to withstand enemy attacks and sustain your health during prolonged combat encounters.
- Subdermal Armor: Increases your armor rating, reducing incoming physical damage.
- Pain Editor: Reduces incoming damage by a percentage, providing additional survivability.
- Second Heart: Automatically restores your health to maximum when you are about to die, granting you a second chance in combat.
7.2 Offensive Cyberware
Offensive cyberware enhances your damage output, allowing you to eliminate enemies more quickly and efficiently.
- Berserk: Temporarily increases your damage output, movement speed, and armor rating, allowing you to overwhelm enemies with superior firepower.
- Sandevistan: Slows down time, allowing you to react more quickly, dodge enemy attacks, and line up precise shots.
- Monowire: A powerful melee weapon that deals high damage and can slice through enemy armor with ease.
7.3 Tactical Cyberware
Tactical cyberware provides strategic advantages, allowing you to control the battlefield, manipulate enemies, and gain the upper hand in combat.
- Cyberdeck: Enables you to perform quickhacks, allowing you to disable enemies, control devices, and disrupt their attacks.
- Optical Camo: Grants you temporary invisibility, allowing you to stealthily navigate past enemies or set up ambushes.
- Target Analysis: Highlights enemy weak points, increasing your critical hit chance and damage output.
8. Utilizing Quickhacks Effectively
Quickhacks are invaluable tools for gaining a tactical advantage during the “(Don’t Fear) The Reaper” quest. Mastering the use of quickhacks can significantly improve your survivability, control enemy behavior, and overcome environmental obstacles.
8.1 Essential Quickhacks
Certain quickhacks are particularly effective in the Reaper ending, providing a range of tactical options for dealing with enemies and navigating the environment.
- Short Circuit: Deals electrical damage to enemies, disabling their cyberware and interrupting their attacks.
- Overheat: Causes enemies to burst into flames, dealing continuous damage over time.
- Cyberpsychosis: Forces enemies to attack each other, diverting their attention and reducing the number of threats you have to face.
- Reboot Optics: Blinds enemies, impairing their vision and making them vulnerable to attack.
- Sonic Shock: Silences enemies, preventing them from calling for reinforcements or alerting their allies.
8.2 Quickhacking Strategies
Employ strategic quickhacking tactics to maximize your effectiveness in combat.
- Use Short Circuit or Overheat to weaken armored enemies before engaging them with weapons.
- Apply Cyberpsychosis to groups of enemies to sow chaos and disrupt their formations.
- Utilize Reboot Optics to blind enemies and create openings for stealthy takedowns.
- Employ Sonic Shock to prevent enemies from alerting reinforcements, allowing you to clear areas more quietly.
9. The Importance of Stealth and Evasion
While direct confrontation is sometimes unavoidable, stealth and evasion can be invaluable tools for minimizing risks and conserving resources during the “(Don’t Fear) The Reaper” quest.
9.1 Stealth Tactics
Utilize stealth tactics to bypass enemy patrols, avoid unnecessary combat encounters, and set up ambushes.
- Crouch and move slowly to reduce your visibility and noise.
- Use cover to conceal your presence from enemies.
- Utilize distractions to lure enemies away from their patrol routes.
- Perform stealthy takedowns to eliminate enemies without alerting their allies.
9.2 Evasion Techniques
Master evasion techniques to avoid incoming attacks, maintain your distance from enemies, and reposition yourself for tactical advantages.
- Dodge and dash to evade enemy projectiles and melee attacks.
- Slide and roll to quickly move between cover points.
- Utilize cyberware enhancements like the Kerenzikov to slow down time and improve your reaction speed.
10. Understanding the Lore and Motivations
To fully appreciate the “(Don’t Fear) The Reaper” quest, it’s essential to understand the lore and motivations of the characters involved, as well as the underlying themes of Cyberpunk 2077.
10.1 Johnny Silverhand’s Perspective
Johnny Silverhand’s desire to storm Arasaka Tower alone stems from his deep-seated hatred for the corporation and his desire for revenge against those who wronged him. Understanding his motivations provides insight into his actions and the choices he makes during the quest.
10.2 V’s Agency
By choosing to embark on the “(Don’t Fear) The Reaper” quest, V asserts their agency and takes control of their own destiny. This decision reflects V’s determination to defy fate and find a solution to their impending demise.
10.3 Themes of Choice and Consequence
The “(Don’t Fear) The Reaper” quest explores themes of choice and consequence, highlighting the impact of individual decisions on the lives of others and the fate of Night City. The choices you make in Mikoshi ultimately determine the outcome of the quest and the legacy you leave behind.
This comprehensive guide provides you with the knowledge and strategies needed to conquer the “(Don’t Fear) The Reaper” quest in Cyberpunk 2077. Remember to prepare thoroughly, utilize your skills and resources wisely, and make informed decisions that align with your desired outcome. Good luck, and may you emerge victorious from the depths of Arasaka Tower.
At CONDUCT.EDU.VN, we understand the importance of ethical gameplay. While “Don’t Fear the Reaper” offers a thrilling path, remember that every choice has consequences. Explore our resources for ethical decision-making in gaming and beyond. Contact us at 100 Ethics Plaza, Guideline City, CA 90210, United States. Whatsapp: +1 (707) 555-1234. Visit our website: CONDUCT.EDU.VN for more information.
FAQ: Navigating Ethical Dilemmas in Cyberpunk 2077
-
What are the main ethical considerations in Cyberpunk 2077?
Cyberpunk 2077 presents players with numerous moral dilemmas, often involving choices between personal gain and the well-being of others. Key ethical considerations include violence, exploitation, corporate ethics, and the value of human life in a technologically advanced society.
-
How does player agency affect the ethical landscape of the game?
Player agency significantly shapes the ethical dimensions of Cyberpunk 2077. The choices players make regarding violence, relationships, and alliances can lead to varied outcomes with distinct moral implications, underscoring the importance of thoughtful decision-making.
-
What are some examples of ethically challenging quests in the game?
Quests like “The Gig,” “The Rescue,” and “The Ripperdoc” require players to navigate morally ambiguous situations. These scenarios involve decisions about whom to trust, how to use violence, and whether to prioritize personal gain over the welfare of others.
-
How can players make ethically informed decisions in Cyberpunk 2077?
To make ethically informed decisions, players should consider the potential consequences of their actions, empathize with non-player characters (NPCs), and reflect on their own values. Consulting external resources, such as CONDUCT.EDU.VN, can provide additional guidance.
-
What role do corporations play in the ethical problems presented in the game?
Corporations in Cyberpunk 2077 are often depicted as ruthless entities that prioritize profit over ethical considerations. They engage in exploitation, environmental destruction, and corruption, presenting players with opportunities to challenge their power and influence.
-
How does technology impact the ethical considerations in Cyberpunk 2077?
Advanced technology in Cyberpunk 2077 raises complex ethical questions about transhumanism, artificial intelligence, and the blurring lines between humans and machines. Players must grapple with the implications of cybernetic enhancements, mind uploading, and the potential for technology to exacerbate social inequalities.
-
What are the consequences of making unethical choices in the game?
Unethical choices in Cyberpunk 2077 can lead to negative consequences, such as strained relationships, negative reputation, and undesirable outcomes in quests. These consequences underscore the importance of considering the moral implications of one’s actions.
-
How does the game encourage reflection on ethical issues?
Cyberpunk 2077 encourages ethical reflection through its narrative, character interactions, and quest design. The game presents players with moral dilemmas and prompts them to consider the consequences of their choices, fostering a deeper understanding of ethical issues.
-
What resources are available for players seeking guidance on ethical decision-making in the game?
Players seeking guidance on ethical decision-making can consult in-game resources, online forums, and external websites like conduct.edu.vn. These resources provide insights, perspectives, and frameworks for navigating the moral complexities of Cyberpunk 2077.
-
How can the ethical lessons learned in Cyberpunk 2077 be applied to real-life situations?
The ethical lessons learned in Cyberpunk 2077 can be applied to real-life situations by encouraging critical thinking, empathy, and ethical awareness. By reflecting on the moral dilemmas presented in the game, players can develop a greater understanding of ethical issues and make more informed decisions in their own lives.