Valve’s Steam Deck has revolutionized handheld gaming, offering an unmatched price-to-performance ratio and access to a vast game library through Steam. If you’re looking to expand your gaming horizons beyond PC titles and dive into the world of retro and classic games, emulation is the answer. This Emudeck Guide will walk you through setting up your Steam Deck to play games from your favorite retro consoles and even some modern systems using emulation software.
We will primarily focus on EmuDeck, a powerful and user-friendly tool designed to streamline the emulation setup process. However, we will also touch upon alternative solutions like RetroDeck and Batocera for those seeking different approaches. If you’re new to the Steam Deck and want a comprehensive overview of its general capabilities, consider checking out mikeroyal’s Steam Deck guide on GitHub, a fantastic resource created by mikeroyal.
**Table of Contents**
[EmuDeck vs Batocera vs RetroDeck vs EmulationStation](#emudeck-vs-batocera-vs-retrodeck-vs-emulationstation)
[Recommended Tools](#recommended-tools)
[Getting Started with EmuDeck](#getting-started-with-emudeck)
[Adding Games and BIOS Files](#adding-games-and-bios-files)
[Steam ROM Manager (SRM)](#steam-rom-manager-srm)
[EmulationStation Desktop Edition](#emulationstation-desktop-edition)
[Updating EmuDeck and Emulators](#updating-emudeck-and-emulators)
[CryoUtilities for Enhanced Performance](#cryoutilities-for-enhanced-performance)
[Additional EmuDeck Tools](#additional-emudeck-tools)
[Hotkeys for Emulation](#hotkeys-for-emulation)
System-Specific Recommendations:
[RetroArch: The All-in-One Emulator](#retroarch-the-all-in-one-emulator)
[Nintendo 3DS Emulation with Citra](#nintendo-3ds-emulation-with-citra)
[Nintendo GameCube Emulation with Dolphin](#nintendo-gamecube-emulation-with-dolphin)
[Nintendo Wii Emulation with Dolphin](#nintendo-wii-emulation-with-dolphin)
[PrimeHack for Metroid Prime Trilogy](#primehack-for-metroid-prime-trilogy)
[Nintendo Wii U Emulation with Cemu](#nintendo-wii-u-emulation-with-cemu)
[Nintendo Switch Emulation with Yuzu](#nintendo-switch-emulation-with-yuzu)
[Sony PS Vita Emulation with Vita3K](#sony-ps-vita-emulation-with-vita3k)
[Sony PlayStation Emulation with DuckStation](#sony-playstation-emulation-with-duckstation)
[Sony PlayStation 2 Emulation with PCSX2](#sony-playstation-2-emulation-with-pcsx2)
[Sony PlayStation 3 Emulation with RPCS3](#sony-playstation-3-emulation-with-rpcs3)
[Microsoft Xbox Emulation with Xemu](#microsoft-xbox-emulation-with-xemu)
[Microsoft Xbox 360 Emulation with Xenia](#microsoft-xbox-360-emulation-with-xenia)
Other Emulation Options:
[RetroDeck: A Streamlined Emulation Solution](#retrodeck-a-streamlined-emulation-solution)
[Batocera: A Dedicated Emulation OS](#batocera-a-dedicated-emulation-os)
[Changelog](#changelog)
EmuDeck vs Batocera vs RetroDeck vs EmulationStation
Before we dive into the setup process, let’s briefly compare the main emulation options available for your Steam Deck. Understanding the differences will help you choose the best approach for your needs.
EmuDeck stands out as a comprehensive tool designed to simplify and automate the emulation experience. It’s not a standalone application, but rather a collection of scripts that handle everything from downloading emulators from official sources to pre-configuring settings, hotkeys, and integrating with EmulationStation and Steam ROM Manager. EmuDeck streamlines the often complex manual installation and configuration process, making it incredibly user-friendly. While some users might have concerns about automated installations, EmuDeck operates without requiring root access and only installs files you would otherwise install manually. For those preferring a completely self-contained solution, Batocera or RetroDeck might be more appealing.
Batocera offers a different approach as a custom Linux operating system entirely dedicated to game emulation. It’s a self-contained, bootable OS that can be run from various media like microSD cards, USB drives, or external hard drives. This allows you to dual-boot your Steam Deck, keeping your SteamOS environment separate from your emulation setup. For example, you can use SteamOS for your regular PC gaming and then simply boot into Batocera from an SD card when you want to immerse yourself in retro games. This separation is ideal for users who want a dedicated emulation environment distinct from their SteamOS setup.
RetroDeck is another all-in-one emulation solution, utilizing EmulationStation as its primary user interface. It aims to provide a simple, unified emulation experience accessible directly within SteamOS. RetroDeck is packaged as a single application with pre-installed and configured emulators, making it easy to launch and manage. Being available as a FlatPak in the Discover app within Steam Deck’s Desktop Mode simplifies installation even further. It’s worth noting that RetroDeck is actively being developed and is still in pre-release, meaning it’s constantly evolving with new features and improvements.
EmulationStation, specifically EmulationStation Desktop Edition (ES-DE), is a frontend that provides a visually appealing and user-friendly interface for browsing and launching your retro games. It acts as a central hub for your emulation library. ES-DE can be installed independently by downloading the AppImage or comes bundled with EmuDeck and RetroDeck. A key feature of ES-DE is its automatic update capability, meaning it automatically detects and reflects any changes to your ROM folders, ensuring your game library is always up-to-date within the frontend.
Ultimately, using any of these tools is optional. You always have the choice to manually install emulators individually from the Discover Store and configure them yourself, just like you would on a Windows PC. You could also install EmulationStation Desktop Edition and set it up manually. EmuDeck, Batocera, and RetroDeck are designed to simplify the process, offering varying degrees of automation and integration to make retro gaming on your Steam Deck more accessible and enjoyable.
Recommended Tools for EmuDeck Setup
To enhance your EmuDeck setup experience, especially during the initial configuration in Desktop Mode, consider gathering these recommended tools:
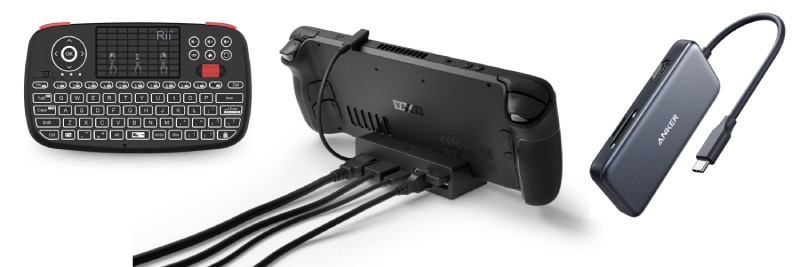
Keyboard and Mouse: Navigating Desktop Mode and configuring emulators is significantly easier with a physical keyboard and mouse. While the Steam Deck’s trackpads and on-screen keyboard are functional, a traditional keyboard and mouse provide greater precision and speed. Furthermore, using Steam ROM Manager requires closing the Steam application, which disables some helpful trackpad controls, making a mouse particularly useful.
If you own a Bluetooth keyboard and mouse, pairing them with your Steam Deck is straightforward, and the pairing persists seamlessly between Game Mode and Desktop Mode. For a more portable solution, the Rii mini keyboard is a popular choice. It’s USB rechargeable and connects via a 2.4GHz USB dongle, offering a compact and convenient input method.
Steam Deck Dock or USB-C Hub: Connecting your Steam Deck to an external monitor or TV via a dock or USB-C hub transforms it into a desktop-like setup, simplifying the configuration process. You can use the official Valve Steam Deck Docking Station, a USB-C hub like this one from Anker, or third-party docks such as this option from iVoler. For a comparison of different docking solutions, this video provides valuable insights.
MicroSD Card: Regardless of your chosen emulation setup method, a microSD card is essential for storing your retro game ROMs. MicroSD cards offer a cost-effective and easily swappable storage solution. The ideal size depends on your intended usage. If you plan to store both Steam games and retro ROMs on a single card, a larger capacity card is recommended. For a dedicated retro gaming microSD card, a smaller size may suffice, but keep in mind that CD-based and newer console games require significantly more storage space than older cartridge-based games.
Importantly, microSD card read/write speeds generally do not impact emulation performance or game loading times for retro games. Storing ROMs on the internal storage is unlikely to provide a noticeable performance boost for emulation. However, if you intend to use the microSD card for PC/Steam games as well, consider a high-speed Class 2 (A2) card for faster PC game load times, rather than a Class 1 (A1) card. Opt for reputable brands like SanDisk or Samsung to ensure the long-term reliability of your microSD card. A 1TB SanDisk Extreme card is a popular choice, offering ample space for both PC and retro games.
MicroSD Card Recommendations:
256GB microSD: [SanDisk Ultra](https://amzn.to/3MkPO1R), [SanDisk Extreme](https://amzn.to/3SKjTKu), [Samsung EVO Select](https://amzn.to/3MbJlpO)
512GB microSD: [SanDisk Ultra](https://amzn.to/3SYUCg5), [SanDisk Extreme](https://amzn.to/3rDfyNu), [Samsung EVO Select](https://amzn.to/3RJGE02)
1TB microSD: [SanDisk Ultra](https://amzn.to/3MbliHM), [SanDisk Extreme](https://amzn.to/3McD0KK), [SanDisk Extreme Pro](https://amzn.to/3ChWERd)
Formatting your microSD card is crucial before use. To format a microSD card on your Steam Deck:
- Insert the microSD card into your Steam Deck while in SteamOS Game Mode.
- Navigate to STEAM > Settings > System and select “Format SD Card”.
Keep in mind that while the formatted microSD card is readable in both SteamOS Game Mode and Desktop Mode, it utilizes a Linux file system that is not natively readable by Windows or macOS without specialized software. Therefore, transferring files to and from the microSD card is best done using an external hard drive or flash drive connected to your Steam Deck as an intermediary between your Steam Deck and your Windows or macOS PC. See the Adding Games and BIOS files section for more details on file transfers.
Flash Drive or External USB Drive: If you primarily use a Windows PC or Mac, a flash drive or external USB hard drive is the easiest way to transfer game files to your Steam Deck, regardless of whether you store them internally or on a microSD card. This is because Steam Deck in Desktop Mode can read Windows file systems like exFAT and NTFS, while Windows and macOS cannot natively read Linux file systems. The workflow involves copying your game files to an external drive, connecting it to your Steam Deck (via a dock or hub), and then dragging and dropping the files into the appropriate folders on your Steam Deck.
If your microSD card is not recognized in SteamOS Game Mode after formatting or setting up EmuDeck, you may need to re-link it to your Steam library. To do this:
- Switch to Desktop Mode on your Steam Deck.
- Open Steam in Desktop Mode.
- Go to Settings > Downloads > Steam Library Folders > “+” icon.
- Navigate to your microSD card’s location (/run/media/mmcblk0p1) and select it.
- Your microSD card should now be recognized for Steam game storage.
Getting Started with EmuDeck: A Step-by-Step Guide
Installing EmuDeck on your Steam Deck is a straightforward process. The exact steps vary slightly depending on whether you intend to store your games on the Steam Deck’s internal storage or a microSD card. If you’re using the internal storage, no special preparation is needed. However, if you plan to use a microSD card, ensure it’s formatted on your Steam Deck first (refer to the Tools section if you haven’t already).
EmuDeck provides a comprehensive FAQ page, which is an excellent resource if you encounter any issues not covered in this guide.
To install EmuDeck:
- Switch to Desktop Mode on your Steam Deck (STEAM > Power > Switch to Desktop).
- Open a web browser (like Firefox) and go to the EmuDeck website.
- Download the EmuDeck application directly to your Steam Deck, saving it to your Desktop when prompted.
- Locate the EmuDeck application on your Desktop and open it.
EmuDeck will initialize, download necessary files, and then present you with the choice between EASY MODE and CUSTOM MODE.
Easy Mode: This option automatically downloads and pre-configures all supported emulation systems with default settings. It’s perfect for users who want to quickly start playing without delving into customization. Even if you begin with Easy Mode, you can always re-run EmuDeck in Custom Mode later to fine-tune your setup.
Custom Mode: This mode allows you to select specific systems to install and customize various configurations, including aspect ratios, EmulationStation themes, shaders, and more. If you have prior emulation experience or prefer greater control over your setup, Custom Mode is recommended.
If EmuDeck doesn’t initially detect your microSD card, ensure the card’s name doesn’t contain spaces. Reports suggest that card names with spaces (e.g., “Samsung 512”) might not be recognized. Rename your card to something without spaces (e.g., “Samsung_512”) and try again.
After choosing your preferred mode, EmuDeck will guide you through the remaining prompts. The video walkthrough mentioned earlier in the article provides a visual guide to this process. You might encounter pop-ups regarding missing Yuzu (Switch) keys and prompts about game file locations. You can disregard these for now, as we’ll address them in the next section.
Adding Games and BIOS Files to EmuDeck
Once EmuDeck is installed, the next crucial step is adding your game ROM files and BIOS files.
It’s important to acknowledge that ROM files are copyrighted, and we cannot provide them on this website. You are responsible for dumping your own game files (the process varies depending on the console) or obtaining them through legal means. Similarly, BIOS (system) files are also copyrighted and are not distributed here.
The most convenient method for transferring game files to your Steam Deck (whether you’re using internal storage or a microSD card) from a Windows PC or Mac is using a flash drive or an external USB hard drive. As mentioned earlier, Steam Deck in Desktop Mode can read Windows file systems (exFAT, NTFS), while Windows and macOS have limited compatibility with Linux file systems. Therefore, transfer your game files to an external drive, connect it to your Steam Deck, and then drag and drop the files to the appropriate folders. Using a USB/Bluetooth mouse and keyboard during this file transfer process will significantly simplify navigation.
Note: Older SteamOS versions had a behavior where single-clicking a file would open it. To change this to a more conventional selection behavior:
- Open the Settings menu in SteamOS Desktop Mode (bottom left corner).
- Go to Workspace Behavior > General Behavior.
- Under “Clicking files or folders,” change the option to “Selects them.”
Here are the primary folder locations for your ROMs and BIOS files within the EmuDeck structure:
ROMs: Primary/Emulation/roms/ (microSD card method)
BIOS: Primary/Emulation/bios/ (microSD card method)

Alternatively, you can navigate to these locations via:
/run/media/SDCARDNAME/Emulation (microSD card method)
/home/deck/Emulation/roms/ (internal storage method)
/home/deck/Emulation/bios/ (internal storage method)
To determine the specific folders, file types, and required BIOS files for each emulator, consult the comprehensive Emulator Cheatsheet or the dedicated emulator pages on the EmuDeck wiki. Some emulators require BIOS files to be placed in specific subfolders (e.g., the “dc” subfolder for Dreamcast BIOS).
Here’s a list of common BIOS files and their locations that are frequently used in EmuDeck setups:
**GAME BOY (for boot logo):** /Emulation/bios/gb_bios.bin
**GAME BOY COLOR (for boot logo):** /Emulation/bios/gbc_bios.bin
**GAME BOY ADVANCE (for boot logo):** /Emulation/bios/gba_bios.bin
**NINTENDO DS:** /Emulation/bios/bios7.bin /Emulation/bios/bios9.bin /Emulation/bios/firmware.bin
**GAMECUBE (for boot logo):** /home/deck/.var/app/org.DolphinEmu.dolphin-emu/data/dolphin-emu/GC/USA/IPL.bin (see [GameCube section](#nintendo-gamecube-emulation-with-dolphin) below for details)
**SWITCH:** /Emulation/bios/yuzu/keys/prod.keys
**PLAYSTATION 1:** /Emulation/bios/scph5501.bin
**PLAYSTATION 2:** /Emulation/bios/SCPH-70012.bin /Emulation/bios/SCPH-70012.MEC /Emulation/bios/SCPH-70012.NVM
**SEGA CD:** /Emulation/bios/bios_CD_E.bin /Emulation/bios/bios_CD_J.bin /Emulation/bios/bios_CD_U.bin
**SATURN:** /Emulation/bios/sega_101.bin /Emulation/bios/mpr-17933.bin
**DREAMCAST:** /Emulation/bios/dc/dc_boot.bin
**XBOX:** /Emulation/bios/mcpx_1.0.bin /Emulation/bios/Complex_4627.bin (modified retail version)
**NEO GEO:** /Emulation/roms/neogeo/neogeo.zip
Steam ROM Manager (SRM): Integrating Emulated Games into SteamOS
With your ROMs and BIOS files in place, the next step is to integrate your games into the SteamOS interface. Steam ROM Manager (SRM) is the tool we’ll use to achieve this. SRM allows you to add your retro games to your Steam library, making them accessible directly from Game Mode and alongside your PC games. For games you don’t want cluttering your SteamOS main menu, we will utilize EmulationStation.
Using Steam ROM Manager requires closing the Steam client, which temporarily reverts your Steam Deck controls to “lizard mode,” offering reduced functionality. While you can navigate using the right trackpad as a mouse cursor (L2 for right-click, R2 for left-click), using a mouse and keyboard is highly recommended for these steps to streamline the process.
1. Configure Parsers: Launch EmuDeck and navigate to Tools & Stuff > SteamRomManager. Confirm that you want to close Steam and open SRM. Once SRM is open, you’ll see the main interface. On the left-hand column, toggle off any systems you don’t want to appear directly in your SteamOS game library. These systems will still be accessible through EmulationStation, regardless of your toggle selection here. Pay close attention to systems with multiple parsers, such as PSP, Switch, and PS3. For these, ensure you select the parser corresponding to your desired emulator or, in the case of PS3, the file type you’re using.
Generally, parsing fewer systems is advisable to avoid overwhelming your SteamOS interface. Remember, you can access all systems through EmulationStation. Even if you only want a single game from a system (like one SNES game) to appear in SteamOS, you’ll still need to parse the entire SNES catalog initially, but you can easily clean up your Steam library in Step #4.
2. Generate App List: Click the “Preview” section at the top left of SRM and select “Generate app list.” SRM will now scan the parsers you’ve enabled and attempt to match your ROMs with entries in the SteamGridDB database to fetch artwork. This process can take several minutes depending on the size of your game library. You can monitor the progress at the top of the screen as SRM cycles through “providers” to download artwork assets.
Once the app list generation is complete, review your games to ensure they are correctly matched with your ROMs. If sections of games are missing (e.g., 3DS games), double-check that you’ve placed the ROMs in the correct folders and are using compatible file types (refer to this sheet for compatibility). Mismatches between your game and the artwork often arise from ROM file names or SteamGridDB incorrectly matching a game, especially for games with identical titles across different console generations (e.g., Bionic Commando). Verify your game’s naming on SteamGridDB to see if adjustments are needed.
3. Customize Artwork: Now for the visual customization! Go through your game list and personalize the artwork to your liking. Hovering your mouse over the artwork reveals multiple image options that you can scroll through to find your preferred style. Make sure to customize different art formats. By default, you’ll see “Grid” images, which are displayed in SteamOS when a game is your most recently played title. Switch to “Posters” (Select type > Posters at the top) to view common cover art, which is prominently displayed when browsing your SteamOS library. Focus on customizing the “Posters” for the most impactful visual enhancement.
For mismatched games or games lacking artwork, you can manually add your own. Download desired images from SteamGridDB and save them to your Steam Deck. Then, hover over the game in SRM, click the small photo icon in the bottom-left corner, locate your downloaded image, and add it manually. You can also correct mismatched entries using SRM’s “exception” tool (more details here). For games you don’t plan to add to your SteamOS library, you can ignore mismatches for now.
4. Save and Refine App List: Once you’re satisfied with the artwork, save your configuration by clicking “Save app list” near the bottom of the screen. This process can take several minutes. Monitor the progress in the Event Log at the top-left. When the Event Log indicates “Done adding/removing entries,” you can exit Steam ROM Manager and reopen Steam.
In your Steam library, you’ll see your newly added games organized by system or emulator in the left-hand sidebar. Now, go through your library and remove any games you don’t want to appear in your SteamOS Game Mode interface. Deleting a game here only removes its entry from your Steam library, not the actual game file. It also does not affect its presence in EmulationStation. To remove a game, right-click it, select Manage > Remove non-Steam game from your library. For faster removal, hold CTRL and select multiple games at once, similar to file browser selection.
After removing unwanted games from your SteamOS Game Mode library, your Steam ROM Manager setup is complete! Exit Desktop Mode, switch back to Game Mode, and enjoy your emulated games integrated into your Steam Deck experience. Remember that this is just the initial setup. Explore the system-specific sections below to fine-tune each emulator for optimal performance and your preferences.
EmulationStation Desktop Edition: A Unified Retro Gaming Frontend
Adding EmulationStation Desktop Edition (ES-DE) to your SteamOS experience via EmuDeck is incredibly simple. After the initial EmuDeck setup, open Steam ROM Manager (refer to the previous section). In the Parsers section on the left, ensure EmulationStation-DE is toggled ON. If you only want ES-DE added to SteamOS without individual games, toggle OFF all parsers except EmulationStation-DE. This EmuDeck wiki visualization illustrates the process.
By default, EmulationStation selects preferred emulators for each system. To customize these emulator choices, access the Main Menu within ES-DE by pressing START > Other Settings > Alternative Emulators and adjust them as desired. Here are recommended emulator preferences for major systems in ES-DE, with changes from default bolded:
dreamcast = Flycast
gb = Gambatte
gba = mGBA
gbc = Gambatte
**gc = Dolphin (standalone)**
genesis = Genesis Plus GX
**mame = MAME 2003-Plus (if using Mame 2003 Plus romset)**
**n3ds = Citra (standalone)**
n64 = Mupen64Plus-Next
**nds = melonDS**
nes = Nestopia UE
**ps2 = PCSX2 (standalone)**
psp = PPSSPP
**psx = SwanStation or DuckStation (standalone)**
saturn = Beetle Saturn
**snes = bsnes**
switch = Yuzu (standalone)
**wii = Dolphin (standalone)**
Generally, RetroArch cores are excellent choices for systems up to and including PS1, N64, and PSP. While standalone emulators might offer slightly better performance, RetroArch cores provide universal features like hotkeys and RetroAchievements, simplifying configuration compared to manually setting up these features in standalone emulators. To adjust the emulator for a specific game, highlight the game in ES-DE, press SELECT > Edit this Game’s Metadata > Alternative Emulator, and make your selection.
To explore additional themes for EmulationStation, check out these options on the ES-DE website. Themes are stored in Home/.emulationstation/themes (you may need to enable hidden files to see the .emulationstation folder). Some themes require adjustments to the theme.xml file to optimize aspect ratio or other settings.
Launching PS3 games from ES-DE is possible, but it requires additional configuration. This guide on the EmuDeck wiki provides detailed instructions.
A useful navigation tip for EmulationStation: To quickly page down in settings menus or game lists, press the R2 button. This speeds up navigation through large game collections or quickly exiting ES-DE (press START, R2, A, then A).
Updating EmuDeck and Emulators: Keeping Your System Current
The EmuDeck platform receives periodic updates that introduce new features and improvements. To update EmuDeck itself, simply open the application. It will automatically detect available updates, install them, and prompt you to reboot EmuDeck. You can review a changelog of release updates on the EmuDeck GitHub repository.
Once EmuDeck is installed, there are two primary methods for updating your emulators:
Flatpak Updates: Many emulators are installed as Flatpaks and are updated individually through the Discover store’s built-in update tool. In Desktop Mode, you’ll see an “Up” arrow icon in the bottom-right taskbar when updates are available. Click this icon to install emulator updates. Alternatively, open EmuDeck, select “Tools and Stuff” > “Update Emulators and Tools” > “Update Flatpaks” to achieve the same result.
AppImage Updates: Other emulators are installed directly from developer websites as AppImages. EmuDeck simplifies updating these as well. Open EmuDeck, select “Tools and Stuff” > “Update Emulators and Tools” > “Update AppImages” to update these emulators.
Important Note on Updates: Running EmuDeck updates might occasionally overwrite custom configurations you’ve made. While an option exists in the update script to preserve settings, slight improvements or changes in apps or EmuDeck itself may still lead to settings being overwritten. To ensure your preferred game settings persist across updates, consider creating per-game settings configurations (the process varies by emulator).
Furthermore, updates to EmuDeck or individual emulators can sometimes introduce unexpected behavior. This is inherent in the complexity of consolidating a vast emulation community into a single tool. If you encounter issues after updating, the EmuDeck Discord server is a valuable resource for seeking help and troubleshooting.
CryoUtilities for Enhanced Performance: Optimizing Your Steam Deck
CryoUtilities is a powerful tool designed to optimize your Steam Deck’s performance, particularly for demanding emulators like Yuzu (Nintendo Switch). When used in conjunction with the PowerTools plugin (discussed later), CryoUtilities can significantly improve gameplay smoothness with minimal effort. Created by YouTuber CryoByte33, a detailed explanation of CryoUtilities and its benefits is available in this video.
Installation Steps for CryoUtilities:
- In Steam Deck’s Desktop Mode, use a web browser to navigate to the CryoUtilities GitHub page.
- Download the latest package by right-clicking and selecting “Save As,” saving it to your desktop (direct link here).
- If you haven’t already, you’ll need to create a sudo password. Open the Konsole app and type “passwd,” then press ENTER. Follow the prompts to create a system password (or change an existing one). Remember this password for later steps.
- Double-click the CryoUtilities icon on your desktop. It will run an installation script and create additional desktop icons.
- Open the CryoUtilities application. It will prompt you for the sudo password you created.
- In the main menu, simply click the “Recommended” settings button to apply the optimized settings automatically. For a more in-depth explanation of the settings, watch this video from the developer.
- Power off your Steam Deck completely. Then, hold the VOLUME UP button while powering it back on. Release the button after you hear the Steam Deck “bloop” sound. This will boot you into the BIOS menu.
- Using the right trackpad, navigate to “Setup Utility” in the bottom-right corner and click it with R2.
- Go to Advanced > UMA Frame Buffer Size and change the value from 1G to 4G.
- Press the SELECT button and confirm to save the changes and restart your Steam Deck.
To revert to the default settings at any time, re-open CryoUtilities and click the “Stock” settings option. You’ll also need to repeat step #6 of the installation process, reverting the VRAM size back to 1GB in the BIOS.
Note: CryoUtilities’ recommended settings create a 16GB swap file on your internal SSD. If you have a 64GB Steam Deck, this might be a concern due to limited internal storage. Using a large microSD card for game storage can help alleviate storage concerns.
Additional EmuDeck Tools: Expanding Functionality
Beyond emulator installation and configuration, EmuDeck includes several built-in tools to enhance your emulation experience. These tools are accessible within EmuDeck under the “Tools & Stuff” section.
PowerTools: PowerTools is a plugin that allows fine-tuning of specific emulators and games for optimal performance. It’s particularly effective with Dolphin, enabling you to reduce CPU threads from 8 to 3 (and disable SMT), which can improve clock speeds and result in smoother gameplay.
PowerTools can be installed directly through EmuDeck. Open EmuDeck, select “Tools & Stuff” > “PowerTools,” and follow the prompts. For manual installation, you can use Decky Loader, a plugin manager that provides a storefront and installation path for plugins like PowerTools. Install Decky Loader by following the instructions on their website. Once installed, access the plugins menu by pressing the “three dots” button in Game Mode to open the Quick Access Menu (QAM), then navigate to the plugins icon at the bottom. From there, you can access the plugin store and find PowerTools. Note that all plugins require sudo access, and EmuDeck or Decky Loader will guide you through the password prompt when needed.
GyroDSU: GyroDSU is a plugin that unlocks the Steam Deck’s gyro controls for use in emulators for Nintendo 3DS, Wii, Wii U, and Switch. For setup instructions, refer to this guide on the EmuDeck wiki.
Caution: Using plugins can sometimes lead to instability or crashes. For example, when exiting PowerTools, pressing the B button on the Steam Deck is recommended over the QAM (“three dots”) button, as the latter can occasionally cause crashes.
EmuDeck Compressor: This tool analyzes your ROM library and compresses games to space-saving formats, potentially freeing up to 70% of storage space. PSX, PS2, Sega CD, and Dreamcast games are converted to CHD format, while GameCube/Wii games are converted to RVZ format.
BIOS Checker: The BIOS Checker tool scans your BIOS folder and identifies any potential issues. Even if you’ve added BIOS files, they might fail the check due to case sensitivity mismatches or not being the exact files EmuDeck expects.
Quick Settings: If you want to quickly adjust bezels, shaders, or aspect ratios for specific systems, the Quick Settings tool provides convenient toggles for these options.
SaveBackup: SaveBackup is a beta tool designed to back up your game save files to cloud services like Google Drive or Dropbox. Currently, it focuses solely on save game backups, but future updates will likely include syncing capabilities across devices.
Emulator Guides: This section provides a dropdown menu of different emulators, offering notes and information about each. The most valuable feature here is the “Reset configuration” button for each emulator. If you encounter issues with emulator settings (e.g., GameCube settings), you can easily reset them to default without re-running the entire EmuDeck update process.
Reset or Uninstall EmuDeck: If you need to reset EmuDeck to its default state or uninstall it entirely, you can do so through the “Tools & Stuff” section as well.
VibrantDeck (External Tool):
VibrantDeck is a plugin (installed via DeckyLoader) that is not part of EmuDeck directly but is highly recommended for enhancing the Steam Deck screen’s color saturation. It can make colors appear more vibrant and visually appealing. A VibrantDeck setting of 120 is a common preference.
Hotkeys for Emulation: Streamlined Control on Steam Deck
A key aspect of emulating games on the Steam Deck is effectively mapping controls to mimic the original console controllers. EmuDeck preconfigures controls for you using the bindings illustrated in the images above. If you wish to customize these bindings, you can adjust them within each emulator’s settings menu.
For certain systems (Wii U, 3DS, etc.), a Steam Controller Profile needs to be enabled for hotkeys to function correctly. For example, with 3DS:
- Launch a 3DS game in Steam Deck Game Mode.
- Press the STEAM button > Controller Settings > Current Layout > Template > EmuDeck – Citra 3DS.
Note: This profile selection needs to be done once per game for systems requiring controller profiles; the Steam Deck will remember the profile afterward.
RetroArch: The All-in-One Emulator Powerhouse
App: RetroArch (FlatPak)
File types: Varies
BIOS: Varies (place in /Emulation/bios/ folder)
More info: EmuDeck wiki page
RetroArch is a versatile, all-in-one emulation program offering a standardized emulation experience. It provides universal hotkeys, cheat implementation, shaders, filters, autosaves, and more. For less demanding systems (generally up to PSP), RetroArch is an excellent choice. However, for more complex systems, standalone emulators often offer better performance. Standalone emulators are also available for systems that run well in RetroArch (PS1, PSP, N64) if you prefer them.
For a list of systems commonly supported by RetroArch within EmuDeck, consult this list on the EmuDeck GitHub page. This list details system names, accepted file extensions, and any required BIOS files. A convenient way to manage BIOS files is to search for a “RetroArch BIOS pack” and place all the files from the pack into the /Emulation/bios/ folder. These packs often contain more files than strictly necessary but ensure you have the required BIOS readily available.
Important: RetroArch requires your Steam Deck to be running at a 60Hz refresh rate. If you experience slowdown, press the QAM (“three dots”) button, go to the Battery (Performance) section, and ensure both Framerate Limit and Refresh Rate are set to 60.
Managing Multi-Disc Games: For games spanning multiple discs, using an m3u file is the easiest way to manage them. This tutorial on the EmuDeck wiki provides clear instructions.
PSP System Files: If you’re running PSP games through RetroArch, you’ll need to download PSP system files within RetroArch itself. Open RetroArch, go to Main Menu > Online Updater > Core System Files Downloader > PPSSPP.zip. This will download and install the necessary files for proper menu functionality.
N64 Image Size Adjustments: Due to N64 video processing, some games have black bars around the image (a characteristic of certain N64 titles). To zoom in and remove these borders:
- Press SELECT + Y to open the RetroArch quick menu.
- Press B to return to the main menu.
- Select Settings > Video > Scaling > Aspect Ratio and set it to Custom.
- Adjust the custom aspect ratio parameters to stretch the image to your desired screen size.
- Once satisfied, go to Quick Menu > Overrides > Save Game Overrides. This will apply the scaling setting every time you launch this specific game.
N64 30fps Cap Fix: If you encounter a 30fps frame rate cap in N64 games, disable rewind:
- Launch an N64 game.
- Press SELECT + Y to open the RetroArch quick menu.
- Press B to return to the main menu.
- Select Settings > Frame Throttling > Rewind and turn it OFF.
- After disabling rewind, go to Quick Menu > Overrides > Save Core Overrides. This will disable rewind for all N64 games.
RetroAchievements Integration: RetroArch seamlessly integrates with RetroAchievements, a community-driven platform for tracking and earning achievements in retro games. During EmuDeck installation, you have the option to integrate your RetroAchievements account. Sign up for a free account on the RetroAchievements website and enter your login details during EmuDeck setup. If you’ve already installed EmuDeck, you can add RetroAchievements later by re-running EmuDeck in Custom Mode and entering your login details when prompted.
Here are essential universal hotkeys for RetroArch systems:
Exit game: SELECT + START
Fast forward: SELECT + R2
Save state: SELECT + R1
Load state: SELECT + L1
RetroArch Quick Menu: SELECT + Y (or L3 + R3)
Toggle FPS: SELECT + X
RetroArch can be a complex application. EmuDeck preconfigures most settings for you, aiming for a seamless experience where direct interaction with RetroArch menus is minimal. However, if you need deeper customization, my RetroArch Starter Guide provides a more in-depth exploration of RetroArch’s options.
Nintendo 3DS Emulation with Citra: Handheld Gaming on Steam Deck
App: Citra (standalone)
File types: .3ds .3dsx .app .axf .cci .cxi .elf
BIOS: Title Keys are needed for encrypted ROM types (aes_keys.txt). Decrypted ROMs are recommended for best results.
More info: EmuDeck wiki page
Enable Fast Forward: To maximize fast forward speed in Citra:
- Open Citra > Emulation > Configure > General.
- Under “Use Alternate Speed,” move the slider fully to the right (“unthrottled”). Ensure “Use Alternate Speed” remains unchecked.
- Go to Citra > Emulation > Configure > Controls > Hotkeys.
- Set “Toggle Alternate Speed” to a keyboard key (e.g., number 9). Use the Steam Deck on-screen keyboard (STEAM + X) to input the key.
- Open a 3DS game and ensure the Citra 3DS controller profile is loaded (STEAM button > Controller Settings > Current Layout > Template > EmuDeck – Citra 3DS).
- Go to STEAM > Controller Settings > Edit Layout > Joysticks > R3 Click.
- Set R3 Click to Keyboard > 9 (or your chosen key).
- Back out to the game. R3 will now toggle fast forward on/off. This profile editing is currently needed for each game until integrated into EmuDeck.
Exit Game: Press and hold R5 for a few seconds to exit a 3DS game.
Improved Visuals: EmuDeck defaults to 2x resolution scaling, but many games run well and look sharper at 3x. However, performance can vary. To try 3x resolution:
- Press L4 to open the Menu Bar.
- Go to Emulation > Configure > Graphics > Internal Resolution > 3x.
- Test game performance. Revert to 2x if needed for other games. Citra lacks per-game graphics settings.
Controls: The EmuDeck Citra version lacks traditional hotkeys, but it includes a pre-configured controller profile that auto-loads upon EmuDeck installation. To enable it:
- Launch a 3DS game in Steam Deck Game Mode.
- Press the STEAM button > Controller Settings > Current Layout > Template > EmuDeck – Citra 3DS.
Now, L4 toggles Full Screen, R4 swaps screens, L5 toggles layout, and R5 (hold) exits the game. This profile setup is required only once per game.
In addition to hotkeys, a radial quick menu provides access to functions like Fast Forward and Save States. Activate it by sliding your thumb on the left trackpad:
Notes:
- .cia files are supported but require installation in Citra before use. They are not placed in the ROMS folder and are incompatible with Steam ROM Manager and EmulationStation. Unencrypted .3ds files are recommended.
- Default Fast Forward speed is 500%. Adjust it in Configure > General > Alternative speed.
- Gyro controls are possible with SteamDeckGyroDSU. Setup instructions here.
Nintendo GameCube Emulation with Dolphin: Classic Nintendo in HD
App: Dolphin (standalone)
File types: .ciso .dol .elf .gcm .gcz .iso .nkit.iso .rvz .wad .wia .wbfs
BIOS: Optional IPL.bin for boot logo (details below)
More info: EmuDeck wiki page
PowerTools Plugin: Some GameCube games may not run at full speed due to Steam Deck core handling. The PowerTools plugin resolves this. See the PowerTools section for installation. In addition to PowerTools, open the QAM (“three button”) menu, enable Advanced View, enable Manual GPU Clock Control, and set it to 1200 MHz.
Gecko and Action Replay Codes: Enhance gameplay with codes.
- Open Dolphin in Desktop Mode > Options > Configuration > General > check “Enable Cheats.”
- Load games into Dolphin (Options > Configuration > Paths > add GameCube ROM folder path, e.g., /run/media/mmcblk0p1/Emulation/roms/gc).
- Right-click a game > Properties > AR (Action Replay) or Gecko Codes tabs. Pre-populated codes may be available to enable.
To add custom codes:
- Search the game name on the Dolphin wiki for available codes.
- Copy the code text.
- In game Properties (AR or Gecko tab), “Add New Code.”
- Name the code (e.g., “60fps patch”).
- Paste the code (code text only, not the name).
- “Save.” The code is now selectable in the tab.
Widescreen Hack: EmuDeck offers a widescreen hack option during setup. It works well for many games, but some (e.g., Super Mario Sunshine) may have side distortion. Gecko or Action Replay codes can provide fixes, sometimes pre-added to game properties. Search the Dolphin wiki for codes (e.g., 16:9 fix for Super Mario Sunshine). Many 16:9 fixes require disabling the default EmuDeck widescreen hack. Toggle widescreen aspect ratio in-game with START + RIGHT on the d-pad.
Improved Visuals: EmuDeck defaults to 2x resolution. Increase or decrease resolution with START + UP/DOWN on the d-pad. 3x resolution may look better docked to an external display, but 2x is often sufficient on the Steam Deck screen.
Boot Logo: Display the GameCube boot logo:
- Obtain GameCube BIOS files (e.g., “gc-ntsc-12.bin”). Rename it to “IPL.bin.”
- Place IPL.bin in the GameCube system folder (hidden folder, press CTRL+H to show):
/home/deck/.var/app/org.DolphinEmu.dolphin-emu/data/dolphin-emu/GC/USA/IPL.bin - Restart Dolphin.
- Options > Configuration > GameCube > uncheck “Skip Main Menu” (if grayed out, BIOS file or location issue).
- Boot logo will now appear when launching a GameCube game. If stretched, Options > Graphics Settings > Hacks > “Immediately Present XFB” should be OFF.
Controller Profiles: Some games have aged controls, like reversed camera axes. Create a custom controller profile to fix this:
- Dolphin > Options > Controller Settings > Port 1 (Standard Controller) > Configure.
- Remap right stick X/Y axes to opposite directions.
- In “Profile” (top right), name it (e.g., “reverse”) > Save.
To apply this profile to a specific game:
- Dolphin > right-click game > Properties > Game Config > Editor.
- Under “User Config,” type:
[Controls] PadProfile1 = GC_reverse_camera(replace “GC_reverse_camera” with your profile name).
This method can be used for various controller tweaks per game.
Nintendo Wii Emulation with Dolphin: Motion Gaming on Steam Deck
App: Dolphin (standalone)
File types: .ciso .dol .elf .gcm .gcz .iso .json .nkit .iso .rvz .wad .wia .wbfs
BIOS: None required
More info: EmuDeck wiki page
Most Wii emulation settings are similar to GameCube (as they use the same Dolphin emulator). Refer to the GameCube section above for general Dolphin settings.
PowerTools Plugin: As with GameCube, PowerTools is recommended for performance optimization. See the PowerTools section for details. Additionally, enable Manual GPU Clock Control and set it to 1200 MHz in the QAM menu.
Wii System Menu: Access the Wii System Menu within Dolphin:
- Dolphin in Desktop Mode > Tools > Perform Online System Update > United States (or region).
- Tools > Load Wii System Menu (4.3U) > perform initial setup (16:9 aspect ratio can make pointer use difficult at screen edges).
- To add Wii Virtual Console or WiiWare games (.wad files) to the Wii Menu: Tools > Install WAD > select .wad files.
This Wii Menu access is primarily for novelty, as it’s not accessible from Steam Deck Game Mode. This video from Archades Games provides more in-depth information.
Wiimote Control Schemes: EmuDeck pre-installs several Wii control profiles. Toggle between them with SELECT + LEFT/RIGHT on the left analog stick. Wii games vary in control scheme compatibility. While most can be handled by these profiles, games requiring full Wii motion controls (e.g., Wii Sports) may not be fully playable on Steam Deck with these profiles. Focus on games with Nunchuk, Classic Controller, or GameCube controller support. This list details Classic Controller compatible games.
The provided control schemes are not definitive. Customize them in settings as desired. YouTube commenter MeowtheMouse recommended this alternative layout:
C = L1
Z = L2
A = A
B = R2
1 = B
2 = Y
Shake = R1
Gyro Controls: Gyro controls are possible using SteamDeckGyroDSU. Setup instructions here.
PrimeHack: Metroid Prime Trilogy Optimized for Steam Deck
App: PrimeHack Dolphin fork (standalone)
File types: .ciso .dol .elf .gcm .gcz .iso .json .nkit .iso .rvz .wad .wia .wbfs
BIOS: None required
More info: EmuDeck wiki page
PrimeHack is a Dolphin fork specifically optimized for Metroid Prime games. The Metroid Prime Trilogy Wii game (place in Emulation/roms/primehacks folder) is recommended for best results.
PowerTools Plugin: PowerTools is crucial for performance optimization. See the PowerTools section. Enable Manual GPU Clock Control and set it to 1200 MHz in the QAM menu.
HD Textures: Some HD textures are pre-installed in EmuDeck PrimeHack. To add more, refer to my PrimeHack (Windows) guide – the process is identical. Place texture packs in:
/home/deck/.var/app/io.github.shiion.primehack/data/dolphin-emu/Load/Textures/R3M/
(Note: .var folder is hidden by default. In Dolphin file manager, click the hamburger menu > “view hidden files” to show hidden folders.)
PrimeHack-specific controls are shown in the image above.
Nintendo Wii U Emulation with Cemu: Modern Nintendo on Handheld
App: Cemu
File types: .rpx .wud .wux .wua .elf .iso .wad
BIOS: Title Keys (place in Emulation/roms/wiiu/keys.txt) for WUD/WUX files
More info: EmuDeck wiki page
Cemu, a Windows application, runs seamlessly on Steam Deck thanks to EmuDeck’s integration – no Proton configuration needed. Configure Cemu in Desktop Mode (“Cemu EmuDeck” application).
Adding Games: Wii U game files and setup vary:
- RPX (Loadiine): Folders (code, content, meta) easiest to find and use (e.g., USBHelper). Create a game folder, place the three folders inside, and put the game folder in Emulation/roms/wiiu/roms (second “roms” subfolder). Unencrypted, keys.txt not needed.
- WUA: Compressed files from RPX or other types. Unencrypted, recommended file type. See my compression guide for creation.
- WUD/WUX: Full-disc dumps, single-file, encrypted. Require keys.txt file (obtain yourself or dump from a hacked Wii U).
- NUS: Folder with .h3 and .app files, encrypted. Decrypt to RPX, but RPX (or WUA) is generally preferred.
DLC and Updates: Install DLC/updates directly in Cemu in Desktop Mode. DLC/update folders should have the same three-folder structure (code, content, meta) as RPX games. Place DLC/update folders in Emulation/roms/wiiu (subfolders UPDATES and DLC recommended). In Cemu, File > Install game title, update, or DLC > navigate to DLC/update location (SD card, often D: drive) > open meta.xml or main DLC/update folder.
Gyro Controls: Gyro controls are supported via SteamDeckGyroDSU. Setup instructions here.
Graphics Packs: Essential for Cemu. Options > Graphics Packs > “Download latest community graphics packs.” Graphics packs for installed games will appear. Check Graphics settings for each game, setting aspect ratio to 16:10 and resolution to 1280×800 for Steam Deck display. Recommended tweaks:
**Mario Kart 8**
Enhancements > Contrasty > Colorful

**New Super Mario Bros U**
Workarounds > Title Screen Crash Fix > ON

**The Legend of Zelda: Wind Waker HD**
Enhancements > Contrasty v1.1 > GameCube style
Enhancements > No SSAO > ON
Graphics > Resolution > 1280x720 (for best performance)
Workarounds > FPS Slowdown > ON

**The Legend of Zelda: Twilight Princess HD**
Enhancements > Contrasty > default
Graphics > Performance Resolution > 1280x720
Modes > Distant Fog > ON

**The Legend of Zelda: Breath of the Wild**
Cheats > (choose desired cheats)
Mods > Xbox Controller Button Layout > ON
Mods > FPS++ > Mode > Advanced Settings
Mods > FPS++ > Framerate Limit > 40fps (also set Framerate to 40 in Steam QAM)
Controls: EmuDeck Cemu (Windows version) lacks expected hotkeys. However, a pre-configured controller profile auto-loads:
- Launch a Wii U game in Steam Deck Game Mode.
- STEAM button > Controller Settings > Current Layout > Template > EmuDeck – Cemu.
R4 shows gamepad screen, SELECT + START exits the game.
Nintendo Switch Emulation with Yuzu: Portable Modern Nintendo
App: Yuzu
File types: .kp .nca .nro .nso .nsp .xci
BIOS: Prod keys in Emulation/bios/yuzu/keys
More info: EmuDeck wiki page
Two Switch emulators are available: Yuzu and Ryujinx. This guide focuses on Yuzu, but Ryujinx information is here.
Obtaining Game Files: Dump your own game files and prod.keys from a modded Nintendo Switch.
NSP or XCI formats are recommended. Switch Army Knife (SAK) converts XCI/NSZ to NSP and patches game files with updates. Rename ROMs without special characters (e.g., é in Pokémon) to launch from Steam.
DLC and Updates: Install DLC/updates in Yuzu in Desktop Mode. NSP format recommended. Do not place DLC/updates in Emulation/roms/switch folder to avoid Steam ROM Manager issues. Store them in Emulation/roms/bios/yuzu folder. In Yuzu, File > Install Files to NAND… > navigate to DLC/update files > select files (multiple selection possible). Delete NSP files after installation.
Yuzu Cheats/Mods: Find mods at GBATemp. Download and unzip mods to get a folder with an exefs subfolder. Right-click game in Yuzu > “Open Mod Data Location” > paste mod folder. Verify installation: right-click game > Properties > “Add-Ons” tab.
Performance and Compatibility: Default EmuDeck settings work for many games. Steam Deck emulation database provides per-game recommendations. Per-game configurations: right-click game in Yuzu > Properties > adjust resolution, VSync, accuracy. Check “Compatibility” column in Yuzu for game compatibility.
PowerTools plugin ([#additional-emudeck-tools]) is beneficial for many Switch games. Disable SMT (simultaneous multi-threading) to reduce threads from 8 to 4 and boost performance. Per-game SMT setting: toggle SMT off while game is running > PowerTools > Persistent Profile: ON.
Manual GPU Clock Control can also improve performance: QAM button > battery icon > Manual GPU Clock Control > ON > set frequency (1300-1600 MHz, experiment for best results).
Gyro Controls: Gyro controls are possible using SteamDeckGyroDSU. Setup instructions here.
Sony PS Vita Emulation with Vita3K: Portable PlayStation Power
App: Vita3K
File types: NoNpDRM dumps via VitaShell
BIOS: PS Vita firmware
More info: EmuDeck wiki page
PS Vita emulation on Steam Deck is possible, but not extensively tested in this guide. Vita3K Quickstart guide includes game dumping instructions from a jailbroken PS Vita. My PS Vita jailbreak guide is here.
Guide update pending after testing. ETA Prime showcase video available.
Sony PlayStation Emulation with DuckStation: Enhanced PS1 Gaming
App: DuckStation
File types: .cue .chd .ecm .iso .m3u .mds .pbp
BIOS: scph5501.bin or similar (lowercase!) in /Emulation/bios/ folder
More info: EmuDeck wiki page
PlayStation games run well in RetroArch, but standalone DuckStation emulator is also excellent. It features a radial Quick Menu (left trackpad scroll near bottom-left, similar to Citra section) for easy navigation. Enable PS1 controller profile for Quick Menu access.
For multi-disc games, use .m3u files or convert to .pbp format. Instructions on the EmuDeck wiki. For .bin files, generate .cue files using this tool.
Sony PlayStation 2 Emulation with PCSX2: Bringing PS2 Classics to Steam Deck
App: PCSX2-Qt (see note below)
File types: .chd .cso .gz .img .iso
BIOS: See below
More info: EmuDeck wiki page
EmuDeck installs two PCSX2 versions: stable “PCSX2” and nightly “PCSX2-Qt EmuDeck” (default). PCSX2-Qt offers frequent updates and a graphical interface.
PS2 BIOS: Use BIOS file sets like this PS2 slim model set. Place them directly in /Emulation/bios folder:
SCPH-70012.bin
SCPH-70012.MEC
SCPH-70012.NVM
Widescreen Hacks: PCSX2-Qt > Settings > Emulation > enable “Enable Cheats” and “Enable Widescreen Patches.” Use hotkeys to cycle Aspect Ratio for best fit. Also, check in-game widescreen settings, as many PS2 games had built-in widescreen support.
Faster Fast Forward: Default fast forward is 500%. Remove limit: Settings > Emulation > “Fast Forward Speed” > “Unlimited.” Default fast forward hotkey: SELECT + R2. If hotkey doesn’t work, QAM (“three dot”) settings > Performance > Advanced View > Framerate Limit > OFF.
Improved Visuals: Settings > Graphics:
Rendering tab / Anisotropic Filtering: 8x
OSD tab / Shade Boost: ON
OSD tab / Saturation: 75
OSD tab / FXAA: ON
Default 2x rendering resolution, but 3x resolution (supersampling) looks significantly better with minimal performance impact. Increase/decrease resolution in-game with START + UP/DOWN on the d-pad.
Controller Profile: For games with reversed horizontal camera (e.g., Jak & Daxter), create a custom controller profile:
- Settings > Controllers > “New Profile” (bottom-right).
- Name it, choose “Load Current Profile” (“Shared”).
- Change right analog stick mapping. Exit windows and app.
Per-Game Settings: PCSX2-Qt EmuDeck > right-click game > Properties. Change default resolution, anisotropic filtering, or load custom controller profiles per game.
Boot Logo: Settings > BIOS > uncheck “Fast Boot” to see full PS2 boot logo.
Sony PlayStation 3 Emulation with RPCS3: Pushing the Limits on Steam Deck
App: RPCS3
File types: /PS3_GAME/USRDIR/eboot.bin or .pkg (and .rap) files installed in RPCS3
BIOS: PS3 firmware
More info: EmuDeck wiki page
BIOS Installation: Download PS3 firmware update file and install in RPCS3. RPCS3 in Desktop Mode > File > Install Firmware > find downloaded PS3 file. Delete downloaded file after installation. RPCS3 Quickstart guide for detailed instructions.
Game Files: Two main types: extracted ISO/PSN files, or .pkg/.rap files.
- Extracted ISO/PSN files: Folders like (Game Name)/PS3_GAME/USRDIR/eboot.bin. Place (Game Name) folders in /Emulation/roms/ps3. In Steam ROM Manager, use “RPCS3 (Extracted ISO/PSN)” parser.
- Installed PKG files: .pkg files from PSN store installed directly in RPCS3: File > Install Packages/Raps/Edats > select .pkg file or drag and drop. Installs to Emulation/storage/rpcs3/dev_hdd0/game/. Delete .pkg files after installation. Some .pkg installations require accompanying .rap files (part of .pkg extraction). Use PSNDLv4 to find missing .rap files. In Steam ROM Manager, use “RPCS3 (Installed PKG)” parser.
- To dump your own PS3 files from discs or PSN, see RPCS3 Quickstart guide.
For adding PS3 games to EmulationStation, follow these EmuDeck wiki instructions.
Many PS3 games may not work well in RPCS3, and Steam Deck performance can be limited. Consult the RPCS3 compatibility list and check for game compatibility and performance tweaks.
Microsoft Xbox Emulation with Xemu: Original Xbox on Steam Deck
App: Xemu
File types: .iso (xiso formatted, see note below)
BIOS: mcpx_1.0.bin and modified retail “COMPLEX 4627” BIOS (in /Emulation/bios)
More info: EmuDeck wiki page
Prepare Game Files: Xbox .iso files need to be “xiso” formatted for Xemu. Use extract-iso tool. EmuDeck wiki instructions for setup.
BIOS Files: EmuDeck pre-installs Xemu’s Xbox HDD image. Add MCPX Boot ROM and BIOS Flash ROM images to /Emulation/bios folder. BIOS file information here. If emulator doesn’t recognize BIOS, naming issue likely. Machine > System > point application to BIOS files directly.
Performance and Compatibility: Xbox emulation on Steam Deck is not perfect. Xemu compatibility list indicates game compatibility. Compatible games run acceptably at 1x Internal Resolution Scale (EmuDeck default). Some games may run at 2x resolution (SELECT + START > Quick Menu > Settings > All Settings).
Widescreen: Some games support widescreen or 4:3 aspect ratios. Xbox display defaults to stretched screen. Toggle widescreen support in-game settings if available. For 4:3 aspect ratio: SELECT + START > Quick Menu > Settings > Display Mode.
White and black buttons are mapped to L1 and R1 on Steam Deck.
Microsoft Xbox 360 Emulation with Xenia: Experimental Xbox 360 on Steam Deck
App: Xenia
File types: .iso (guide on ripping them from Xbox 360)
BIOS: None required
More info: Xenia quickstart guide and EmuDeck wiki page
Xenia is experimental, and limited games are playable. Install via EmuDeck: Tools & Stuff > Emulator Guides > Xenia (screenshot below).
RetroDeck: A Streamlined Emulation Solution for Steam Deck
RetroDeck is an all-in-one emulation solution using EmulationStation as its frontend. It operates as a single, self-contained app with pre-configured emulators, offering a straightforward emulation experience within SteamOS. Installation is easy via the Discover app in Desktop Mode.
RetroDeck is actively developed and currently in pre-release, with ongoing feature additions and refinements. Treat it as a beta program until final release.
Batocera: A Dedicated Emulation OS for Steam Deck
Batocera is a custom Linux OS focused on game emulation, using EmulationStation as its frontend. It is a mature and refined emulation OS with extensive development history across various platforms. Batocera is actively developed with frequent significant releases.
A key advantage is its self-contained, bootable nature. Run Batocera from microSD card, USB drive, or external hard drive, enabling dual-booting and separation from SteamOS. Ideal for users wanting a dedicated emulation environment distinct from their PC gaming on SteamOS.
Batocera has comprehensive guides and an active Discord server for support. System compatibility list here. Yuzu (Switch) requires manual installation.
Batocera is currently in beta on Steam Deck, but is stable and improving.
Changelog
05MAR2024 – Updated Switch and Citra sections
24NOV2023 – Added note about EmuDeck recognizing SD cards
31JUL2023 – Updated EmuDeck wiki links – General cleanup and maintenance
13APR2023 – Updated Wii U section to link to WUA compression guide
08MAR2023 – Added CryoUtilities section – Updated Switch section to further explain SMT and GPU clock control
16JAN2023 – Added section about re-linking the SD card for use when in Game Mode
19OCT2022 – Added screenshot of Xenia installation option – Fixed wording about PCSX2-Qt as the default emulator
18OCT2022 – Added link to ES-DE themes – Added note about fixing the 30fps cap in N64
17OCT2022 – Added note about N64 image sizes in the RetroArch section
16OCT2022 – Published guide