The Grasp of Avarice dungeon in Destiny 2 is a thrilling pirate-themed adventure, released as part of the Bungie 30th Anniversary Pack. This dungeon is not only a challenging test of skill and teamwork but also a treasure trove of loot, featuring fan-favorite weapons from Destiny‘s past and unique Bungie-themed rewards. If you’re looking to delve into the depths of this loot-filled cave and emerge victorious, this comprehensive guide will provide you with a step-by-step walkthrough, ensuring you navigate every trap and defeat every boss.
For those seeking the legendary Gjallarhorn Exotic rocket launcher, completing the Grasp of Avarice dungeon is a crucial step. Make sure to pick up the “And Out Fly The Wolves” quest from Xur before you begin to kickstart your journey towards obtaining this iconic weapon.
Entering the Depths: Cosmodrome and Burdened by Riches
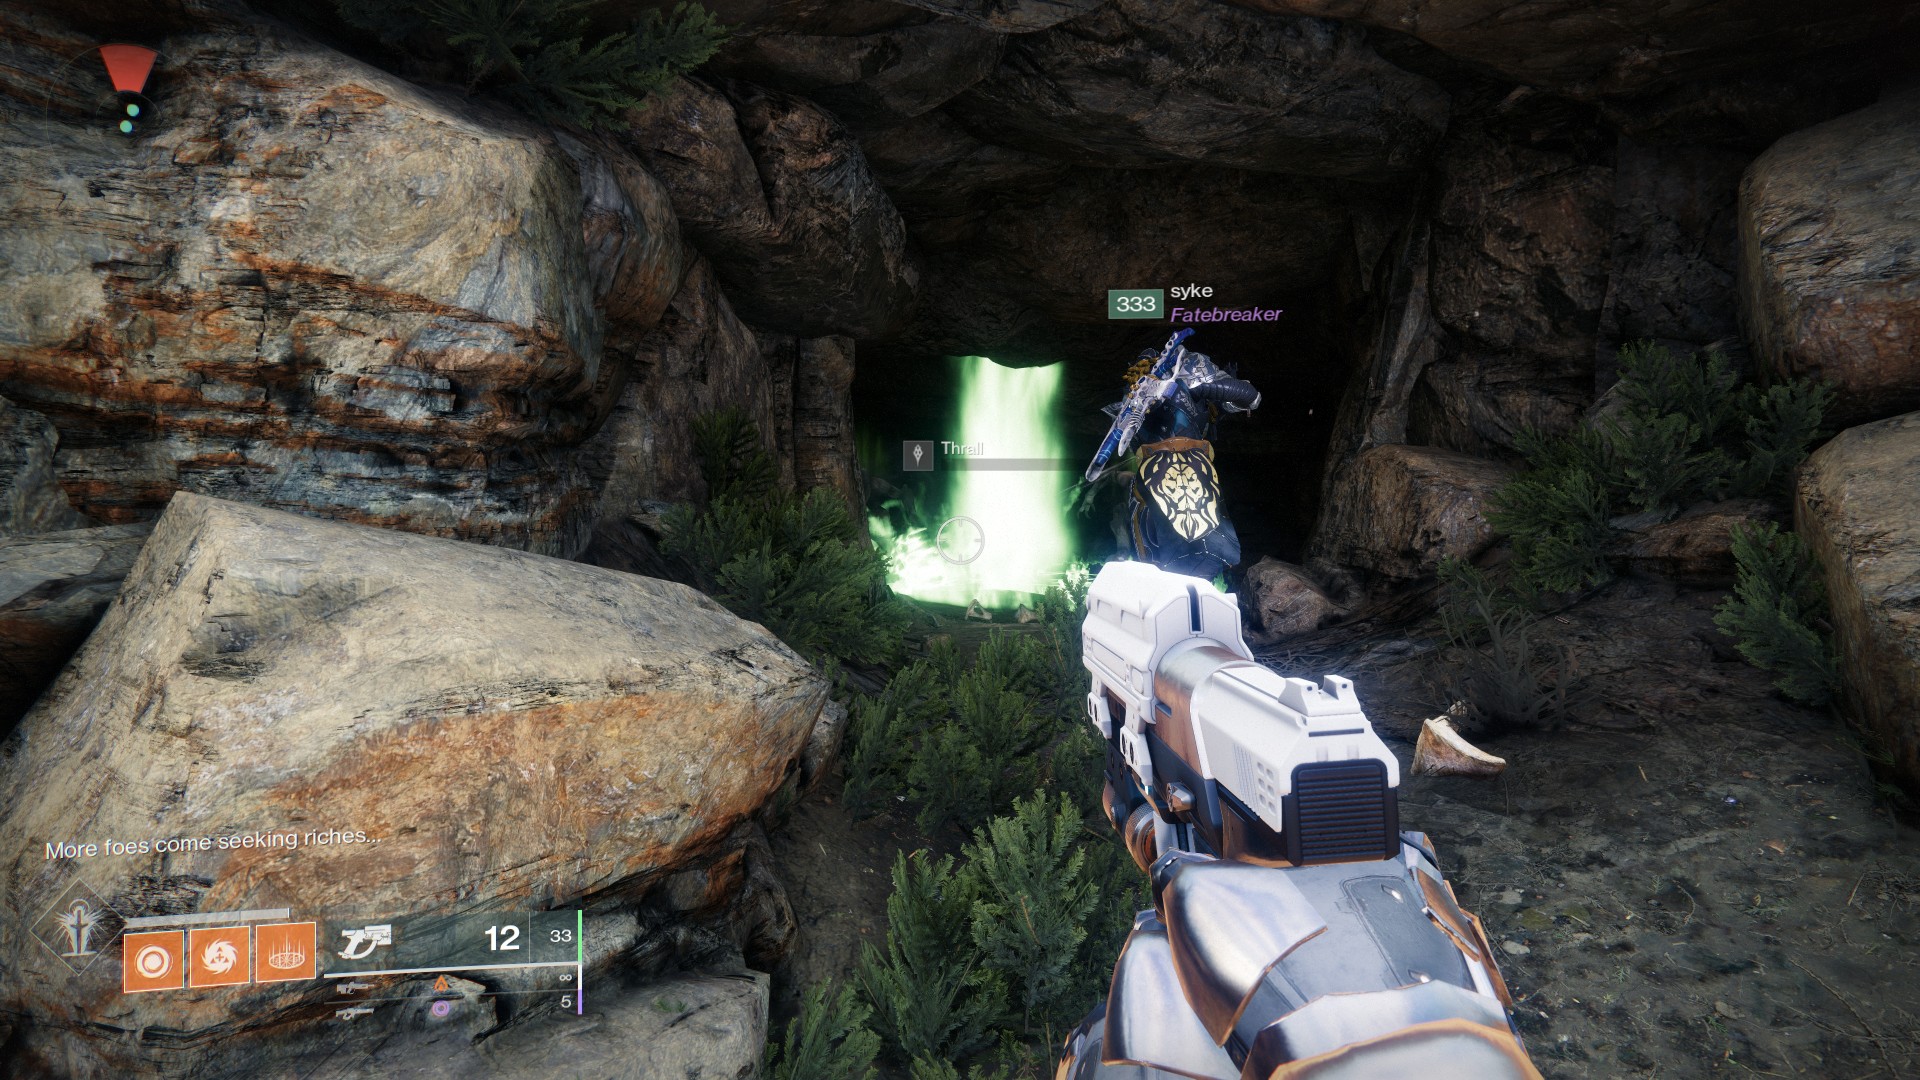
Your adventure into the Grasp of Avarice begins in a familiar location: the Cosmodrome. As you move forward, you’ll encounter a group of Fallen enemies gathered around a cave. This isn’t just any cave; it’s the infamous loot cave from the original Destiny, a nostalgic nod to the game’s history.
Don’t venture too close to the cave entrance immediately. Instead, position yourself slightly back to allow enemies to spawn continuously from within. Your initial task is to eliminate these spawning enemies.
Guardians stand their ground against waves of Fallen enemies emerging from the loot cave entrance in Destiny 2’s Grasp of Avarice dungeon.
As you defeat these enemies, they will drop Exotic-looking Engrams that are visually distinct with their gold and red glow. These Engrams are key to the dungeon’s primary mechanic: Burdened by Riches.
Burdened by Riches Mechanic Explained:
Collecting these Engrams inflicts you with the Burdened by Riches debuff. This debuff has a timer of 25 seconds. If you fail to remove the debuff before the timer expires, it will result in death. Picking up more Engrams will stack the debuff, increasing its intensity, and refresh the timer. However, accumulating stacks is necessary to progress.
To get rid of the Burdened by Riches debuff, you need to interact with a white crystal located inside the loot cave. Standing near this crystal while Burdened by Riches will cause it to drain the debuff stacks from you, removing two stacks at a time. The more stacks you deposit into the crystal, the larger it will grow.
Once the crystal has absorbed enough debuff stacks and grown to a significant size, a hole will open in the floor of the loot cave, marking your entrance into the true dungeon depths. Prepare to drop into the unknown!
Navigating the Pirate Traps
Unlike typical Destiny 2 dungeons where you primarily focus on combat encounters, Grasp of Avarice throws a curveball right from the start: booby traps. As you’re essentially breaking into a pirate’s lair, you’ll need to be cautious and clever to avoid deadly traps scattered throughout the initial areas.
Rusted Gangplank Traps:
After dropping through the loot cave, you’ll find yourself in the Rusted Gangplank area. This section is filled with misleading paths and instant-death traps. Here’s a breakdown of how to navigate this treacherous zone:
-
Door Selection: You’ll encounter two doors side-by-side. Take the second door on the right. The first door on the right is a trap and will lead to your demise.
-
Pressure Plate Trap: Immediately after entering the correct door, watch out for a pressure plate on the floor. Jump over it to avoid triggering another deadly trap.
-
Lever Activation: Proceed to the terminal in this small room and pull the lever. This action is crucial for opening the next path.
Avoid the Switch at the Walkway End: Do not interact with the switch located at the end of the walkway in the Rusted Gangplank area. Pulling this switch will launch you off into space, resulting in a preventable death.
Guardians carefully choose the second door on the right to progress through the trap-laden Rusted Gangplank section of Destiny 2’s Grasp of Avarice.
Pipe and Falling Platforms:
-
Enter the Pipe: After pulling the lever, a pipe will open up. Enter it to continue your journey.
-
Suspended Platforms: You’ll emerge into a room with platforms suspended in mid-air. Jump onto these platforms, but be quick! Standing on them for too long will cause them to collapse, sending you plummeting. Also, ignore the terminal across the room; it’s another spike trap.
-
Strategic Fall: Instead of trying to reach the opposite side, intentionally fall through the trap doors in the platforms. Aim to fall strategically into a secret room located on the right side.
-
Secret Room Lever: In this hidden room, find and pull the lever. This action will open up the correct path forward. After pulling the lever, make your way back to the room with the two initial doors.
The Pipe Maze:
-
Wall Fixtures Climb: Back in the room with two doors, look to your right. You’ll see wall fixtures. Climb these fixtures, ascending upwards. Continue climbing until you reach a set of pipes high above.
-
Pipe Selection: You’ll be presented with six pipes. Enter the third pipe from the right. You should be able to see sunlight filtering through a grate above the entrance of the correct pipe.
-
Pressure Pad and Grate: Inside the correct pipe, step on the pressure pad to open the grate above you. Jump up through the grate to proceed.
Guardians utilize wall fixtures to navigate upwards towards the pipe puzzle section of the Grasp of Avarice dungeon in Destiny 2.
Reservoir Door Puzzle:
-
Fixture Climb and Switch: After emerging from the pipes, climb the fixtures in front of you. Be cautious of a pressure plate on the left; it’s a spike trap to avoid. Continue along the path until you reach another switch.
-
Diagram Observation: At this switch location, you’ll see a diagram displaying doors in open and closed states. Pay close attention to this diagram as it provides the key to solving the puzzle.
-
Switch and Zig-Zag: Activate the switch and move into the next room across the way. In this new room, interact with the switch again. You’ll need to zig-zag back and forth between rooms, activating switches and moving through newly opened doors based on the diagram. Continue this process until you reach the third switch room on the left.
-
Final Switch and Large Doors: In the third switch room on the left, jump up and activate another switch. This action will open two large doors on the side. Be warned: these rooms beyond the large doors are dark and contain more traps, so proceed with caution.
-
Backtrack and Second Large Door: With the first large door open, backtrack to the very first switch you encountered in this reservoir area. Defeat any enemies that have spawned behind the newly opened large door. Activate the switch here again to open the second large door across the reservoir.
-
Forward Door: In the area beyond the second large door, you’ll see two doors. Take the door that leads straight forward, ignoring the door on the left.
Congratulations! You have successfully navigated the majority of the traps in the opening section of the Grasp of Avarice dungeon and are now ready to face the first combat encounter.
Scorch Cannon Puzzle Encounter
The next section introduces you to another key mechanic of the Grasp of Avarice dungeon: Scorch Cannons. This area serves as a quick puzzle encounter to familiarize you with these powerful weapons.
-
Giant Cylinder Entry: Jump into the giant cylinder structure. Head to the panel located near the door marked number one.
-
Door Three Activation: Throw the switch at the panel near door one. This will open door number three.
-
Door Three Switch: Go through door three, defeat the enemies inside, and interact with the switch in that room. This switch will open door number one, which will now be filled with enemies.
-
Door One Enemies and Switch: Eliminate the enemies that have appeared in door one and then activate the switch in this room. This action will open door number two.
-
Acquiring the Scorch Cannon: Door two contains a Scorch Cannon. Have a player with good aim pick up this weapon. Once equipped, move towards door number four.
A Guardian utilizes a fully charged Scorch Cannon shot to activate the power supply and open door four in Destiny 2’s Grasp of Avarice dungeon.
Powering Door Four:
-
Target the Energy Box: Aim the Scorch Cannon at the energy box located next to door number four. Specifically, focus on the cylinder in the middle of the energy box.
-
Charged Shots or Full Charge: You can either shoot the Scorch Cannon at the cylinder three to four times with standard shots, or charge a single shot fully by holding the trigger until it reaches maximum power.
-
Door Opening: Successfully powering the device will cause door number four to open, and a barricade blocking your path will drop.
-
Crevice Avoidance: Proceed up the stairs and jump into one of the crevices in the wall to avoid being crushed by a rolling barrel trap.
-
Vent Break: In the next room, break the vent to continue onward, putting you on the path to the first boss encounter of the Grasp of Avarice dungeon.
Phry’zhia, The Insatiable Boss Guide
Phry’zhia, The Insatiable serves as the first true boss encounter in the Grasp of Avarice dungeon. This boss is designed to reinforce the dungeon’s core mechanics and is relatively straightforward to defeat, especially with coordinated teamwork.
Encounter Arena Overview:
The arena for the Phry’zhia encounter is divided into two distinct sides: right and left. Each side features locked doors that are connected to energy devices. In the back of the arena, you’ll find a Scorch Cannon Vandal, and at the front, a crystal similar to the one in the loot cave.
Burdened by Riches Phase:
-
Scorch Cannon Acquisition: Begin by eliminating the initial wave of enemies. Have one player pick up the Scorch Cannon dropped by the Scorch Cannon Vandal.
-
Right Side Doors: Use the Scorch Cannon to activate the energy device on the right side of the arena. This will open the locked doors on the right, revealing a group of enemies.
-
Engram Collection and Crystal Deposit (Right Side): Defeat the enemies that emerge from the right side doors. Collect the Engrams they drop, inflicting yourself with the Burdened by Riches debuff. Quickly run to the crystal at the front of the room and deposit your debuff stacks.
-
Left Side Doors (Repeat): Repeat the process on the left side of the arena. Use the Scorch Cannon to open the left side doors, defeat the enemies, collect Engrams, and deposit the Burdened by Riches debuff into the crystal.
Guardians utilize powerful weaponry against Phry’zhia, The Insatiable during the first boss encounter of Destiny 2’s Grasp of Avarice dungeon.
Damage Phase:
-
Crystal Growth and Shield Lower: Once you have deposited enough Burdened by Riches stacks into the crystal from both sides, it will grow to its full size and lower Phry’zhia’s shield.
-
Boss DPS: Phry’zhia is now vulnerable to damage. It’s recommended to take cover behind the crystal for protection from boss attacks, or utilize a Well of Radiance for survivability and damage boost. Unleash your strongest damage-dealing weapons, such as rockets, fusion rifles, linear fusion rifles, or even swords.
-
Repeat Cycle: If you don’t defeat Phry’zhia within the damage phase, his shield will regenerate, and you will need to repeat the Burdened by Riches and crystal growth cycle to initiate another damage phase.
-
Progression: After defeating Phry’zhia, proceed through the door at the back of the arena and turn left to continue your dungeon descent.
Sparrow Bomb Defusal Challenge
Following the first boss encounter, you’ll face a thrilling Sparrow-based challenge: bomb defusal. This section tests your speed, navigation skills, and awareness of your surroundings.
-
Large Door and Sparrow Summon: You’ll arrive at a large door leading to a vast open area. Pull the left switch (the right switch is a trap) to open the door and immediately summon your Sparrow.
-
Mine Defusal Objective: At the far end of the area, you’ll see a mine counting down. Your objective is to reach this mine and stay within its designated area for approximately one full second to defuse it. If the timer reaches zero before you defuse the mine, it will detonate, resulting in death.
-
Timer Extension Switches: Each mine initially gives you only 15 seconds to reach and defuse it. However, you can extend the timer by riding your Sparrow near specific switches scattered along the path to each mine.
Mine A and Extender Switches:
-
Mine A Location: The first mine, Mine A, is located at the end of the initial straight path.
-
Extender Switch 1: For Mine A, the first extender switch is located on the right side of the path, near some trees.
-
Extender Switch 2: The second extender switch for Mine A is on the left side, overlooking a bluff, situated on some rocks near a crashed ship.
Locations of the timer extender switches for the first mine (Mine A) in the Sparrow bomb defusal challenge of Destiny 2’s Grasp of Avarice dungeon.
Mine B and Extender Switches:
-
Mine B Location: After defusing Mine A, proceed along the path to Mine B.
-
Extender Switch 3: For Mine B, the first extender switch is on the right side of the path, just past a small tunnel.
-
Extender Switch 4: The second extender switch for Mine B is on the left ramp as you approach the mine.
Locations of the timer extender switches for the second mine (Mine B) in the Sparrow bomb defusal challenge of Destiny 2’s Grasp of Avarice dungeon.
Mine C and Extender Switches:
-
Mine C Location: Continue following the path to Mine C.
-
Extender Switch 5: For Mine C, the first extender switch is located just through the metal ramp you encounter on the path.
-
Extender Switch 6: The second extender switch for Mine C is at the end of the tunnel on the left side.
Locations of the timer extender switches for the third mine (Mine C) in the Sparrow bomb defusal challenge of Destiny 2’s Grasp of Avarice dungeon.
Mine D and Extender Switches:
-
Mine D Location: The final mine, Mine D, is located further along the path.
-
Extender Switch 7: For Mine D, the first extender switch is on the rock ramp located on the right side.
-
Extender Switch 8: The final extender switch is in the right eye socket of the skull (which will be on your left as you approach). To reach this switch, use the cannon on the left side to launch yourself towards the skull.
Locations of the timer extender switches for the fourth mine (Mine D) in the Sparrow bomb defusal challenge of Destiny 2’s Grasp of Avarice dungeon.
Successfully defusing all four mines (A, B, C, and D) will complete this encounter, allowing you to proceed deeper into the dungeon.
Cannon Platform Puzzle Encounter
The next encounter takes place in a vast lagoon area and involves utilizing cannons to solve a puzzle. This section requires coordination and effective use of Scorch Cannons for both platform traversal and puzzle completion.
Lagoon Arena and Cannon Platforms:
You’ll enter a large cavernous area filled with water, featuring a mechanical hot air balloon structure embedded in the cave ceiling. Around the sides of this structure, you’ll notice orange nodes. Scattered throughout the lagoon are multiple platforms, each equipped with a cannon and a Scorch Cannon Vandal.
Activating Cannons and Platform Hopping:
-
Scorch Cannon Acquisition: Steal a Scorch Cannon from one of the Vandals on the platforms.
-
Cannon Activation: Use the Scorch Cannon to shoot the energy device connected to a platform’s cannon. This will activate the cannon, making it ready to launch players.
-
Platform Launch: To launch yourself and your fireteam members, ensure everyone who wants to be launched stands underneath the cannon barrel before you activate the power supply with the Scorch Cannon. For self-launches, shoot the energy device, hold the trigger to charge the shot (but don’t release it), position yourself under the cannon, and then release the trigger to launch.
-
Active Platform Identification: Your objective is to find an “active” platform. An active platform is indicated by the presence of enemies, specifically a shielded Servitor called an “Abundance Monitor.”
-
Platform Traversal: Use the cannons to launch yourselves from platform to platform, navigating towards the platform with the Abundance Monitor. This may require multiple cannon jumps, depending on the location of the active platform.
Guardians coordinate cannon launches to traverse platforms in the lagoon puzzle encounter of Destiny 2’s Grasp of Avarice dungeon.
Abundance Monitor and Servitor Bomb:
-
Platform Clear and Engram Collection: Once you reach the active platform, eliminate all enemies, including the Abundance Monitor’s protectors. Collect the Engrams dropped by the defeated enemies.
-
Crystal Deposit and Shield Break: Deposit the collected Engrams into the crystal located in the central room of the platform. Repeat this process, collecting Engrams from subsequent waves of enemies and depositing them into the crystal. Once enough Engrams are deposited, the crystal will grow and break the Abundance Monitor’s shield.
-
Servitor Bomb Transformation: Defeat the Abundance Monitor. Instead of dying normally, it will transform into a rolling cannonball (Servitor Bomb).
-
Positioning the Servitor Bomb: Carefully approach the Servitor Bomb and use your Guardian’s body to push it towards the platform’s cannon. Be extremely cautious not to accidentally push the bomb into the lagoon below.
Launching Servitor Bombs at Fallen Shield:
-
Cannon Aim and Node Target: Once the Servitor Bomb is positioned in the platform’s cannon, rotate the cannon so it is aimed at one of the orange nodes on the hot air balloon structure in the center of the lagoon.
-
Node Destruction: With the cannon aimed correctly, use the Scorch Cannon to activate the platform’s cannon, launching the Servitor Bomb into the targeted orange node.
-
Fallen Shield Damage: A successful hit will remove one-fourth of the “Fallen Shield” health bar displayed at the top of the screen.
-
Repeat and Final Cannon: Repeat this entire process three more times, targeting different orange nodes, to deplete the Fallen Shield completely. After destroying all four nodes, a final cannon will activate in the middle of the lagoon. Ride this central cannon upwards to reach the final boss arena.
Guardians launch a Servitor bomb towards an orange node on the central structure to weaken the Fallen Shield in Destiny 2’s Grasp of Avarice dungeon.
Captain Avarokk, The Covetous Final Boss Guide
Captain Avarokk, The Covetous is the final challenge of the Grasp of Avarice dungeon. While not overwhelmingly difficult, this boss fight requires understanding its mechanics and effective team coordination to secure victory and claim your loot.
Boss Arena and Setup:
The final boss arena is divided into four distinct sections:
- Three Enemy Platforms: These platforms are positioned around the central stage and feature chests hanging from the walls. These are where you’ll primarily engage enemies and trigger mechanics.
- Central Ship/Stage: Captain Avarokk remains on this central stage throughout the encounter.
Minion Elimination: R-M80 and Grisprax:
-
Initial Minions: The first priority in this fight is to eliminate Captain Avarokk’s two key minions: R-M80, a Shank, and Grisprax, a stealth Vandal. These enemies are heavily armored and can pose a significant threat if left unchecked.
-
Grisprax Engram Drop: While R-M80 does not drop Engrams, Grisprax drops 10 Engrams upon defeat.
-
Engram Deposit (Grisprax): After defeating Grisprax, quickly jump onto the central stage, collect the Engrams, and deposit your Burdened by Riches debuff into the crystal located in the center of the stage. Be cautious of Captain Avarokk’s attacks and use the crystal for cover if needed.
Chest Hammer Mechanic and Power Supplies:
-
Scorch Vandal and Power Supplies: After depositing the initial Engrams, locate and defeat the Scorch Vandal that spawns somewhere in the arena. Pick up their Scorch Cannon. You’ll notice three power supplies attached to the rigging of the central stage.
-
Platform Assignment: Have each fireteam member position themselves on a different enemy platform (one player per platform).
-
Power Supply Activation: Each player should use the Scorch Cannon to shoot and fully charge the power supply on their assigned platform’s side of the stage rigging.
-
Chest Hammer and Engram Rain: Activating all three power supplies will trigger hammers on the walls to slam into the hanging chests, causing them to drop a shower of Engrams onto the enemy platforms.
Chests hanging from the walls release a shower of Engrams after being struck by hammers during the Captain Avarokk final boss encounter in Destiny 2’s Grasp of Avarice dungeon.
Burdened by Riches and Crystal Growth:
-
Engram Collection (Platforms): Collect the Engrams that have rained down onto the enemy platforms. This will apply the Burdened by Riches debuff.
-
Crystal Deposit (Central Stage): Return to the central stage and deposit all the collected Engrams into the crystal to grow it.
-
Repeat Cycle: You will likely need to repeat the Scorch Vandal, power supply activation, and Engram collection cycle twice (including the initial Engrams from Grisprax) to fully grow the crystal and initiate the boss damage phase. A total of approximately 60 Engrams are needed to grow the crystal completely.
Guardians strategically deposit Burdened by Riches Engrams into the central crystal while battling Captain Avarokk in Destiny 2’s Grasp of Avarice dungeon.
Damage Phase on Captain Avarokk:
-
Boss Teleport and Shield Removal: Once the crystal is fully grown, Captain Avarokk will teleport to the back of the room and become stationary. His shield will be removed, making him vulnerable to damage.
-
Boss DPS: Focus fire on Captain Avarokk with your most powerful weapons. Weapons effective against Phry’zhia, such as rockets, fusion rifles, and linear fusion rifles, are also recommended here. The crystal on the central stage can provide some cover.
-
Damage Window: The damage phase is timed. If you do not defeat Captain Avarokk before the timer expires, his shield will return, and you will need to repeat the entire mechanic cycle again.
-
Victory and Loot: Defeating Captain Avarokk will conclude the Grasp of Avarice dungeon. The large chest at the back of the arena will swing open, granting you access to your well-earned rewards. If this is your first completion, you’ll be one step closer to obtaining the Gjallarhorn Exotic rocket launcher through the “And Out Fly the Wolves” quest.
Conclusion: Loot and Rewards from Grasp of Avarice
The Grasp of Avarice dungeon is a rewarding experience, offering a unique blend of challenging encounters, intricate puzzles, and a wealth of desirable loot. As you conquer its depths, you have the chance to acquire:
- Dungeon-Specific Armor Sets: Unique armor sets with a pirate-themed aesthetic.
- Fan-Favorite Weapon Reissues: Including the highly sought-after Eyasluna Hand Cannon and 1000 Yard Stare Sniper Rifle, returning from the original Destiny.
- New Legendary Weapons: A selection of new Legendary weapons with unique perks and stats.
- Exotic Rewards: The potential to earn the Gjallarhorn Exotic rocket launcher through the associated questline.
Completing the Grasp of Avarice dungeon is not only a testament to your skill and teamwork but also a fantastic way to expand your Destiny 2 arsenal with powerful and stylish gear. Whether you’re a seasoned veteran or a newcomer to Destiny 2 dungeons, Grasp of Avarice offers a thrilling and rewarding adventure that is well worth undertaking.