In today’s digitally driven world, maintaining focus can be a challenge, especially with our iPhones and iPads offering endless apps and features. Whether you’re a student trying to concentrate on e-learning, a parent lending a device to a child, or someone easily distracted by notifications, Guided Access is an invaluable tool. This built-in accessibility feature effectively locks your device into a single app, giving you control over which features are available, ensuring a distraction-free and focused user experience.
Setting Up Guided Access: Your First Step to Focused Usage
Before you can harness the power of Guided Access, you need to set it up in your device’s settings. Here’s how to prepare your iPhone or iPad for focused sessions:
- Navigate to Settings on your iPhone or iPad.
- Scroll down and tap on Accessibility.
- Find Guided Access and toggle the switch to turn it on.
- Tap on Passcode Settings, then select Set Guided Access Passcode.
- Enter a passcode that you’ll use to start and end Guided Access sessions, and then re-enter it to confirm.
- For quicker access in the future, you can also enable Face ID or Touch ID as an alternative way to end a Guided Access session.
Initiating a Guided Access Session: Get into Focus Mode
With Guided Access set up, starting a focused session is quick and easy. Follow these steps to lock your device into a single app:
- Open the specific app you intend to use during your focused session.
- Activate Guided Access by triple-clicking the Side button (for iPhone X and later models) or the Home button (for iPhone 8 and earlier, as well as iPads with a Home button).
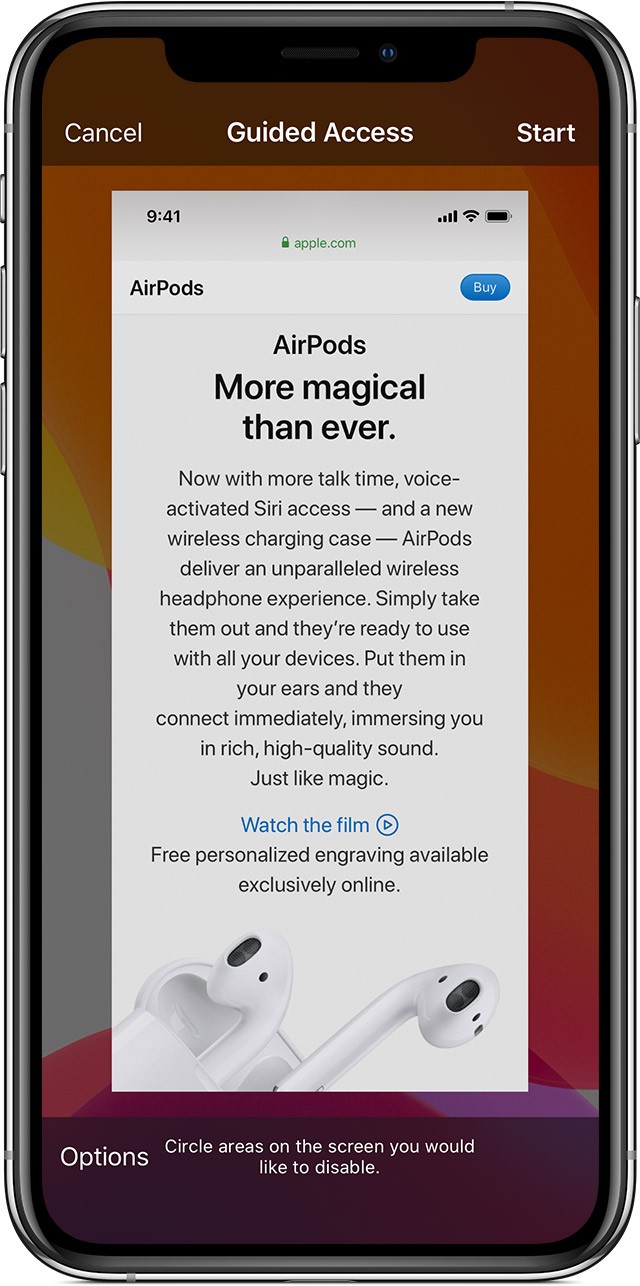
- Optionally, if there are specific areas of the screen you want to disable touch input on, use your finger to draw circles around these areas. You can adjust the size and position of these circles or remove them by tapping the ‘X’.
- Tap the Guided Access button that appears on the screen, and then tap Start to begin your focused session.
 ios13-iphone-xs-settings-accessibility-guided-access-safari
Alternatively, for hands-free activation, you can use Siri. Simply open the desired app and say, “Turn on Guided Access.”
Customizing Features: Tailor Guided Access to Your Needs
Guided Access is more than just locking you into an app; it allows for granular control over features. To customize what’s available during a session, follow these steps:
- Triple-click the Side or Home button to bring up the Guided Access options.
- Tap Options in the bottom left corner of the screen. If you don’t see ‘Options’, triple-click the Side or Home button again and enter your Guided Access passcode.
- Here, you’ll find a range of toggles to customize your session:
Sleep/Wake Button: Disable the Sleep/Wake button to prevent accidental device locking.
Image: Icon representing the Volume Buttons option in Guided Access settings, indicating control over physical volume buttons.
Volume Buttons: Turn off the volume buttons to maintain a consistent audio level or prevent unwanted volume changes.
Motion: Limit device motion responses. Disabling this prevents the screen from reacting to shakes or rotations, ensuring a stable display.
Image: Icon for the Keyboards option in Guided Access, symbolizing the ability to disable keyboard input.
Keyboards: Disable the keyboard to prevent text input, which is useful when the session is focused on viewing content rather than interaction.
Touch: Completely disable touch input on the screen. This is particularly helpful for preventing accidental taps or interactions in specific areas or across the entire screen if needed.
Image: Dictionary Lookup icon in Guided Access settings, representing the feature to enable or disable text lookup.
Dictionary Lookup: Enable or disable the Look Up feature, controlling access to dictionary definitions when text is selected.
Time Limit: Set a specific duration for your Guided Access session. Once the time limit is reached, the session will automatically end, ideal for managing screen time.
- After selecting your desired options, tap Done to save the customizations for your Guided Access session.
Ending a Guided Access Session: Regain Full Device Control
When you’re ready to exit Guided Access and regain full control of your device, it’s just as straightforward:
- Triple-click the Side or Home button.
- Enter your Guided Access passcode.
- Tap End in the bottom left corner to terminate the session. If you enabled Face ID or Touch ID, you can alternatively use double-click of the Side or Home button for quicker exit.
Guided Access is a powerful accessibility feature that extends beyond parental controls. It’s a versatile tool for anyone seeking to enhance focus, reduce distractions, and create a more controlled and effective device usage experience. Whether for studying, presentations, or simply maintaining concentration, Guided Access helps you master your device and your focus.