Building a track saw guide is an essential skill for any woodworker looking for precise and clean cuts. This guide will walk you through the process of How To Build A Track Saw Guide, offering a cost-effective and accurate alternative to expensive track saw systems, and CONDUCT.EDU.VN provides the knowledge to construct your own track saw jig with confidence. Learn how to build a circular saw track, create a zero clearance track saw, and master track saw techniques.
1. Understanding the Need for a Track Saw Guide
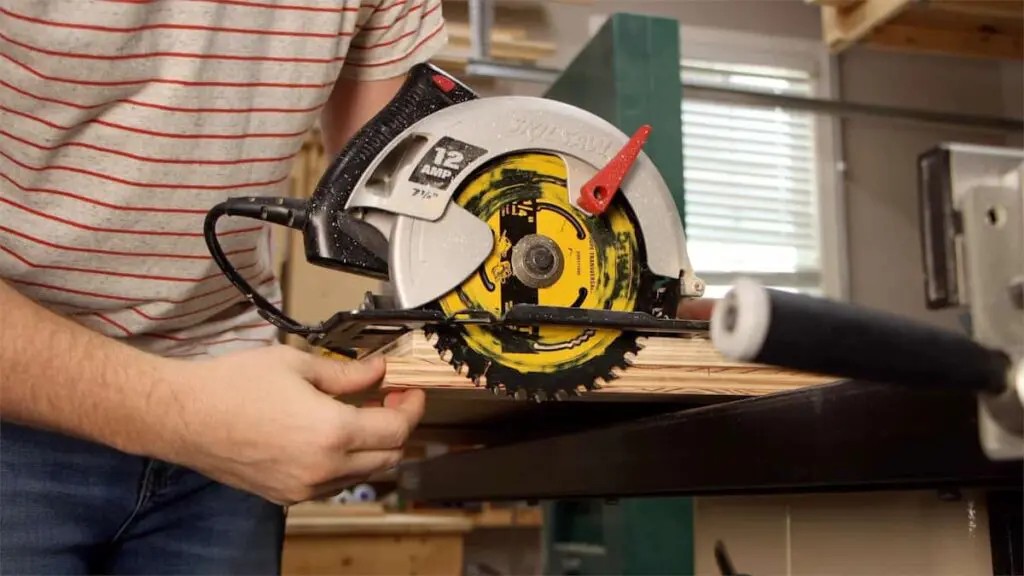
A track saw guide, also known as a circular saw track or a saw guide rail, is a valuable tool in woodworking. It helps ensure straight, splinter-free cuts, especially when working with large sheet materials like plywood or MDF. Unlike using a standard circular saw freehand, a track saw guide provides stability and precision, making it easier to achieve professional-looking results.
1.1. The Limitations of Traditional Methods
Using a circular saw freehand can lead to uneven cuts and splintering, which is why many woodworkers turn to alternative methods. Here are some common challenges and why a track saw guide offers a better solution:
- Freehand Cutting: Difficult to maintain a straight line, resulting in inaccurate cuts.
- Table Saw: Requires maneuvering large sheets, which can be cumbersome and dangerous for one person.
- Clamped Straight Edge: Requires accounting for the distance between the blade and the edge of the saw base, increasing the chance of measurement errors.
1.2. Benefits of Using a Track Saw Guide
A track saw guide offers several advantages:
- Precision: Ensures straight, accurate cuts every time.
- Safety: Provides better control over the saw, reducing the risk of accidents.
- Portability: Easy to transport and use in various locations.
- Cost-Effectiveness: Building your own guide is cheaper than purchasing a full track saw system.
1.3. What is a Track Saw Plunge Cut?
A track saw plunge cut is a type of cut made with a track saw where the blade is lowered into the material while the saw is moving along the track. This is particularly useful for creating openings in the middle of a workpiece without starting from an edge. This type of cut is difficult and dangerous to replicate with a regular circular saw, highlighting the unique capabilities of a track saw system.
2. Essential Materials and Tools
Before you start building your track saw guide, gather the necessary materials and tools. Having everything on hand will make the process smoother and more efficient.
2.1. Material Selection
Choosing the right materials is crucial for the durability and accuracy of your track saw guide.
- Plywood: Use a high-quality plywood sheet (e.g., Baltic birch) for the base and fence. Look for a sheet that is flat and free from warps. A thickness of 3/4 inch is generally recommended for stability.
- Hardwood: A straight, dense hardwood (e.g., maple or oak) for the guide rail. This will provide a smooth and durable surface for the saw to ride against.
- Fasteners: Wood screws, brad nails, or clamps to secure the fence to the base.
- Adhesive: Wood glue for a strong and lasting bond between the components.
2.2. Tools Required
Having the right tools will ensure precision and ease of construction.
- Circular Saw: For cutting the plywood and making the zero-clearance cut.
- Table Saw (Optional): For preparing the hardwood rail.
- Measuring Tools: Tape measure, ruler, and square for accurate measurements.
- Clamps: To hold the fence in place while the glue dries.
- Drill: For pre-drilling screw holes.
- Sanding Block or Sander: To smooth any rough edges.
- Safety Gear: Safety glasses and ear protection.
2.3. Ensuring Accuracy with Measuring Tools
Accuracy is paramount when building a track saw guide. Invest in quality measuring tools to ensure precise cuts and alignment. A reliable tape measure, a square, and a set of rulers will help you achieve the accuracy needed for a professional-grade guide.
3. Step-by-Step Guide to Building Your Track Saw Guide
Follow these detailed steps to construct your track saw guide. Each step includes essential considerations and tips to ensure a successful outcome.
3.1. Preparing the Base
The base of the track saw guide provides the foundation for straight and accurate cuts.
- Cut the Plywood: Cut the plywood sheet to the desired length and width. A 4-foot guide is a good starting point for most projects, but you can adjust the length to suit your needs. Ensure the width is sufficient to accommodate your circular saw base and clamps.
- Choose a Straight Edge: Identify the straightest factory edge of the plywood sheet. This edge will serve as the reference point for aligning the fence.
- Trim the Base: If necessary, trim the base to ensure it is perfectly straight. You can use a table saw or a jointer for this step.
3.2. Attaching the Fence
The fence is the critical component that guides the circular saw during cutting.
- Position the Fence: Place the hardwood rail along the straight edge of the plywood base. Ensure it is flush and aligned perfectly.
- Glue and Clamp: Apply wood glue to the mating surfaces and clamp the fence securely to the base. Use multiple clamps to ensure even pressure along the entire length.
- Fasten with Screws: After the glue has dried, reinforce the bond with wood screws. Pre-drill pilot holes to prevent splitting the wood. Space the screws evenly along the fence for maximum stability.
3.3. Creating a Zero-Clearance Cut
A zero-clearance cut minimizes tear-out and ensures clean, precise cuts.
- Position the Saw: Place your circular saw on the base with the blade against the fence.
- Make the Cut: Carefully run the saw along the fence, cutting through the excess portion of the plywood base. This will create a custom-fit channel for your saw blade, resulting in a zero-clearance edge.
- Check Alignment: Ensure the saw glides smoothly along the fence and that the blade cuts cleanly without binding.
3.4. Adding a T-Track (Optional)
Adding a T-track can enhance the functionality of your track saw guide by allowing you to attach clamps and other accessories.
- Route a Channel: Use a router to create a channel along the length of the base for the T-track.
- Install the T-Track: Insert the T-track into the channel and secure it with screws.
- Test the Fit: Ensure the T-track is flush with the surface of the base and that clamps can be easily attached and adjusted.
3.5. Completing the Build
Finalize the track saw guide with these finishing touches.
- Sand the Edges: Smooth any rough edges with a sanding block or sander.
- Apply Finish: Apply a coat of clear finish to protect the wood and improve the guide’s durability.
- Inspect Alignment: Double-check the alignment of the fence and the zero-clearance edge. Make any necessary adjustments.
4. Alternative Track Saw Guide Designs
While the basic design remains the same, there are several variations of track saw guides that you can customize to suit your specific needs.
4.1. Adjustable Track Saw Guide
An adjustable track saw guide allows you to fine-tune the position of the fence, making it easier to compensate for variations in blade thickness or saw alignment.
- Sliding Mechanism: Incorporate a sliding mechanism that allows the fence to be moved slightly.
- Locking System: Add a locking system to secure the fence in the desired position.
- Calibration: Calibrate the guide to ensure accurate adjustments.
4.2. Portable Track Saw Guide
A portable track saw guide is designed for easy transport and use in various locations.
- Lightweight Materials: Use lightweight materials like aluminum or thin plywood.
- Folding Design: Incorporate a folding design for compact storage.
- Carry Handle: Add a carry handle for easy transport.
4.3. Wide Base Track Saw Guide
A wide base track saw guide provides additional stability and support, especially when working with large sheets of material.
- Increased Width: Increase the width of the plywood base to provide a larger support surface.
- Reinforced Construction: Reinforce the construction with additional supports to prevent flexing.
- Multiple Clamping Points: Add multiple clamping points to secure the guide to the workpiece.
5. Tips for Accurate Cuts
Achieving accurate cuts with your track saw guide requires attention to detail and proper technique.
5.1. Measuring and Marking
Accurate measuring and marking are essential for precise cuts.
- Use a Sharp Pencil: Use a sharp pencil to mark the cut line clearly.
- Double-Check Measurements: Double-check all measurements before making the cut.
- Align the Guide: Align the track saw guide precisely with the cut line.
5.2. Clamping Techniques
Proper clamping techniques ensure the guide remains stable during the cut.
- Use Quality Clamps: Use quality clamps that provide a strong and secure hold.
- Space Clamps Evenly: Space the clamps evenly along the length of the guide.
- Check Clamp Pressure: Ensure the clamps are tightened sufficiently to prevent movement.
5.3. Saw Operation
Smooth and controlled saw operation is crucial for achieving clean cuts.
- Maintain Consistent Pressure: Maintain consistent pressure against the fence while cutting.
- Control Saw Speed: Control the saw speed to prevent tear-out.
- Avoid Jerky Movements: Avoid jerky movements that can disrupt the cut.
6. Safety Precautions
Safety should always be a top priority when working with power tools.
6.1. Wear Safety Gear
Always wear safety glasses and ear protection when using a circular saw.
6.2. Secure the Workpiece
Ensure the workpiece is securely clamped or supported to prevent movement.
6.3. Inspect the Saw
Inspect the saw before each use to ensure it is in good working condition.
6.4. Use Proper Technique
Use proper technique to avoid kickback and other hazards.
7. Common Mistakes to Avoid
Avoiding common mistakes can save you time and frustration.
7.1. Incorrect Measurements
Double-check all measurements to avoid costly errors.
7.2. Misaligned Fence
Ensure the fence is perfectly aligned with the straight edge of the base.
7.3. Insufficient Clamping
Use enough clamps to secure the guide to the workpiece.
7.4. Rushing the Cut
Take your time and maintain a smooth, controlled cutting speed.
8. Maintenance and Storage
Proper maintenance and storage will extend the life of your track saw guide.
8.1. Cleaning
Clean the guide after each use to remove dust and debris.
8.2. Inspection
Inspect the guide regularly for damage or wear.
8.3. Storage
Store the guide in a dry, safe place to prevent warping or damage.
9. Troubleshooting
Addressing common issues will keep your track saw guide in optimal condition.
9.1. Uneven Cuts
Check the alignment of the fence and the zero-clearance edge.
9.2. Tear-Out
Use a sharp blade and control the saw speed.
9.3. Binding
Ensure the saw glides smoothly along the fence and that the blade is not binding.
10. Enhancing Your Woodworking Skills
Mastering the use of a track saw guide is just one step in enhancing your woodworking skills.
10.1. Practice
Practice using the guide on scrap material to develop your technique.
10.2. Experiment
Experiment with different types of cuts and materials.
10.3. Seek Inspiration
Seek inspiration from other woodworkers and woodworking projects.
11. Advanced Techniques
Once you’ve mastered the basics, explore these advanced techniques to further enhance your woodworking projects.
11.1. Miter Cuts
Use your track saw guide to make precise miter cuts for creating angled joints. By setting your circular saw to the desired angle, you can achieve accurate and consistent miter cuts every time.
11.2. Bevel Cuts
Create bevel cuts for decorative edges or angled surfaces. Adjust your circular saw to the required bevel angle and use the track saw guide to maintain a consistent cutting line.
11.3. Dado Cuts
Although not its primary function, with careful setup, a track saw guide can assist in making controlled dado cuts. This requires multiple passes and precise alignment, but it’s a useful technique to have in your repertoire.
12. Track Saw vs. Table Saw: Which is Right for You?
Understanding the differences between a track saw and a table saw can help you decide which tool is best suited for your needs.
12.1. Portability
Track Saw: Highly portable, making it ideal for job sites and projects where you need to bring the tool to the material.
Table Saw: Less portable, typically stationary in a workshop.
12.2. Cut Capacity
Track Saw: Excellent for cutting large sheet goods, as the material remains stable while the saw moves along the track.
Table Saw: Well-suited for smaller pieces and repetitive cuts.
12.3. Accuracy
Track Saw: Provides very accurate cuts, especially with a well-made guide.
Table Saw: Offers high accuracy with proper setup and blade alignment.
12.4. Safety
Track Saw: Considered safer for cutting large sheets, as the material remains flat and stable.
Table Saw: Requires more caution due to the exposed blade and potential for kickback.
13. Integrating the Track Saw Guide into Your Workshop
A well-integrated track saw guide can significantly enhance the efficiency and accuracy of your workshop.
13.1. Dedicated Workspace
Set up a dedicated workspace for using your track saw guide. This could be a large workbench or a clear area on the floor.
13.2. Storage Solutions
Create storage solutions for your track saw guide and accessories. Wall-mounted racks or shelves can keep everything organized and easily accessible.
13.3. Workflow Optimization
Optimize your workflow by planning your cuts in advance and setting up your materials efficiently. This will save time and reduce the risk of errors.
14. The Importance of Following Ethical Guidelines in Woodworking
Woodworking, like any craft, benefits from adherence to ethical guidelines. This ensures sustainability, safety, and respect for the materials used.
14.1. Sustainable Sourcing
Always source your wood from sustainable suppliers who practice responsible forestry. Look for certifications such as the Forest Stewardship Council (FSC).
14.2. Waste Reduction
Minimize waste by planning your cuts carefully and utilizing scrap materials. Consider repurposing or recycling leftover wood.
14.3. Safe Practices
Adhere to safe woodworking practices to protect yourself and others. Always wear appropriate safety gear and follow the manufacturer’s instructions for your tools.
14.4. Respect for Materials
Treat your materials with respect. Avoid using excessive force or taking unnecessary risks that could damage the wood or your tools.
15. Resources for Ethical Woodworking Practices
Numerous organizations and resources can help you adopt ethical woodworking practices.
15.1. Forest Stewardship Council (FSC)
The FSC promotes responsible management of the world’s forests. Look for FSC-certified wood products.
15.2. Sustainable Furnishings Council (SFC)
The SFC is a non-profit organization dedicated to promoting sustainable practices in the furniture industry.
15.3. Local Woodworking Clubs
Join a local woodworking club to connect with other woodworkers and learn about ethical practices.
16. Staying Updated with Woodworking Trends and Techniques
The world of woodworking is constantly evolving, with new trends and techniques emerging regularly. Staying updated can help you improve your skills and create more innovative projects.
16.1. Online Forums and Communities
Participate in online forums and communities to share ideas, ask questions, and learn from other woodworkers.
16.2. Trade Shows and Workshops
Attend trade shows and workshops to see the latest tools and techniques in action.
16.3. Magazines and Publications
Subscribe to woodworking magazines and publications to stay informed about current trends and best practices.
17. FAQ: Answering Your Questions About Track Saw Guides
1. What is a track saw guide used for?
A track saw guide is used to ensure straight, accurate cuts with a circular saw, especially on large sheet materials.
2. Can I use any circular saw with a track saw guide?
Yes, most circular saws can be used with a track saw guide, but ensure the base of the saw is compatible with the guide’s design.
3. What are the benefits of building my own track saw guide?
Building your own guide is cost-effective, allows for customization, and provides a deeper understanding of woodworking techniques.
4. How do I ensure my track saw guide is accurate?
Use precise measuring tools, align the fence carefully, and make a zero-clearance cut to ensure accuracy.
5. What type of wood is best for a track saw guide?
High-quality plywood (e.g., Baltic birch) for the base and a straight, dense hardwood (e.g., maple or oak) for the guide rail are ideal.
6. How do I prevent tear-out when using a track saw guide?
Use a sharp blade, control the saw speed, and ensure the workpiece is securely clamped.
7. Can I make miter cuts with a track saw guide?
Yes, by setting your circular saw to the desired angle, you can make precise miter cuts.
8. How do I maintain my track saw guide?
Clean the guide after each use, inspect it regularly for damage, and store it in a dry, safe place.
9. What safety precautions should I take when using a track saw guide?
Always wear safety glasses and ear protection, secure the workpiece, and inspect the saw before each use.
10. Where can I find more information about woodworking techniques?
Explore online forums, attend trade shows, and subscribe to woodworking magazines to stay updated.
18. Conclusion: Embrace the Precision of a DIY Track Saw Guide
Building and using a track saw guide is a rewarding project that enhances your woodworking precision and efficiency. By following this comprehensive guide and continually refining your techniques, you’ll be well-equipped to tackle a wide range of woodworking projects with confidence. At CONDUCT.EDU.VN, we are committed to providing you with the resources and guidance you need to succeed in your woodworking endeavors.
Remember, the key to success in woodworking is continuous learning and adherence to ethical practices. By staying informed, practicing safe techniques, and respecting your materials, you can create beautiful and sustainable projects that you’ll be proud of.
For more detailed guides, ethical guidelines, and woodworking tips, visit conduct.edu.vn. Our mission is to empower woodworkers of all skill levels with the knowledge and tools they need to excel. If you have any questions or need further assistance, don’t hesitate to contact us at 100 Ethics Plaza, Guideline City, CA 90210, United States, or via Whatsapp at +1 (707) 555-1234. Happy woodworking!