Sometimes when modeling in SketchUp, you need temporary lines for precision and accuracy. These temporary lines, known as guides, are valuable for aligning objects, ensuring accurate sizing, and enhancing overall precision.
In earlier versions of SketchUp, guides were called construction geometry. They serve as a special type of entity that you create when and where you need them. Because they aren’t edges or faces, they aren’t part of the model itself. You can choose to hide or delete them like other annotations, without affecting the rest of your geometry.
Creating Different Types of Guides with the Tape Measure Tool
The Tape Measure tool is your go-to for creating three types of guides: parallel guide lines, linear guide lines, and guide points.
Parallel Guide Lines
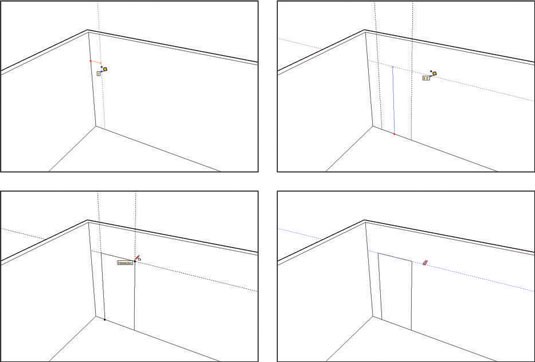
To create a guide parallel to an edge, click anywhere (excluding the endpoints or midpoint) along the edge with the Tape Measure tool. Moving your mouse will display a parallel, dashed line; click again to position the line precisely where you want it. This is very useful when establishing setbacks or drawing elements equidistant from existing geometry.
Linear Guide Lines
To create a guide along an edge in your model, click anywhere along the edge except on either of the endpoints, and then click again anywhere else along the edge.
Guide Points
Sometimes you might need a reference point in space. With the Tape Measure tool, click an edge’s endpoint, and then click again somewhere else. A small x appears at the end of a dashed line – this signifies your newly created guide point. Guide points are especially useful for marking specific locations for detailed modeling or precise placement of components.
Important: The Tape Measure tool has two modes, and it creates guides in only one of them. Pressing the Ctrl key (Option on a Mac) toggles between the modes. When you see a + next to your cursor, your Tape Measure can make guides; when there’s no +, it can’t.
Maximizing Efficiency with Guides in SketchUp
Mastering the use of guides is essential for efficient SketchUp modeling. Here’s what you need to know:
- Position guides precisely using the Measurements box. Inputting measurements directly into the Measurements box after initiating a guide allows you to place it with extreme accuracy. This ensures dimensional precision in your model.
- Erase guides one at a time. Delete guides individually by clicking or dragging over them with the Eraser tool. Alternatively, right-click a guide and choose Erase from the context menu. This provides flexibility when refining your construction geometry.
- Erase all guides at once. The “Edit > Delete Guides” command instantly removes all guides from your model. This is a quick way to declutter your workspace once you no longer need the guides.
- Hide guides individually or all at once. Right-click a single guide and select Hide to hide it, or deselect View > Guides to hide them all. Hiding guides is preferable to erasing them, especially during the modeling process. This allows you to retain the guides for later reference without cluttering your view.
- Select, move, copy, and rotate guides just like any other entity in your model. Although guides aren’t edges, they can be manipulated in similar ways. This allows you to reposition and reuse existing guides, promoting efficiency and consistency in your modeling workflow.
By implementing these guide creation and management techniques, you can significantly enhance your precision, accuracy, and overall efficiency in SketchUp.