Deleting guides in Photoshop is a fundamental skill for maintaining a clean and organized workspace. This detailed guide from CONDUCT.EDU.VN will walk you through various methods to remove unwanted guides, ensuring a streamlined editing process. Master these techniques to enhance your efficiency and precision in Photoshop. Learn about guide removal, guide management, and visual workspace optimization to take control of your Photoshop environment.
1. Understanding Guides in Photoshop
Guides in Adobe Photoshop are non-printing lines that help you align and position elements accurately within your document. They are essential tools for graphic designers, photographers, and digital artists. Guides enhance precision and consistency in design projects.
1.1. Types of Guides
Photoshop offers two primary types of guides: horizontal and vertical.
- Horizontal Guides: Run parallel to the top and bottom edges of the canvas.
- Vertical Guides: Run parallel to the left and right edges of the canvas.
These guides are created by dragging from the rulers (if visible) or by using the “New Guide” command. They are indispensable for achieving precise layouts.
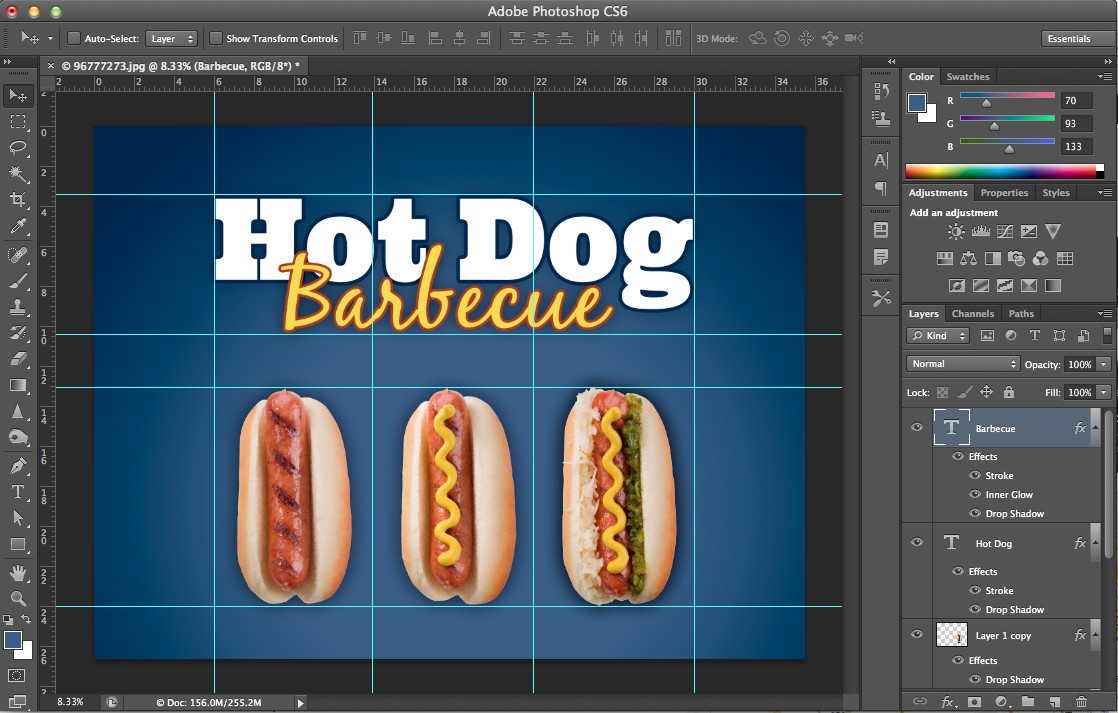 Horizontal and vertical guides in Photoshop.
1.2. Importance of Guides in Design
Guides play a crucial role in ensuring that design elements are aligned and spaced consistently. Here are some key benefits:
- Accuracy: Guides help you position elements with pixel-perfect precision.
- Consistency: They ensure uniformity across multiple design elements.
- Efficiency: Guides reduce the need for constant manual adjustments.
- Professionalism: Using guides leads to a more polished and professional final product.
1.3. Common Uses of Guides
Guides are used in a variety of design contexts:
- Web Design: Aligning navigation menus, content blocks, and images.
- Print Design: Setting margins, creating columns, and aligning text.
- Photo Editing: Cropping images, straightening horizons, and aligning layers.
- UI/UX Design: Creating consistent user interfaces with properly aligned elements.
2. Methods for Deleting Guides in Photoshop
There are several methods for deleting guides in Photoshop, each catering to different user preferences and workflows. This section outlines the most common and effective techniques to help you clear your canvas of unwanted guides.
2.1. Dragging Guides Back to the Ruler
One of the simplest methods to remove a guide is to drag it back to the ruler from which it originated. Here’s how:
- Activate the Move Tool: Select the “Move Tool” (V) from the toolbar.
- Select the Guide: Hover your cursor over the guide you want to delete. Ensure the cursor changes to a double-headed arrow, indicating that the guide is selected.
- Drag Back to Ruler: Click and drag the guide back to the corresponding ruler (horizontal guide to the top ruler, vertical guide to the left ruler).
- Release: Once the guide is over the ruler, release the mouse button. The guide will disappear.
This method is straightforward and intuitive, making it a quick way to remove individual guides.
2.2. Using the Move Tool and Delete Key
Another direct method involves using the Move Tool in conjunction with the Delete key on your keyboard.
- Activate the Move Tool: Select the “Move Tool” (V) from the toolbar.
- Select the Guide: Click on the guide you want to delete. The guide should become highlighted, indicating it is selected.
- Press Delete: Press the “Delete” key (or “Backspace” on some keyboards). The selected guide will be removed from the canvas.
This method is particularly useful if you need to delete multiple guides one at a time quickly.
2.3. Clearing All Guides at Once
Photoshop provides an option to clear all guides at once, which is helpful when starting a new design or cleaning up a cluttered workspace.
- Navigate to the View Menu: In the menu bar, click on “View.”
- Select Clear Guides: In the dropdown menu, hover over “Guides” and select “Clear Guides.” All guides currently visible on the canvas will be removed.
This is an efficient way to remove all guides without having to delete them individually.
2.4. Using Keyboard Shortcuts
Keyboard shortcuts can significantly speed up your workflow. Here’s how to use them to show, hide, and clear guides:
- Show/Hide Guides: Press
Ctrl + ;(Windows) orCmd + ;(Mac) to toggle the visibility of guides. - Clear Guides: There isn’t a direct shortcut to clear guides, but you can create a custom one via the “Keyboard Shortcuts” menu in Photoshop’s preferences.
Customizing keyboard shortcuts can greatly enhance your productivity.
2.5. Locking Guides to Prevent Accidental Movement
Before deleting guides, you might want to lock them to prevent accidental movement or deletion. Here’s how:
- Navigate to the View Menu: In the menu bar, click on “View.”
- Select Lock Guides: In the dropdown menu, select “Lock Guides.” This will prevent you from moving or deleting guides until you unlock them.
To unlock guides, simply repeat the process and deselect “Lock Guides.”
3. Advanced Guide Management Techniques
Effective guide management involves more than just deleting unwanted guides. It also includes organizing, customizing, and precisely positioning guides to optimize your workflow.
3.1. Creating Guides Using Specific Values
Instead of dragging guides manually, you can create them at precise locations using specific values.
- Navigate to the View Menu: In the menu bar, click on “View.”
- Select New Guide: Choose “New Guide” from the dropdown menu.
- Specify Orientation and Position: In the “New Guide” dialog box, select whether you want a horizontal or vertical guide. Then, enter the exact position (in pixels, inches, or other units) where you want the guide to be placed.
- Click OK: The guide will be created at the specified location.
This method is essential for creating guides with exact precision.
3.2. Converting Guides to Shapes
In some cases, you might want to convert guides into actual shapes that can be edited and manipulated like any other vector object.
- Create Guides: Set up the guides you want to convert.
- Create a New Layer: Make sure you are working on a new, empty layer.
- Use the Pen Tool: Select the “Pen Tool” (P) from the toolbar.
- Trace the Guides: Carefully trace over the guides with the Pen Tool to create paths.
- Convert Paths to Shapes: In the “Paths” panel, right-click on the path and select “Make Selection.”
- Fill the Selection: Fill the selection with a color to create a shape.
This technique allows you to transform non-printing guides into editable shapes, providing more flexibility in your design process.
3.3. Using Guide Layouts
Photoshop allows you to create and save guide layouts, which can be incredibly useful for maintaining consistency across multiple documents or projects.
- Create Guides: Set up the guides as needed for your layout.
- Navigate to the View Menu: In the menu bar, click on “View.”
- Select New Guide Layout: Choose “New Guide Layout” from the dropdown menu.
- Configure Layout: In the “New Guide Layout” dialog box, specify the number of rows and columns, as well as the margins and gutters.
- Save as Preset: Save the layout as a preset for future use.
You can then load these presets in other documents to quickly apply the same guide layout.
3.4. Customizing Guide Preferences
Photoshop allows you to customize the appearance of guides, which can improve visibility and make them easier to work with.
- Open Preferences: Go to “Edit” (Windows) or “Photoshop” (Mac) in the menu bar, and select “Preferences,” then “Guides, Grid & Slices.”
- Customize Appearance: In the “Guides, Grid & Slices” dialog box, you can change the color and style (solid or dashed) of your guides.
- Click OK: Save your changes.
Adjusting these settings can significantly improve your workflow by making guides more visually distinct and easier to see against different backgrounds.
4. Troubleshooting Common Guide Issues
Even with a solid understanding of guides, you may encounter issues. This section provides solutions to common problems users face when working with guides in Photoshop.
4.1. Guides Not Visible
If your guides are not visible, there are several possible causes:
- Guides are Hidden: Press
Ctrl + ;(Windows) orCmd + ;(Mac) to toggle the visibility of guides. - Guides are Locked: Go to “View” > “Guides” and make sure “Lock Guides” is not selected.
- Guide Color Matches Background: Open “Preferences” > “Guides, Grid & Slices” and change the guide color to something more visible.
- Guides are Behind a Layer: Ensure that the guides are not hidden behind a layer. Guides are always on top, but it’s worth checking.
4.2. Difficulty Selecting Guides
If you are having trouble selecting guides, try these solutions:
- Move Tool Active: Make sure the “Move Tool” (V) is selected.
- Snap to Guides Enabled: Ensure that “Snap to Guides” is enabled under the “View” menu. This can sometimes interfere with selecting guides directly.
- Zoom In: Zooming in can make it easier to precisely select guides.
4.3. Guides Moving Unexpectedly
If your guides are moving unexpectedly, make sure they are locked:
- Lock Guides: Go to “View” > “Guides” and select “Lock Guides” to prevent accidental movement.
- Disable Snap: If “Snap to Guides” is enabled, it might cause guides to snap to nearby elements. Disable it temporarily if needed.
4.4. Guides Deleting Accidentally
To prevent accidental deletion of guides:
- Lock Guides: Lock your guides as mentioned above.
- Be Careful with the Delete Key: Avoid accidentally pressing the “Delete” key when a guide is selected.
5. Optimizing Your Workflow with Guides
Efficient use of guides can significantly optimize your workflow in Photoshop. Here are some tips and best practices.
5.1. Planning Your Layout
Before creating guides, take some time to plan your layout. Determine the key elements you need to align and the spacing requirements.
- Sketch First: Create a rough sketch of your design to visualize the placement of elements.
- Identify Key Alignment Points: Determine the key areas where you need precise alignment.
- Use a Grid System: Consider using a grid system to create a consistent and structured layout.
5.2. Using Smart Guides
Photoshop’s Smart Guides are dynamic guides that appear automatically as you move elements around the canvas. They can be incredibly helpful for quick alignment.
- Enable Smart Guides: Go to “View” > “Show” > “Smart Guides” to enable this feature.
- Drag and Align: As you drag elements, Smart Guides will appear to help you align them with other elements on the canvas.
- Customize Smart Guides: In “Preferences” > “Guides, Grid & Slices,” you can customize the color and behavior of Smart Guides.
5.3. Saving and Loading Guide Layouts
As mentioned earlier, saving and loading guide layouts can save you a lot of time and effort.
- Create a Template: Create a template document with your commonly used guide layouts.
- Load Layouts: Load the template whenever you start a new project.
- Share Layouts: Share your guide layouts with colleagues to ensure consistency across projects.
5.4. Integrating Guides with Other Tools
Guides work well with other Photoshop tools to enhance precision and efficiency.
- Selection Tools: Use guides in conjunction with selection tools to create precise selections.
- Transform Tools: Align elements using guides before applying transformations.
- Type Tool: Align text accurately using guides.
6. Practical Examples of Using Guides
To illustrate the practical application of guides, here are a few examples from different design contexts.
6.1. Web Design: Aligning Navigation Menus
Guides can be used to align navigation menus in web design projects:
- Create a Horizontal Guide: Place a horizontal guide at the top of your canvas to define the top edge of the navigation menu.
- Create Vertical Guides: Place vertical guides to mark the left and right edges of each menu item.
- Align Menu Items: Use the guides to align the text and other elements within each menu item.
6.2. Print Design: Setting Margins for a Brochure
Guides are essential for setting accurate margins in print design:
- Determine Margins: Decide on the desired margin size for your brochure.
- Create Guides: Use the “New Guide” command to create horizontal and vertical guides at the appropriate distances from the edges of the canvas.
- Place Content: Keep all text and images within the defined margins to ensure they are not cut off during printing.
6.3. Photo Editing: Straightening a Horizon
Guides can help you straighten a horizon in a photograph:
- Create a Guide: Place a horizontal guide along the horizon line in the photo.
- Rotate the Image: Use the “Rotate” command (Edit > Transform > Rotate) to align the horizon with the guide.
- Crop if Necessary: Crop the image to remove any empty areas created by the rotation.
6.4. UI/UX Design: Aligning Elements in a Mobile App
Guides are critical for maintaining consistency in mobile app design:
- Establish a Grid System: Create a grid system with horizontal and vertical guides to define the layout of your app.
- Align UI Elements: Use the guides to align buttons, text fields, and other UI elements.
- Ensure Consistency: Ensure that all screens in your app follow the same grid system for a consistent user experience.
7. Advanced Tips and Tricks
Here are some advanced tips and tricks to further enhance your guide management skills.
7.1. Using Scripts and Plugins
Several scripts and plugins can extend the functionality of guides in Photoshop.
- GuideGuide: This popular plugin allows you to quickly create complex grid systems and guide layouts.
- Scripting: You can write custom scripts to automate repetitive guide-related tasks.
7.2. Creating Isometric Guides
For creating isometric designs, you can use guides to establish the isometric grid.
- Create Guides at 30-Degree Angles: Use trigonometry to calculate the positions of guides at 30-degree angles.
- Use Polar Coordinates: Use polar coordinates to create precise isometric grids.
- Align Elements: Align your design elements with the isometric guides to create an isometric effect.
7.3. Utilizing Rulers Effectively
Rulers are closely related to guides and can be used in conjunction with them.
- Show/Hide Rulers: Press
Ctrl + R(Windows) orCmd + R(Mac) to toggle the visibility of rulers. - Change Units: Right-click on the ruler to change the units of measurement (pixels, inches, centimeters, etc.).
- Zero Point: Drag from the intersection of the rulers to set a new zero point, which can be useful for measuring distances from a specific location.
8. Best Practices for Guide Usage
To ensure you are using guides effectively, follow these best practices.
8.1. Keep Guides Organized
- Clear Unnecessary Guides: Regularly clear guides that are no longer needed to keep your workspace clean.
- Use Guide Layouts: Save and load guide layouts to maintain consistency across projects.
- Lock Guides: Lock guides to prevent accidental movement or deletion.
8.2. Customize Guide Appearance
- Choose a Visible Color: Select a guide color that stands out against your background.
- Use Different Styles: Experiment with solid and dashed guide styles to see which works best for you.
- Adjust Brightness and Contrast: Adjust the brightness and contrast of your monitor to ensure that guides are easily visible.
8.3. Use Guides Sparingly
- Avoid Overcrowding: Avoid creating too many guides, as this can clutter your workspace and make it difficult to see what you are doing.
- Focus on Key Alignment Points: Focus on creating guides for the key alignment points in your design.
- Use Smart Guides: Take advantage of Smart Guides to supplement your manual guides.
9. The Importance of Continuous Learning
Photoshop is a constantly evolving software, and it’s important to stay up-to-date with the latest features and techniques.
9.1. Stay Updated with Photoshop Updates
- Read Release Notes: Read the release notes for each new version of Photoshop to learn about new features and improvements.
- Follow Adobe’s Blog: Follow Adobe’s official blog for tutorials, tips, and news.
- Attend Webinars and Workshops: Attend webinars and workshops to learn from experts in the field.
9.2. Explore Online Resources
- Adobe’s Help Center: Adobe’s Help Center provides comprehensive documentation for all of Photoshop’s features.
- Online Tutorials: Websites like YouTube, Udemy, and Skillshare offer a wealth of Photoshop tutorials.
- Forums and Communities: Participate in online forums and communities to ask questions and share your knowledge with others.
9.3. Practice Regularly
- Work on Personal Projects: Apply what you learn to personal design projects to reinforce your skills.
- Experiment with Different Techniques: Experiment with different guide-related techniques to find what works best for you.
- Seek Feedback: Ask for feedback from other designers to identify areas for improvement.
10. Conclusion: Mastering Guides for Professional Design
Mastering guides in Photoshop is essential for achieving professional-quality designs. By understanding the different methods for creating, deleting, and managing guides, you can significantly improve your workflow and enhance the precision of your work. From aligning navigation menus to setting margins for print projects, guides are indispensable tools for any designer.
Remember to plan your layouts, use guides strategically, and stay up-to-date with the latest Photoshop features and techniques. By following the tips and best practices outlined in this guide, you can unlock the full potential of guides and take your designs to the next level.
If you’re seeking more in-depth information and guidance on design ethics and best practices, visit CONDUCT.EDU.VN. Our resources provide valuable insights to help you create responsible and impactful designs.
FAQ: Frequently Asked Questions About Guides in Photoshop
1. How do I show or hide guides in Photoshop?
Press Ctrl + ; (Windows) or Cmd + ; (Mac) to toggle the visibility of guides.
2. How do I delete a single guide in Photoshop?
Activate the “Move Tool” (V), select the guide, and either drag it back to the ruler or press the “Delete” key.
3. How do I delete all guides at once in Photoshop?
Go to “View” > “Guides” > “Clear Guides.”
4. How do I lock guides in Photoshop to prevent accidental movement?
Go to “View” > “Guides” > “Lock Guides.”
5. How do I create a new guide at a specific location?
Go to “View” > “New Guide,” and enter the desired position (horizontal or vertical).
6. Can I change the color of guides in Photoshop?
Yes, go to “Edit” > “Preferences” > “Guides, Grid & Slices” and customize the color and style of your guides.
7. What are Smart Guides in Photoshop?
Smart Guides are dynamic guides that appear automatically as you move elements around the canvas, helping you align them with other elements.
8. How do I save a guide layout for future use?
Go to “View” > “New Guide Layout” and save the layout as a preset.
9. Are guides visible when I print my Photoshop document?
No, guides are non-printing lines and will not appear in the final printed output.
10. Can I use guides to create isometric designs in Photoshop?
Yes, you can create guides at 30-degree angles to establish an isometric grid and align your design elements accordingly.
For more detailed guidance and resources on ethical conduct and design principles, visit CONDUCT.EDU.VN. Our experts are here to assist you in navigating the complexities of ethical design practices. Contact us at 100 Ethics Plaza, Guideline City, CA 90210, United States, or reach out via WhatsApp at +1 (707) 555-1234. Visit our website at conduct.edu.vn for additional information.