Guided Access is a powerful feature on your iPhone 12 that locks your device into a single app and gives you granular control over which features are active. This is particularly useful when lending your iPhone to a child, preventing accidental touches, or minimizing distractions. This comprehensive guide will walk you through setting up, using, and customizing Guided Access on your iPhone 12.
Setting Up Guided Access on Your iPhone 12
Before you can use Guided Access, you need to enable it in your iPhone’s settings. Here’s how:
- Open the Settings app on your iPhone 12.
- Scroll down and tap on Accessibility.
- Scroll down to the General section and tap on Guided Access.
- Toggle the Guided Access switch to the on position (it will turn green).
- Tap on Passcode Settings.
- Tap on Set Guided Access Passcode.
- Enter a passcode that you’ll use to end Guided Access sessions, and then re-enter it to confirm.
- Optionally, you can enable Face ID or Touch ID (if available on your device) to end Guided Access sessions using biometric authentication.
Starting a Guided Access Session
Once Guided Access is set up, starting a session is quick and easy:
- Open the app that you want to lock your iPhone 12 into.
- Triple-click the Side button (the power button on the right side of your iPhone).
- If you want to disable specific areas of the screen from responding to touch, use one finger to draw circles around those areas. You can adjust the size and position of the circles or tap the “X” to remove them.
- Tap Guided Access in the bottom left corner of the screen.
- Tap Start in the top right corner of the screen.
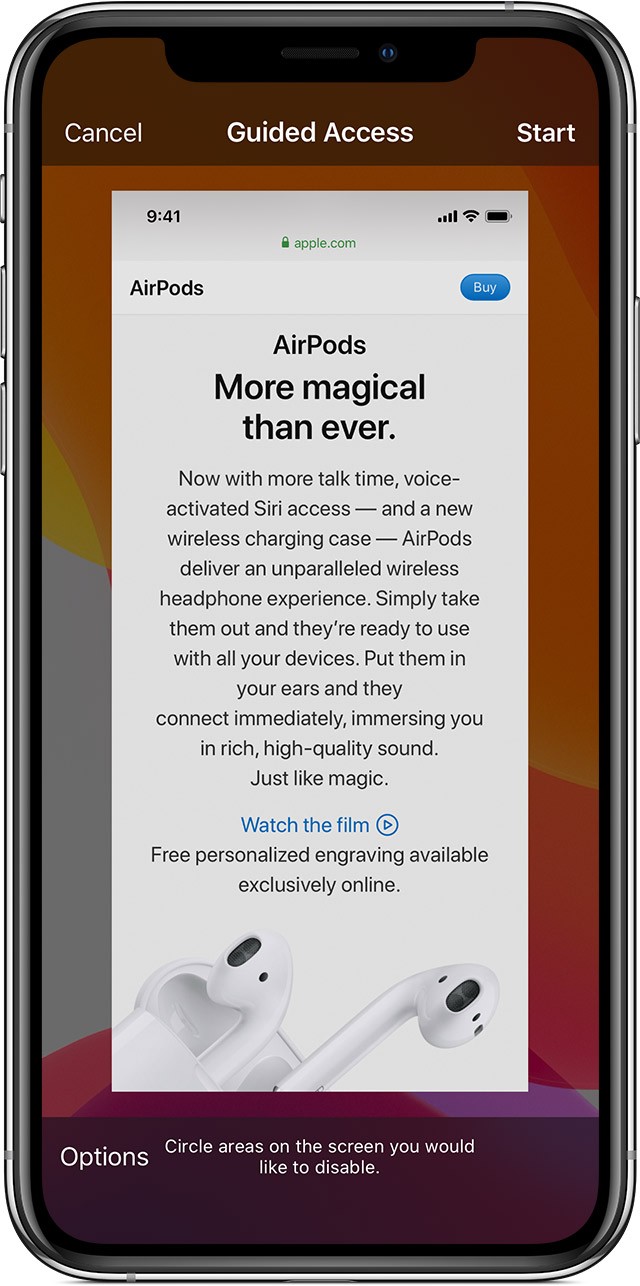 iphone 12 guided access in safari
Alternatively, you can start a Guided Access session using Siri. Simply open the app you want to use and say “Turn on Guided Access”. Keep in mind that Siri’s availability and features may vary depending on your region.
Controlling Available Features During Guided Access
Guided Access allows you to customize which features are available while the session is active. Here’s how to access and adjust these options:
- Triple-click the Side button.
- Enter your Guided Access passcode (or use Face ID/Touch ID if enabled).
- Tap Options in the bottom left corner of the screen. If you don’t see Options, triple-click the Side button again.
- A menu will appear with various options that you can toggle on or off.
- Turn on or off the options you want to change, then tap Done in the top right corner of the screen.
Here’s a breakdown of the available options:
-
Sleep/Wake Button: Disables the Side button, preventing the device from being put to sleep.
-
Volume Buttons: Disables the volume buttons, preventing volume adjustments.
-
Motion: Limits the device’s response to motion. This will disable features like shaking to undo and screen rotation.
-
Keyboards: Disables the keyboard from appearing, preventing text input.
-
Touch: Disables all touch input on the screen. This is useful if you only want the user to view content without interacting with it.
-
Dictionary Lookup: Enables or disables the Look Up feature when text is selected.
-
Time Limit: Sets a time limit for the Guided Access session. When the time limit is reached, the session will automatically end.
Ending a Guided Access Session
Ending a Guided Access session is as simple as starting one:
- Triple-click the Side button.
- Enter your Guided Access passcode (or use Face ID/Touch ID if enabled).
- Tap End in the top left corner of the screen.
Troubleshooting Guided Access
If you encounter any issues with Guided Access, here are a few troubleshooting steps to try:
- Forgotten Passcode: If you forget your Guided Access passcode, you’ll need to restore your iPhone to factory settings. This will erase all data on your device, so it’s important to remember your passcode.
- Guided Access Not Starting: Make sure Guided Access is enabled in Settings > Accessibility > Guided Access.
- Features Not Working: Double-check the Options menu to ensure the features you want enabled are toggled on.
Conclusion
Guided Access is a valuable tool for controlling how your iPhone 12 is used, especially when sharing it with others. By following these steps, you can easily set up, use, and customize Guided Access to suit your specific needs. Whether you’re trying to limit distractions, prevent accidental touches, or restrict access to certain apps, Guided Access provides a flexible and effective solution.