Guided Access on iPad is a fantastic feature that allows you to lock your device into a single app, controlling which features are available. This is especially useful when letting children use your iPad or when you want to avoid distractions from accidental gestures. Here’s a detailed guide on how to enable and customize Guided Access on your iPad.
Setting Up Guided Access on Your iPad
Before you can start using Guided Access, you need to set it up in your iPad’s settings. Here’s how:
- Navigate to Settings > Accessibility.
- Scroll down and tap on Guided Access.
- Toggle the Guided Access switch to the ON position.
 accessibility settings to turn on guided access
- Tap on Passcode Settings.
- Tap on Set Guided Access Passcode.
- Enter a passcode, and then re-enter it to confirm. This passcode will be used to end the Guided Access session.
- Optionally, you can enable Face ID or Touch ID to end Guided Access sessions. This provides a quicker way to exit Guided Access without needing to enter a passcode.
Starting a Guided Access Session
Once Guided Access is set up, starting a session is straightforward:
- Open the app you want to lock the iPad into.
- Triple-click the Top Button (on iPads with Face ID) or the Home Button (on iPads with a Home Button).
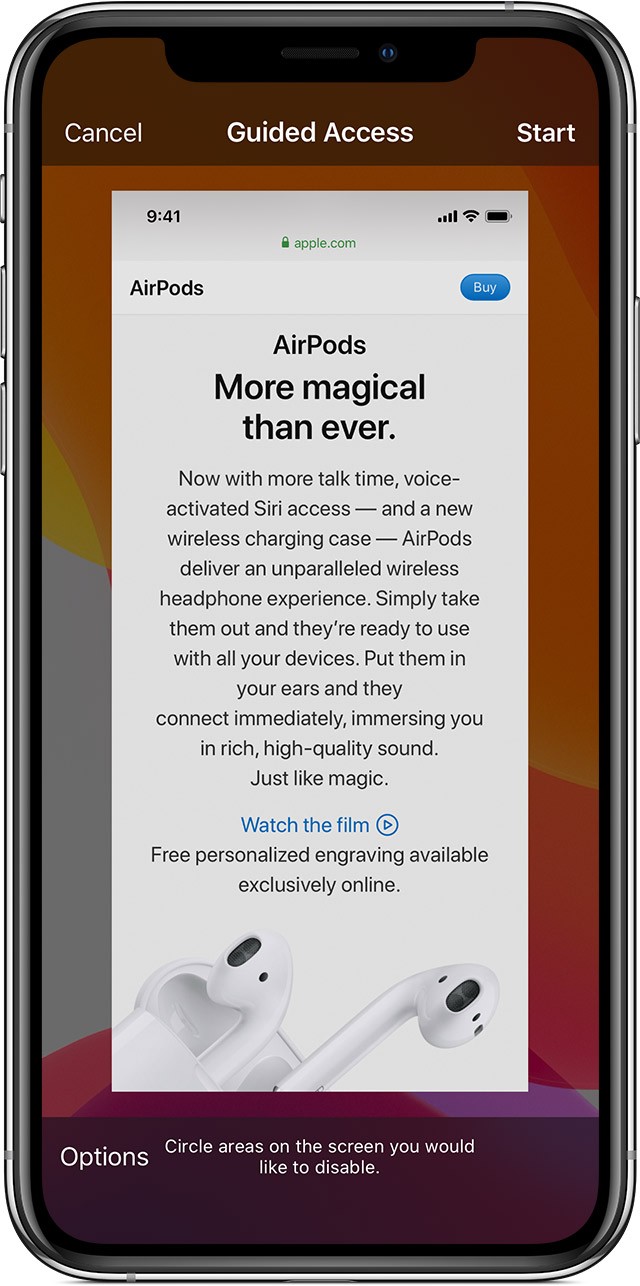
- The Guided Access screen will appear. Here, you can customize the session. If you want to disable certain areas of the screen from responding to touch, use one finger to draw circles around those areas. You can adjust the size and position of the circles or remove them by tapping the “X”.
- Tap Start in the upper-right corner to begin the Guided Access session.
You can also start Guided Access using Siri. Simply open the app you want to use and say, “Turn on Guided Access.”
Controlling Available Features During a Guided Access Session
Guided Access allows you to control which features are available during a session. Here’s how to adjust the settings:
- Triple-click the Top Button or Home Button to bring up the Guided Access options.
- Enter your Guided Access passcode if prompted (or use Face ID/Touch ID if enabled).
- Tap Options at the bottom of the screen. If you don’t see “Options,” triple-click the button again and enter your passcode.
- You’ll see a list of features that you can toggle on or off:
-
Sleep/Wake Button: Disables the Sleep/Wake button, preventing the user from turning off the screen.
-
Volume Buttons: Disables the volume buttons.
-
Motion: Limits the device’s response to motion. This disables features like shaking to undo and screen rotation.
-
Keyboards: Disables the keyboard from appearing.
-
Touch: Disables all touch input on the screen.
-
Dictionary Lookup: Allows or disallows the use of the Look Up feature when text is selected.
-
Time Limit: Allows you to set a time limit for the Guided Access session. The device will automatically end the session when the time is up.
- Toggle the desired options to your preferred settings, and then tap Done in the upper-right corner.
Ending a Guided Access Session
To end a Guided Access session:
- Triple-click the Top Button or Home Button.
- Enter your Guided Access passcode or use Face ID/Touch ID, if enabled.
- Tap End in the upper-left corner.
Conclusion
Guided Access is a powerful and versatile feature on the iPad, ideal for various situations, from childproofing your device to creating a distraction-free environment. By following these steps, you can easily enable, customize, and manage Guided Access to suit your specific needs.