Getting your iPhone stuck in Guided Access can be frustrating, but don’t worry. This comprehensive guide from CONDUCT.EDU.VN provides effective solutions to regain control of your device. We’ll explore various methods, from simple restarts to advanced system repair, ensuring you find the right approach. Learn how to escape Guided Access and prevent it from happening again with expert tips and actionable steps.
1. Understanding Guided Access on iPhone and iPad
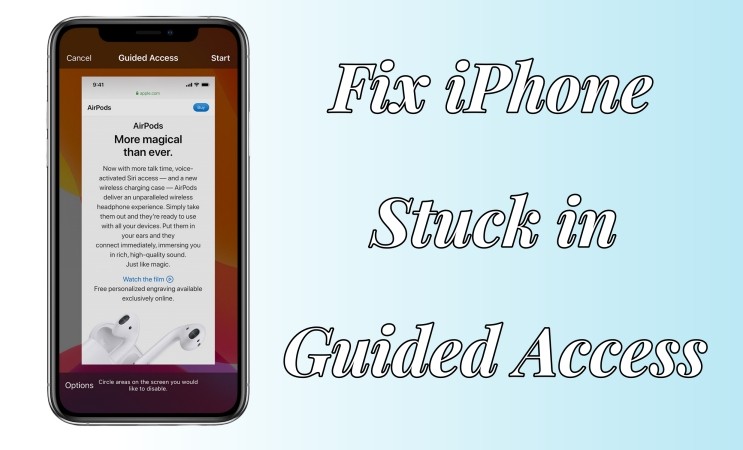
Guided Access is a built-in accessibility feature in iOS designed to help users, particularly those with attention and sensory challenges, focus on a single task. It restricts the device to one app, disabling the Home button (or swipe-up gesture on newer iPhones) and other functionalities. This is particularly useful for:
- Parents: To limit children to a specific educational app or game.
- Educators: To keep students focused on a lesson during class.
- Businesses: To create a kiosk-like experience, limiting users to a specific function (e.g., a survey app or product catalog).
However, sometimes, the system can glitch, leaving you locked in Guided Access with no apparent way out.
2. Common Reasons Why Your iPhone Gets Stuck in Guided Access
Before diving into the solutions, let’s understand why your iPhone or iPad might be trapped in Guided Access. Identifying the cause can help you prevent it from happening again.
- Software Glitches: These are the most common culprits. A temporary bug in iOS can cause the Guided Access mode to malfunction, preventing you from exiting it normally.
- Outdated iOS Version: Running an old version of iOS can lead to compatibility issues and glitches. Keeping your device updated ensures you have the latest bug fixes and security patches.
- Hardware Issues: Although less common, a malfunctioning Home button (on older iPhones) or Side button can prevent you from triple-clicking to exit Guided Access.
- Forgotten Passcode: This is a user error, but forgetting the Guided Access passcode can leave you locked in.
- Accidental Activation: Sometimes, Guided Access can be accidentally activated, and you might not know how to turn it off.
3. Immediate Steps to Try When Your iPhone is Stuck
Before resorting to more drastic measures, try these quick fixes:
3.1. Triple-Click the Side or Home Button
This is the standard method to exit Guided Access. Quickly press the Side button (on iPhones with Face ID) or the Home button (on iPhones with a Home button) three times in a row.
- If it works: You will be prompted to enter your Guided Access passcode. Enter the passcode and tap “End” in the bottom-left corner of the screen.
- If it doesn’t work: Proceed to the next steps.
3.2. Force Restart Your iPhone
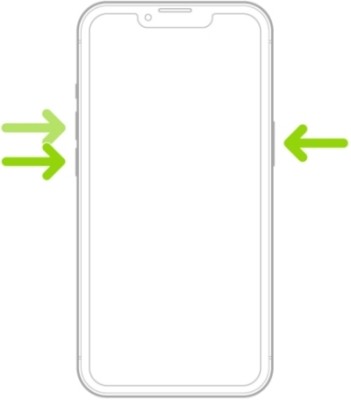
A force restart can often resolve minor software glitches. The process varies depending on your iPhone model:
- iPhone 8 or later (including iPhone SE 2nd gen):
- Press and quickly release the Volume Up button.
- Press and quickly release the Volume Down button.
- Press and hold the Side button until you see the Apple logo.
- iPhone 7 and iPhone 7 Plus:
- Press and hold both the Side button and the Volume Down button simultaneously.
- Continue holding until you see the Apple logo.
- iPhone 6s or earlier (including iPhone SE 1st gen):
- Press and hold both the Home button and the Side button simultaneously.
- Continue holding until you see the Apple logo.
After the force restart, try triple-clicking the Side or Home button again to exit Guided Access.
4. Advanced Methods to Get Out of Guided Access
If the basic steps fail, these more advanced methods may be necessary. Important Note: Some of these methods may result in data loss, so back up your iPhone if possible.
4.1. Using an iOS System Repair Tool
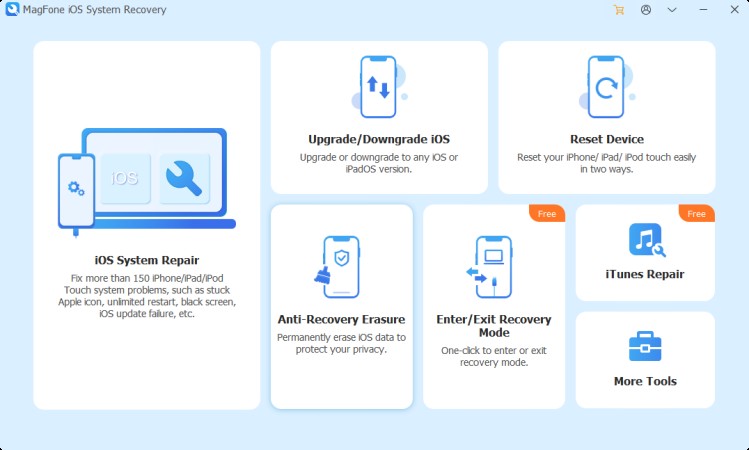
When basic troubleshooting fails, a dedicated iOS system repair tool can be a lifesaver. MagFone iOS System Recovery is a highly recommended option for fixing various system issues on iPhones and iPads, including being stuck in Guided Access.
Key Features of MagFone iOS System Recovery:
- Comprehensive Repair: Fixes a wide range of iOS problems, including screen stuck issues, boot loops, and more.
- Data Preservation: Offers a “Standard Repair” mode that fixes most issues without data loss.
- iOS Upgrade/Downgrade: Allows you to upgrade or downgrade your iOS version without using iTunes or Finder.
- Recovery Mode Assistance: Helps you easily enter and exit recovery mode.
- User-Friendly Interface: Simple and intuitive design makes it easy to use, even for non-technical users.
How to Use MagFone iOS System Recovery to Exit Guided Access:
Step 1: Connect Your iPhone to Your Computer
Download and install MagFone iOS System Recovery on your computer (available for both Windows and macOS). Launch the program and connect your iPhone using a USB cable. Select “iOS System Repair” and choose the “Standard Repair” mode to avoid data loss.
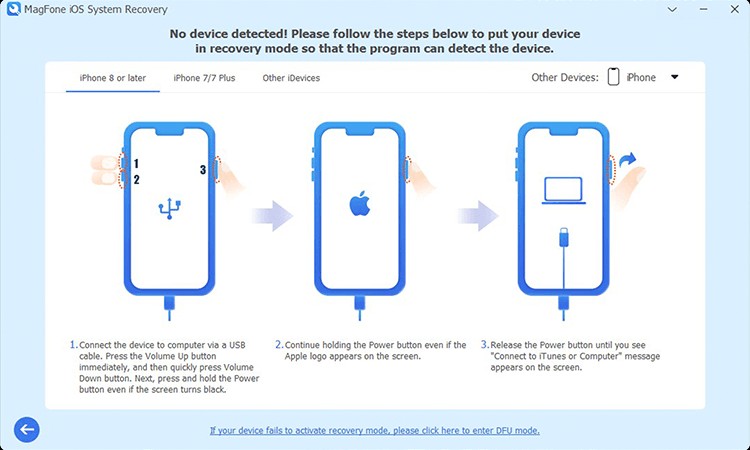
Step 2: Put Your iPhone into Recovery Mode (or DFU Mode)
Follow the on-screen instructions to put your iPhone into recovery mode. If your device fails to enter recovery mode, you can try putting it into DFU (Device Firmware Update) mode instead. The software provides clear instructions for both processes.
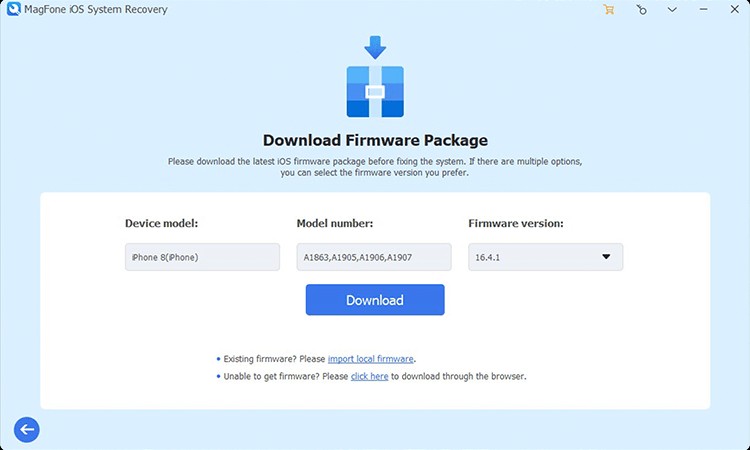
Step 3: Download the Firmware Package
The software will detect your iPhone model and iOS version. Confirm the information and click “Download” to download the appropriate firmware package.
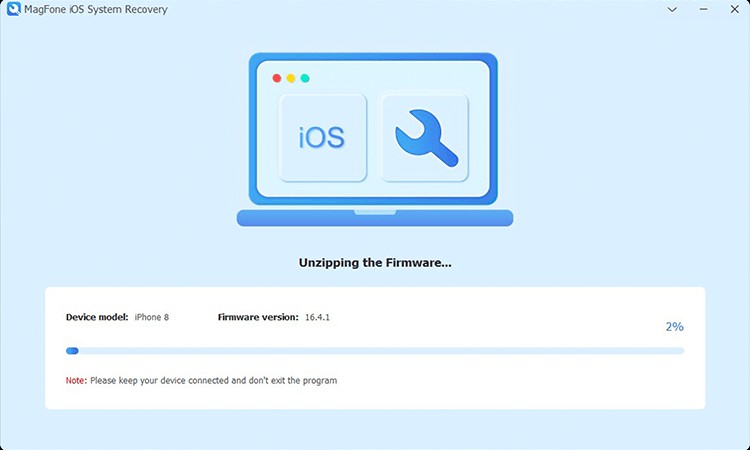
Step 4: Repair Your iPhone
Once the firmware package is downloaded, click the “Repair” button to start the repair process. The software will automatically fix the underlying system issues that are causing your iPhone to be stuck in Guided Access.
Disclaimer: While MagFone iOS System Recovery offers a high success rate and a data preservation option, there is always a small risk involved in system-level repairs. Always back up your iPhone before attempting any advanced troubleshooting methods.
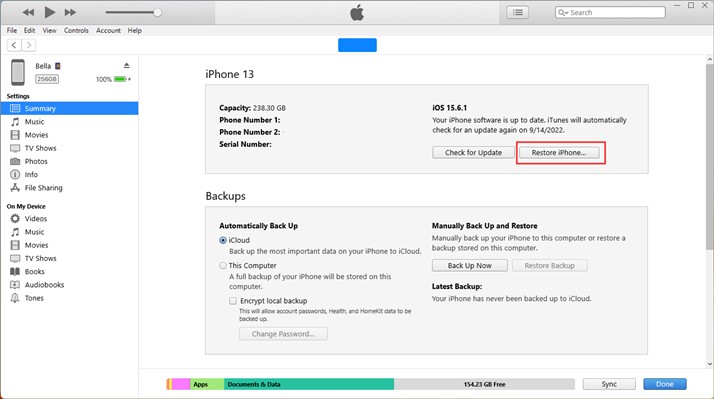
4.2. Restore Your iPhone with iTunes (Data Loss)
If you’re unable to use a third-party tool or the issue persists, restoring your iPhone using iTunes is another option. However, this method will erase all data on your device, so ensure you have a recent backup before proceeding.
Steps to Restore Your iPhone with iTunes:
- Connect your iPhone to your computer using a USB cable.
- Open iTunes (or Finder on macOS Catalina or later).
- If prompted, trust the computer on your iPhone.
- Select your iPhone when it appears in iTunes (or Finder).
- Click “Restore iPhone.”
- Follow the on-screen instructions to complete the restoration process.
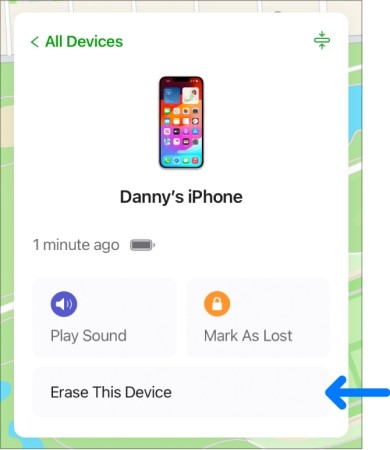
4.3. Erase Your iPhone Remotely Using Find My (Data Loss)
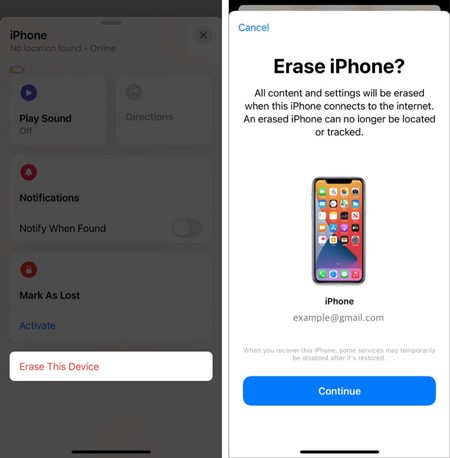
If you have “Find My iPhone” enabled on your device, you can remotely erase it using the Find My app on another Apple device or through iCloud.com. This will also remove Guided Access, but it will erase all your data.
Using the Find My App:
- Open the Find My app on another Apple device (iPhone, iPad, or Mac) signed in with the same Apple ID.
- Tap the “Devices” tab.
- Select the iPhone that is stuck in Guided Access.
- Scroll down and tap “Erase This Device.”
- Follow the on-screen instructions to confirm the erasure.
Using iCloud.com:
- Go to iCloud.com in a web browser on a computer or another device.
- Sign in with your Apple ID and password.
- Click on “Find iPhone.”
- Select the iPhone that is stuck in Guided Access from the “All Devices” list.
- Click “Erase iPhone.”
- Follow the on-screen instructions to confirm the erasure.
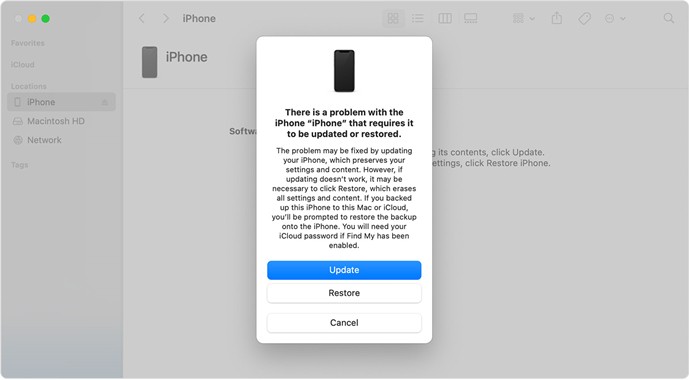
4.4. Restore Your iPhone in Recovery Mode (Data Loss)
If other methods fail, you can try restoring your iPhone in recovery mode. This is a more advanced method that can resolve deeper system issues. Like restoring with iTunes, this will erase all data on your device.
Steps to Restore Your iPhone in Recovery Mode:
- Connect your iPhone to your computer using a USB cable.
- Open iTunes (or Finder on macOS Catalina or later).
- Put your iPhone into recovery mode. The steps vary depending on your iPhone model:
- iPhone 8 or later (including iPhone SE 2nd gen): Press and quickly release the Volume Up button, press and quickly release the Volume Down button, then press and hold the Side button until you see the recovery mode screen.
- iPhone 7 and iPhone 7 Plus: Press and hold both the Side button and the Volume Down button simultaneously until you see the recovery mode screen.
- iPhone 6s or earlier (including iPhone SE 1st gen): Press and hold both the Home button and the Side button simultaneously until you see the recovery mode screen.
- In iTunes (or Finder), you will see a message saying that it has detected an iPhone in recovery mode.
- Click “Restore.”
- Follow the on-screen instructions to complete the restoration process.
5. Preventing Your iPhone from Getting Stuck in Guided Access Again
Once you’ve successfully gotten your iPhone out of Guided Access, take these steps to prevent it from happening again:
- Keep Your iOS Up to Date: Regularly update your iPhone to the latest version of iOS to ensure you have the latest bug fixes and security patches. Go to Settings > General > Software Update to check for updates.
- Remember Your Guided Access Passcode: Store your passcode in a safe place or use a password manager. Alternatively, enable Touch ID or Face ID for Guided Access (Settings > Accessibility > Guided Access > Passcode Settings).
- Disable Guided Access When Not in Use: If you only use Guided Access occasionally, turn it off when you’re not using it. Go to Settings > Accessibility > Guided Access and toggle the switch to off.
- Be Mindful of Accidental Activation: Pay attention when triple-clicking the Side or Home button, as it can accidentally activate Guided Access.
- Regularly Restart Your iPhone: Restarting your iPhone periodically can help prevent minor software glitches.
6. Troubleshooting Common Guided Access Issues
Here are some common issues and their solutions:
| Issue | Solution |
|---|---|
| Forgot Guided Access Passcode | If you have Touch ID or Face ID enabled for Guided Access, use it to exit. Otherwise, you’ll need to restore your iPhone, which will erase your data. |
| Triple-Click Not Working | Ensure the Side or Home button is functioning correctly. Try force restarting your iPhone. Check if button functionality is limited in Accessibility settings. |
| Guided Access Turns On Unexpectedly | Review your Accessibility settings and ensure that the Accessibility Shortcut (Settings > Accessibility > Accessibility Shortcut) is not accidentally triggering Guided Access. |
| Cannot Disable Guided Access | Try force restarting your iPhone. If that doesn’t work, use an iOS system repair tool or restore your iPhone. |
7. Expert Tips for Using Guided Access Effectively
- Customize Guided Access Options: Before starting a Guided Access session, tap “Options” at the bottom-left corner of the screen. Here, you can disable the Side button, Volume buttons, touch input, and keyboard access. This allows you to tailor the Guided Access experience to your specific needs.
- Set Time Limits: Use the “Time Limit” option to automatically end a Guided Access session after a specified duration. This is useful for limiting screen time for children.
- Circle Areas to Disable: Use your finger to draw circles around areas of the screen that you want to disable during the Guided Access session. This prevents users from accidentally tapping on certain buttons or links.
- Use Guided Access for Testing: Developers can use Guided Access to test their apps in a restricted environment, simulating how a user with limited access might interact with the app.
8. Frequently Asked Questions (FAQs) About Guided Access
-
Q1. How to disable Guided Access on iPhone without passcode?
A: If you have enabled Touch ID or Face ID for Guided Access, you can use it to disable Guided Access without the passcode. Otherwise, restoring your iPhone is the only option, which will erase all your data.
-
Q2. How to turn on Guided Access on iPhone?
A: Go to Settings > Accessibility > Guided Access and toggle the switch to on. You will be prompted to set a passcode.
-
Q3. How to start a Guided Access session on iPhone or iPad?
A: Open the app you want to restrict access to. Triple-click the Side or Home button. Tap “Guided Access” and then “Start.”
-
Q4. Why isn’t Guided Access working on iPhone and iPad?
A: Possible reasons include a disabled feature, passcode issues, software glitches, or hardware problems. Try restarting your device, checking for updates, and troubleshooting hardware.
-
Q5. Can I use Guided Access on multiple apps simultaneously?
A: No, Guided Access restricts the device to a single app.
-
Q6. Does Guided Access prevent access to the internet?
A: No, Guided Access does not automatically prevent access to the internet. However, you can disable Safari or other web browsers to prevent internet access during a Guided Access session.
-
Q7. Can I use Guided Access to prevent in-app purchases?
A: Yes, you can disable touch input in specific areas of the screen to prevent accidental in-app purchases.
-
Q8. Is Guided Access available on Android devices?
A: No, Guided Access is an iOS-specific feature. However, some Android devices offer similar features through parental control apps or accessibility settings.
-
Q9. Where can I find more information about Guided Access?
A: You can find more information about Guided Access on Apple’s support website or by contacting Apple Support.
-
Q10. Is there a limit to the number of times I can enter the wrong Guided Access passcode?
A: No, there is no limit to the number of times you can enter the wrong Guided Access passcode. However, after multiple incorrect attempts, you may want to consider restoring your iPhone.
9. Conclusion
Getting your iPhone out of Guided Access can be a challenging experience, but with the right tools and knowledge, you can regain control of your device. Remember to start with the simplest solutions and progress to more advanced methods if necessary. Always back up your iPhone before attempting any troubleshooting steps that could result in data loss.
This comprehensive guide from CONDUCT.EDU.VN has provided you with the knowledge and resources you need to tackle the Guided Access issue. If you’re still struggling, don’t hesitate to seek professional help from Apple Support or a qualified technician.
For more information about digital ethics, device usage guidelines, and responsible technology practices, visit CONDUCT.EDU.VN. We offer a wide range of resources to help you navigate the complex world of technology with confidence and integrity. Our resources include detailed articles, expert opinions, and practical guides covering topics such as online privacy, data security, and ethical considerations in the digital age.
Need more assistance with your iPhone or other tech-related issues? Contact our team of experts at CONDUCT.EDU.VN for personalized guidance and support.
Contact Information:
- Address: 100 Ethics Plaza, Guideline City, CA 90210, United States
- WhatsApp: +1 (707) 555-1234
- Website: CONDUCT.EDU.VN
Let conduct.edu.vn be your trusted partner in navigating the ever-evolving digital landscape. We are committed to providing you with the information and tools you need to make informed decisions and use technology responsibly.