How To Get Your Phone Off Guided Access? CONDUCT.EDU.VN understands the frustration of being locked in Guided Access and offers straightforward solutions. This guide provides detailed, step-by-step instructions to regain control of your iPhone or iPad, ensuring a smooth and hassle-free experience. Explore reliable solutions, understand guided access removal, and discover quick fixes to get your device back to normal.
Table of Contents
- Understanding Guided Access
- Reasons Why Your iPhone/iPad Might Be Stuck
- Immediate Steps: Exiting Guided Access
- Comprehensive Solutions: How to Turn Off Guided Access
- Best Practices for Avoiding Future Issues
- Advanced Troubleshooting
- The Importance of Regular Software Updates
- Understanding Accessibility Features
- Guided Access for Different User Groups
- Security and Privacy Considerations
- Future of Guided Access and iOS Accessibility
- Frequently Asked Questions (FAQs)
- Conclusion
1. Understanding Guided Access
Guided Access is a powerful accessibility feature on iPhones and iPads designed to help users with cognitive or attention difficulties stay focused on a single task. It restricts the device to a single app, disabling the Home button (or Side button on newer models) and preventing users from navigating to other apps or areas of the device. This is especially useful in educational settings, for individuals with autism, or in any situation where limiting device functionality is beneficial.
Guided Access is a feature designed to help users stay focused, control access and increase security. This feature is extremely beneficial for parents who wish to control their children’s usage of devices or educators.
Key Features of Guided Access:
- Single App Mode: Locks the device to a single application.
- Disable Hardware Buttons: Prevents use of the volume buttons, sleep/wake button, and Home/Side button.
- Touch Restriction: Disables touch input on specific areas of the screen.
- Time Limits: Sets a time limit for Guided Access sessions.
Alt Text: iPhone home screen displaying various app icons, illustrating the environment users are trying to exit when stuck in Guided Access.
2. Reasons Why Your iPhone/iPad Might Be Stuck
While Guided Access is designed to be a helpful feature, it can sometimes malfunction, leaving users stuck in single-app mode. Several factors can contribute to this issue, including:
- Software Glitches: Temporary software bugs can cause Guided Access to freeze or become unresponsive.
- Outdated iOS Version: Running an older version of iOS can lead to compatibility issues and unexpected behavior.
- Incorrect Passcode: Forgetting the Guided Access passcode can prevent you from exiting the mode.
- Hardware Issues: A faulty Home or Side button can make it difficult to triple-click and exit Guided Access.
- Accidental Activation: Unintentional triple-clicks can inadvertently activate Guided Access.
- Interrupted Sessions: If a Guided Access session is interrupted by a crash or unexpected shutdown, it may not properly disengage.
One user from the Apple Community shared their experience: “My iPhone 13 I believe is currently stuck in Guided Access mode. I without knowing what it was accidentally turned it on squiggled all over the phone trying to turn it off (again I was unaware how it worked) and now I cannot use my phone screen at all.”
3. Immediate Steps: Exiting Guided Access
Before attempting more complex solutions, try these quick steps to exit Guided Access:
- Triple-Click the Side or Home Button: This is the standard method to exit Guided Access. Quickly press the Side button (on newer iPhones and iPads without a Home button) or the Home button (on older models) three times in rapid succession.
- Enter Your Passcode: If prompted, enter the Guided Access passcode. This is usually different from your device’s lock screen passcode.
- Use Touch ID or Face ID: If you’ve enabled Touch ID or Face ID for Guided Access, use your fingerprint or facial recognition to exit.
Alt Text: Image illustrating the process of exiting Guided Access on an iPhone by triple-clicking the side button.
4. Comprehensive Solutions: How to Turn Off Guided Access
If the immediate steps don’t work, try these more comprehensive solutions to turn off Guided Access.
4.1. Force Restarting Your iPhone/iPad
A force restart can often resolve minor software glitches that may be causing Guided Access to freeze. The process varies depending on your device model:
- iPhone 8 or Later:
- Press and quickly release the Volume Up button.
- Press and quickly release the Volume Down button.
- Press and hold the Side button until you see the Apple logo.
- iPhone 7/7 Plus:
- Press and hold both the Side button and the Volume Down button simultaneously.
- Continue holding until you see the Apple logo.
- iPhone 6s or Earlier:
- Press and hold both the Home button and the Power button simultaneously.
- Continue holding until you see the Apple logo.
After the device restarts, go to Settings > Accessibility > Guided Access and toggle the switch to turn it off.
Alt Text: Visual guide showing how to force restart an iPhone without a home button, highlighting the volume and side buttons.
4.2. Using iOS System Repair Tools
If a force restart doesn’t work, an iOS system repair tool can help fix underlying software issues. CONDUCT.EDU.VN recommends using reputable tools like MagFone iOS System Recovery, which are designed to resolve various iOS problems, including being stuck in Guided Access.
Key Features of MagFone iOS System Recovery:
- Fixes various iOS issues like screen stuck, mode stuck, and more.
- Supports upgrading and downgrading iOS without iTunes/Finder.
- Offers two modes for resetting iPhone, iPad, and iPod touch.
- Assists the entering and exiting of recovery mode for free.
Steps to Use MagFone iOS System Recovery:
- Download and Install: Download MagFone iOS System Recovery from the official website and install it on your computer.
- Connect Your iPhone: Connect your iPhone to the computer using a USB cable.
- Select Repair Mode: Open MagFone iOS System Recovery and select “iOS System Repair,” then choose “Standard Repair” mode to avoid data loss.
- Enter Recovery Mode: Follow the on-screen instructions to put your iPhone into recovery mode.
- Download Firmware Package: Verify the device information and click the “Download” button to get the appropriate firmware package for your device.
- Start Repair: Click the “Repair” button to begin the process of fixing the iPhone stuck in Guided Access issue. Wait for the process to complete, and your device will restart automatically.
Alt Text: Screenshot of the MagFone iOS System Recovery interface, showcasing the options for system repair.
Alt Text: Illustration guiding users on how to put their iPhone into recovery mode using button combinations.
Alt Text: Image depicting the process of downloading the firmware package for an iPhone using iOS System Recovery software.
Alt Text: Visual representation of repairing an iPhone without data loss using iOS System Recovery.
4.3. Restoring with iTunes
If other methods fail, restoring your iPhone or iPad with iTunes (or Finder on macOS Catalina and later) is another option. However, this will erase all data on your device, so ensure you have a recent backup.
Steps to Restore with iTunes:
- Connect to Computer: Connect your iPhone to your computer via USB and open iTunes (or Finder).
- Select Device: Click on the device icon when it appears in iTunes (or Finder).
- Restore iPhone: In the “Summary” section, click “Restore iPhone.”
- Confirm Restore: Follow the on-screen prompts to confirm the restore process.
Alt Text: Screenshot of iTunes interface showing the option to restore an iPhone from a computer backup.
4.4. Disabling Guided Access via Find My
If you can’t access your iPhone directly, you can use the Find My app on another Apple device or through iCloud to remotely erase your device and disable Guided Access.
Steps to Use Find My App:
- Open Find My App: On another Apple device, open the Find My app.
- Select Device: Tap the “Devices” button and select your iPhone.
- Erase Device: Tap “Erase This Device” and follow the prompts to confirm.
Alt Text: Graphic illustrating how to erase an iPhone remotely using the Find My app on another Apple device.
4.5. Turning off Guided Access at iCloud.com
Similar to the Find My app, you can use iCloud.com to remotely erase your device.
Steps to Use iCloud.com:
- Go to iCloud.com: Open a web browser and go to iCloud.com.
- Sign In: Enter your Apple ID and password to sign in.
- Find Devices: Click “Find Devices.”
- Select Device: Select your iPhone from the “All Devices” list.
- Erase Device: Click “Erase iPhone” and follow the prompts to confirm.
Alt Text: Image displaying the process of erasing an iPhone via iCloud.com through a web browser.
4.6. Restoring iPhone in Recovery Mode
If all else fails, restoring your iPhone in recovery mode is a more advanced option. This method can resolve deep-seated software issues.
Steps to Restore in Recovery Mode:
- Connect to Computer: Connect your iPhone to your computer via USB and open iTunes (or Finder).
- Enter Recovery Mode: Follow the specific steps to enter recovery mode for your iPhone model:
- iPhone 8 or Later: Press and quickly release the Volume Up button, then press and quickly release the Volume Down button, then press and hold the Side button until you see the recovery mode screen.
- iPhone 7/7 Plus: Press and hold both the Side button and the Volume Down button until you see the recovery mode screen.
- iPhone 6s or Earlier: Press and hold both the Home button and the Power button until you see the recovery mode screen.
- Restore iPhone: In iTunes (or Finder), click “Restore” and follow the prompts to confirm.
Alt Text: Illustration showing the steps to restore an iPhone in recovery mode using iTunes on a computer.
5. Best Practices for Avoiding Future Issues
To prevent your iPhone or iPad from getting stuck in Guided Access again, consider these best practices:
- Update iOS Regularly: Keep your device’s operating system up to date to ensure you have the latest bug fixes and security enhancements.
- Set a Memorable Passcode: Choose a Guided Access passcode that you can easily remember but is different from your device’s lock screen passcode.
- Enable Touch ID or Face ID: Use biometric authentication for Guided Access to avoid passcode-related issues.
- Be Mindful of Triple-Clicks: Avoid accidental triple-clicks of the Home or Side button.
- Disable Guided Access When Not Needed: Turn off Guided Access when you’re not actively using it to prevent accidental activation.
- Regular Backups: Maintain regular backups of your device to minimize data loss in case you need to restore.
6. Advanced Troubleshooting
If you’ve tried all the standard solutions and your iPhone is still stuck in Guided Access, here are some advanced troubleshooting steps:
- Check Hardware Buttons: Ensure that your Home or Side button is functioning correctly. If it’s damaged or unresponsive, you may need to seek professional repair.
- DFU Mode Restore: Device Firmware Update (DFU) mode is a deeper restore that can sometimes resolve persistent issues. This process is more complex and should be done with caution.
- Contact Apple Support: If you’re unable to resolve the issue on your own, contact Apple Support for further assistance.
7. The Importance of Regular Software Updates
Keeping your iOS software up to date is crucial for maintaining the stability and security of your device. Software updates often include bug fixes and improvements that can address issues like Guided Access malfunctions. Apple regularly releases updates to enhance performance and resolve known problems.
Benefits of Regular Updates:
- Bug Fixes: Resolves known issues and glitches.
- Security Enhancements: Protects your device from vulnerabilities.
- Performance Improvements: Optimizes device performance and efficiency.
- New Features: Introduces new functionalities and capabilities.
8. Understanding Accessibility Features
Guided Access is just one of many accessibility features available on iPhones and iPads. These features are designed to make devices more usable for individuals with disabilities. Understanding and utilizing these features can greatly enhance the user experience for a wide range of people.
Other Notable Accessibility Features:
- VoiceOver: A screen reader that audibly describes what’s on the screen.
- Zoom: Magnifies the screen for users with low vision.
- Display Accommodations: Adjusts colors, contrast, and brightness.
- Switch Control: Allows users to control their device using adaptive switches.
- AssistiveTouch: Provides on-screen buttons for users with motor impairments.
9. Guided Access for Different User Groups
Guided Access can be beneficial for various user groups, each with unique needs and use cases:
- Parents: Restricting children to educational apps or limiting screen time.
- Educators: Creating focused learning environments in classrooms.
- Individuals with Autism: Helping maintain focus and reducing distractions.
- Businesses: Securing kiosks or point-of-sale systems.
- Seniors: Simplifying device usage and preventing accidental navigation.
10. Security and Privacy Considerations
When using Guided Access, it’s important to consider security and privacy implications:
- Passcode Protection: Always set a strong and unique Guided Access passcode to prevent unauthorized access.
- Data Security: Be aware of the data being accessed within the locked app and ensure it is protected.
- Physical Security: In kiosk or public settings, secure the device physically to prevent theft or tampering.
- Privacy Settings: Review the privacy settings of the locked app to ensure sensitive information is not exposed.
11. Future of Guided Access and iOS Accessibility
Apple is continuously working to improve accessibility features in iOS. The future of Guided Access and other accessibility tools is likely to include:
- AI-Powered Enhancements: Using artificial intelligence to personalize accessibility settings and improve usability.
- Advanced Customization: Providing more granular control over device features and restrictions.
- Integration with Assistive Technologies: Seamlessly working with third-party assistive devices and software.
- Improved Voice Control: Enhancing voice commands and dictation capabilities.
- Greater Awareness: Promoting awareness and understanding of accessibility features among developers and users.
12. Frequently Asked Questions (FAQs)
Q1. How to disable Guided Access on iPhone without a passcode?
A: To disable Guided Access without a passcode, try using Touch ID or Face ID if you have enabled it for Guided Access. If not, you may need to restore your device using iTunes or iCloud, which will erase your data.
Q2. How to turn on Guided Access on iPhone?
A: To enable Guided Access, go to Settings > Accessibility > Guided Access and toggle the switch to turn it on. You can also set a passcode and configure other options.
Q3. How to start a Guided Access session on iPhone or iPad?
A: Open the app you want to lock, then quickly press the Side or Home button three times. Select “Guided Access” and tap “Start.”
Q4. Why isn’t Guided Access working on iPhone and iPad?
A: Guided Access may not work due to disabled settings, passcode issues, software glitches, or hardware problems. Try restarting your device, checking settings, and troubleshooting hardware.
Q5. Can I use Siri to turn off Guided Access?
A: Yes, you can use Siri to turn on Guided Access by saying “Turn on Guided Access.” However, to turn it off, you typically need to use the triple-click method or enter the passcode.
Q6. What happens if I forget my Guided Access passcode?
A: If you forget your Guided Access passcode, you will need to restore your device using iTunes or iCloud. This will erase all data on your device.
Q7. Does Guided Access drain the battery faster?
A: Guided Access itself does not significantly drain the battery. However, if you are using an app that consumes a lot of power, the battery may drain faster.
Q8. Can I use Guided Access on multiple apps simultaneously?
A: No, Guided Access only allows you to lock the device to a single app at a time.
Q9. Is Guided Access available on all iPhone and iPad models?
A: Yes, Guided Access is available on all iPhone and iPad models running iOS 6 and later.
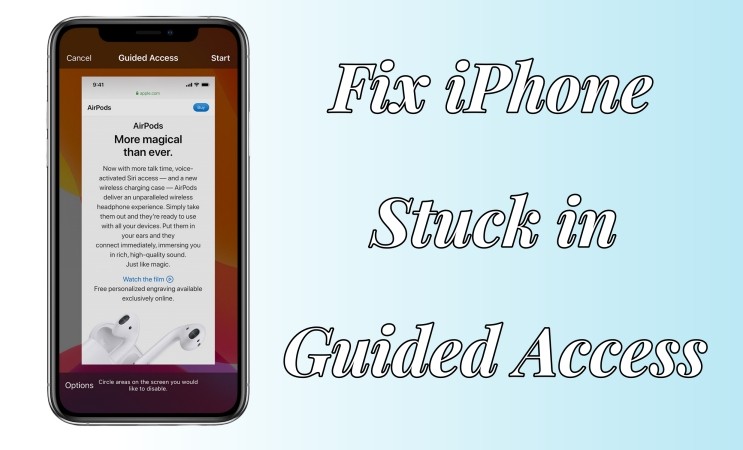
Q10. How do I adjust the hardware button options in Guided Access?
A: When starting a Guided Access session, you can circle areas of the screen or hardware buttons you wish to disable. Tap “Options” at the bottom of the screen to customize these settings.
13. Conclusion
Dealing with an iPhone or iPad stuck in Guided Access can be frustrating, but with the right knowledge and tools, you can resolve the issue and regain control of your device. By following the steps outlined in this guide, you can troubleshoot the problem and implement preventative measures to avoid future occurrences. Remember to keep your software updated, set a memorable passcode, and utilize accessibility features to enhance your overall user experience. For more detailed guides and support, visit conduct.edu.vn, your trusted resource for understanding and optimizing your digital life. If you require further assistance, contact us at 100 Ethics Plaza, Guideline City, CA 90210, United States, or via WhatsApp at +1 (707) 555-1234.