Guided Access is a powerful feature on iPhones and iPads designed to limit the device to a single app, but sometimes exiting it can be tricky; understanding the proper steps is crucial for regaining full control of your device, ensuring a smooth user experience, and preventing frustration, which CONDUCT.EDU.VN can comprehensively guide you through; this can be useful in different settings such as schools, workplace training, or personal use. Learn about accessibility settings and device management for seamless navigation.
1. Understanding Guided Access
Guided Access is an accessibility feature on Apple devices like iPhones, iPads, and iPod Touches that restricts the device to a single app. It’s designed to help users with cognitive disabilities or those who need to focus on a specific task without distractions. This feature can be beneficial in various scenarios, from educational settings to therapeutic environments. However, knowing how to properly exit Guided Access is essential for anyone using it.
1.1. Purpose of Guided Access
Guided Access serves several key purposes:
- Focus and Attention: It helps individuals with attention deficits or cognitive challenges to stay focused on a single task by preventing them from navigating to other apps or device functions.
- Child Safety: Parents can use Guided Access to lock their children into educational apps or games, preventing them from accessing inappropriate content or making unauthorized purchases.
- Accessibility: It provides a controlled environment for users with specific accessibility needs, ensuring they can use an app without getting lost or confused.
- Kiosk Mode: Businesses and organizations use Guided Access to set up devices in kiosk mode, allowing customers or employees to interact with a single app for specific purposes, such as information displays or point-of-sale systems.
1.2. Benefits of Using Guided Access
There are several benefits to utilizing Guided Access:
- Improved Focus: By limiting access to a single app, users can concentrate better on the task at hand, reducing distractions and improving productivity.
- Enhanced Security: Parents can ensure their children are using approved apps and prevent them from accessing harmful or inappropriate content.
- Customization: Guided Access allows users to disable hardware buttons, touch input, and specific areas of the screen, providing a customized and controlled user experience.
- Simplicity: It simplifies device usage for individuals who may be overwhelmed by the full functionality of an iPhone or iPad, making it easier for them to interact with technology.
1.3. Scenarios Where Guided Access Is Useful
Guided Access can be particularly useful in the following scenarios:
- Education: Teachers can use Guided Access to lock students into educational apps during lessons, preventing them from browsing the internet or playing games.
- Therapy: Therapists can use Guided Access to create a controlled environment for individuals with autism or other cognitive disorders, helping them to focus on therapeutic activities.
- Retail: Retailers can use Guided Access to set up iPads as information kiosks, allowing customers to browse product catalogs or access store maps without accessing other device functions.
- Restaurants: Restaurants can use Guided Access to set up tablets for customers to view menus or place orders, ensuring they don’t access other apps or settings.
- Museums: Museums can use Guided Access to provide interactive exhibits on iPads, allowing visitors to explore specific content without getting distracted by other features.
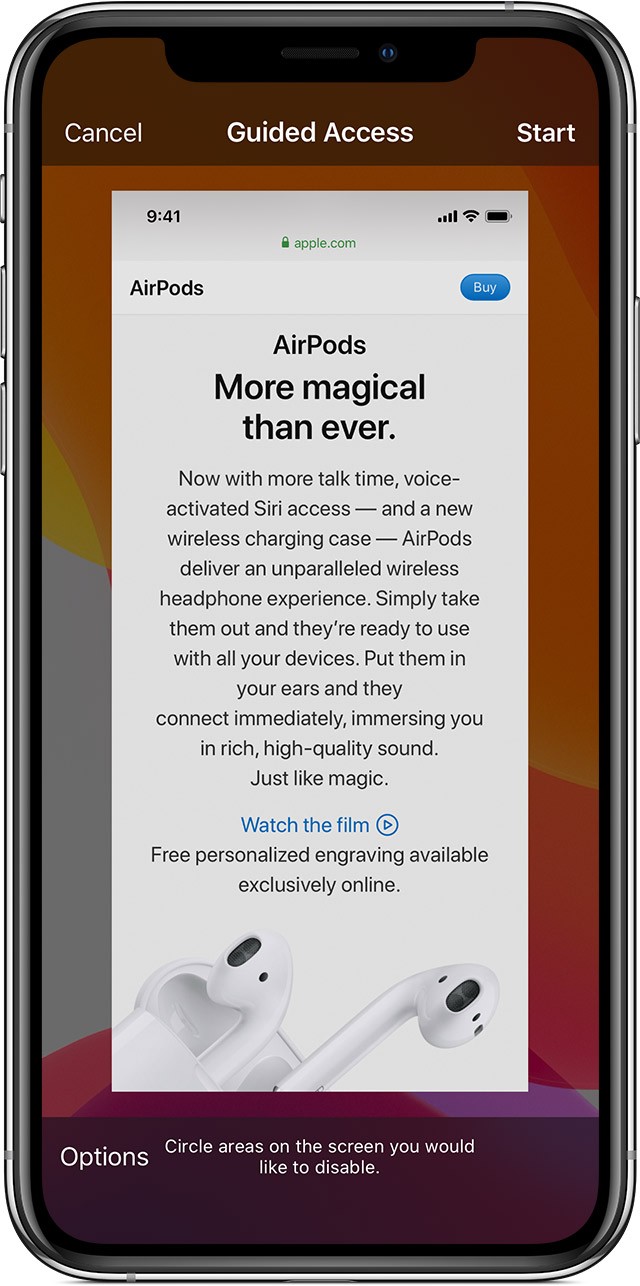 Close up of a tablet screen displaying an active Guided Access session.
2. Common Reasons for Getting Stuck in Guided Access
Users may find themselves stuck in Guided Access for several reasons:
- Forgotten Passcode: One of the most common reasons is forgetting the Guided Access passcode. This can happen if the passcode was set a long time ago or if multiple people use the device.
- Disabled Buttons: If the hardware buttons (such as the Home button or Side button) are disabled within Guided Access settings, it can be difficult to exit the mode using the standard methods.
- Touch Sensitivity: Sometimes, touch sensitivity issues can prevent the user from correctly entering the passcode or tapping the “End” button.
- Software Glitches: Occasionally, software glitches or bugs can cause Guided Access to malfunction, making it difficult to exit even with the correct passcode.
- Accidental Activation: Users may accidentally activate Guided Access without realizing it, especially if the triple-click shortcut is enabled.
3. Step-by-Step Guide to Exiting Guided Access
Here’s a comprehensive guide on how to exit Guided Access, covering various scenarios:
3.1. Using the Correct Passcode
The most straightforward way to exit Guided Access is by using the correct passcode:
- Triple-Click the Side or Home Button: Depending on your iPhone or iPad model, quickly press the Side button (for iPhone X and later) or the Home button (for iPhone 8 and earlier) three times in rapid succession.
- Enter the Guided Access Passcode: A passcode entry screen will appear. Enter the passcode you set when you enabled Guided Access.
- Tap “End”: After entering the correct passcode, tap the “End” button in the lower-left corner of the screen.
If the passcode is correct, Guided Access will be disabled, and you’ll be able to use your device normally.
3.2. Using Touch ID or Face ID
If you enabled Touch ID or Face ID for Guided Access, you can use these biometric methods to exit the mode:
- Triple-Click the Side or Home Button: As before, triple-click the Side or Home button to bring up the Guided Access exit screen.
- Authenticate with Touch ID or Face ID: Instead of entering the passcode, use your registered fingerprint (Touch ID) or facial recognition (Face ID) to authenticate.
- Tap “End”: Once authenticated, the “End” button will become active. Tap it to exit Guided Access.
3.3. What to Do If You Forget the Passcode
Forgetting the Guided Access passcode can be frustrating, but there are several ways to recover:
- Try Default Passcodes: Before trying more complex methods, attempt entering common default passcodes like “0000” or “1234.” Sometimes, users set simple passcodes that are easy to guess.
- Ask the Person Who Set It Up: If someone else set up Guided Access on your device (e.g., a parent or teacher), ask them for the passcode.
- Use Recovery Options:
- Apple ID Recovery: If you associated an Apple ID with Guided Access, you might be able to recover the passcode through your Apple account. Follow the on-screen prompts after failing to enter the passcode several times.
- Recovery Key: If you set up a recovery key for your Apple ID, use it to reset the Guided Access passcode.
- Restore Your Device: If all else fails, you may need to restore your device to its factory settings. This will erase all data on your device, so it should be a last resort. Here’s how to do it:
- Connect to a Computer: Connect your iPhone or iPad to a computer using a USB cable.
- Enter Recovery Mode:
- iPhone 8 or Later: Press and quickly release the Volume Up button, press and quickly release the Volume Down button, then press and hold the Side button until you see the recovery mode screen.
- iPhone 7/7 Plus: Press and hold the Side button and the Volume Down button at the same time until you see the recovery mode screen.
- iPhone 6s or Earlier: Press and hold the Home button and the Side button at the same time until you see the recovery mode screen.
- Restore in iTunes/Finder: On your computer, iTunes (or Finder on macOS Catalina and later) will detect that your device is in recovery mode. Click “Restore” to erase the device and install the latest version of iOS or iPadOS.
- Set Up as New: After the restore process is complete, you’ll need to set up your device as new. You can then restore from a backup if you have one, but keep in mind that the Guided Access passcode will also be restored.
3.4. Using Siri to Disable Guided Access
In some cases, Siri can be used to disable Guided Access, especially if you have configured Siri to work when the device is locked:
- Activate Siri: Press and hold the Side or Home button (depending on your device) to activate Siri.
- Say “Turn off Guided Access”: Clearly speak the command “Turn off Guided Access” to Siri.
- Authenticate If Prompted: Siri may ask you to authenticate with your passcode, Touch ID, or Face ID before disabling Guided Access.
- Verify Guided Access Is Disabled: Check if Guided Access has been successfully disabled by attempting to navigate to other apps or device functions.
3.5. Force Restarting Your Device
If Guided Access is malfunctioning or preventing you from exiting normally, force restarting your device can sometimes resolve the issue:
- Force Restart:
- iPhone 8 or Later: Press and quickly release the Volume Up button, press and quickly release the Volume Down button, then press and hold the Side button until the Apple logo appears.
- iPhone 7/7 Plus: Press and hold the Side button and the Volume Down button at the same time until the Apple logo appears.
- iPhone 6s or Earlier: Press and hold the Home button and the Side button at the same time until the Apple logo appears.
- Check Guided Access Status: After the device restarts, check if Guided Access is still enabled. If it is, try the standard methods for exiting using the passcode, Touch ID, or Face ID.
3.6. Disabling Guided Access Through Accessibility Settings
If you can access the Settings app, you can disable Guided Access directly through the Accessibility settings:
- Open Settings: Tap the Settings app icon on your home screen.
- Go to Accessibility: Scroll down and tap on “Accessibility.”
- Find Guided Access: Scroll down to the “General” section and tap on “Guided Access.”
- Toggle Off: Tap the toggle switch next to “Guided Access” to turn it off.
- Enter Passcode If Prompted: You may be prompted to enter your Guided Access passcode to disable the feature.
4. Preventing Future Issues with Guided Access
To avoid getting stuck in Guided Access in the future, consider the following tips:
4.1. Remembering Your Passcode
- Use a Memorable Passcode: Choose a passcode that is easy for you to remember but difficult for others to guess.
- Store Passcode Securely: If you have trouble remembering passcodes, store it in a secure password manager or write it down and keep it in a safe place.
- Share with Trusted Individuals: If someone else may need to exit Guided Access on your device (e.g., a family member), share the passcode with them.
4.2. Enabling Touch ID or Face ID
- Set Up Biometric Authentication: Enable Touch ID or Face ID for Guided Access to provide an alternative method for exiting the mode without needing to remember the passcode.
4.3. Regularly Testing Guided Access
- Practice Entering and Exiting: Periodically test Guided Access to ensure you can enter and exit the mode without any issues. This can help you become familiar with the process and identify any potential problems early on.
4.4. Keeping Your Device Updated
- Install Software Updates: Keep your iPhone or iPad updated with the latest version of iOS or iPadOS. Software updates often include bug fixes and performance improvements that can help prevent issues with Guided Access.
4.5. Documenting Settings
- Record Configuration Details: Keep a record of your Guided Access settings, including the passcode, enabled features, and any configured time limits. This can be helpful if you need to troubleshoot issues or restore your device to a previous state.
5. Advanced Troubleshooting Tips
If you’re still having trouble exiting Guided Access, try these advanced troubleshooting tips:
5.1. Using AssistiveTouch
AssistiveTouch is an accessibility feature that creates a virtual Home button on the screen. If your physical Home button is broken or disabled, you can use AssistiveTouch to exit Guided Access:
- Enable AssistiveTouch: If AssistiveTouch is not already enabled, go to Settings > Accessibility > Touch > AssistiveTouch and turn it on.
- Customize Top Level Menu: Customize the AssistiveTouch menu to include the “Home” function.
- Triple-Click with AssistiveTouch: Use AssistiveTouch to simulate triple-clicking the Home button, then enter your passcode or use Touch ID/Face ID to exit Guided Access.
5.2. Connecting to iTunes/Finder for Recovery
As mentioned earlier, connecting your device to iTunes or Finder on a computer can help you restore it to factory settings if you’ve forgotten the passcode. Follow the steps outlined in Section 3.3 for restoring your device.
5.3. Contacting Apple Support
If you’ve tried all the troubleshooting steps and are still unable to exit Guided Access, contact Apple Support for assistance. They may be able to provide additional guidance or help you restore your device. You can reach Apple Support through their website, by phone, or by visiting an Apple Store.
6. Real-World Examples and Case Studies
Understanding how Guided Access works in real-world scenarios can provide valuable insights into its practical applications. Here are a few examples:
6.1. Educational Settings
In a classroom setting, a teacher might use Guided Access to lock students into a specific educational app during a lesson. This prevents students from being distracted by other apps or websites and helps them focus on the task at hand.
- Scenario: A third-grade teacher uses iPads to teach math. She enables Guided Access on each iPad, locking the students into a math learning app.
- Benefits: Students stay focused on math exercises, and the teacher can ensure they are not accessing other apps or games during lesson time.
6.2. Therapeutic Environments
Therapists often use Guided Access to create a controlled environment for individuals with autism or other cognitive disorders. By limiting access to a single app, they can help their clients focus on therapeutic activities and reduce distractions.
- Scenario: A therapist works with a child with autism who uses an iPad for communication. The therapist enables Guided Access, locking the child into a communication app that helps them express their needs and emotions.
- Benefits: The child can focus on communicating without getting overwhelmed by other apps or device functions.
6.3. Business Applications
Businesses use Guided Access to set up devices in kiosk mode, allowing customers or employees to interact with a single app for specific purposes.
- Scenario: A retail store uses iPads as information kiosks for customers to browse product catalogs. The store enables Guided Access, locking the iPads into a catalog app that provides product information and allows customers to place orders.
- Benefits: Customers can easily access product information without accessing other device functions, and the store can ensure the iPads are used for their intended purpose.
6.4. Home Use
Parents can use Guided Access to create a safe and controlled environment for their children when using iPhones or iPads.
- Scenario: A parent allows their child to use an iPad for playing educational games. The parent enables Guided Access, locking the child into a selection of approved games and apps.
- Benefits: The child can play games without accessing inappropriate content or making unauthorized purchases, and the parent can have peace of mind knowing their child is using the device safely.
7. Legal and Ethical Considerations
When using Guided Access, it’s important to be aware of the legal and ethical considerations:
7.1. Privacy
Respect the privacy of individuals using devices with Guided Access enabled. Avoid accessing or monitoring their activity without their knowledge or consent.
7.2. Consent
Obtain consent from individuals before enabling Guided Access on their devices, especially if they are adults or capable of making their own decisions. Explain the purpose of Guided Access and how it will affect their device usage.
7.3. Accessibility
Ensure that Guided Access is used in a way that promotes accessibility and inclusivity. Avoid using it to restrict access to essential information or services.
7.4. Compliance
Comply with all applicable laws and regulations when using Guided Access, including those related to privacy, data protection, and accessibility.
7.5. Transparency
Be transparent about the use of Guided Access and provide clear instructions on how to exit the mode. Avoid using it in a deceptive or manipulative way.
8. Guided Access and Other Accessibility Features
Guided Access is just one of many accessibility features available on iPhones and iPads. Here’s how it compares to other features:
8.1. VoiceOver
VoiceOver is a screen reader that provides spoken descriptions of items on the screen. While Guided Access restricts access to a single app, VoiceOver helps users with visual impairments navigate the device and use apps more effectively.
8.2. Zoom
Zoom magnifies the screen to make it easier for users with low vision to see content. Guided Access can be used in conjunction with Zoom to create a more accessible environment for users with visual impairments.
8.3. Switch Control
Switch Control allows users to control their device using one or more switches instead of the touchscreen. Guided Access can be used with Switch Control to create a customized and controlled user experience for individuals with motor impairments.
8.4. AssistiveTouch
AssistiveTouch creates a virtual Home button on the screen, which can be helpful for users with physical disabilities or those who have a broken Home button. Guided Access can be used with AssistiveTouch to provide an alternative method for exiting the mode if the physical Home button is disabled.
9. Guided Access in Different iOS Versions
The steps for setting up and exiting Guided Access may vary slightly depending on the version of iOS or iPadOS installed on your device. Here’s a brief overview of the differences:
9.1. iOS 12 and Earlier
In iOS 12 and earlier, Guided Access is located in Settings > General > Accessibility > Guided Access. The steps for setting up and exiting Guided Access are similar to those in later versions of iOS, but the menu options may be slightly different.
9.2. iOS 13 and Later
In iOS 13 and later, Guided Access is located in Settings > Accessibility > Guided Access. The steps for setting up and exiting Guided Access are generally the same as in iOS 12, but there may be some minor differences in the menu layout and options.
9.3. iPadOS
The steps for setting up and exiting Guided Access on iPadOS are the same as on iOS 13 and later. The feature is located in Settings > Accessibility > Guided Access, and the menu options are similar to those on iPhones.
10. Frequently Asked Questions (FAQ)
1. What is Guided Access?
Guided Access is an accessibility feature that restricts an iPhone, iPad, or iPod Touch to a single app, allowing users to focus on a specific task.
2. How do I enable Guided Access?
Go to Settings > Accessibility > Guided Access and toggle the feature on. You can also set a passcode and configure other options.
3. How do I exit Guided Access?
Triple-click the Side or Home button, then enter your Guided Access passcode or use Touch ID/Face ID.
4. What if I forget my Guided Access passcode?
Try default passcodes, ask the person who set it up, use Apple ID recovery or a recovery key, or restore your device to factory settings as a last resort.
5. Can I use Siri to disable Guided Access?
Yes, if you have configured Siri to work when the device is locked, you can say “Turn off Guided Access.”
6. How do I force restart my device if Guided Access is malfunctioning?
The method varies depending on your iPhone or iPad model. Refer to Section 3.5 for detailed instructions.
7. Can I disable hardware buttons in Guided Access?
Yes, you can disable the Sleep/Wake button, Volume buttons, and other hardware features in Guided Access settings.
8. Is Guided Access useful for children?
Yes, parents can use Guided Access to lock their children into educational apps or games, preventing them from accessing inappropriate content.
9. How does Guided Access compare to other accessibility features?
Guided Access works differently from features like VoiceOver, Zoom, and Switch Control, but they can be used together to create a more accessible environment.
10. Where can I find more information about Guided Access?
Visit the Apple Support website or contact Apple Support directly for additional guidance and troubleshooting tips.
11. Conclusion
Exiting Guided Access doesn’t have to be a daunting task. By understanding the various methods available and taking preventive measures, you can ensure a smooth and hassle-free experience. Whether you’re a parent, educator, therapist, or business professional, Guided Access can be a valuable tool for creating a focused and controlled environment on your iPhone or iPad.
Remember to keep your passcode safe, enable Touch ID or Face ID for easy access, and stay informed about the latest features and updates. For more detailed guides, tips, and resources on Guided Access and other accessibility features, visit CONDUCT.EDU.VN. Our comprehensive articles and tutorials can help you make the most of your Apple devices and create a more accessible and inclusive digital world.
If you’re struggling to implement these steps or need more personalized assistance, don’t hesitate to reach out to the experts at CONDUCT.EDU.VN. Visit our website at conduct.edu.vn or contact us at 100 Ethics Plaza, Guideline City, CA 90210, United States, or via WhatsApp at +1 (707) 555-1234. Our team is dedicated to providing you with the support and guidance you need to navigate the world of accessibility and device management effectively.