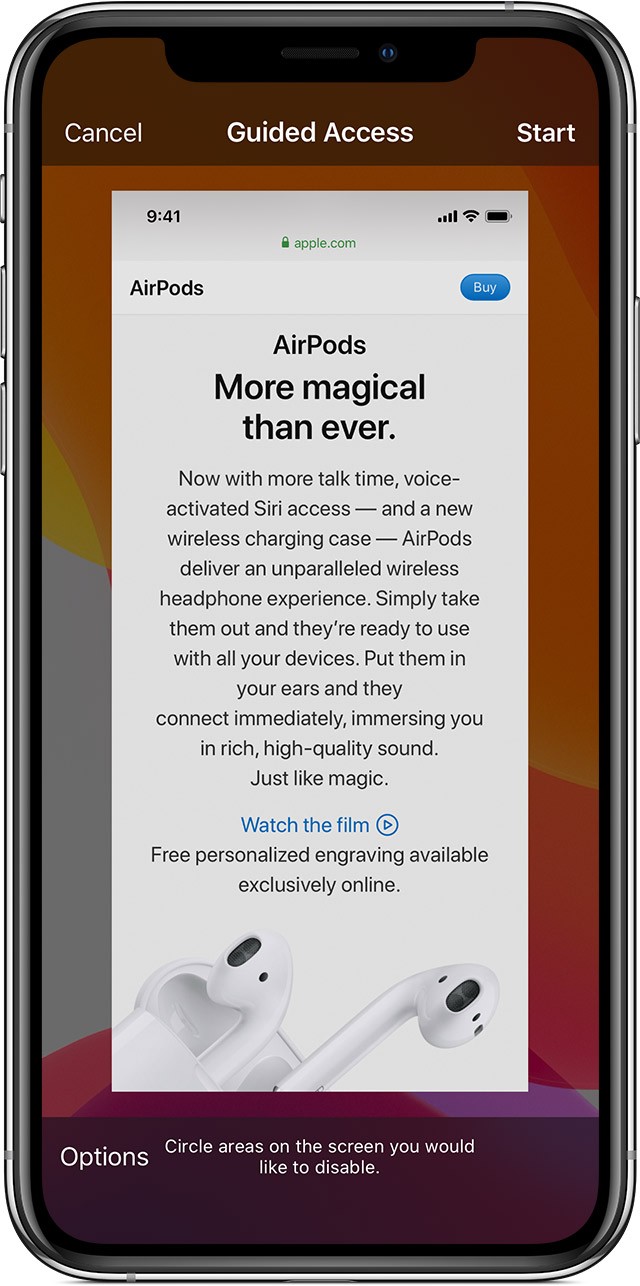
Guided Access is a powerful feature on your iPhone, iPad, and iPod touch that allows you to restrict your device to a single app and control which features are available. This is particularly useful when you want to:
- Let a child use your device without worrying about them accidentally accessing other apps or making unwanted purchases.
- Focus on a specific task without distractions from notifications or accidental gestures.
- Create a controlled testing environment for app development.
This guide will provide you with a detailed walkthrough of how to set up, start, customize, and end a Guided Access session on your iOS device.
Setting Up Guided Access
Before you can use Guided Access, you need to enable it in your device’s settings. Here’s how:
- Open the Settings app on your iPhone, iPad, or iPod touch.
- Scroll down and tap on Accessibility.
- In the Accessibility menu, scroll down to the General section and tap on Guided Access.
- Toggle the Guided Access switch to the “on” position.
- Tap on Passcode Settings.
- Tap on Set Guided Access Passcode.
- Enter a passcode that you’ll use to end Guided Access sessions. Re-enter the passcode to confirm.
- Optionally, you can enable Face ID or Touch ID to end Guided Access sessions using biometric authentication.
Starting a Guided Access Session
Once Guided Access is set up, you can start a session within any app. Follow these steps:
- Open the app you want to use in Guided Access.
- Triple-click the Side button (on iPhone X and later) or the Home button (on iPhone 8 and earlier).
- The Guided Access screen will appear. Here, you can customize the session by disabling certain areas of the screen or features.
- If you want to disable touch input in specific areas, use one finger to draw a circle around those areas. You can move, resize, or remove the circles by tapping the “X”.
- Tap Guided Access at the bottom of the screen, then tap Start in the upper right corner to begin the session.
 ios13-iphone-xs-settings-accessibility-guided-access-safari
Alternatively, you can start a Guided Access session using Siri. Open the desired app and say, “Turn on Guided Access.” Keep in mind that Siri availability and features may vary depending on your region.
Customizing Guided Access Features
Guided Access offers a range of options to customize the session and control which features are available. To access these options:
- Triple-click the Side button or Home button during a Guided Access session.
- If prompted, enter your Guided Access passcode.
- Tap Options at the bottom of the screen.
- Enable or disable the desired options, and then tap Done.
Here’s a breakdown of the available options:
- Sleep/Wake Button: Disables the Sleep/Wake button, preventing the user from turning off the device.
- Volume Buttons: Disables the volume buttons, preventing the user from adjusting the volume.
The Guided Access option to disable or enable volume control buttons.
- Motion: Limits the device’s response to motion. Disabling this will prevent screen rotation and disable the shake-to-undo feature.
- Keyboards: Disables the keyboard, preventing text input.
The Guided Access settings providing the option to restrict keyboard usage.
- Touch: Disables touch input on the screen, rendering the screen unresponsive to touch.
- Dictionary Lookup: Enables the Look Up feature, allowing the user to select text and access dictionary definitions.
The Guided Access option to allow or disallow dictionary lookups.
- Time Limit: Set a time limit for the Guided Access session. When the time limit expires, the session will automatically end.
Ending a Guided Access Session
To end a Guided Access session, follow these steps:
- Triple-click the Side button or Home button.
- Enter your Guided Access passcode.
- Tap End in the upper-left corner of the screen.
Alternatively, if you enabled Face ID or Touch ID for Guided Access, you can double-click the Side button or Home button to end the session using biometric authentication.
Troubleshooting Guided Access
If you encounter any issues with Guided Access, here are a few troubleshooting tips:
- Forgot your passcode: If you forget your Guided Access passcode, you’ll need to restore your device to factory settings. This will erase all data on your device, so it’s essential to back up your device regularly.
- Guided Access won’t start: Make sure Guided Access is enabled in Settings > Accessibility > Guided Access. Also, ensure that you are triple-clicking the Side button or Home button quickly and accurately.
- Screen is unresponsive: If you accidentally disable touch input for the entire screen, you’ll need to force restart your device to exit Guided Access.
By following these instructions, you can effectively use Guided Access to create a more focused and controlled environment on your iPhone, iPad, or iPod touch. It is a versatile tool to provide device access in a safe and controlled manner.