Guided Access is a powerful feature on your iPhone, iPad, and iPod touch that allows you to lock your device to a single app and control which features are available. This is particularly useful when you want to restrict access to certain functionalities, whether it’s for a child using your device, preventing accidental gestures, or focusing on a specific task. This guide provides a detailed walkthrough of how to use Guided Access on your iPhone effectively.
Setting Up Guided Access on Your iPhone
Before you can start using Guided Access, you need to enable it in your iPhone’s settings. Here’s how:
- Open the Settings app on your iPhone.
- Scroll down and tap on Accessibility.
- In the Accessibility menu, find and tap on Guided Access.
- Toggle the Guided Access switch to the ON position.
 Guided Access settings screen showing the Guided Access toggle
- Tap on Passcode Settings, then tap on Set Guided Access Passcode.
- Enter a new passcode, and then re-enter it to confirm. This passcode will be used to end a Guided Access session.
- (Optional) You can also enable Face ID or Touch ID to end Guided Access sessions using biometric authentication.
Starting a Guided Access Session
Once Guided Access is set up, you can easily start a session within any app. Follow these steps:
- Open the app that you want to lock your device to.
- Triple-click the Side button (on iPhone X and later) or the Home button (on iPhone 8 and earlier).
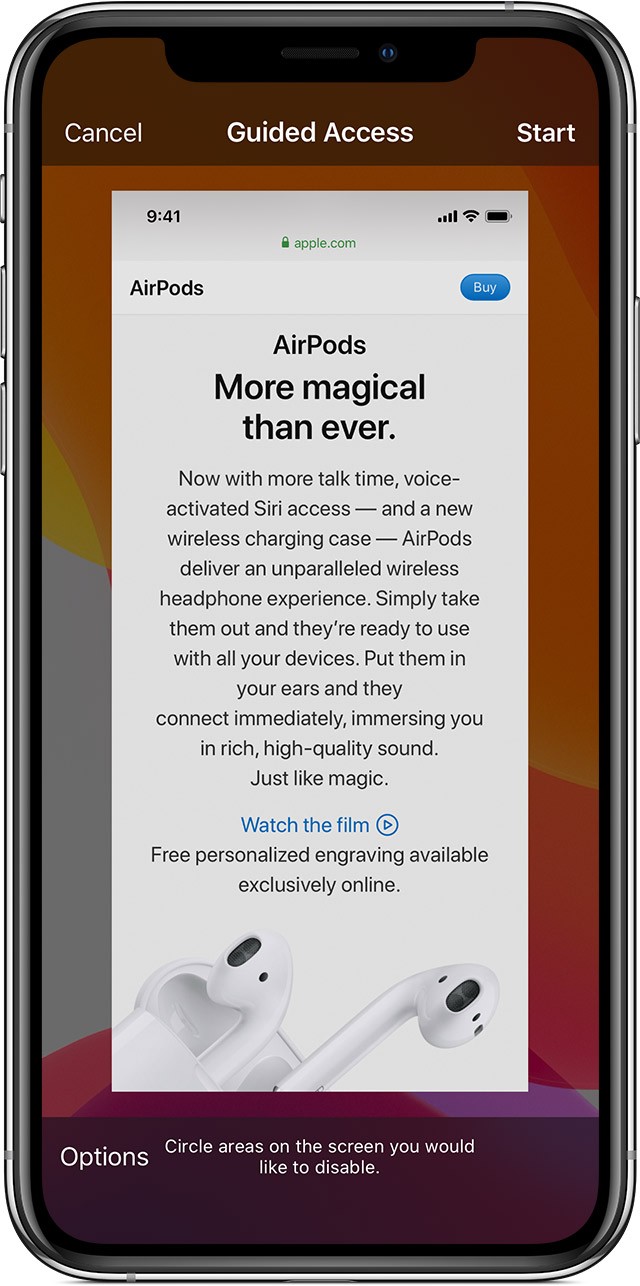
- (Optional) If you want to disable certain areas of the screen from responding to touch, use one finger to circle those areas. You can adjust the size and position of the circles or tap the “X” to remove them.
- Tap Guided Access, then tap Start in the top-right corner of the screen.
- If you have configured Siri, you can simply say “Turn on Guided Access.”
Controlling Available Features During a Guided Access Session
Guided Access offers granular control over which features are accessible during a session. Here’s how to customize the options:
-
Triple-click the Side button or Home button.
-
Enter your Guided Access passcode (or use Face ID/Touch ID if enabled).
-
Tap Options at the bottom-left of the screen. If you don’t see options, triple-click the Side or Home button again and enter your passcode.
-
A menu will appear, allowing you to toggle various features on or off:
-
Sleep/Wake Button: Disables the Sleep/Wake button, preventing the device from being put to sleep.
-
Volume Buttons: Disables the volume buttons, preventing volume adjustments.
-
Motion: Limits the device’s response to motion, such as shaking or rotating.
-
Keyboards: Disables the keyboard from appearing.
-
Touch: Disables all touch input on the screen.
-
Dictionary Lookup: Enables or disables the Look Up feature when selecting text.
-
Time Limit: Set a time limit for the Guided Access session. When the time expires, the session will automatically end.
-
-
Once you’ve configured the desired options, tap Done in the top-right corner.
Ending a Guided Access Session
To end a Guided Access session, follow these steps:
- Triple-click the Side button or Home button.
- Enter your Guided Access passcode (or use Face ID/Touch ID if enabled).
- Tap End in the top-left corner of the screen.
Troubleshooting and Additional Help
If you encounter any issues with Guided Access, here are some troubleshooting steps:
- Forgotten Passcode: If you forget your Guided Access passcode, you may need to restore your device to factory settings.
- Guided Access Not Starting: Ensure that Guided Access is enabled in Settings > Accessibility > Guided Access.
- Features Not Working: Double-check the options you’ve selected in the Guided Access settings menu.
For further assistance, consult Apple’s official support resources or contact Apple Support directly.
Guided Access is a versatile feature that can greatly enhance the usability and security of your iPhone in various situations. By understanding how to set up, start, customize, and end Guided Access sessions, you can effectively control the user experience on your device.