Hanging outdoor lights with guide wire is a great way to add ambiance and extend the usability of your outdoor spaces, as discussed on CONDUCT.EDU.VN. This method ensures your lights are not only beautifully displayed but also securely and durably installed. By using a guide wire, you can create stunning visual effects while providing essential support, especially for longer spans or heavier lights. Master outdoor lighting solutions with our comprehensive guide for durable and attractive setups.
1. Understanding the Need for Guide Wires
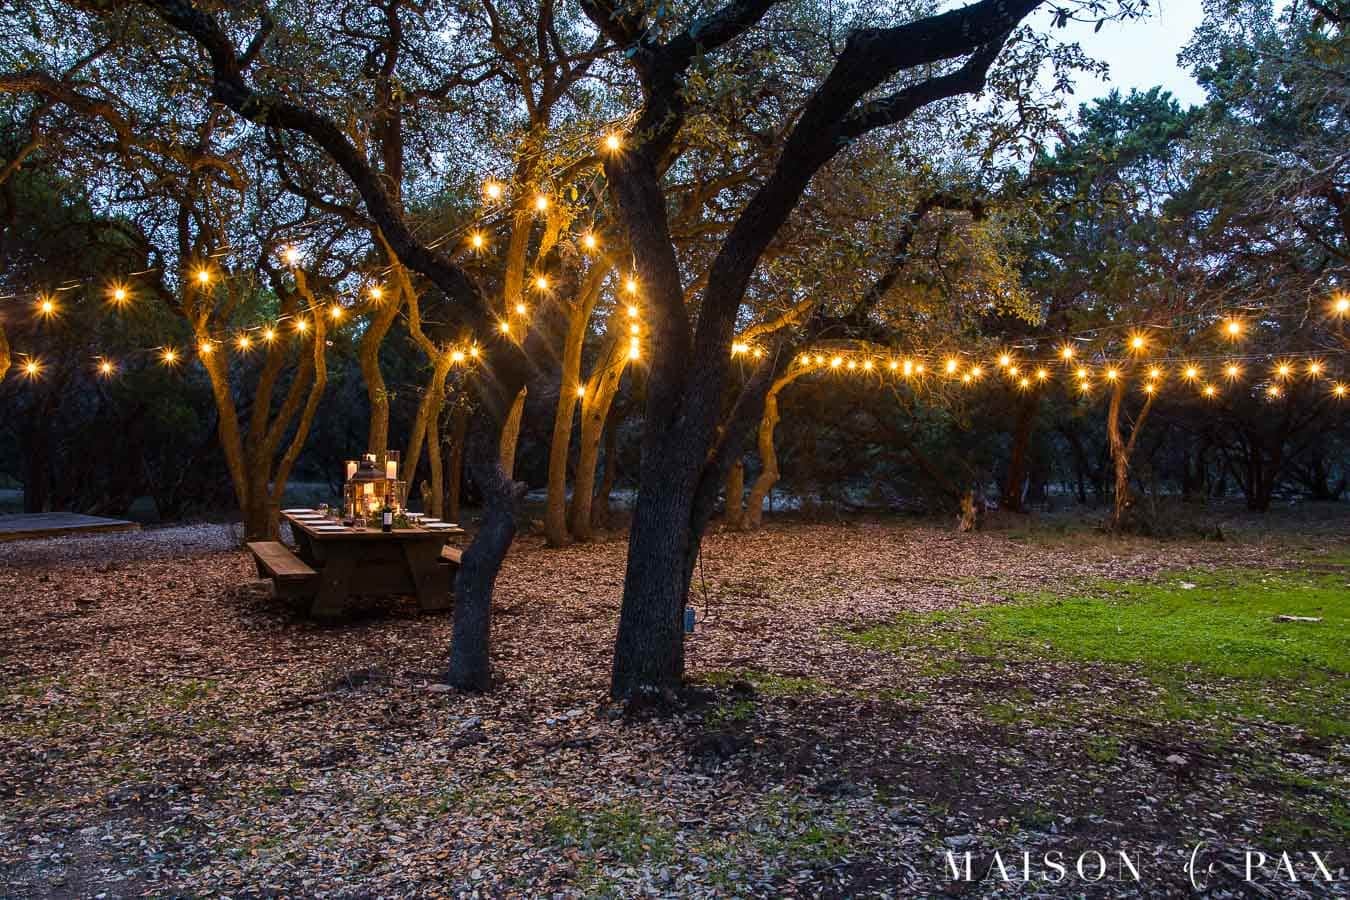
When it comes to illuminating your outdoor spaces, hanging string lights is a popular and effective way to create a warm and inviting atmosphere. However, simply draping lights from trees or structures can lead to sagging, tangling, and potential damage to the lights themselves. That’s where guide wires come in. A guide wire, also known as a support wire or catenary wire, provides a strong and stable foundation for hanging outdoor lights. It is a crucial component for any long-term or professional-looking lighting installation.
1.1. Why Use Guide Wires?
- Support and Stability: Guide wires prevent sagging and keep your lights taut, especially over long distances.
- Longevity: They reduce strain on the light strings, extending their lifespan.
- Aesthetics: Guide wires create a clean, professional, and visually appealing look.
- Safety: Properly installed guide wires minimize the risk of lights falling or becoming a hazard.
- Versatility: They allow you to hang lights in areas where there are no natural supports.
1.2. Common Scenarios for Using Guide Wires
- Patios and Decks: Hanging lights over a patio or deck to create an intimate and inviting space for dining and relaxation.
- Gardens and Landscapes: Illuminating pathways, garden features, or creating a magical ambiance in your backyard.
- Event Spaces: Decorating for parties, weddings, or other outdoor events where reliable and attractive lighting is essential.
- Commercial Applications: Enhancing the atmosphere of restaurant patios, outdoor seating areas, or storefronts.
2. Planning Your Outdoor Lighting Project
Before you start gathering materials and climbing ladders, careful planning is essential for a successful outdoor lighting project. This involves assessing your space, determining the desired look, and considering practical factors like power sources and support structures.
2.1. Assessing Your Space
- Measurements: Accurately measure the distance between the points where you plan to hang your lights. This will help you determine the length of guide wire and the number of lights you need.
- Support Structures: Identify existing trees, posts, walls, or other structures that can serve as anchor points for your guide wires.
- Power Source: Locate a convenient and accessible outdoor electrical outlet. If necessary, plan for the use of extension cords or consider installing a new outlet.
- Environmental Factors: Consider the weather conditions in your area. If you live in a windy or snowy climate, you may need to use heavier-duty materials and ensure your installation is extra secure.
2.2. Designing Your Lighting Layout
- Desired Look: Decide on the overall aesthetic you want to achieve. Do you prefer a neat, linear arrangement, a playful zigzag pattern, or a whimsical, free-flowing design?
- Light Spacing: Determine how far apart you want your lights to be spaced along the guide wire. Closer spacing will create a brighter, more concentrated light, while wider spacing will result in a softer, more diffused glow.
- Hanging Height: Consider the height at which you want to hang your lights. A higher hanging height will provide more ambient light, while a lower height will create a more intimate and cozy atmosphere.
2.3. Safety Considerations
- Electrical Safety: Always use outdoor-rated lights and extension cords. Ensure all connections are properly sealed to prevent water damage and electrical hazards.
- Weight Limits: Be aware of the weight limits of your support structures and guide wires. Avoid overloading them, as this could lead to collapse or failure.
- Ladder Safety: Use a sturdy ladder and follow all safety precautions when working at heights. Have someone spot you to ensure your safety.
- Underground Utilities: Before digging or driving posts into the ground, check for underground utilities such as gas lines or electrical cables. Contact your local utility company to have them marked if necessary.
3. Choosing the Right Materials
Selecting the right materials is crucial for a durable, safe, and visually appealing outdoor lighting installation. Here’s a breakdown of the essential components and factors to consider when making your choices.
3.1. Guide Wire (Support Wire)
- Material: Stainless steel is the best choice for guide wire due to its strength, durability, and resistance to rust and corrosion. Galvanized steel is a more affordable option, but it is more susceptible to rust over time.
- Diameter/Gauge: The diameter or gauge of the wire determines its strength and weight-bearing capacity. For most residential applications, a 12-gauge or 1/8-inch diameter wire is sufficient. For longer spans or heavier lights, consider using a thicker gauge wire.
- Breaking Strength: Check the breaking strength of the wire to ensure it can handle the weight of your lights and any potential stress from wind or snow.
3.2. String Lights
- Type: LED string lights are highly recommended due to their energy efficiency, long lifespan, and durability. They also produce less heat than traditional incandescent bulbs, making them safer to use.
- Commercial Grade vs. Standard: Commercial-grade lights are designed to withstand harsh weather conditions and are generally more durable than standard string lights. They are a good investment if you want your lights to last for many years.
- Bulb Style: Choose a bulb style that complements your desired aesthetic. Globe lights, Edison-style bulbs, and fairy lights are all popular options.
- Length: Calculate the total length of string lights you need based on your layout and the spacing between lights.
- Weather Resistance: Ensure the lights are specifically designed for outdoor use and are rated for wet locations.
3.3. Hardware and Accessories
- Eye Hooks/Screw Hooks: These are used to attach the guide wire to your support structures. Choose hooks made of stainless steel or galvanized steel for corrosion resistance. Make sure the hooks are strong enough to support the weight of the wire and lights.
- Turnbuckles: Turnbuckles are adjustable connectors that allow you to tighten the guide wire, ensuring it is taut and prevents sagging.
- Wire Rope Clips/Clamps: These are used to secure the ends of the guide wire to the eye hooks or turnbuckles. Choose clips that are the correct size for your wire and made of corrosion-resistant material.
- Zip Ties/Cable Ties: These are used to attach the string lights to the guide wire. Choose UV-resistant zip ties to prevent them from becoming brittle and breaking in the sun.
- Extension Cords: If needed, use outdoor-rated extension cords to reach your power source. Choose cords that are the appropriate length and gauge for your lights.
3.4. Tool Checklist
- Measuring Tape: For accurate measurements of your space and wire lengths.
- Ladder: To safely reach high anchor points.
- Drill: To pre-drill holes for eye hooks in wood or other materials.
- Screwdriver: To tighten eye hooks and other hardware.
- Wire Cutters/Snips: To cut the guide wire to the desired length.
- Pliers: To crimp wire rope clips and tighten hardware.
- Hammer: To tap eye hooks into wood.
- Level: To ensure your lights are hanging straight.
- Safety Glasses: To protect your eyes from debris.
- Gloves: To protect your hands.
4. Step-by-Step Installation Guide
With your plan in place and your materials gathered, it’s time to start installing your outdoor string lights with guide wire. Follow these step-by-step instructions for a safe and successful installation.
4.1. Preparing the Support Structures
- Cleaning: Clean the surfaces of your support structures to remove any dirt, debris, or loose paint.
- Pre-Drilling: If you are attaching eye hooks to wood, pre-drill pilot holes to make it easier to screw in the hooks and prevent the wood from splitting.
- Reinforcement: If your support structures are weak or unstable, reinforce them before attaching the eye hooks. For example, you could add additional bracing to a fence post or wrap a tree trunk with a support band.
4.2. Attaching the Eye Hooks
- Placement: Position the eye hooks at the desired height and location on your support structures. Make sure they are aligned so that the guide wire will run straight and level.
- Installation: Screw the eye hooks into the support structures, using a screwdriver or pliers to tighten them securely. If you are attaching the hooks to a tree, be careful not to damage the bark.
- Testing: Once the eye hooks are installed, test their stability by pulling on them firmly. If they feel loose or wobbly, tighten them further or choose a different location.
4.3. Installing the Guide Wire
- Cutting: Measure and cut the guide wire to the appropriate length, leaving some extra slack for adjustments.
- Attaching to Eye Hooks: Thread one end of the guide wire through the eye of an eye hook. Use wire rope clips to secure the wire to itself, creating a loop around the eye hook.
- Installing Turnbuckles (Optional): If you are using turnbuckles, attach them to the eye hooks before attaching the guide wire. Thread the guide wire through the turnbuckle and secure it with wire rope clips.
- Tensioning the Wire: Pull the guide wire taut and attach the other end to the corresponding eye hook or turnbuckle. If using turnbuckles, tighten them until the wire is taut and level.
4.4. Hanging the String Lights
- Layout: Before hanging the lights, lay them out along the guide wire to determine the desired spacing and arrangement.
- Attaching with Zip Ties: Use zip ties to attach the string lights to the guide wire. Space the zip ties evenly along the wire, ensuring the lights are securely attached but not too tightly constricted.
- Adjusting and Fine-Tuning: Once all the lights are attached, step back and assess the overall look. Make any necessary adjustments to the spacing, alignment, or tension of the lights and guide wire.
4.5. Connecting to Power
- Plugging In: Plug the string lights into your outdoor electrical outlet or extension cord.
- Testing: Turn on the lights to ensure they are working properly.
- Securing Connections: Use weatherproof connectors or electrical tape to seal any exposed connections and protect them from moisture.
5. Creative Outdoor Lighting Ideas
With your guide wire and string lights installed, you can unleash your creativity and transform your outdoor spaces into magical retreats. Here are some inspiring ideas to get you started.
5.1. Patio and Deck Lighting
- Overhead Canopy: Create a stunning overhead canopy of lights by stringing them in a crisscross or radial pattern above your patio or deck.
- Perimeter Lighting: Outline the perimeter of your patio or deck with string lights to define the space and create a warm, inviting glow.
- Accent Lighting: Highlight specific features, such as plants, furniture, or architectural details, with strategically placed string lights.
5.2. Garden and Landscape Lighting
- Pathway Illumination: Line pathways with string lights to provide safe and attractive illumination for nighttime strolls.
- Tree Lighting: Wrap tree trunks and branches with string lights to create a magical, ethereal effect.
- Water Feature Lighting: Illuminate ponds, fountains, or other water features with submersible string lights to add a touch of drama and elegance.
5.3. Event Lighting
- Wedding Decor: Use string lights to create a romantic and festive atmosphere for outdoor weddings.
- Party Lighting: Decorate for parties and gatherings with colorful string lights and creative lighting arrangements.
- Holiday Lighting: Celebrate holidays with themed string lights and festive displays.
5.4. Unique Lighting Techniques
- Layered Lighting: Combine string lights with other types of outdoor lighting, such as spotlights, floodlights, or lanterns, to create a layered and dynamic lighting scheme.
- Dimmable Lighting: Use dimmable string lights to adjust the brightness and create different moods.
- Smart Lighting: Incorporate smart lighting technology to control your string lights remotely and automate their operation.
6. Maintaining Your Outdoor Lights
To ensure your outdoor string lights continue to shine brightly for years to come, regular maintenance is essential. Here are some tips for keeping your lights in top condition.
6.1. Cleaning
- Regular Cleaning: Periodically clean your string lights to remove dust, dirt, and cobwebs. Use a soft cloth or brush and a mild detergent.
- Bulb Cleaning: Clean individual bulbs with a damp cloth to remove any buildup of grime.
6.2. Inspections
- Regular Inspections: Inspect your string lights regularly for any signs of damage, such as frayed wires, cracked bulbs, or loose connections.
- Wire Inspection: Check the guide wire for any signs of rust or corrosion.
6.3. Repairs
- Bulb Replacement: Replace any burned-out bulbs promptly to maintain the brightness and uniformity of your lighting.
- Wire Repairs: Repair any damaged wires or connections immediately to prevent electrical hazards.
- Hardware Replacement: Replace any corroded or damaged hardware, such as eye hooks or wire rope clips.
6.4. Seasonal Storage
- Take Down Lights: If you live in an area with harsh winters, consider taking down your string lights and storing them indoors during the off-season.
- Proper Storage: Store your string lights in a dry, protected location to prevent damage from moisture or pests.
7. Troubleshooting Common Issues
Even with careful planning and installation, you may encounter some common issues with your outdoor string lights. Here’s how to troubleshoot them.
7.1. Lights Not Working
- Check the Power Source: Ensure the lights are plugged into a working outlet and the extension cord is functioning properly.
- Check the Bulbs: Replace any burned-out bulbs.
- Check the Connections: Inspect all connections for looseness or corrosion.
- Check the Fuse/Breaker: Check the fuse or breaker in your electrical panel to see if it has tripped.
7.2. Lights Sagging
- Tighten the Guide Wire: Tighten the turnbuckles (if used) to increase the tension on the guide wire.
- Add Additional Support: Add additional eye hooks or support structures to reduce the span of the guide wire.
- Reduce the Weight: Remove some of the lights to reduce the overall weight on the guide wire.
7.3. Lights Tangling
- Proper Installation: Ensure the lights are properly attached to the guide wire and are not hanging too loosely.
- Wind Protection: Protect the lights from strong winds by using windbreaks or choosing a more sheltered location.
- Regular Maintenance: Untangle any tangled lights promptly to prevent further damage.
7.4. Lights Flickering
- Loose Connections: Check all connections for looseness or corrosion.
- Voltage Issues: Ensure the lights are receiving the correct voltage.
- Faulty Bulbs: Replace any flickering bulbs.
8. Advanced Techniques and Considerations
For those looking to take their outdoor lighting to the next level, here are some advanced techniques and considerations to explore.
8.1. Using Dimmers
- Mood Lighting: Dimmers allow you to adjust the brightness of your string lights to create different moods and atmospheres.
- Energy Savings: Dimmers can also help you save energy by reducing the amount of power consumed by the lights.
- Compatibility: Make sure your dimmer is compatible with the type of lights you are using (e.g., LED or incandescent).
8.2. Smart Home Integration
- Remote Control: Smart home integration allows you to control your string lights remotely using your smartphone or other devices.
- Automation: You can also automate your lights to turn on and off at specific times or in response to certain events.
- Voice Control: Some smart home systems also offer voice control, allowing you to control your lights with simple voice commands.
8.3. Solar-Powered String Lights
- Energy Efficiency: Solar-powered string lights are a great option for those looking to reduce their carbon footprint and save money on electricity bills.
- Placement: Make sure to place the solar panel in a location where it will receive plenty of direct sunlight.
- Battery Life: Be aware that solar-powered lights may not shine as brightly or for as long as traditional lights, especially on cloudy days.
8.4. Professional Installation
- Complex Projects: For complex or large-scale outdoor lighting projects, consider hiring a professional installer.
- Expertise: Professional installers have the expertise and equipment to ensure a safe, reliable, and visually appealing installation.
- Warranty: Many professional installers offer warranties on their work, providing you with peace of mind.
9. The Importance of Ethical Considerations
When planning and installing your outdoor lighting, it’s important to consider the ethical implications of your choices. This includes minimizing light pollution, protecting wildlife, and respecting your neighbors.
9.1. Light Pollution
- Shielded Lights: Use shielded lights that direct the light downwards, minimizing light pollution and glare.
- Low Brightness: Choose lights with a lower brightness to reduce the impact on the night sky.
- Limited Hours: Turn off your lights when they are not needed to conserve energy and reduce light pollution.
9.2. Wildlife Protection
- Dark Sky Initiatives: Support dark sky initiatives that aim to reduce light pollution and protect nocturnal wildlife.
- Wildlife-Friendly Lighting: Use lighting that is specifically designed to be wildlife-friendly, such as lights with a warm color temperature and low UV emissions.
- Avoid Over-Illumination: Avoid over-illuminating your property, as this can disrupt the natural behavior of wildlife.
9.3. Neighborly Considerations
- Respect Boundaries: Respect your neighbors’ privacy and avoid directing lights onto their property.
- Communicate: Communicate with your neighbors about your lighting plans and address any concerns they may have.
- Be Mindful: Be mindful of the impact your lighting has on your neighbors and make adjustments as needed.
10. Conclusion: Illuminate Your World Responsibly
Hanging outdoor lights with guide wires is a fantastic way to enhance your outdoor spaces, creating ambiance, extending usability, and adding a touch of magic. By following the steps outlined in this guide, you can create a stunning and durable lighting installation that will bring joy for years to come. Remember to prioritize safety, choose quality materials, and consider the ethical implications of your choices.
At CONDUCT.EDU.VN, we are committed to providing you with the information and resources you need to make informed decisions about your outdoor lighting projects. Whether you’re looking for tips on choosing the right lights, troubleshooting common issues, or exploring advanced techniques, we’ve got you covered.
For more detailed guidance and to explore a wide range of outdoor lighting solutions, visit CONDUCT.EDU.VN. Our comprehensive resources will help you create the perfect ambiance for your outdoor spaces while ensuring safety and sustainability. Need personalized advice? Contact us at 100 Ethics Plaza, Guideline City, CA 90210, United States, or reach out via Whatsapp at +1 (707) 555-1234.
By choosing to illuminate your world responsibly, you can create beautiful and inviting outdoor spaces while minimizing your impact on the environment and respecting your community. Let CONDUCT.EDU.VN be your guide to a brighter, more sustainable future.
FAQ: Hanging Outdoor Lights with Guide Wire
1. What is the purpose of using a guide wire for outdoor lights?
A guide wire provides support and stability, preventing sagging and extending the lifespan of your lights. It also creates a cleaner, more professional look.
2. What type of wire is best for hanging outdoor lights?
Stainless steel wire is the best option due to its strength, durability, and resistance to rust.
3. How do I determine the correct gauge of wire to use?
For most residential applications, a 12-gauge or 1/8-inch diameter wire is sufficient. For longer spans or heavier lights, use a thicker gauge.
4. What are the key safety considerations when hanging outdoor lights?
Ensure you use outdoor-rated lights and extension cords, avoid overloading support structures, and follow ladder safety precautions.
5. How high should I hang my outdoor string lights?
Hang your lights at least 9 feet off the ground to allow for sag and ensure adequate clearance.
6. What tools do I need for hanging outdoor lights with a guide wire?
Essential tools include a measuring tape, ladder, drill, screwdriver, wire cutters, pliers, hammer, level, safety glasses, and gloves.
7. How do I prevent my outdoor lights from sagging?
Use a guide wire and tighten it with turnbuckles to ensure it is taut. Add additional support if necessary.
8. How can I make my outdoor lighting more energy-efficient?
Use LED string lights, consider solar-powered options, and use dimmers to adjust brightness.
9. How do I maintain my outdoor lights to ensure they last longer?
Clean the lights regularly, inspect for damage, repair any issues promptly, and store them properly during the off-season.
10. Where can I find reliable information and guidance on outdoor lighting?
Visit conduct.edu.vn for comprehensive resources, tips, and expert advice on all aspects of outdoor lighting.