Mountain biking demands precision and reliability, and How To Install Chain Guide correctly is paramount for a smooth ride. This guide, brought to you by CONDUCT.EDU.VN, will cover everything you need to know about bicycle chain guides, from understanding their purpose to the intricacies of installation, ensuring optimal performance on any terrain. Master the process of chain guide setup, bike chain retention, and drivetrain protection to elevate your mountain biking experience.
1. Understanding the Mountain Bike Chain Guide
A mountain bike chain guide is a device designed to keep the chain securely on the chainring(s), especially during aggressive riding. This is vital in mountain biking where rough terrain can easily cause the chain to derail. It prevents the chain from falling off during jumps, bumpy rides, and technical sections.
1.1. The Role of a Chain Guide
The primary role of a chain guide is to maintain chain retention. By keeping the chain aligned and on the chainring, it prevents disruptions to your pedaling and power transfer. This is crucial for maintaining momentum and control on challenging trails. Additionally, a chain guide can protect the chainring from impacts, extending its lifespan.
1.2. Is a Chain Guide Necessary?
While not strictly mandatory, a chain guide is highly recommended for mountain bikers who frequently encounter rough terrain or experience chain derailment. Consider your riding style and the trails you ride. If you’re consistently navigating technical descents and jumps, a chain guide is a valuable investment. However, if you primarily ride smoother trails, it might not be essential. According to the International Mountain Bicycling Association (IMBA), proper equipment, including chain guides, enhances safety and enjoyment on trails.
2. Benefits of Using a Chain Guide
Investing in a chain guide offers several key advantages that can significantly improve your mountain biking experience.
2.1. Superior Chain Retention
Chain guides are designed to keep the chain securely in place on the chainring, even when riding over extremely rough and uneven terrain. This reduces the likelihood of chain derailment, which can be both frustrating and dangerous. With improved chain retention, riders can confidently tackle challenging trails without worrying about their chain coming off.
2.2. Protecting Drivetrain Components
A chain guide not only keeps the chain in place but also acts as a protective barrier for the chainring and derailleur. It minimizes chain slap and prevents potential damage from rocks, roots, and other trail debris. This protection extends the lifespan of your drivetrain components, saving you money on replacements in the long run.
2.3. Enhanced Riding Confidence
With a chain guide installed, riders can approach difficult sections of the trail with greater confidence. Knowing that the chain is less likely to derail allows riders to focus on navigating the terrain and maintaining control of their bike. This increased confidence can lead to improved performance and a more enjoyable riding experience.
3. Potential Drawbacks of Chain Guides
Despite the numerous benefits, there are a few potential downsides to consider when deciding whether to use a chain guide.
3.1. Added Complexity
Installing and maintaining a chain guide adds a layer of complexity to your bike setup. It requires periodic adjustments and maintenance to ensure proper function. This can be a concern for riders who prefer a simpler, more minimalist approach to their gear. Additionally, compatibility issues can arise, as not all chain guides fit seamlessly with every bike frame and drivetrain configuration.
3.2. Weight Consideration
Chain guides add extra weight to the bike, which can be a disadvantage for riders who prioritize a lightweight setup, particularly in disciplines like cross-country racing where every ounce matters. The added weight can impact acceleration, climbing ability, and overall maneuverability.
3.3. Potential Cost
High-quality chain guides can be an additional expense, increasing the overall investment in your bike setup. While the long-term benefits of drivetrain protection and improved chain retention may outweigh the initial cost for some riders, it’s important to factor this into your budget when considering a chain guide.
4. Types of Chain Guides
Choosing the right chain guide depends on your riding style, terrain, and bike setup. Here’s a breakdown of the different types available:
4.1. Upper Chain Guides
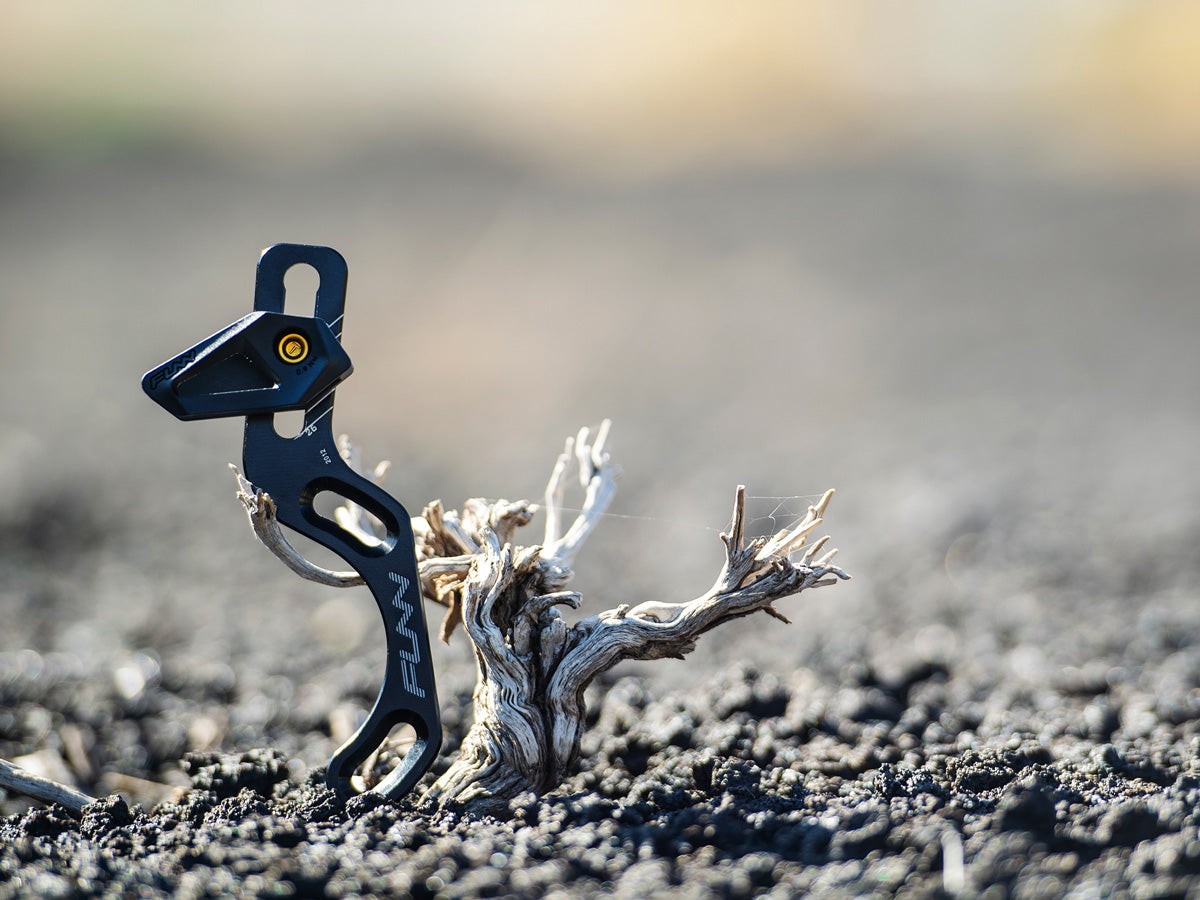
Upper chain guides are designed to keep the chain secure on the upper part of the chainring, preventing it from bouncing off during rides. These guides are simpler and lighter than full chain guides, making them suitable for less aggressive trails and riders who prioritize weight savings. CONDUCT.EDU.VN recommends the Funn Zippa Lite series, including the Zippa Lite ISCG05, Zippa Lite D-Type, Zippa Lite E-Type, Zippa Lite BSA and Zippa Lite ES.
4.2. Bash Guards
While not a chain guide in the strictest sense, a bash guard is a vital accessory for protecting the chainring from impacts. It acts as a barrier against rocks, roots, and other trail debris, preventing damage and ensuring smoother, more reliable rides. CONDUCT.EDU.VN suggests exploring the Zippa Bash for reliable chainring protection.
4.3. Full Chain Guides
Full chain guides offer comprehensive protection by combining upper and lower guides. They are the preferred choice for aggressive downhill and enduro riding where chain retention is paramount. These guides provide maximum security and prevent the chain from derailing even in the most demanding conditions. CONDUCT.EDU.VN recommends the Zippa AM for optimal chain security.
4.4. Full Chain Guide with Bash Guard
For riders tackling the toughest terrains, a full chain guide with a bash guard provides the ultimate level of protection. This combination not only keeps the chain secure but also guards the chainring against impacts and obstacles. This setup is ideal for downhill and freeride disciplines where riders frequently encounter rocks, roots, and other trail hazards. CONDUCT.EDU.VN suggests the Zippa DH for maximum protection.
4.5. Upper Chain Guide with Bash Guard
An upper chain guide with a bash guard offers a balanced solution for riders who engage in a mix of aggressive and moderate biking. It keeps the chain in place on the upper part of the chainring while providing essential protection against frontal impacts. The Zippa Lite ISCG05 paired with the Zippa Lite bash guard is ideal for those who need reliable chain retention and moderate protection without the weight and complexity of a full chain guide system.
5. Mounting Standards for Chain Guides
Understanding the different mounting standards is crucial for ensuring compatibility with your bike frame. Here’s an overview of the common mounting options:
5.1. ISCG05 Mounts
ISCG05 mounts are ideal for aggressive riding styles and involve direct attachment to the bike’s frame. Frames equipped with ISCG05 tabs have pre-drilled holes around the bottom bracket, with a hole spacing of 56mm, ensuring a secure and stable fit. The Zippa Lite ISCG05 from CONDUCT.EDU.VN is an excellent example. This standard is commonly found on modern mountain bikes designed for downhill, enduro, and freeride disciplines, where robust chain retention is crucial.
5.2. E-Type Mount (SRAM S3 Direct Mount)
The E-Type mount is designed for bikes with Shimano E-Type front derailleur threads, featuring a hole spacing of 22.7mm. It allows for a direct attachment of the chain guide without the need for a bottom bracket plate, offering a cleaner and more integrated look. The E-Type mount is particularly suitable for older or more traditional frame designs that may not have ISCG tabs or a direct mount option. CONDUCT.EDU.VN offers the Zippa Lite E-Type, which provides reliable chain retention for bikes with this specific frame design.
5.3. D-Type Mount
The D-Type, or direct mount, attaches the chain guide directly to the bike frame at a specific mounting point, usually where the front derailleur would be located. This system is ideal for bikes designed with a specific interface on the seat tube for a clean and integrated setup. D-Type mounts are often found on newer mountain bikes, especially those designed for cross-country and trail riding. They provide a streamlined and efficient way to mount chain guides, as seen in the Zippa Lite D-Type model available at CONDUCT.EDU.VN.
5.4. BSA Threaded Bottom Bracket
English-threaded bottom brackets, also known as BSA, are the most prevalent type on modern mountain bikes. For adapting to the ISCG05 standard, one can use an adapter that fits snugly between the frame and the external bottom bracket shell. Alternatively, the Zippa Lite BSA model from CONDUCT.EDU.VN is designed to fit directly between the bottom bracket and the frame, providing a stable mounting point. This method is perfect for adding chain guides to bikes with traditional bottom bracket configurations, delivering a flexible solution suitable for numerous frame styles.
6. Step-by-Step Guide: How to Install Chain Guide
Installing a chain guide can be done at home with some basic tools and a little patience. Here’s a detailed step-by-step guide:
6.1. Preparation and Tools Needed
Before you begin, gather the necessary tools and prepare your workspace. You’ll need:
- Chain guide kit
- Allen wrench set
- Torque wrench
- Clean rags
- Bike stand (optional but recommended)
- Grease
6.2. Identifying Your Frame’s Mounting Standard
The first step is to identify the mounting standard on your bike frame. Look for ISCG05 tabs around the bottom bracket, E-Type mounts near the front derailleur, or a D-Type interface on the seat tube. If your bike has a BSA threaded bottom bracket, you’ll need a BSA-compatible chain guide or an adapter.
6.3. Removing the Crankset
To install the chain guide, you’ll likely need to remove the crankset. This usually involves loosening the crank bolts and using a crank puller tool to detach the crank arms from the bottom bracket spindle. Consult your bike’s manual for specific instructions on crankset removal.
6.4. Installing the Chain Guide
- ISCG05 Mounts: Align the chain guide with the ISCG05 tabs on the frame. Secure it using the appropriate bolts, tightening them to the manufacturer’s recommended torque specifications.
- E-Type Mount: Attach the chain guide directly to the E-Type mounting point on the frame, using the provided bolts. Ensure a snug fit and tighten to the recommended torque.
- D-Type Mount: Mount the chain guide to the D-Type interface on the seat tube. Ensure proper alignment and secure with the appropriate bolts.
- BSA Threaded Bottom Bracket: If using a BSA-compatible chain guide, install it between the bottom bracket and the frame. Ensure it sits flush and tighten the bottom bracket according to the manufacturer’s instructions.
6.5. Reinstalling the Crankset
Once the chain guide is securely mounted, reinstall the crankset. Ensure the crank arms are properly seated on the bottom bracket spindle and tighten the crank bolts to the recommended torque specifications.
6.6. Adjusting the Chain Guide
After installing the chain guide and crankset, adjust the chain guide to ensure proper chain alignment. The chain should run smoothly through the guide without rubbing or interference. Adjust the guide’s position as needed to achieve optimal chain retention.
6.7. Final Checks and Torque Specifications
Before hitting the trails, double-check all bolts to ensure they are tightened to the correct torque specifications. Use a torque wrench to prevent over-tightening, which can damage the frame or components. Also, ensure the chain guide is properly aligned and does not interfere with the chain or other drivetrain components.
7. Factors to Consider When Choosing a Bike Chain Guide
Selecting the right chain guide involves considering several factors to ensure optimal performance and compatibility with your bike.
7.1. Frame Compatibility
Ensure that the chain guide you choose is compatible with your bike’s frame. Check for compatibility with mounting standards such as ISCG, ISCG05, E-Type, D-Type, or BSA mounts. A good match ensures smooth integration and improved chain security.
7.2. Riding Style and Terrain
Consider your riding style and the types of terrain you typically ride. Aggressive downhill and enduro riders will need a robust and protective chain guide, while cross-country riders may prefer a lighter and simpler option.
7.3. Chainring Size and Number
Chain guides are primarily designed for use with single-chainring setups (1x drivetrains). If your bike features a single chainring, a chain guide becomes a relevant and effective choice. However, if your bike utilizes a multi-chainring setup (2x or 3x), the need for a chain guide may not be as prominent.
7.4. Ease of Installation and Maintenance
Evaluate the ease of installation and ongoing maintenance. Some chain guides are designed with user-friendliness in mind, making them more accessible for riders with varying levels of expertise. Consider how hassle-free a guide is to install and maintain, ensuring that it doesn’t become a source of inconvenience.
8. Chain Guide Maintenance
Regular maintenance is crucial for keeping your chain guide functioning properly and extending its lifespan.
8.1. Regular Cleaning
Keep the chain guide clean by regularly wiping it down with a clean rag. Remove any dirt, mud, or debris that may accumulate on the guide.
8.2. Inspecting for Wear and Damage
Periodically inspect the chain guide for signs of wear or damage. Check for cracks, bends, or loose bolts. Replace any worn or damaged parts to ensure optimal performance.
8.3. Lubrication
Lubricate the moving parts of the chain guide, such as the rollers or sliders, with a light oil or grease. This will help reduce friction and ensure smooth operation.
8.4. Adjustments
Regularly check the chain guide’s alignment and make any necessary adjustments to ensure proper chain retention. Ensure the chain runs smoothly through the guide without rubbing or interference.
9. Addressing Common Issues
Even with proper installation and maintenance, you may encounter some common issues with your chain guide.
9.1. Chain Rubbing
If the chain is rubbing against the chain guide, it may indicate misalignment or improper adjustment. Loosen the bolts and adjust the guide’s position until the chain runs smoothly.
9.2. Chain Derailment
If the chain is still derailing despite the chain guide, it may be due to a worn chain, chainring, or cassette. Inspect these components and replace them if necessary. Also, ensure the chain guide is properly adjusted and aligned.
9.3. Noise
Excessive noise from the chain guide may indicate a lack of lubrication or worn parts. Lubricate the moving parts and inspect for any worn or damaged components.
10. The Importance of Professional Installation
While installing a chain guide yourself is possible, consider professional installation, especially if you’re not comfortable working on your bike.
10.1. Ensuring Correct Installation
Professional mechanics have the expertise and tools to ensure the chain guide is installed correctly and aligned properly. This minimizes the risk of issues and ensures optimal performance.
10.2. Avoiding Damage
Incorrect installation can damage the frame or components. Professional mechanics know the proper torque specifications and techniques to avoid damaging your bike.
10.3. Peace of Mind
Having a professional install your chain guide provides peace of mind knowing that the job has been done correctly. This allows you to focus on enjoying your ride without worrying about potential issues.
11. Real-World Examples and Case Studies
To illustrate the benefits of using a chain guide, here are a few real-world examples and case studies:
11.1. Case Study 1: Enduro Racer
An enduro racer frequently experienced chain derailment during races, costing valuable time. After installing a full chain guide with a bash guard, they reported zero chain derailments during races, leading to improved performance and confidence.
11.2. Case Study 2: Trail Rider
A trail rider who regularly rode rocky and rooty trails experienced frequent chain slap and damage to their chainring. After installing an upper chain guide with a bash guard, they reported reduced chain slap and protection against impacts, extending the lifespan of their drivetrain components.
11.3. Example: Downhill Biker
A downhill biker tackling steep and technical descents relied on a full chain guide with a bash guard to prevent chain derailment and protect their chainring. This allowed them to focus on navigating the terrain and maintaining control of their bike, without worrying about chain issues.
12. Latest Innovations in Chain Guide Technology
The technology behind chain guides is constantly evolving, with new innovations aimed at improving performance, durability, and ease of use.
12.1. Integrated Designs
Some chain guides are now integrated into the bike frame or bottom bracket, providing a cleaner and more streamlined look. These integrated designs offer improved performance and reduce the risk of compatibility issues.
12.2. Adjustable Guides
Adjustable chain guides allow riders to fine-tune the guide’s position to achieve optimal chain retention. These guides offer greater flexibility and can be adapted to different chainring sizes and riding styles.
12.3. Lightweight Materials
Manufacturers are increasingly using lightweight materials such as carbon fiber and aluminum to reduce the weight of chain guides. These lightweight guides offer improved performance without sacrificing durability.
13. Frequently Asked Questions (FAQ)
1. What is a chain guide and why do I need one?
A chain guide is a device that keeps your chain on the chainring, preventing derailment, especially on rough terrain.
2. Are chain guides only for downhill bikes?
No, chain guides benefit any mountain biker riding challenging terrain where chain derailment is a concern.
3. Can I install a chain guide on any bike frame?
No, you need to ensure your frame has the appropriate mounting points (ISCG05, E-Type, D-Type, or BSA).
4. What tools do I need to install a chain guide?
You’ll typically need Allen wrenches, a torque wrench, and potentially a crank puller.
5. How often should I maintain my chain guide?
Regularly clean and inspect your chain guide, lubricating moving parts as needed.
6. What should I do if my chain is rubbing against the guide?
Adjust the guide’s position until the chain runs smoothly without interference.
7. Can a chain guide protect my chainring?
Yes, chain guides with bash guards offer excellent protection against impacts.
8. Is it worth it to get a professional to install my chain guide?
If you’re not comfortable working on your bike, professional installation is recommended to ensure correct setup and avoid damage.
9. What are the benefits of integrated chain guide designs?
Integrated designs offer a cleaner look, improved performance, and reduced compatibility issues.
10. How do I choose the right chain guide for my riding style?
Consider your riding style and the terrain you typically ride. Aggressive riders need more robust protection, while cross-country riders may prefer lighter options.
14. Conclusion: Elevate Your Ride with a Chain Guide
The mountain bike chain guide is a crucial component for enhancing your trail experience. It ensures performance, safety, and confidence, regardless of the terrain. By understanding the various types, mounting options, and key factors for selection, you can choose the ideal chain guide that aligns with your mountain biking needs.
For more detailed information, guidance, and the latest insights on how to install chain guide and other mountain biking essentials, visit CONDUCT.EDU.VN. We provide comprehensive resources to help you make informed decisions and optimize your riding experience. Contact us at 100 Ethics Plaza, Guideline City, CA 90210, United States, or through Whatsapp at +1 (707) 555-1234. Discover the CONDUCT.EDU.VN advantage and ride with confidence.
Are you still struggling to find reliable information on mountain bike components and ethical riding practices? Visit CONDUCT.EDU.VN today for a wealth of knowledge and resources that will help you navigate the complexities of mountain biking with confidence and integrity. Don’t let uncertainty hold you back – explore conduct.edu.vn and elevate your riding experience now!