Making precise and straight cuts with a circular saw can be challenging. A circular saw cutting guide, also known as a track saw guide, offers a simple yet effective solution. This comprehensive guide, brought to you by CONDUCT.EDU.VN, provides detailed instructions on building your own circular saw guide, ensuring accurate cuts and professional-looking results. Enhance your woodworking projects with this essential tool and related woodworking precision tips.
1. Understanding the Need for a Circular Saw Cutting Guide
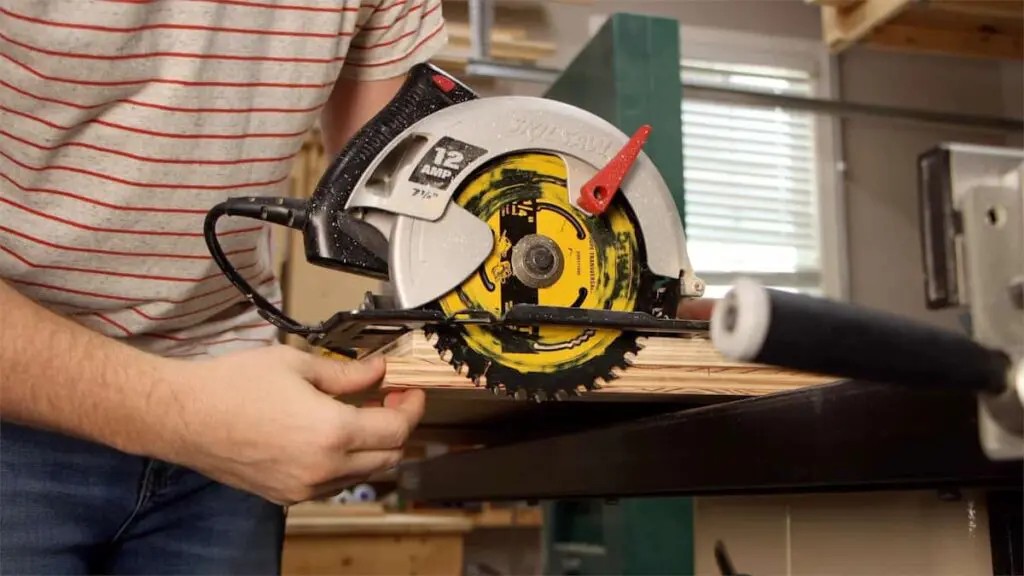
A circular saw, while versatile, can be difficult to control when making long, straight cuts. Without a guide, the saw can wander, leading to uneven edges and wasted material. A cutting guide addresses this issue by providing a stable, straight edge for the saw to follow, resulting in clean, accurate cuts every time. This is vital for achieving professional results in woodworking projects, large or small.
1.1. The Limitations of Freehand Cutting
Freehand cutting with a circular saw often results in:
- Inaccurate cuts: The saw can easily deviate from the intended line, leading to errors.
- Uneven edges: Without a guide, it’s difficult to maintain a consistent cutting angle, resulting in rough or splintered edges.
- Wasted material: Mistakes can lead to unusable pieces, increasing material costs.
- Safety concerns: Losing control of the saw can be dangerous.
1.2. Benefits of Using a Cutting Guide
Using a circular saw cutting guide offers several advantages:
- Accuracy: Ensures straight, precise cuts, minimizing errors.
- Efficiency: Saves time and material by reducing mistakes.
- Safety: Provides better control over the saw, reducing the risk of accidents.
- Professional results: Produces clean, even edges for a polished look.
- Versatility: Can be used with various materials, including plywood, MDF, and solid wood.
1.3. Alternatives to Building a Guide
While this guide focuses on building your own cutting guide, there are alternative options available:
- Clamping straight edges: These are commercially available straight edges that clamp onto the workpiece. While effective, they require accounting for the distance between the saw blade and the edge of the saw base, introducing a potential for error.
- Retro-fit track saw kits: These kits convert your circular saw into a track saw. However, they may not fit perfectly and can have some “slop,” affecting cut accuracy.
- Professional track saws: These are dedicated tools designed for precision cutting. They are generally more expensive than building a guide but offer superior performance and features.
2. Planning Your Circular Saw Cutting Guide
Before you start building, it’s important to plan your cutting guide carefully. Consider the following factors:
2.1. Determining the Length of the Guide
The length of your cutting guide will depend on the types of cuts you plan to make. A 4-foot guide is a good general-purpose length, allowing for both crosscuts and shorter rip cuts. For longer cuts, such as breaking down full sheets of plywood, an 8-foot guide may be necessary.
2.2. Choosing the Right Materials
- Plywood: A stable and affordable option for the base of the guide.
- Solid wood: Can be used for the fence, providing a durable and straight edge. Hardwoods like maple or oak are good choices.
- Fasteners: Screws, brad nails, or clamps can be used to attach the fence to the base.
- Glue: Wood glue provides a strong and durable bond.
2.3. Essential Tools
- Circular saw: Obviously!
- Measuring tape: For accurate measurements.
- Square: To ensure the fence is perpendicular to the base (optional, but recommended).
- Clamps: To hold the fence in place while the glue dries.
- Drill/driver: For screws.
- Brad nailer (optional): For faster fastening.
- Safety glasses: Always protect your eyes.
- Hearing protection: Circular saws can be loud.
2.4. Safety Considerations
- Wear safety glasses and hearing protection.
- Ensure the workpiece is securely clamped or supported.
- Keep your hands away from the blade.
- Disconnect the power before making any adjustments to the saw or guide.
- Work in a well-ventilated area.
3. Step-by-Step Guide to Building Your Circular Saw Cutting Guide
This section provides a detailed, step-by-step guide to building your own circular saw cutting guide.
3.1. Preparing the Base
- Cut the base: Cut a piece of plywood to the desired length and width. A width of 12-18 inches is generally sufficient.
- Choose a straight edge: Select the straightest factory edge of the plywood to use as the reference edge for your guide.
- Prepare the fence: Cut a piece of solid wood or plywood to use as the fence. The fence should be at least 3 inches wide and the same length as the base.
3.2. Attaching the Fence
- Position the fence: Place the fence along the chosen straight edge of the base.
- Align the fence: Ensure the fence is straight and parallel to the edge of the base. Use a square to check for perpendicularity if desired.
- Glue the fence: Apply a generous amount of wood glue to the bottom of the fence.
- Fasten the fence: Secure the fence to the base using screws, brad nails, or clamps. If using screws, pre-drill pilot holes to prevent splitting the wood.
- Allow the glue to dry: Let the glue dry completely according to the manufacturer’s instructions.
3.3. Making the Zero-Clearance Cut
- Position the saw: Place your circular saw on the base with the saw’s baseplate against the fence.
- Adjust the blade depth: Set the blade depth to slightly deeper than the thickness of the base.
- Make the cut: Turn on the saw and carefully run it along the fence, cutting through the base. This creates a zero-clearance edge, which will improve the accuracy of your cuts.
3.4. Fine-Tuning and Testing
- Inspect the cut: Check the zero-clearance edge for any imperfections or inconsistencies.
- Make a test cut: Measure and mark a piece of scrap wood and use the guide to make a cut.
- Evaluate the accuracy: Check the cut for straightness and accuracy. If necessary, make adjustments to the fence or the saw’s alignment.
4. Optimizing Your Circular Saw Cutting Guide
Once you’ve built your basic cutting guide, there are several ways to optimize its performance and functionality.
4.1. Adding a Non-Slip Surface
To prevent the guide from slipping during use, you can add a non-slip surface to the bottom. Options include:
- Rubber matting: Cut a piece of rubber matting to the same size as the base and attach it with adhesive.
- Sandpaper: Glue strips of sandpaper to the bottom of the base.
- Non-slip tape: Apply non-slip tape to the bottom of the base.
4.2. Incorporating a Measurement Scale
Adding a measurement scale to your cutting guide can make it easier to set up cuts accurately. You can use a commercially available measuring tape or create your own using a ruler and marker.
4.3. Creating a T-Track System
A T-track system allows you to easily attach clamps and other accessories to your cutting guide. You can install T-tracks along the length of the base or fence.
4.4. Building a Crosscut Sled
A crosscut sled is a specialized type of cutting guide that is designed for making accurate crosscuts. It typically consists of a platform that rides in the miter slots of your table saw.
5. Advanced Techniques for Using Your Circular Saw Cutting Guide
With practice, you can use your circular saw cutting guide for a variety of advanced techniques.
5.1. Cutting сложных angles
To cut angles other than 90 degrees, you can use an adjustable bevel gauge to set the angle of your circular saw. Then, clamp the guide to the workpiece at the desired angle and make the cut.
5.2. Making Dadoes and Rabbets
With careful setup, you can use your cutting guide to make dadoes (grooves) and rabbets (notches) in your workpieces. This requires making multiple passes with the saw, removing a small amount of material with each pass.
5.3. Cutting Circles
While not its primary function, you can use a cutting guide to cut circles with your circular saw. This requires creating a pivot point at the center of the circle and attaching the guide to the saw in a way that allows it to rotate around the pivot point.
6. Troubleshooting Common Issues
Even with a well-built cutting guide, you may encounter some common issues. This section provides troubleshooting tips for these problems.
6.1. Saw Wandering Away From the Fence
- Check the fence: Ensure the fence is straight and securely attached to the base.
- Check the saw’s baseplate: Make sure the baseplate is flat and clean.
- Apply consistent pressure: Maintain even pressure against the fence while cutting.
- Use a sharp blade: A dull blade can cause the saw to wander.
6.2. Inaccurate Cuts
- Double-check measurements: Ensure your measurements are accurate before making the cut.
- Verify the zero-clearance edge: Make sure the zero-clearance edge is clean and straight.
- Check the saw’s alignment: Ensure the saw’s blade is properly aligned with the baseplate.
6.3. Guide Slipping During Use
- Add a non-slip surface: As mentioned earlier, adding a non-slip surface to the bottom of the guide can prevent it from slipping.
- Use clamps: Secure the guide to the workpiece with clamps.
7. Maintaining Your Circular Saw Cutting Guide
To ensure your cutting guide lasts for years to come, it’s important to maintain it properly.
7.1. Cleaning
- Remove dust and debris: Regularly clean the guide with a brush or vacuum cleaner.
- Clean the zero-clearance edge: Keep the zero-clearance edge free of sawdust and other debris.
7.2. Storage
- Store in a dry place: Store the guide in a dry place to prevent warping or damage.
- Protect the edges: Protect the edges of the guide from damage by storing it in a case or hanging it on a wall.
8. The Importance of Precision in Woodworking
Precision is paramount in woodworking, and a circular saw cutting guide is a key tool for achieving it. Accurate cuts lead to:
- Stronger joints: Precise joints fit together tightly, resulting in stronger and more durable structures.
- Professional appearance: Accurate cuts create clean, even edges that contribute to a polished and professional look.
- Reduced waste: Precise cuts minimize errors and waste, saving you time and money.
- Increased efficiency: Accurate cuts reduce the need for rework and adjustments, allowing you to complete projects more quickly.
9. Conduct.edu.vn: Your Resource for Woodworking and Beyond
At CONDUCT.EDU.VN, we understand the challenges and rewards of woodworking. That’s why we’re committed to providing you with the information and resources you need to succeed. From detailed guides like this one to tips on choosing the right tools and materials, we’re here to help you every step of the way.
9.1. Explore Our Extensive Library of Articles
Our website features an extensive library of articles covering a wide range of woodworking topics, including:
- Choosing the right saw blades: Learn how to select the best saw blade for your circular saw, miter saw, jigsaw, table saw, or bandsaw.
- Beginner woodworking mistakes: Discover the most common mistakes made by beginning woodworkers and how to avoid them.
- Selecting the right wood: Get tips on choosing the best type of wood for your projects.
- Woodworking safety: Learn about the importance of safety in woodworking and how to protect yourself from injury.
9.2. Connect With Our Community of Woodworkers
Join our online forum to connect with other woodworkers, ask questions, share your projects, and get feedback from experienced craftspeople.
9.3. Access Expert Advice and Guidance
Our team of experienced woodworkers is available to provide expert advice and guidance on any woodworking topic. Contact us with your questions and we’ll do our best to help.
10. Frequently Asked Questions (FAQs)
1. What is a circular saw cutting guide?
A circular saw cutting guide is a tool that helps you make straight, accurate cuts with a circular saw. It typically consists of a base with a fence that guides the saw along the cut line.
2. Why should I use a cutting guide?
Using a cutting guide improves accuracy, efficiency, and safety when cutting with a circular saw. It reduces the risk of errors, wasted material, and accidents.
3. What materials do I need to build a cutting guide?
You’ll need plywood or MDF for the base, solid wood or plywood for the fence, glue, and fasteners (screws, brad nails, or clamps).
4. How long should my cutting guide be?
A 4-foot guide is a good general-purpose length, while an 8-foot guide is better for breaking down full sheets of plywood.
5. How do I make a zero-clearance cut?
Place your circular saw on the base with the baseplate against the fence, adjust the blade depth, and run the saw along the fence to cut through the base.
6. How do I prevent the guide from slipping during use?
Add a non-slip surface to the bottom of the guide or secure it to the workpiece with clamps.
7. Can I use a cutting guide to cut angles?
Yes, you can use an adjustable bevel gauge to set the angle of your circular saw and then clamp the guide to the workpiece at the desired angle.
8. How do I maintain my cutting guide?
Clean the guide regularly with a brush or vacuum cleaner and store it in a dry place.
9. Where can I find more information about woodworking?
Visit CONDUCT.EDU.VN for a wealth of articles, tips, and resources on woodworking.
10. What if my saw wanders away from the fence?
Check the fence, the saw’s baseplate, and your cutting technique. Use a sharp blade and apply consistent pressure against the fence.
Conclusion: Elevate Your Woodworking with a Circular Saw Cutting Guide
Building and using a circular saw cutting guide is a simple yet effective way to improve the accuracy, efficiency, and safety of your woodworking projects. By following the steps outlined in this guide, you can create a valuable tool that will help you achieve professional-looking results every time. Remember to visit CONDUCT.EDU.VN for more woodworking tips, resources, and expert advice.
Ready to take your woodworking to the next level? Visit CONDUCT.EDU.VN today to discover a wealth of information and resources, including detailed guides, expert advice, and a thriving community of fellow woodworkers. Address: 100 Ethics Plaza, Guideline City, CA 90210, United States. Whatsapp: +1 (707) 555-1234. Website: conduct.edu.vn. Let us help you achieve your woodworking goals and create projects you can be proud of.