Crafting accurate and clean cuts with a skill saw, also known as a circular saw, can be challenging without the proper guidance. This detailed guide from conduct.edu.vn explores How To Make A Skill Saw Guide, also known as a circular saw guide, providing enhanced precision and safety for your woodworking projects. Discover the best methods, materials, and step-by-step instructions to create a reliable cutting jig and improve your skill saw techniques. This resource offers practical advice, ensuring your projects achieve professional-grade results with improved accuracy and efficiency, and helps ensure precise cuts every time.
1. Understanding the Need for a Skill Saw Guide
A skill saw, or circular saw, is a versatile tool in any woodworking shop, but achieving straight, accurate cuts can be difficult without assistance. A skill saw guide addresses this challenge by providing a stable, consistent reference point. It allows users to make precise cuts, reducing errors and improving the overall quality of their work. The need for a skill saw guide becomes apparent when working with large sheets of material or intricate cuts. Let’s delve into why this tool is essential.
1.1. Enhancing Precision and Accuracy
One of the primary benefits of a skill saw guide is the enhanced precision it offers. Without a guide, it’s easy for the saw to wander, especially when cutting large pieces of plywood or other sheet goods. A guide ensures the saw follows a straight line, leading to more accurate cuts.
- Consistent Cuts: Ensures each cut matches the intended dimensions.
- Reduced Errors: Minimizes the risk of mistakes that can waste materials.
- Improved Quality: Enhances the overall finish and appearance of your projects.
1.2. Improving Safety
Safety is another critical reason to use a skill saw guide. A stable guide reduces the likelihood of the saw slipping or kicking back, which can cause serious injuries. By keeping the saw on a controlled path, users can focus on maintaining proper technique and avoiding accidents.
- Reduced Kickback: Decreases the chance of the saw suddenly jerking backward.
- Better Control: Allows for a firmer grip and more controlled movement.
- Minimized Risk: Lowers the overall risk of accidents and injuries.
1.3. Increasing Efficiency
A skill saw guide also boosts efficiency by reducing the time and effort needed to make accurate cuts. With a guide in place, there’s less need for repeated measurements and adjustments, allowing for faster project completion.
- Faster Cutting: Speeds up the cutting process without sacrificing accuracy.
- Less Rework: Reduces the need to correct mistakes, saving time and materials.
- Streamlined Workflow: Creates a smoother, more efficient workflow in your workshop.
1.4. Overcoming Challenges
Many woodworkers face challenges when using a skill saw without a guide. These challenges include:
- Difficulty Cutting Straight Lines: Maintaining a straight line freehand is challenging, especially over long distances.
- Inconsistent Cut Depth: Ensuring a uniform cut depth can be difficult without a stable reference.
- Material Waste: Errors in cutting can lead to wasted materials and increased project costs.
1.5. Why Use a Skill Saw Guide?
The skill saw guide offers a practical solution to these challenges. It provides a straight, stable edge for the saw to follow, ensuring accurate and consistent cuts every time. Whether you’re working on a small DIY project or a large-scale woodworking endeavor, a skill saw guide is an invaluable tool.
1.6. Skill Saw Guide: A Cost-Effective Solution
Purchasing pre-made track saw systems can be expensive. Building your own skill saw guide is a cost-effective alternative that allows you to achieve similar results with minimal investment.
1.7. Common Pitfalls
Even with a guide, common errors can occur. These include:
- Inaccurate Measurement: Misreading or misinterpreting measurements can lead to errors.
- Improper Clamping: Failure to secure the guide firmly can result in movement during cutting.
- Using a Warped Guide: Employing a guide that is not perfectly straight will transfer imperfections to the cut.
By understanding the need for a skill saw guide and addressing potential pitfalls, woodworkers can enhance their precision, safety, and efficiency, leading to better results and a more enjoyable woodworking experience.
2. Types of Skill Saw Guides
There are several types of skill saw guides, each with its own advantages and disadvantages. Understanding these options will help you choose the best guide for your specific needs and woodworking style.
2.1. Straight Edge Clamps
Straight edge clamps are commercially available tools designed to provide a straight edge for your skill saw. They typically consist of a long, rigid bar with clamps that secure it to the workpiece.
Advantages:
- Portability: Easy to move and set up on different projects.
- Adjustability: Can be adjusted to accommodate different material thicknesses and cut widths.
- Reusability: Can be used for various projects and materials.
Disadvantages:
- Cost: Can be more expensive than homemade options.
- Accuracy: Requires careful alignment and clamping to ensure a straight cut.
- Offset Calculation: You must account for the distance between the saw blade and the edge of the saw base, which can introduce error.
2.2. Retro-Fit Track Saw Kits
Retro-fit track saw kits are designed to convert your existing skill saw into a track saw. These kits typically include a track and a mounting system that attaches the saw to the track.
Advantages:
- Improved Accuracy: The track system helps guide the saw, resulting in straighter cuts.
- Enhanced Safety: The track keeps the saw on a controlled path, reducing the risk of kickback.
- Convenience: Allows for easy and repeatable cuts.
Disadvantages:
- Fit Issues: May not fit all skill saw models perfectly.
- Slop: Some kits have play that can affect cut accuracy.
- Cost: More expensive than building a guide.
- Track Maintenance: The edge of the track can become uneven over time.
2.3. Homemade Skill Saw Guides
Building your own skill saw guide is a cost-effective and customizable solution. A homemade guide typically consists of a straight edge attached to a base that the saw can ride along.
Advantages:
- Cost-Effective: Made from readily available and inexpensive materials.
- Customizable: Can be tailored to fit your specific saw and project needs.
- Zero Clearance: Can be designed for a zero-clearance cut, improving accuracy.
Disadvantages:
- Time Investment: Requires time and effort to build.
- Skill Required: Needs some woodworking skills to construct accurately.
- Material Quality: Accuracy depends on the straightness of the materials used.
2.4. Choosing the Right Type
When selecting a skill saw guide, consider the following factors:
- Budget: How much are you willing to spend?
- Project Needs: What types of cuts will you be making?
- Skill Level: How comfortable are you with DIY projects?
- Desired Accuracy: How precise do your cuts need to be?
2.5. Summary Table
| Type of Guide | Advantages | Disadvantages |
|---|---|---|
| Straight Edge Clamps | Portable, adjustable, reusable | Costly, accuracy depends on alignment, offset calculation required |
| Retro-Fit Track Kits | Improved accuracy, enhanced safety, convenient | Fit issues, slop, costly, track maintenance |
| Homemade Skill Guides | Cost-effective, customizable, zero clearance possible | Time investment, skill required, accuracy depends on material quality |

2.6. Additional Tips
- Read Reviews: Before purchasing any guide, read reviews to understand its performance and durability.
- Watch Tutorials: Look for online tutorials that demonstrate how to use different types of guides.
- Start Simple: If you’re new to woodworking, start with a simple homemade guide before investing in more expensive options.
By exploring these various types of skill saw guides, you can determine the best option for your woodworking needs. Each guide offers unique benefits and drawbacks, so consider your budget, project requirements, and skill level to make an informed decision.
3. Planning Your Skill Saw Guide
Before diving into the construction of your skill saw guide, careful planning is essential. This ensures that the finished guide meets your specific needs and provides accurate, safe, and efficient cutting.
3.1. Determining the Dimensions
The first step in planning your skill saw guide is to determine the appropriate dimensions. This includes the length, width, and thickness of the guide.
- Length: The length of the guide should be long enough to accommodate the cuts you typically make. A 4-foot guide is suitable for crosscuts and shorter rip cuts, while an 8-foot guide is better for longer rip cuts on plywood sheets.
- Width: The width of the guide should be sufficient to provide stability and accommodate the base of your skill saw. A width of 12 inches is generally adequate, with 6 inches on either side of the saw’s path.
- Thickness: The thickness of the guide should be enough to provide rigidity and prevent flexing during use. A thickness of 3/4 inch is typically sufficient.
3.2. Selecting the Right Materials
Choosing the right materials is crucial for the durability and accuracy of your skill saw guide.
- Plywood: High-quality plywood is an excellent choice for the base and fence of the guide. It’s stable, relatively inexpensive, and easy to work with.
- MDF (Medium-Density Fiberboard): MDF is another option for the base, offering a smooth, consistent surface. However, it’s not as durable as plywood and can be more susceptible to moisture damage.
- Hardwood: Hardwood can be used for the fence to provide a straight, durable edge. Oak, maple, and birch are good choices.
3.3. Considerations for Saw Clearance
Ensure that the saw motor and any other parts will clear the fence at your desired cutting depth.
- Lowest Depth: Lower the saw until it touches the fence, then raise it slightly to provide ample clearance. This is your lowest depth setting.
- Blade Clearance: Place some stock under the fence to confirm that the blade will cut all the way through.
3.4. Ensuring Straightness
A straight edge is critical for the accuracy of your skill saw guide.
- Factory Edge: Utilize the factory edge of a plywood sheet, which is typically very straight.
- Panel Saw: Have the home center cut the plywood for you on their panel saw, ensuring a straight cut.
3.5. Designing for Clamping
Plan for adequate space to clamp the guide securely to your workpiece.
- Clamp Space: Ensure the side of the jig opposite the fence is wide enough to accommodate clamps, typically around 6 inches.
- Avoid Clamping on the Fence: Design the guide so that you don’t need to clamp on the fence or cutting side, as this can affect accuracy.
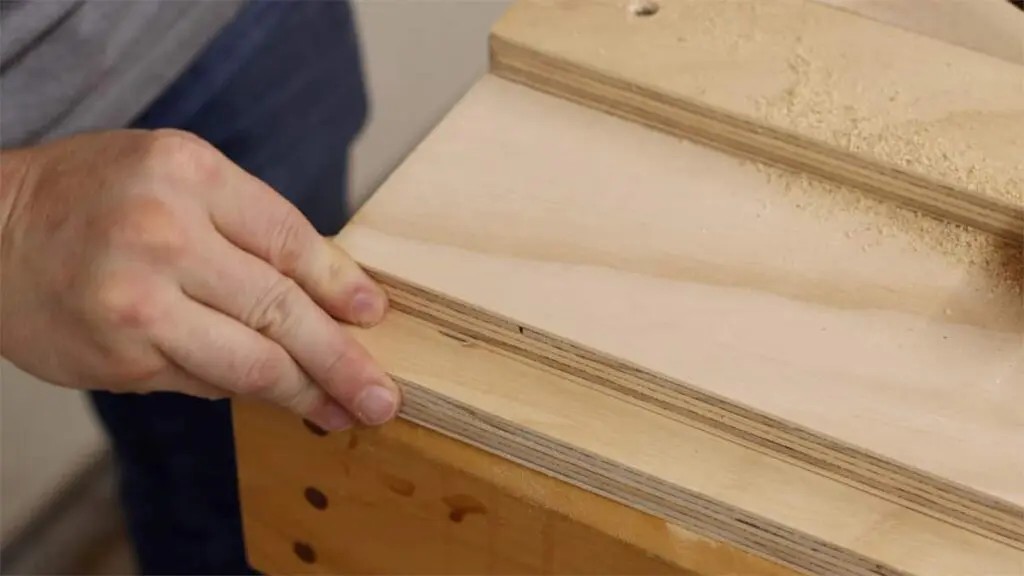
3.6. Planning for Zero Clearance Cut
The cutting side of the jig should initially be wider than the saw base. This allows you to make a zero-clearance cut as the final step, ensuring the blade cuts precisely along the edge of the guide.
3.7. Step-by-Step Planning Checklist
- Measure Your Saw: Measure the distance from the edge of the saw base to the blade.
- Determine Length: Decide on the appropriate length for your guide based on your typical projects.
- Choose Materials: Select high-quality materials for the base and fence.
- Plan for Clearance: Ensure adequate clearance for the saw motor and blade.
- Ensure Straightness: Plan to use a factory edge or have the material cut straight.
- Design for Clamping: Provide enough space for secure clamping.
- Zero Clearance: Plan for a zero-clearance cut to finalize the guide.
3.8. Importance of Accurate Measurements
Accurate measurements are paramount. Use a high-quality measuring tape and double-check all dimensions before cutting any materials. Small errors can accumulate and affect the overall accuracy of the guide.
3.9. CAD Software
Consider using CAD (Computer-Aided Design) software to create a detailed plan of your skill saw guide. This allows you to visualize the guide, make adjustments, and ensure that all dimensions are correct before you start building.
By carefully planning your skill saw guide, you can ensure that it meets your specific needs and provides accurate, safe, and efficient cutting. Take the time to consider all the factors outlined above, and you’ll be well on your way to building a high-quality guide that will enhance your woodworking projects for years to come.
4. Step-by-Step Guide to Building a Skill Saw Guide
Now that you have a solid plan, it’s time to build your skill saw guide. This step-by-step guide will walk you through the process, ensuring you create an accurate and reliable tool for your woodworking projects.
4.1. Gathering Your Tools and Materials
Before you start, gather all the necessary tools and materials:
- Materials:
- Plywood (3/4 inch thick) for the base and fence
- Wood glue
- Screws (1 1/4 inch) or Brad Nails
- Tools:
- Circular saw (skill saw)
- Measuring tape
- Square
- Clamps
- Drill or Impact Driver
- Safety glasses
- Hearing protection
4.2. Cutting the Base and Fence
- Cut the Base:
- Measure and cut a piece of plywood to the desired length and width. For example, for a 4-foot guide, cut the base to 4 feet long and 12 inches wide.
- Cut the Fence:
- Cut a piece of plywood or hardwood to the same length as the base and 3 inches wide. This will serve as the fence for your guide.
4.3. Attaching the Fence to the Base
- Position the Fence:
- Place the fence along one edge of the base, ensuring it is flush with the edge.
- Glue and Clamp:
- Apply wood glue to the edge of the base where the fence will be attached.
- Clamp the fence tightly to the base, ensuring it is square and aligned.
- Secure with Screws or Nails:
- Pre-drill pilot holes through the fence into the base to prevent splitting.
- Drive screws through the fence into the base every 6-8 inches. Alternatively, use brad nails to secure the fence.
- Allow to Dry:
- Let the glue dry completely according to the manufacturer’s instructions, usually 24 hours.
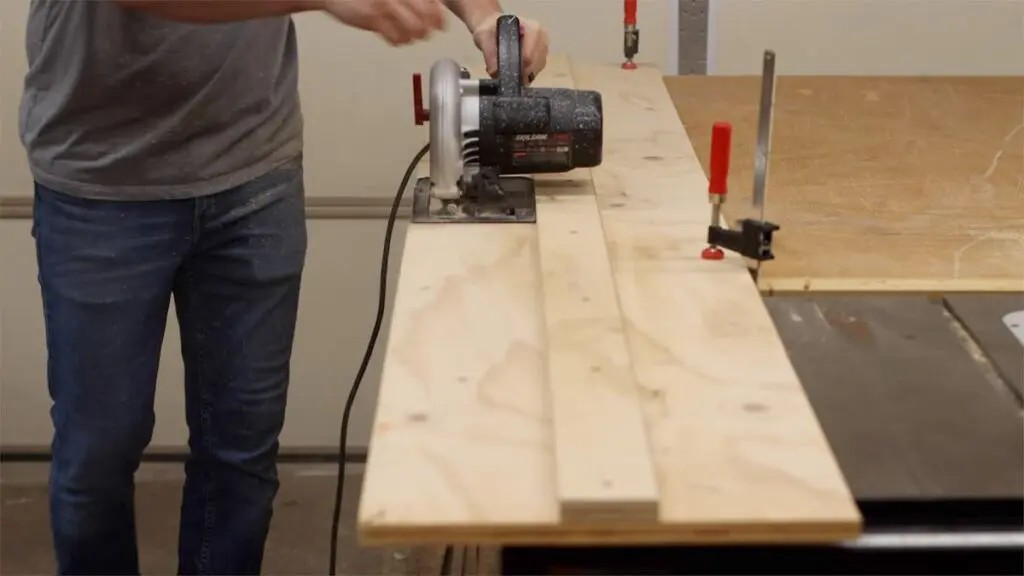
4.4. Making the Zero-Clearance Cut
- Position Your Saw:
- Place your skill saw on the base with the saw blade against the fence.
- Adjust Blade Depth:
- Adjust the blade depth to match the thickness of the material you will be cutting.
- Make the Cut:
- Turn on the saw and carefully guide it along the fence, cutting through the base. This creates a zero-clearance edge that perfectly matches your saw blade.
4.5. Testing the Guide
- Measure and Mark:
- Measure and mark a piece of wood that you want to cut.
- Position the Guide:
- Align the edge of the guide with your marked line.
- Clamp the Guide:
- Securely clamp the guide to the workpiece, ensuring it doesn’t move during the cut.
- Make the Cut:
- Turn on the saw and guide it along the fence, keeping consistent pressure against the guide.
- Check for Accuracy:
- After the cut, check the accuracy of the cut against your marked line. Adjust the guide if necessary.
4.6. Tips for a Successful Build
- Use a Square: Ensure the fence is square to the base using a reliable square.
- Apply Even Pressure: When making the zero-clearance cut, apply even and consistent pressure against the fence.
- Check Alignment: Regularly check the alignment of the fence to the base to ensure accuracy.
- Use Clamps: Clamps are your best friend during this process. Use them liberally to hold everything in place while the glue dries.
- Pre-Drill Holes: Always pre-drill pilot holes before driving screws to prevent the wood from splitting.
4.7. Alternative Methods
- Using a Router: If you have a router, you can use it to create a perfectly straight edge on the fence.
- Adding a T-Track: Consider adding a T-track to the base of the guide for easy clamping.
4.8. Safety Precautions
- Wear Safety Glasses: Always wear safety glasses to protect your eyes from flying debris.
- Use Hearing Protection: Use hearing protection to reduce noise exposure.
- Unplug the Saw: Always unplug the saw before making any adjustments.
- Keep Hands Clear: Keep your hands clear of the blade at all times.
4.9. Troubleshooting
- Inaccurate Cuts: If your cuts are not accurate, check the alignment of the fence to the base and ensure the guide is securely clamped to the workpiece.
- Saw Wandering: If the saw wanders during the cut, ensure you are applying consistent pressure against the fence.
By following this step-by-step guide, you can build a high-quality skill saw guide that will enhance the accuracy, safety, and efficiency of your woodworking projects. Take your time, pay attention to detail, and enjoy the process of creating a valuable tool for your shop.
5. Advanced Techniques and Enhancements
Once you’ve mastered the basics of building a skill saw guide, you can explore advanced techniques and enhancements to further improve its functionality and precision.
5.1. Adding a T-Track for Clamping
One of the most useful enhancements you can add to your skill saw guide is a T-track. This allows you to easily clamp the guide to your workpiece at any point along its length.
Benefits:
- Versatile Clamping: Provides multiple clamping points for different workpiece sizes and shapes.
- Secure Hold: Ensures the guide stays firmly in place during the cut.
- Easy Adjustment: Allows for quick and easy adjustments to the clamping position.
How to Add a T-Track:
- Choose a T-Track: Select a T-track that is compatible with your clamps.
- Route a Groove: Use a router with a T-slot bit to create a groove along the base of the guide.
- Install the T-Track: Insert the T-track into the groove and secure it with screws.
5.2. Creating a Zero-Clearance Insert
A zero-clearance insert is a small piece of material that fits snugly around the saw blade, minimizing tear-out and improving cut quality.
Benefits:
- Reduced Tear-Out: Prevents splintering and tear-out, especially when cutting plywood or other delicate materials.
- Cleaner Cuts: Provides a cleaner, more precise cut edge.
- Enhanced Safety: Reduces the chance of small pieces getting caught between the blade and the workpiece.
How to Create a Zero-Clearance Insert:
- Cut an Insert: Cut a piece of plywood or MDF to fit the space around the blade.
- Attach the Insert: Attach the insert to the base of the guide using double-sided tape or screws.
- Make the Cut: Run the saw through the insert to create a zero-clearance slot.
5.3. Incorporating a Dust Collection Port
Dust collection is essential for maintaining a clean and safe workshop. Adding a dust collection port to your skill saw guide can significantly reduce the amount of airborne dust.
Benefits:
- Cleaner Workshop: Reduces dust buildup, making your workshop cleaner and safer.
- Improved Visibility: Enhances visibility by removing dust from the cutting area.
- Healthier Environment: Minimizes the risk of respiratory problems caused by dust inhalation.
How to Add a Dust Collection Port:
- Choose a Port: Select a dust collection port that matches your vacuum hose.
- Drill a Hole: Drill a hole in the base of the guide near the blade.
- Attach the Port: Attach the dust collection port to the hole using screws or adhesive.
- Connect to Vacuum: Connect the port to your vacuum system.
5.4. Using Adjustable Fences
Adjustable fences allow you to fine-tune the position of the fence, ensuring perfect alignment and accurate cuts.
Benefits:
- Precise Adjustments: Allows for small, precise adjustments to the fence position.
- Improved Accuracy: Ensures the fence is perfectly aligned, resulting in more accurate cuts.
- Versatility: Can be adjusted to accommodate different blade thicknesses and cutting needs.
How to Add Adjustable Fences:
- Install Adjustment Hardware: Install threaded inserts and adjustment screws in the base of the guide.
- Attach the Fence: Attach the fence to the adjustment screws, allowing you to move it slightly.
- Fine-Tune Alignment: Use the adjustment screws to fine-tune the alignment of the fence.
5.5. Creating a Bevel Cutting Jig
For more advanced projects, consider creating a bevel cutting jig that allows you to make angled cuts with your skill saw.
Benefits:
- Angled Cuts: Enables you to make bevel cuts at various angles.
- Versatility: Expands the range of projects you can tackle with your skill saw.
- Precision: Provides accurate and consistent bevel cuts.
How to Create a Bevel Cutting Jig:
- Build a Frame: Construct a frame that holds the workpiece at the desired angle.
- Attach a Guide: Attach a guide to the frame that the skill saw can ride along.
- Secure the Workpiece: Secure the workpiece to the frame using clamps or other fasteners.
5.6. Using Digital Angle Finders
Digital angle finders can help you set the precise angle for bevel cuts, ensuring accuracy and consistency.
Benefits:
- Accurate Angles: Provides precise angle measurements.
- Easy to Use: Simple and intuitive to operate.
- Consistent Results: Ensures consistent angles for repeatable cuts.
How to Use a Digital Angle Finder:
- Set the Angle: Set the desired angle on the digital angle finder.
- Adjust the Jig: Adjust the bevel cutting jig until it matches the angle on the finder.
- Secure the Jig: Secure the jig in place and make the cut.
5.7. Safety Considerations
When using advanced techniques, always prioritize safety.
- Wear Safety Gear: Always wear safety glasses, hearing protection, and a dust mask.
- Secure the Workpiece: Ensure the workpiece is securely clamped to the jig.
- Double-Check Settings: Double-check all settings and measurements before making the cut.
- Use Proper Technique: Use proper cutting technique and keep your hands clear of the blade.
5.8. Experimentation
Don’t be afraid to experiment with different techniques and enhancements to find what works best for you. Woodworking is a continuous learning process, and trying new things is a great way to improve your skills and creativity.
By exploring these advanced techniques and enhancements, you can take your skill saw guide to the next level and achieve even greater precision, versatility, and efficiency in your woodworking projects.
6. Safety Tips for Using a Skill Saw
Using a skill saw, or circular saw, can be dangerous if proper safety precautions are not followed. Here are essential safety tips to ensure a safe woodworking experience.
6.1. Wear Proper Safety Gear
Always wear appropriate safety gear to protect yourself from potential hazards.
- Safety Glasses: Protect your eyes from flying debris.
- Hearing Protection: Reduce noise exposure from the saw.
- Dust Mask or Respirator: Prevent inhalation of sawdust and other particles.
- Gloves: Improve grip and protect your hands from cuts and splinters.
6.2. Inspect the Saw Before Use
Before each use, inspect the saw to ensure it is in good working condition.
- Check the Blade: Make sure the blade is sharp, clean, and properly installed. Replace dull or damaged blades.
- Inspect the Cord: Check the power cord for any damage or wear. Do not use the saw if the cord is damaged.
- Test the Safety Features: Ensure the blade guard and other safety features are functioning correctly.
6.3. Secure the Workpiece
Always secure the workpiece firmly to prevent movement during the cut.
- Use Clamps: Use clamps to hold the workpiece in place on a stable surface.
- Avoid Freehand Cutting: Never attempt to cut a workpiece that is not properly supported.
- Consider a Work Table: Use a work table or bench to provide a stable cutting surface.
6.4. Maintain Proper Body Position
Maintain a balanced and stable stance while using the saw.
- Keep Both Hands on the Saw: Use both hands to control the saw, keeping a firm grip.
- Avoid Reaching: Position yourself so you don’t have to reach or overextend.
- Stay Balanced: Keep your weight evenly distributed and maintain a stable stance.
6.5. Understand the Saw’s Operation
Familiarize yourself with the saw’s operation and controls.
- Read the Manual: Read and understand the manufacturer’s instructions before using the saw.
- Know the Controls: Understand the location and function of all controls, including the power switch, blade depth adjustment, and bevel adjustment.
- Practice on Scrap Wood: Practice using the saw on scrap wood to get a feel for its operation.
6.6. Use the Right Blade for the Job
Using the correct blade is essential for safety and cut quality.
- Match the Blade to the Material: Use a blade designed for the type of material you are cutting (e.g., wood, plywood, metal).
- Consider the Tooth Count: Choose a blade with the appropriate tooth count for the desired cut quality. Higher tooth counts produce smoother cuts.
6.7. Avoid Cutting in Unsafe Conditions
Avoid using the saw in conditions that could increase the risk of accidents.
- Do Not Use in Wet Conditions: Never use the saw in wet or damp conditions.
- Ensure Adequate Lighting: Make sure the work area is well-lit.
- Avoid Distractions: Avoid distractions and concentrate on the task at hand.
6.8. Keep the Blade Guard in Place
The blade guard is a critical safety feature that protects you from accidental contact with the blade.
- Ensure Proper Function: Make sure the blade guard is functioning correctly and moves freely.
- Never Remove the Guard: Never remove or disable the blade guard.
6.9. Unplug the Saw Before Adjustments
Always unplug the saw before making any adjustments or changing the blade.
- Prevent Accidental Starts: Unplugging the saw prevents accidental starts that could cause injury.
- Follow Procedures: Follow the manufacturer’s instructions for changing the blade and making adjustments.
6.10. Store the Saw Properly
Proper storage helps prevent damage and ensures the saw is ready for use.
- Clean the Saw: Clean the saw after each use to remove sawdust and debris.
- Store in a Dry Place: Store the saw in a dry place to prevent rust and corrosion.
- Protect the Blade: Protect the blade with a blade guard or cover.
6.11. Additional Safety Tips
- Avoid Overreaching: Don’t reach across the blade to retrieve cut pieces.
- Keep the Cord Clear: Keep the power cord clear of the blade and your work area.
- Take Breaks: Take regular breaks to avoid fatigue, which can lead to accidents.
- Never Force the Saw: Let the saw do the work. Forcing it can cause kickback or damage.
- Be Aware of Kickback: Understand the causes of kickback and how to prevent it.
By following these safety tips, you can minimize the risk of accidents and enjoy a safe and productive woodworking experience with your skill saw.
7. Troubleshooting Common Issues
Even with a well-built skill saw guide and careful technique, you may encounter issues during use. Here are some common problems and how to troubleshoot them:
7.1. Inaccurate Cuts
If your cuts are not accurate, several factors could be at play.
Possible Causes:
- Misalignment of the Fence: The fence may not be perfectly aligned with the base.
- Loose Clamps: The guide may not be securely clamped to the workpiece.
- Blade Issues: The blade may be dull or not properly aligned.
- Measurement Errors: Initial measurements may be inaccurate.
Troubleshooting Steps:
- Check Fence Alignment: Use a square to verify that the fence is perfectly square to the base. Adjust as needed.
- Tighten Clamps: Ensure the clamps are securely holding the guide to the workpiece.
- Inspect the Blade: Check the blade for sharpness and proper alignment. Replace if necessary.
- Verify Measurements: Double-check all measurements to ensure they are accurate.
7.2. Saw Wandering
If the saw wanders during the cut, it can result in uneven or inaccurate cuts.
Possible Causes:
- Inconsistent Pressure: Uneven pressure applied to the saw during the cut.
- Dull Blade: A dull blade can cause the saw to drift.
- Loose Guide: The guide may be moving during the cut.
- Material Issues: The material may have internal stresses causing the saw to wander.
Troubleshooting Steps:
- Apply Consistent Pressure: Focus on applying even and consistent pressure to the saw throughout the cut.
- Sharpen or Replace Blade: Ensure the blade is sharp and appropriate for the material.
- Secure the Guide: Double-check that the guide is securely clamped to the workpiece.
- Adjust Cutting Technique: Try making a shallow scoring cut first to guide the saw.
7.3. Tear-Out
Tear-out, or splintering, can occur when cutting certain materials, especially plywood.
Possible Causes:
- Dull Blade: A dull blade can cause excessive tear-out.
- Incorrect Blade Type: Using the wrong blade for the material.
- Cutting Against the Grain: Cutting against the grain can cause splintering.
Troubleshooting Steps:
- Use a Sharp Blade: Ensure the blade is sharp and designed for the material you are cutting.
- Use a Zero-Clearance Insert: A zero-clearance insert can help reduce tear-out.
- Score the Cut Line: Score the cut line with a utility knife before cutting.
- Adjust Cutting Direction: Try cutting with the grain to minimize tear-out.
7.4. Kickback
Kickback is a dangerous situation where the saw suddenly jumps back towards the user.
Possible Causes:
- Pinched Blade: The blade may be pinched in the cut.
- Nail or Knot in Wood: Hitting a nail or knot can cause kickback.
- Forcing the Saw: Forcing the saw through the material can cause kickback.
Troubleshooting Steps:
- Use a Riving Knife: Ensure your saw has a riving knife to prevent the blade from being pinched.
- Inspect the Material: Check the material for nails, knots, or other obstructions.
- Avoid Forcing the Saw: Let the saw do the work and avoid forcing it through the material.
- Maintain Proper Stance: Keep a firm grip on the saw and maintain a balanced stance.
7.5. Guide Slipping
If the guide slips during the cut, it can result in inaccurate cuts and potential safety hazards.
Possible Causes:
- Inadequate Clamping: Not enough clamps or improperly positioned clamps.
- Slippery Surface: The workpiece or guide may have a slippery surface.
Troubleshooting Steps:
- Use More Clamps: Add more clamps to secure the guide to the workpiece.
- Use Non-Slip Material: Add non-slip material, such as rubber pads, to the bottom of the guide.
- Clean the Surface: Ensure the surface of the workpiece and guide are clean and free of debris.
7.6. Burnt Edges
Burnt edges can occur when the blade overheats due to friction.
Possible Causes:
- Dull Blade: A dull blade requires more force, causing it to overheat.
- Slow Cutting Speed: Cutting too slowly can cause the blade to overheat.
- Hard Material: Cutting hard materials can generate more friction.
Troubleshooting Steps:
- Use a Sharp Blade: Ensure the blade is sharp and appropriate for the material.
- Increase Cutting Speed: Increase the cutting speed while maintaining control of the saw.
- Lubricate the Blade: Use a lubricant, such as wax, to reduce friction.
- Take Breaks: Take breaks to allow the blade to cool down.
7.7. Additional Tips
- Consult the Manual: Refer to the saw’s manual for specific troubleshooting guidance.
- Seek Professional Help: If you are unable to resolve the issue, seek assistance from a qualified professional.
By following these troubleshooting steps, you can address common issues and ensure your skill saw guide provides accurate, safe, and efficient cutting.
8. Maintaining Your Skill Saw Guide
Proper maintenance is essential for ensuring the longevity and accuracy of your skill saw guide. Regular care will keep it in optimal condition, providing reliable performance for years to come.
8.1. Cleaning the Guide
Keeping your skill saw guide clean is crucial for maintaining its accuracy and preventing damage.
Cleaning Frequency:
- After Each Use: Wipe down the guide after each use to remove sawdust, debris, and any accumulated residue.
- Periodic Deep Cleaning: Perform a more thorough cleaning every few months or as needed.
Cleaning Materials:
- Soft Cloth: Use a soft, lint-free cloth to wipe down the guide.
- Brush: A stiff brush can help remove stubborn debris from corners and crevices.
- Mild Soap and Water: For stubborn stains or residue, use a mild soap and water solution.
- Solvent: For removing pitch or adhesive, use a solvent specifically designed for woodworking tools.
Cleaning Steps:
- Remove Debris: Use a brush or vacuum to remove loose sawdust and debris.
- Wipe Down Surfaces: Wipe down all surfaces with a soft cloth.
- Clean with Soap and Water: If needed, dampen a cloth with mild soap and water and wipe down the guide. Rinse with a clean, damp cloth.
- Dry Thoroughly: Ensure the guide is completely dry before storing it.
- Apply Solvent (if needed): For pitch or adhesive, apply a small amount of solvent to a cloth and gently rub the