Rulers and guides are indispensable features in Photoshop, empowering users to achieve precise alignment and placement of objects within their designs. Rulers, displayed at the top and left edges of the canvas, serve as visual measuring tools. Guides, on the other hand, are created by dragging from the rulers, forming a customizable grid system to facilitate accurate object positioning. This guide provides a detailed, step-by-step walkthrough on how to effectively use rulers and guides in Photoshop, covering preference settings, display toggling, guide creation, and appearance customization.
Setting Unit and Increment Preferences
Customizing the unit of measurement displayed on your rulers is a crucial first step. This allows you to work with units most relevant to your project, whether it’s inches for print designs, pixels for web graphics, or millimeters for precise technical drawings.
- Navigate to Photoshop in the menu bar and select Preferences, then choose General. This will open the Preferences dialog box.
- In the Preferences window’s sidebar, select Units & Rulers. Here, you can adjust the Ruler units to your preferred unit of measurement, such as inches, pixels, or millimeters.
- Once you’ve made your selection, click the OK button to save the changes.
Displaying and Hiding Rulers
Showing or hiding the rulers is a simple process that can be toggled as needed during your workflow.
- To show the rulers in Photoshop, go to the View menu and select Rulers. Alternatively, you can use the keyboard shortcut CMD+R (Mac) or CTRL+R (Windows).
- To hide the rulers, repeat the same steps: go to the View menu, deselect Rulers, or use the keyboard shortcut CMD+R (Mac) or CTRL+R (Windows).
Creating and Manipulating Guides
Guides provide a visual framework for aligning and positioning elements precisely on your canvas. Understanding how to create, move, hide, delete, and customize them is essential for efficient design work.
-
Creating a Guide: Position your cursor over either the left (vertical guide) or top (horizontal guide) ruler. Click and drag from the ruler onto your document. As you drag, a thin line will appear – this is your guide. Use the ruler markings to accurately place the guide in your desired location.
-
Moving a Guide: Hover your cursor over the guide. When the cursor changes to a double-headed arrow, click and drag to reposition the guide.
-
Hiding/Showing Guides: To toggle the visibility of guides, go to the View menu, select Show, and then choose Guides. This will hide or show all guides currently on your canvas.
-
Deleting Guides: There are two methods for deleting guides:
- Drag the guide back onto the ruler from which it originated.
- Select the guide using the Move Tool (V) and press the DELETE key.
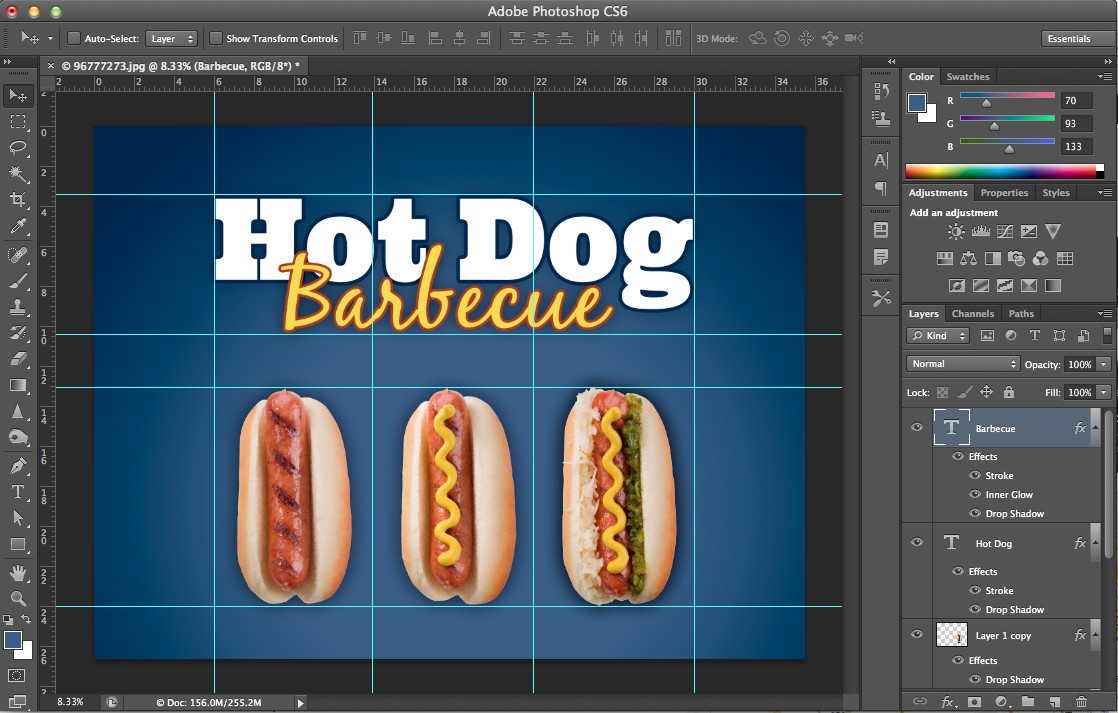 Photoshop interface showing the creation of a guide by dragging from the ruler
-
Changing Guide Appearance: Customizing the color and style of your guides can improve visibility and differentiate them from other elements in your design.
- In the menu, click on Photoshop and select Preferences, then choose General. The Preferences dialog box will appear.
- Select Guides, Grids & Slices from the sidebar.
- In this section, you can adjust the color and style (solid or dashed) of your guides to your preference. Choose a color that provides good contrast against your document’s background.
Conclusion
Mastering the use of rulers and guides in Photoshop is fundamental for achieving precision and consistency in your designs. By understanding how to set preferences, display rulers, create and manipulate guides, and customize their appearance, you can significantly enhance your workflow and create visually appealing and accurately aligned compositions. Whether you’re designing websites, posters, or digital illustrations, rulers and guides are powerful tools that will help you achieve professional-level results.