Making a precise cut in woodworking can be a challenge. How to make a saw guide is essential for both hobbyists and professionals looking to achieve accurate and clean cuts with a circular saw. CONDUCT.EDU.VN offers a detailed guide on constructing your own saw guide, enhancing your woodworking precision, and mastering the art of straight cuts. Learn to craft a reliable cutting jig and explore advanced cutting techniques for flawless woodworking projects.
1. Understanding the Importance of a Saw Guide
A saw guide, often referred to as a track saw guide, is a crucial tool in woodworking. It provides a straight edge for your circular saw, ensuring accurate and consistent cuts every time. Whether you’re working with plywood, hardwood, or other materials, a saw guide enhances the precision of your cuts. The use of a saw guide can be pivotal in projects requiring a high degree of accuracy, such as cabinet making, furniture construction, and detailed woodworking tasks. This level of precision not only improves the quality of the final product but also reduces material waste by minimizing errors during the cutting process.
1.1. Benefits of Using a Saw Guide
- Increased Accuracy: A saw guide ensures straight and precise cuts, which are essential for professional-looking projects. This accuracy is particularly important when working on projects with tight tolerances or intricate designs.
- Improved Safety: By keeping the saw aligned, it reduces the risk of kickback and other accidents. A controlled cutting process minimizes the potential for slips or unexpected movements that can lead to injuries.
- Enhanced Efficiency: A saw guide allows you to make quick and repeatable cuts, saving time on large projects. The ability to set up and execute cuts quickly translates to increased productivity and faster project completion.
- Versatility: Saw guides can be used on various materials, including plywood, hardwood, and even sheet metal. This versatility makes them an indispensable tool for a wide range of woodworking and construction applications.
- Portability: Unlike large stationary saws, a circular saw with a guide is easy to transport to different job sites. The portability factor is especially beneficial for on-site work where bringing a full-sized table saw is not feasible.
1.2. Common Challenges Without a Saw Guide
Without a saw guide, woodworkers often face several challenges that can compromise the quality and safety of their work. These include:
- Inaccurate Cuts: Achieving a perfectly straight cut freehand with a circular saw is difficult, leading to errors and inconsistencies. This can result in wasted material and the need for rework.
- Increased Risk of Accidents: A lack of control over the saw can increase the risk of kickback and other dangerous situations. Maintaining a stable and controlled cutting motion is essential for preventing accidents.
- Wasted Material: Errors in cutting can lead to material waste, increasing project costs. Precise cuts minimize waste and ensure that materials are used efficiently.
- Time-Consuming Process: Correcting errors and making multiple passes to achieve the desired cut can be time-consuming. A saw guide streamlines the cutting process and reduces the time spent on each cut.
- Difficulty with Large Sheets: Cutting large sheets of material, such as plywood, can be particularly challenging without a guide. A saw guide provides the necessary support and stability to make accurate cuts on large pieces.
2. Identifying Your Needs: What Kind of Saw Guide Do You Need?
Before diving into how to make a saw guide, it’s important to assess your specific needs. Different types of projects require different types of guides. Understanding your requirements will help you choose the best design and materials for your saw guide. Consider the size of your projects, the materials you typically work with, and the level of precision you require. This assessment will ensure that your homemade saw guide meets your specific woodworking needs.
2.1. Types of Saw Guides
- Straight Edge Guides: These are the simplest type of saw guide, consisting of a straight piece of material (usually wood or metal) clamped to the workpiece. They are ideal for making straight cuts on smaller pieces of material.
- Track Saw Guides: These guides feature a track that the circular saw rides along, providing excellent accuracy and stability. Track saw guides are particularly useful for cutting large sheets of material, such as plywood.
- T-Square Guides: These guides are designed for making precise crosscuts at a 90-degree angle. They are commonly used in cabinet making and other projects where accurate square cuts are essential.
- Combination Guides: These guides combine features of different types of guides, offering versatility for various cutting tasks. They may include adjustable fences, miter attachments, and other features to enhance their functionality.
2.2. Factors to Consider When Choosing a Saw Guide
- Project Size: For small projects, a simple straight edge guide may suffice. For larger projects, a track saw guide will provide better support and accuracy.
- Material Type: The type of material you’re cutting will influence the design and construction of your saw guide. For example, cutting metal may require a more robust guide made of steel.
- Precision Requirements: If your projects demand a high level of precision, a track saw guide with fine-tuning adjustments is essential.
- Portability: If you need to move your saw guide between job sites, consider a lightweight and compact design.
- Budget: The cost of materials and tools will also play a role in your decision. DIY saw guides can be a cost-effective alternative to commercially available options.
3. Essential Materials and Tools for Building a Saw Guide
Before you begin to make a saw guide, gather the necessary materials and tools. Having everything on hand will streamline the construction process and ensure a successful outcome. The right materials and tools not only make the job easier but also contribute to the durability and accuracy of your saw guide.
3.1. Materials Needed
- Plywood: High-quality plywood is ideal for the base and fence of the saw guide. Choose a thickness that provides stability without being too heavy.
- Straight Edge: A metal ruler or level will serve as a straight edge to guide your cuts. Ensure it is perfectly straight to maintain the accuracy of your saw guide.
- Clamps: Clamps are essential for securing the guide to the workpiece. Choose clamps that are easy to adjust and provide a firm grip.
- Screws: Use wood screws to assemble the components of the saw guide. Select a length that provides adequate holding power without protruding through the material.
- Wood Glue: Wood glue enhances the strength of the joints and prevents the saw guide from shifting during use.
- Sandpaper: Sandpaper is used to smooth any rough edges and ensure a clean finish. Choose a grit appropriate for the type of wood you are using.
3.2. Tools Required
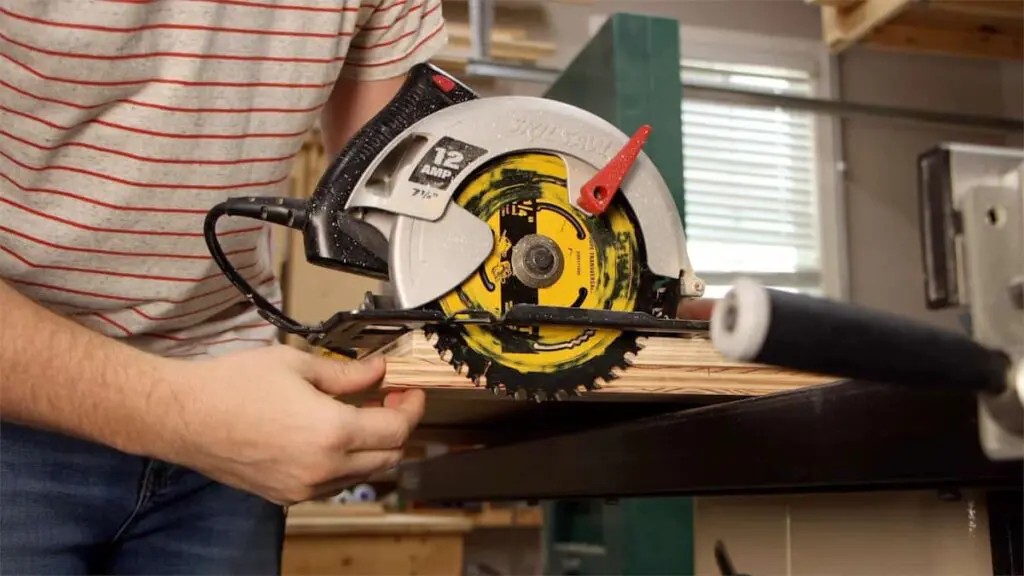
- Circular Saw: Of course, you’ll need a circular saw to use with your guide. Ensure your saw is in good working condition and has a sharp blade.
- Drill: A drill is necessary for creating pilot holes and driving screws. Choose a drill with variable speed control for precise drilling.
- Measuring Tape: A measuring tape is essential for accurate measurements. Select a tape measure that is easy to read and has a locking mechanism.
- Square: A square is used to ensure that the components of the saw guide are aligned at right angles.
- Pencil: A pencil is used for marking cut lines and reference points.
- Safety Glasses: Always wear safety glasses to protect your eyes from debris.
- Hearing Protection: Hearing protection is essential when using power tools.
4. Step-by-Step Guide: How to Make a Saw Guide
Now, let’s get into the detailed steps on how to make a saw guide. Follow these instructions carefully to create a reliable and accurate tool for your woodworking projects. Each step is designed to ensure precision and stability in your saw guide.
4.1. Step 1: Cut the Base and Fence
- Base: Cut a piece of plywood to the desired length and width for the base of your saw guide. A common size is 4 feet long and 12 inches wide, but adjust this to suit your project needs.
- Fence: Cut a strip of plywood to serve as the fence. The fence should be about 3 inches wide and the same length as the base.
4.2. Step 2: Attach the Fence to the Base
- Align: Position the fence along one edge of the base, ensuring it is perfectly straight. Use a square to check the alignment.
- Glue and Screw: Apply wood glue to the edge of the base where the fence will be attached. Secure the fence to the base with screws, driving them through the base into the fence. Space the screws evenly along the length of the fence.
4.3. Step 3: Create a Zero-Clearance Edge
- Position Saw: Place your circular saw on the base with the blade running along the fence.
- Trim Base: Carefully trim the edge of the base with the saw, creating a zero-clearance edge. This ensures that the blade cuts precisely along the fence line.
4.4. Step 4: Add Clamping Support
- Attach Support: Add a strip of plywood to the opposite side of the base to provide additional support for clamping the guide to your workpiece. This strip should be about 3 inches wide and the same length as the base.
- Secure: Glue and screw the support strip to the base, ensuring it is flush with the edge.
4.5. Step 5: Sand and Finish
- Sand Edges: Sand all edges of the saw guide to remove any sharp edges or splinters.
- Apply Finish: Apply a clear finish to protect the wood and improve the durability of the saw guide.
5. Advanced Techniques for Using Your Saw Guide
Once you’ve learned how to make a saw guide, mastering advanced techniques will elevate your woodworking skills. These techniques enhance accuracy, efficiency, and versatility, enabling you to tackle more complex projects with confidence.
5.1. Making Bevel Cuts
- Adjust Saw Angle: Adjust the bevel angle on your circular saw to the desired setting.
- Secure Workpiece: Clamp the workpiece securely to your work surface.
- Align Guide: Align the saw guide with your marked cut line, ensuring the bevel angle is oriented correctly.
- Make Cut: Guide the saw along the fence, maintaining consistent pressure and speed.
5.2. Cutting Large Sheets of Plywood
- Support Plywood: Place the plywood on a stable surface with support underneath to prevent sagging.
- Mark Cut Line: Accurately mark the cut line on the plywood.
- Position Guide: Position the saw guide along the marked line, using clamps to secure it in place.
- Make Cut: Make a smooth, continuous cut along the fence, keeping the saw base flat on the plywood.
5.3. Creating Dadoes and Rabbets
- Set Cutting Depth: Adjust the cutting depth of your circular saw to the desired depth for the dado or rabbet.
- Mark Width: Mark the width of the dado or rabbet on your workpiece.
- Position Guide: Position the saw guide along one edge of the marked area and make a cut.
- Adjust and Repeat: Adjust the position of the saw guide to the opposite edge of the marked area and make another cut.
- Remove Waste: Use a chisel or router to remove the waste material between the two cuts, creating the dado or rabbet.
6. Safety Tips When Using a Circular Saw and Guide
Safety should always be your top priority when working with power tools. Following these safety tips will help prevent accidents and ensure a safe woodworking experience.
6.1. General Safety Guidelines
- Read the Manual: Always read and understand the manufacturer’s instructions for your circular saw and saw guide.
- Wear Safety Gear: Wear safety glasses, hearing protection, and a dust mask to protect yourself from debris and noise.
- Inspect Tools: Before each use, inspect your circular saw and saw guide for any damage or wear.
- Secure Workpiece: Ensure your workpiece is securely clamped to a stable surface before cutting.
- Avoid Loose Clothing: Avoid wearing loose clothing or jewelry that could get caught in the saw.
- Stay Focused: Maintain focus and avoid distractions while operating the saw.
6.2. Specific Safety Tips for Circular Saws
- Use the Right Blade: Use the appropriate blade for the material you are cutting.
- Keep Blade Sharp: A sharp blade reduces the risk of kickback and produces cleaner cuts.
- Maintain a Firm Grip: Hold the saw firmly with both hands, keeping your fingers away from the blade.
- Avoid Overreaching: Position yourself so you can comfortably reach the workpiece without overreaching.
- Unplug When Adjusting: Always unplug the saw before making any adjustments or changing the blade.
6.3. Safety Tips for Using a Saw Guide
- Secure Guide: Ensure the saw guide is securely clamped to the workpiece before cutting.
- Use Proper Clamps: Use clamps that provide a firm grip and are easy to adjust.
- Maintain Consistent Pressure: Apply consistent pressure when guiding the saw along the fence to prevent it from wandering.
- Check Alignment: Before each cut, double-check the alignment of the saw guide to ensure accuracy.
- Avoid Forcing the Saw: Let the saw do the work; avoid forcing it through the material.
7. Troubleshooting Common Issues with Saw Guides
Even with careful construction and use, you may encounter issues with your saw guide. Here are some common problems and how to address them:
7.1. Guide Not Staying Straight
- Problem: The saw guide may shift or wander during the cut, resulting in inaccurate cuts.
- Solution: Ensure the guide is securely clamped to the workpiece with clamps that provide a firm grip. Check the alignment of the guide before each cut and maintain consistent pressure while guiding the saw.
7.2. Blade Binding
- Problem: The saw blade may bind in the material, causing the saw to stall or kickback.
- Solution: Ensure the blade is sharp and appropriate for the material you are cutting. Avoid forcing the saw through the material; let it cut at its own pace. Make sure the workpiece is properly supported to prevent it from pinching the blade.
7.3. Inconsistent Cut Depth
- Problem: The cutting depth may vary along the length of the cut, resulting in an uneven edge.
- Solution: Ensure the saw base is flat on the workpiece and that you are maintaining consistent pressure. Check the depth setting on your saw and make sure it is locked in place.
7.4. Guide Slipping on Workpiece
- Problem: The saw guide may slip on the workpiece, especially when cutting smooth or glossy materials.
- Solution: Use non-slip pads or sandpaper on the bottom of the guide to increase friction. Ensure the clamps are tightened securely and consider using a stronger clamping force.
7.5. Splintering
- Problem: The material may splinter along the cut line, resulting in a rough or uneven edge.
- Solution: Use a sharp blade designed for cutting the specific material. Score the cut line with a utility knife before making the cut to prevent splintering. You can also use masking tape along the cut line to reinforce the material.
8. Maintenance and Care for Your Saw Guide
Proper maintenance and care will extend the life of your saw guide and ensure its accuracy over time. Regular cleaning, inspection, and adjustments will keep your guide in top condition.
8.1. Cleaning
- Remove Debris: After each use, remove any sawdust or debris from the saw guide with a brush or vacuum.
- Clean Clamps: Clean the clamps regularly to remove any buildup of glue or debris.
- Wipe Surfaces: Wipe down the surfaces of the guide with a damp cloth to remove any dirt or grime.
8.2. Inspection
- Check for Damage: Inspect the saw guide regularly for any signs of damage, such as cracks, chips, or loose screws.
- Verify Straightness: Use a straight edge to verify that the guide is still straight and has not warped over time.
- Inspect Clamps: Check the clamps for any signs of wear or damage, such as stripped threads or broken handles.
8.3. Adjustments
- Tighten Screws: Periodically tighten all screws to ensure the components of the saw guide are securely fastened.
- Adjust Clamps: Adjust the clamps as needed to maintain a firm grip on the workpiece.
- Replace Worn Parts: Replace any worn or damaged parts, such as clamps or screws, to maintain the performance of the saw guide.
9. Alternatives to DIY Saw Guides
While building your own saw guide can be a rewarding project, there are also commercially available alternatives that offer convenience and advanced features. Exploring these options can help you determine the best solution for your woodworking needs.
9.1. Commercially Available Track Saw Systems
- Pros: These systems offer high precision, smooth operation, and advanced features such as anti-splinter strips and tilt adjustments. They are designed for professional use and can significantly improve the quality and efficiency of your cuts.
- Cons: Track saw systems can be expensive, and they require dedicated storage space. They may also be overkill for small or occasional woodworking projects.
- Examples: Festool, Makita, DeWalt
9.2. Clamp-On Straight Edge Guides
- Pros: These guides are easy to use and provide a straight edge for your circular saw. They are more affordable than track saw systems and are suitable for a wide range of projects.
- Cons: Clamp-on guides may not be as precise as track saw systems, and they can be difficult to use on large sheets of material. They also require careful alignment to ensure accuracy.
- Examples: Bora Portamate, E. Emerson Tool
9.3. Universal Saw Guide Accessories
- Pros: These accessories attach to your circular saw and provide a guide for making straight cuts. They are versatile and can be used with various saw models.
- Cons: Universal saw guide accessories may not be as stable or accurate as dedicated track saw systems. They also require careful setup and adjustment to ensure proper alignment.
- Examples: Kreg Rip-Cut, Milescraft Saw Guide
10. Maximizing Precision: Tips for Accurate Cuts
Achieving precise cuts requires attention to detail and consistent technique. Here are some tips to help you maximize the accuracy of your cuts:
10.1. Measuring and Marking Accurately
- Use a Sharp Pencil: Use a sharp pencil to mark your cut lines clearly and accurately.
- Double-Check Measurements: Always double-check your measurements before cutting.
- Use a Combination Square: A combination square is an excellent tool for marking accurate 90-degree angles.
- Mark on the Waste Side: When marking your cut line, mark on the waste side of the line to ensure your final piece is the correct size.
10.2. Clamping Techniques
- Use Multiple Clamps: Use multiple clamps to secure the saw guide to the workpiece.
- Apply Even Pressure: Apply even pressure to the clamps to prevent the guide from shifting.
- Protect the Workpiece: Use padding between the clamps and the workpiece to prevent damage.
10.3. Sawing Techniques
- Maintain a Steady Pace: Maintain a steady pace while guiding the saw along the fence.
- Avoid Forcing the Saw: Let the saw do the work; avoid forcing it through the material.
- Keep the Base Flat: Keep the saw base flat on the workpiece to ensure a consistent cutting depth.
- Use a Sharp Blade: Use a sharp blade to reduce the risk of splintering and improve the quality of the cut.
By understanding how to make a saw guide and implementing these advanced techniques, you can significantly improve the accuracy and efficiency of your woodworking projects. Whether you choose to build your own saw guide or invest in a commercially available system, the principles of precision and safety remain paramount.
At CONDUCT.EDU.VN, we understand the challenges woodworkers face in finding reliable information and guidance. That’s why we’re committed to providing detailed, easy-to-understand instructions and resources to help you master your craft.
FAQ: Mastering Saw Guides for Woodworking Precision
1. What is a saw guide and why is it important?
A saw guide, also known as a circular saw guide or track saw guide, is a tool used to guide a circular saw for making straight, accurate cuts. It is essential because it improves precision, safety, and efficiency in woodworking projects.
2. What materials are best for making a DIY saw guide?
High-quality plywood is ideal for the base and fence of a saw guide. A metal ruler or level can serve as a straight edge. Clamps, wood screws, wood glue, and sandpaper are also essential materials.
3. How do I ensure my DIY saw guide is perfectly straight?
Use a metal ruler or level as a straight edge when constructing the guide. Align the fence carefully and use a square to check the alignment. Ensure the base is flat and the fence is securely attached.
4. What are the key safety precautions when using a circular saw with a guide?
Always wear safety glasses, hearing protection, and a dust mask. Inspect tools before use, secure the workpiece, avoid loose clothing, and stay focused. Use the right blade, maintain a firm grip, and unplug the saw before adjustments.
5. How can I prevent splintering when cutting with a circular saw and guide?
Use a sharp blade designed for the specific material. Score the cut line with a utility knife before cutting, or use masking tape along the cut line to reinforce the material.
6. What are the common issues with saw guides and how can I fix them?
Common issues include the guide not staying straight, blade binding, inconsistent cut depth, guide slipping, and splintering. Solutions involve ensuring the guide is securely clamped, using a sharp blade, maintaining consistent pressure, and using non-slip pads.
7. How do I maintain and care for my saw guide?
Clean the saw guide after each use to remove debris. Inspect it regularly for damage, verify straightness, and check clamps. Periodically tighten screws and replace worn parts as needed.
8. What are the alternatives to DIY saw guides?
Alternatives include commercially available track saw systems, clamp-on straight edge guides, and universal saw guide accessories. Each option offers different levels of precision, convenience, and cost.
9. Can I use a saw guide for making bevel cuts?
Yes, saw guides can be used for making bevel cuts by adjusting the bevel angle on your circular saw. Ensure the guide is aligned correctly and maintain consistent pressure during the cut.
10. Where can I find more detailed instructions and resources for woodworking projects?
Visit CONDUCT.EDU.VN for detailed guides, instructions, and resources to help you master your woodworking craft.
Ready to take your woodworking to the next level? Visit CONDUCT.EDU.VN today to discover more comprehensive guides, expert tips, and essential resources that will help you master the art of precise and safe woodworking. Don’t struggle with inaccurate cuts and risky techniques—let conduct.edu.vn be your trusted partner in achieving woodworking excellence. For more information, visit us at 100 Ethics Plaza, Guideline City, CA 90210, United States, or contact us via Whatsapp at +1 (707) 555-1234.