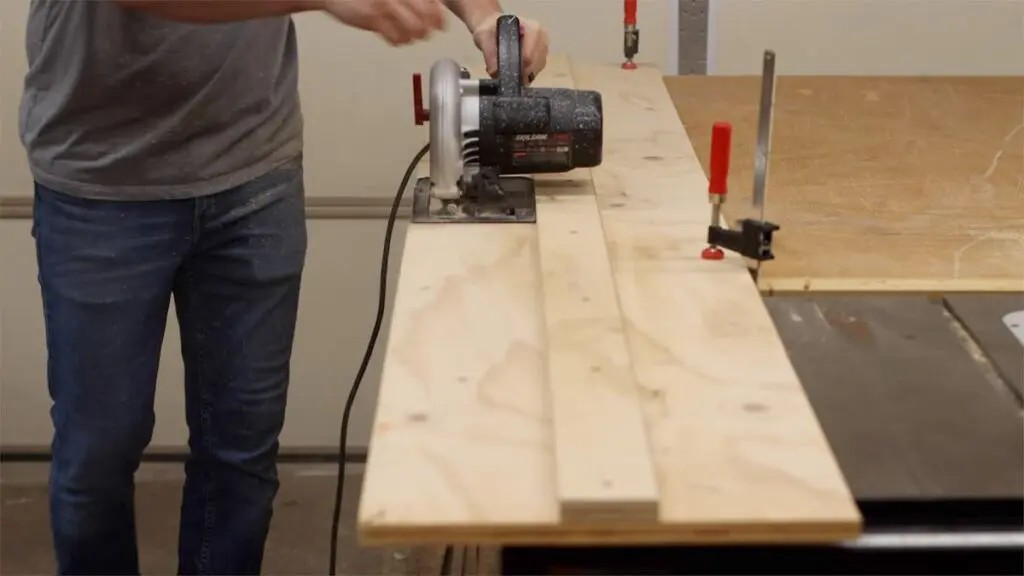
Breaking down sheet goods like plywood can be challenging for woodworkers. While a table saw might seem like an option, it often requires two people and can still be unwieldy. Using a circular saw with a straight edge is a more manageable solution. This guide will show you how to make a track saw guide yourself, offering a superior alternative to other methods.
Alternatives like clamping straight edges have their drawbacks, requiring you to account for the distance between the blade and the edge of your saw’s base, introducing potential for errors. Retrofit track saw kits can also be problematic, often having slop that affects cut accuracy and edges that become uneven over time. Building your own track saw guide addresses these issues and offers a custom, accurate cutting solution.
Considerations Before Building Your Track Saw Guide
Before you begin, consider the following points to ensure your guide meets your specific needs:
-
Saw Clearance: Ensure the saw motor and any other parts clear the fence at your desired cutting depth. Lower the saw until it almost touches the fence, then raise it slightly for ample clearance. Confirm that the blade will cut entirely through the stock at this depth.
-
Straight Edge: Achieving a perfectly straight fence is crucial. You can have plywood cut at a home center on their panel saw for a guaranteed straight edge. Alternatively, utilize the factory edge of the plywood, carefully selecting the straightest one.
-
Initial Width: The cutting side of the jig should be wider than your saw base. This provides enough material for a zero-clearance cut in the final step, ensuring precise cuts every time.
-
Clamping Space: The opposite side of the jig needs to be wide enough to accommodate clamps. Since you cannot clamp directly onto the fence or cutting side, allow sufficient space for secure clamping. A width of 6 inches from the fence to the edge is generally adequate.
Step-by-Step Guide: Building Your DIY Track Saw Guide
Follow these steps to construct your own track saw guide for accurate and repeatable cuts:
-
Prepare the Base: Starting from the straightest factory edge of your plywood, measure 3 inches inward and make a rough, freehand cut. This establishes the initial width of your guide.
-
Position the Fence: With your circular saw in place, flip the fence over so the factory edge faces right. Align it against the saw base and mark its position on each side. Measure 6 inches from the right side of the fence to the intended edge of the jig and mark these points at each end.
-
Cut the Jig to Shape: Use your circular saw to cut the jig along the marked lines. These cuts don’t need to be perfect, as the accuracy will come from the fence alignment.
-
Attach the Fence: Apply glue to the fence and position it within the marked lines. Secure it using screws, brad nails, or clamps. Ensure the fence remains firmly against the jig while the glue dries. Parallel alignment of the fence is not critical at this stage, as long as there is sufficient room for the saw to move freely.
- Make the Zero-Clearance Cut: Once the glue has dried completely, run your saw along the fence to create a zero-clearance cut. Maintain even and consistent pressure against the fence during this step. This cut will define the exact cutting line of your guide.
Testing and Using Your Track Saw Guide
-
Test Cut: Measure and mark the piece you intend to cut. Align your newly built track saw guide with these marks.
-
Secure the Guide: Clamp the track saw guide firmly in place. Ensure the clamps don’t interfere with the saw’s movement.
-
Make the Cut: Run your circular saw along the guide, maintaining even and consistent pressure against the fence. The zero-clearance edge will ensure a clean and accurate cut.
While an 8-foot guide might be excessive for many projects, a 4-foot guide is incredibly versatile. It allows for crosscuts and shorter rip cuts with ease, making it a valuable addition to any woodworking shop. Learning How To Make Track Saw Guide with the right size will make woodworking more precise and less frustrating.
Conclusion
Building your own track saw guide is a worthwhile project that can significantly improve the accuracy and efficiency of your woodworking. By following these steps, you can create a custom tool tailored to your specific needs, eliminating the drawbacks of alternative methods and achieving professional-quality results. So, take the time to how to make track saw guide and transform your woodworking projects.

