Photoshop’s rulers and guides are essential tools for precise object alignment and placement, significantly enhancing your design workflow. Rulers, displayed at the top and left of your canvas, provide visual measurements, while guides, dragged from the rulers, act as non-printing gridlines. This guide will detail how to customize ruler settings, display rulers, create and manipulate guides, and adjust guide preferences for optimal use.
Customizing Ruler Unit Preferences
Before diving into guide placement, configuring your ruler units is crucial for accurate measurements. Here’s how to adjust the unit preferences:
- Navigate to Photoshop in the menu bar, then select Preferences and General. This will open the Preferences window.
- In the Preferences window, choose Units & Rulers from the sidebar. Here, you can set your preferred unit of measurement for rulers, such as inches, pixels, centimeters, or millimeters.
- Click OK to save your changes.
Displaying and Hiding Rulers
The rulers are your starting point for creating guides. Here’s how to toggle their visibility:
- To show rulers, go to the View menu and select Rulers. Alternatively, use the keyboard shortcut CMD+R (Mac) or CTRL+R (Windows).
- To hide rulers, repeat the same steps: Go to the View menu, deselect Rulers, or use the same keyboard shortcut CMD+R (Mac) or CTRL+R (Windows).
Creating and Manipulating Guides
Guides are the core of precise alignment in Photoshop. Here’s a detailed breakdown of how to create, move, hide, delete, and customize them:
- Creating a Guide: Position your cursor over either the left (vertical guide) or top (horizontal guide) ruler. Click and drag from the ruler onto your document canvas. A thin line will appear, representing your guide. Use the ruler markings to accurately position the guide in your desired location.
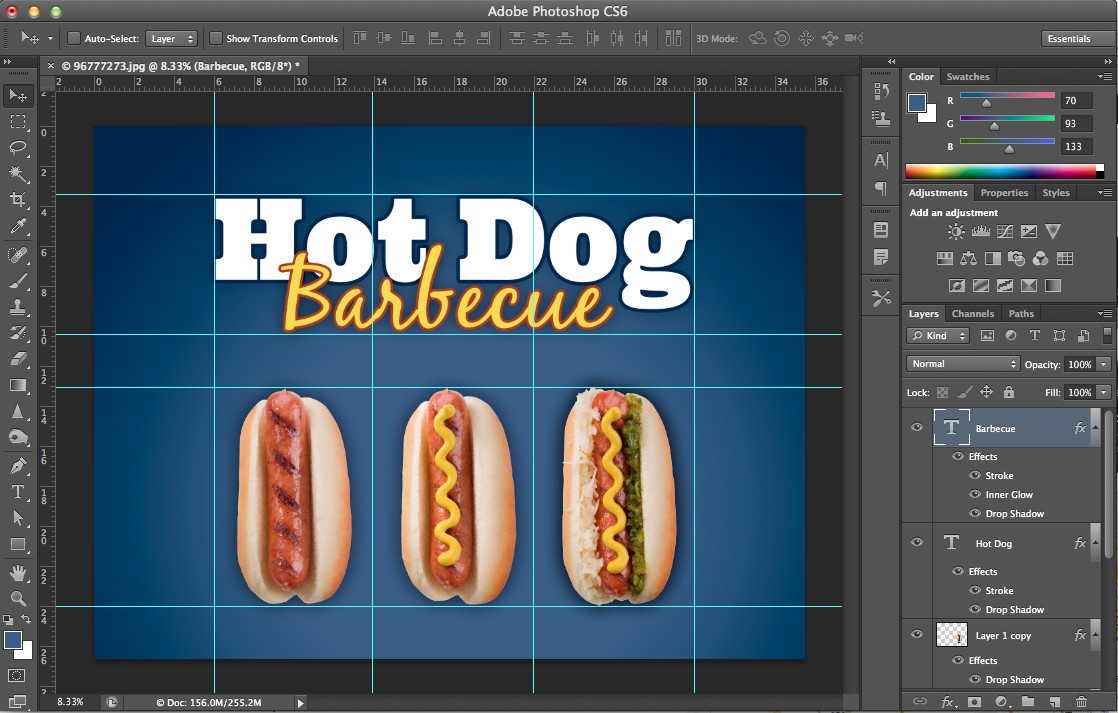 Creating a guide in Photoshop by dragging from the ruler
-
Moving a Guide: Hover your cursor over the guide until the cursor changes to a double-headed arrow. Click and drag the guide to reposition it. Holding down the Shift key while dragging will constrain the movement to either horizontal or vertical.
-
Hiding/Showing Guides: Go to the View menu, select Show, and then toggle Guides. This allows you to quickly hide guides for a cleaner view of your design or reveal them when needed for precise alignment.
-
Deleting Guides: There are two methods for deleting guides. The easiest is to drag the guide back onto the ruler from which it originated. Alternatively, you can use the Move Tool (V), select the guide, and press the DELETE key.
-
Changing Guide Appearance: To customize the color and style of your guides for better visibility:
- Navigate to Photoshop, then Preferences, and General.
- In the Preferences window, select Guides, Grids & Slices.
- Here, you can adjust the color of your guides to a color that contrasts well with your document. You can also choose between lines and dashed lines for the guide’s appearance.
Best Practices for Using Guides
- Plan your layout: Before creating guides, have a clear idea of your desired layout and element placement.
- Use multiple guides: Don’t hesitate to create multiple guides to define columns, rows, and key areas within your design.
- Lock guides: To prevent accidental movement, go to View > Lock Guides.
- Clear guides: Regularly clear unnecessary guides (View > Clear Guides) to maintain a clean workspace.
By mastering the use of rulers and guides in Photoshop, you can achieve precise alignment, consistent spacing, and professional-looking designs. Experiment with different techniques and settings to find what works best for your workflow.