Valve guide repair is essential for maintaining engine performance and longevity. This comprehensive guide, brought to you by CONDUCT.EDU.VN, provides a detailed look at How To Repair Valve Guides, offering practical solutions and insights. By understanding the repair process and addressing common issues, you can ensure your engine runs smoothly and efficiently for years to come. Trust CONDUCT.EDU.VN to help you navigate the complexities of valve guide maintenance. Learn about valve guide replacement and cylinder head repair.
1. Understanding Valve Guides: Function and Importance
Valve guides play a crucial role in the efficient operation of an internal combustion engine. They are cylindrical components pressed into the cylinder head, providing a precise path for the valves to move along as they open and close. Without properly functioning valve guides, the valves would wobble, leading to inefficient combustion, increased wear on valve seats, and potential engine damage.
1.1 The Role of Valve Guides in Engine Performance
Valve guides serve several critical functions:
- Valve Alignment: They ensure the valve moves in a straight line, maintaining proper contact with the valve seat.
- Heat Dissipation: Valve guides help transfer heat away from the valve to the cylinder head, preventing overheating.
- Lubrication: They provide a surface for oil to cling to, lubricating the valve stem and reducing friction.
1.2 Common Materials Used in Valve Guides
Valve guides are typically made from materials that can withstand high temperatures and provide excellent wear resistance. Common materials include:
- Cast Iron: Traditional and cost-effective, cast iron offers good wear resistance.
- Bronze: Superior heat dissipation and reduced friction make bronze an excellent choice for high-performance engines.
- Manganese Bronze: A stronger variant of bronze, providing increased durability and resistance to wear.
- Powdered Metal: This material offers a combination of strength, heat resistance, and oil retention.
1.3 How Valve Guides Contribute to Engine Longevity
Properly maintained valve guides contribute significantly to engine longevity by:
- Reducing Valve Wear: By ensuring proper alignment, valve guides minimize side loading and wear on the valve stem and seat.
- Preventing Oil Leaks: Worn valve guides can allow oil to leak into the combustion chamber, leading to increased oil consumption and emissions.
- Maintaining Combustion Efficiency: Proper valve alignment ensures optimal sealing of the combustion chamber, maximizing power and fuel efficiency.
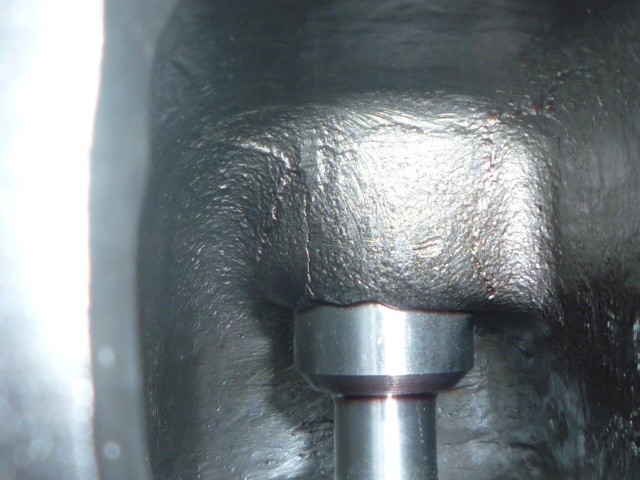 Valve Guides
2. Identifying Valve Guide Problems
Recognizing the signs of worn or damaged valve guides is crucial for timely repair and preventing further engine damage. Several indicators can help you identify potential issues.
2.1 Signs of Worn Valve Guides
Common symptoms of worn valve guides include:
- Excessive Oil Consumption: Oil leaking past the valve guides into the combustion chamber leads to increased oil usage.
- Blue Smoke from Exhaust: Burning oil produces blue smoke, indicating a leak in the valve train.
- Ticking or Clicking Noises: Worn valve guides can cause the valves to move erratically, resulting in unusual engine noises.
- Poor Engine Performance: Misaligned valves can lead to reduced compression and power output.
- Valve Chatter: A rattling sound from the valve train, often noticeable at idle.
2.2 Diagnostic Methods for Valve Guide Issues
Several diagnostic methods can confirm valve guide problems:
- Valve Stem Clearance Test: Measuring the clearance between the valve stem and the guide using a dial indicator can reveal excessive wear.
- Leak-Down Test: Pressurizing the cylinder and monitoring air leakage can indicate if valves are sealing properly.
- Visual Inspection: Removing the cylinder head and visually inspecting the valve guides for cracks, wear, or excessive play can provide a clear diagnosis.
- Wiggle Test: With the valve installed, gently wiggle the valve stem. Excessive movement indicates worn guides.
2.3 Potential Consequences of Neglecting Valve Guide Repair
Ignoring worn valve guides can lead to serious engine problems:
- Valve Seat Damage: Misaligned valves can damage the valve seats, requiring costly repairs.
- Valve Failure: Excessive wear can cause valves to break, leading to catastrophic engine damage.
- Increased Emissions: Oil leaks and poor combustion increase harmful emissions.
- Reduced Fuel Efficiency: Inefficient combustion reduces fuel economy.
- Engine Knocking: Improper valve seating can cause engine knocking, further damaging engine components.
3. Tools and Materials Needed for Valve Guide Repair
Repairing valve guides requires a specific set of tools and materials to ensure the job is done correctly and safely. Here’s a comprehensive list:
3.1 Essential Tools for Valve Guide Replacement
- Valve Spring Compressor: Used to compress valve springs for removal and installation of valves.
- Valve Guide Driver: A specialized tool for pressing valve guides in and out of the cylinder head.
- Valve Guide Reamer: Used to size valve guides to the correct inner diameter after installation.
- Dial Caliper or Micrometer: For precise measurements of valve guides and cylinder head bores.
- Bore Gauge: Measures the diameter of the valve guide bore in the cylinder head.
- Hammer and Punch Set: For general disassembly and assembly tasks.
- Cleaning Supplies: Including brushes, solvents, and rags for cleaning components.
- Safety Glasses and Gloves: Essential for personal protection.
3.2 Necessary Materials for Valve Guide Repair
- Replacement Valve Guides: High-quality valve guides that match the engine specifications.
- Valve Stem Seals: New seals to prevent oil leakage past the valve guides.
- Engine Oil: For lubricating valve stems and guides during assembly.
- Anti-Seize Compound: To prevent galling during valve guide installation.
- Valve Grinding Compound: For lapping valves to their seats.
3.3 Optional but Helpful Equipment
- Valve Refacing Machine: To recondition valve faces for optimal sealing.
- Seat Cutting Tools: For reconditioning valve seats to match the new valve guides.
- Ultrasonic Cleaner: For thorough cleaning of cylinder head components.
- Magnetic Base with Dial Indicator: For precise measurements during valve guide installation.
4. Step-by-Step Guide to Valve Guide Repair
Repairing valve guides is a detailed process that requires precision and care. Follow these steps to ensure a successful repair.
4.1 Preparing the Cylinder Head
- Disassembly:
- Remove the cylinder head from the engine.
- Thoroughly clean the cylinder head to remove all dirt, oil, and debris.
- Remove all valves, springs, retainers, and valve stem seals using a valve spring compressor.
- Inspection:
- Carefully inspect the cylinder head for cracks, damage, or corrosion.
- Check the valve seats for wear or damage.
- Measure the valve guide bores to ensure they are within specifications.
- Cleaning:
- Use a parts cleaner or solvent to thoroughly clean all components.
- Ensure all oil passages are clear.
4.2 Removing Old Valve Guides
- Heating the Cylinder Head:
- Heat the cylinder head to approximately 250-300°F (120-150°C) to expand the metal and ease valve guide removal. A heat gun or oven can be used.
- Driving Out the Old Guides:
- Use a valve guide driver and a hammer or press to drive out the old valve guides from the combustion chamber side. Ensure the driver is properly sized to prevent damage to the cylinder head.
- Cleaning the Bores:
- Thoroughly clean the valve guide bores using a wire brush or honing tool to remove any remaining debris or corrosion.
4.3 Installing New Valve Guides
- Cooling the New Guides:
- Place the new valve guides in a freezer for at least an hour to shrink them slightly, making installation easier.
- Aligning the Guides:
- Position the new valve guide over the bore, ensuring it is properly aligned.
- Pressing in the New Guides:
- Use a valve guide driver and a press to carefully press the new valve guide into the bore. Ensure the guide is driven in straight and to the correct depth, as specified by the engine manufacturer.
- Checking for Proper Installation:
- Verify that the valve guide is fully seated and flush with the cylinder head surface.
- Inspect the surrounding area for any cracks or damage.
4.4 Sizing and Reaming the Valve Guides
- Reaming the Guides:
- Use a valve guide reamer to size the inside diameter of the new valve guides to the specified clearance for the valve stems. This ensures proper valve movement and lubrication.
- Measuring the Clearance:
- Measure the clearance between the valve stem and the guide using a dial caliper or micrometer. The clearance should be within the manufacturer’s specifications.
- Honing (if necessary):
- If the clearance is too tight, use a valve guide hone to carefully enlarge the inside diameter until the correct clearance is achieved.
4.5 Reassembling the Cylinder Head
- Installing Valve Stem Seals:
- Install new valve stem seals onto the valve guides. Ensure they are properly seated to prevent oil leakage.
- Installing Valves:
- Lubricate the valve stems with engine oil and carefully insert them into the valve guides.
- Installing Valve Springs and Retainers:
- Use a valve spring compressor to compress the valve springs and install the retainers and keepers.
- Ensure the keepers are properly seated in the retainer grooves.
- Lapping Valves (if necessary):
- Apply valve grinding compound to the valve face and lap the valves to their seats using a lapping tool. This ensures a proper seal.
- Final Inspection:
- Inspect the entire cylinder head assembly to ensure all components are properly installed and functioning correctly.
5. Common Mistakes to Avoid During Valve Guide Repair
Avoiding common mistakes during valve guide repair is crucial for ensuring the longevity and performance of your engine. Here are some pitfalls to watch out for:
5.1 Improper Valve Guide Sizing
- Problem: Installing valve guides that are not properly sized to match the valve stems.
- Consequence: Too tight, and the valve can bind; too loose, and you’ll have excessive oil consumption and valve chatter.
- Solution: Always measure both the valve stem and the inside diameter of the valve guide after installation and reaming. Ensure they are within the manufacturer’s specified clearance range.
5.2 Overheating the Cylinder Head
- Problem: Applying excessive heat when removing or installing valve guides.
- Consequence: Can cause warping or cracking of the cylinder head, leading to costly repairs.
- Solution: Use a controlled heat source and monitor the temperature of the cylinder head. Aim for a consistent and moderate temperature range, typically around 250-300°F (120-150°C).
5.3 Neglecting Valve Seat Condition
- Problem: Installing new valve guides without addressing the condition of the valve seats.
- Consequence: Poor valve sealing, reduced compression, and decreased engine performance.
- Solution: Inspect the valve seats for wear, damage, or improper angles. Recondition the valve seats using seat cutting tools or a valve refacing machine as necessary.
5.4 Incorrect Installation Depth
- Problem: Not installing the valve guides to the correct depth within the cylinder head.
- Consequence: Can interfere with valve train geometry, leading to improper valve operation and potential damage.
- Solution: Consult the engine manufacturer’s specifications for the correct valve guide installation depth. Use a depth gauge or measuring tool to ensure accurate placement.
5.5 Using the Wrong Tools
- Problem: Attempting to use generic tools instead of specialized valve guide tools.
- Consequence: Can damage the valve guides, cylinder head, or both, leading to rework or replacement.
- Solution: Invest in or rent the correct tools for valve guide repair, such as a valve guide driver, reamer, and spring compressor.
5.6 Ignoring Valve Stem Seals
- Problem: Reusing old or damaged valve stem seals.
- Consequence: Oil leakage into the combustion chamber, leading to increased oil consumption and blue smoke from the exhaust.
- Solution: Always replace the valve stem seals with new ones during valve guide repair. Ensure they are properly seated and lubricated.
5.7 Rushing the Process
- Problem: Attempting to complete the valve guide repair too quickly without proper attention to detail.
- Consequence: Increased risk of mistakes, improper assembly, and potential engine damage.
- Solution: Take your time and follow each step carefully. Double-check your work and consult the engine manufacturer’s specifications as needed.
6. Advanced Techniques for Valve Guide Repair
For those seeking to enhance their valve guide repair skills, several advanced techniques can provide improved performance and longevity.
6.1 Using Bronze Valve Guides
- Benefits: Bronze valve guides offer superior heat dissipation and reduced friction compared to traditional cast iron guides.
- Application: Ideal for high-performance engines and applications where heat management is critical.
- Considerations: Bronze guides may require tighter clearances and more frequent inspection due to their softer material.
6.2 Cryogenic Treatment of Valve Guides
- Benefits: Cryogenic treatment involves cooling the valve guides to extremely low temperatures, which can improve their hardness, wear resistance, and dimensional stability.
- Application: Suitable for high-stress engine applications where durability is paramount.
- Considerations: Requires specialized equipment and expertise.
6.3 Interference Fit vs. Clearance Fit
- Interference Fit: The valve guide is slightly larger than the bore, requiring force to press it in. This provides a secure fit but can stress the cylinder head.
- Clearance Fit: The valve guide is slightly smaller than the bore, allowing it to be installed more easily. Requires additional methods to secure the guide, such as using a retaining compound.
- Considerations: The choice depends on the engine design, materials, and desired performance characteristics.
6.4 Using Valve Guide Liners
- Benefits: Valve guide liners are thin sleeves that are inserted into worn valve guides to restore the correct clearance. This can be a cost-effective alternative to replacing the entire valve guide.
- Application: Suitable for repairing moderately worn valve guides without removing the cylinder head.
- Considerations: Requires specialized tools and precise measurements.
6.5 Optimizing Valve Stem-to-Guide Clearance
- Benefits: Fine-tuning the clearance between the valve stem and guide can improve valve train performance and reduce wear.
- Application: Critical for high-performance engines and racing applications.
- Considerations: Requires precise measurement and specialized tools, such as a honing tool with adjustable pressure.
7. Maintaining Valve Guides for Longevity
Proper maintenance is essential to prolong the life of your valve guides and ensure optimal engine performance.
7.1 Regular Oil Changes
- Importance: Clean oil is crucial for lubricating the valve stems and guides, reducing friction and wear.
- Recommendation: Follow the engine manufacturer’s recommended oil change intervals and use high-quality oil.
7.2 Proper Valve Stem Seal Maintenance
- Importance: Valve stem seals prevent oil from leaking into the combustion chamber, which can damage valve guides and reduce engine performance.
- Recommendation: Inspect the valve stem seals regularly and replace them if they show signs of wear or damage.
7.3 Avoiding Overheating
- Importance: Overheating can cause the valve guides to warp or crack, leading to premature failure.
- Recommendation: Monitor the engine temperature regularly and address any cooling system issues promptly.
7.4 Using Quality Fuel
- Importance: Low-quality fuel can cause deposits to form on the valve stems and guides, leading to increased wear and reduced performance.
- Recommendation: Use high-quality fuel from reputable sources and consider using fuel additives to keep the fuel system clean.
7.5 Regular Valve Adjustments
- Importance: Proper valve adjustments ensure that the valves are opening and closing correctly, reducing stress on the valve guides.
- Recommendation: Follow the engine manufacturer’s recommended valve adjustment intervals and use the correct tools and procedures.
8. Troubleshooting Common Issues After Valve Guide Repair
Even with careful repair, issues can sometimes arise after valve guide work. Here’s how to troubleshoot common problems.
8.1 Excessive Oil Consumption After Repair
- Possible Causes:
- Improperly installed or damaged valve stem seals.
- Excessive clearance between the valve stem and guide.
- Cracks or damage to the cylinder head.
- Troubleshooting Steps:
- Inspect the valve stem seals for proper installation and damage.
- Measure the clearance between the valve stem and guide.
- Perform a leak-down test to check for cylinder head leaks.
8.2 Engine Noise After Valve Guide Replacement
- Possible Causes:
- Improper valve adjustment.
- Loose valve train components.
- Incorrect valve guide installation depth.
- Troubleshooting Steps:
- Adjust the valves according to the engine manufacturer’s specifications.
- Inspect all valve train components for looseness or damage.
- Verify that the valve guides are installed to the correct depth.
8.3 Poor Engine Performance After Valve Guide Work
- Possible Causes:
- Improper valve seating.
- Reduced compression.
- Timing issues.
- Troubleshooting Steps:
- Perform a compression test to check for cylinder leaks.
- Inspect the valve seats and valves for proper sealing.
- Verify the engine timing is correct.
8.4 Blue Smoke From Exhaust After Valve Guide Repair
- Possible Causes:
- Oil leaking past the valve stem seals.
- Worn or damaged piston rings.
- Cylinder head cracks.
- Troubleshooting Steps:
- Inspect the valve stem seals for proper installation and damage.
- Perform a compression test to check for piston ring wear.
- Check the cylinder head for cracks or damage.
9. Valve Guide Repair Cost Analysis
Understanding the costs associated with valve guide repair can help you budget and make informed decisions.
9.1 Factors Affecting Repair Costs
- Engine Type: The complexity and design of the engine can significantly impact repair costs.
- Labor Rates: Labor costs vary depending on the mechanic’s experience and location.
- Parts Costs: The price of replacement valve guides, seals, and other components can vary.
- Additional Repairs: Additional repairs, such as valve seat reconditioning or cylinder head work, can increase the overall cost.
9.2 DIY vs. Professional Repair Costs
- DIY Repair:
- Pros: Lower labor costs, greater control over the repair process.
- Cons: Requires specialized tools, experience, and time.
- Cost Estimate: $200 – $500 for parts and tools.
- Professional Repair:
- Pros: Experienced technicians, access to specialized equipment, warranty on work.
- Cons: Higher labor costs.
- Cost Estimate: $800 – $2000 depending on the extent of the repair.
9.3 Cost-Saving Strategies for Valve Guide Repair
- Shop Around: Get quotes from multiple mechanics to compare prices.
- Buy Parts Online: Purchasing parts online can often save money.
- Consider Used Parts: If appropriate, consider using used parts in good condition to reduce costs.
- Perform Some Tasks Yourself: If you have some mechanical skills, you can perform some of the simpler tasks, such as removing and cleaning the cylinder head.
10. Frequently Asked Questions (FAQs) About Valve Guide Repair
Here are some common questions related to valve guide repair, providing quick answers to help you better understand the process.
10.1. What are valve guides?
Valve guides are cylindrical components in the cylinder head that ensure the valve moves in a straight line, maintaining proper contact with the valve seat.
10.2. How do I know if my valve guides are worn?
Signs include excessive oil consumption, blue smoke from the exhaust, ticking noises, and poor engine performance.
10.3. Can I replace valve guides myself?
Replacing valve guides requires specialized tools and experience. If you’re not comfortable with engine work, it’s best to hire a professional.
10.4. How much does it cost to replace valve guides?
The cost varies, but typically ranges from $800 to $2000 depending on the engine and extent of the repair.
10.5. What tools are needed for valve guide repair?
Essential tools include a valve spring compressor, valve guide driver, valve guide reamer, and measuring tools.
10.6. Can worn valve guides damage my engine?
Yes, worn valve guides can lead to valve seat damage, valve failure, increased emissions, and reduced fuel efficiency.
10.7. How often should valve guides be inspected?
Valve guides should be inspected during major engine services, such as when the cylinder head is removed.
10.8. What are valve stem seals?
Valve stem seals prevent oil from leaking past the valve guides into the combustion chamber.
10.9. What happens if I don’t repair worn valve guides?
Ignoring worn valve guides can lead to serious engine damage and costly repairs.
10.10. Are there different types of valve guides?
Yes, common materials include cast iron, bronze, manganese bronze, and powdered metal.
Repairing valve guides is a complex but essential task for maintaining engine health. With the right tools, knowledge, and attention to detail, you can ensure your engine runs smoothly and efficiently. For more detailed guidance and resources on engine maintenance, visit CONDUCT.EDU.VN. Our comprehensive guides and expert advice will help you tackle any repair with confidence. Contact us at 100 Ethics Plaza, Guideline City, CA 90210, United States, or reach out via Whatsapp at +1 (707) 555-1234. Trust conduct.edu.vn to keep your engine in top condition.