Guided Access is a powerful feature on iPhones, iPads, and iPod touches that allows you to lock your device into a single app and control which features are available. This is particularly useful when you want to let a child use your device without worrying about them accidentally accessing other apps or making unwanted changes, or when you need to focus on a specific task without distractions. This guide will walk you through How To Set Up Guided Access and customize it to your specific needs.
Setting Up Guided Access: A Step-by-Step Guide
Before you can use Guided Access, you need to enable it in your device’s settings. Here’s how to set up Guided Access:
- Navigate to Accessibility Settings: Open the Settings app on your iPhone or iPad. Scroll down and tap on “Accessibility.”
- Enable Guided Access: In the Accessibility settings, scroll down to the “General” section and tap on “Guided Access.” Toggle the switch to turn Guided Access on.
- Configure Passcode Settings: Tap on “Passcode Settings.” Then, tap on “Set Guided Access Passcode.”
- Set Your Passcode: Enter a passcode that you’ll use to end Guided Access sessions. Re-enter the passcode to confirm it.
- Enable Touch ID or Face ID (Optional): For added convenience, you can enable Face ID or Touch ID as an alternative way to end a Guided Access session. This option is available on devices that support these features.
Starting a Guided Access Session
Now that you have set up Guided Access, you can start using it to lock your device into a single app. Here’s how:
- Open the Desired App: Launch the app that you want to use in Guided Access mode.
- Activate Guided Access:
- On iPhone X or later (or iPad without a Home button): Triple-click the side button.
- On iPhone 8 or earlier (or iPad with a Home button): Triple-click the Home button.
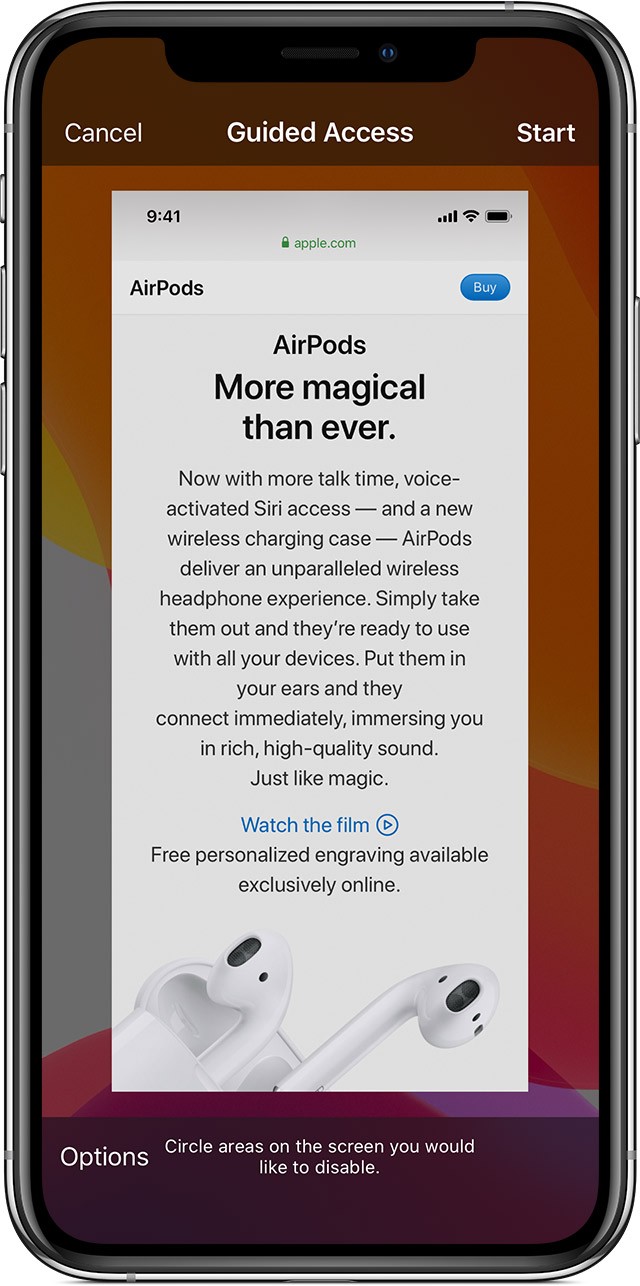
- Customize Screen Restrictions (Optional): If you want to disable specific areas of the screen from responding to touch, use one finger to circle those areas. You can adjust the size and position of the circles, or tap the “X” to remove them. This is useful for preventing accidental taps on ads or other unwanted elements.
- Start the Session: Tap “Guided Access” in the bottom left corner of the screen, then tap “Start” in the top right corner.
 Access Guided Access settings
You can also start a Guided Access session using Siri. Open the app you want to use and say “Turn on Guided Access”. Keep in mind that Siri features may vary depending on your location.
Controlling Available Features During a Guided Access Session
Guided Access allows you to control which features are available while the session is active. To access these options:
- Access Options: Triple-click the Side or Home button. If prompted, enter your Guided Access passcode.
- Select Options: Tap “Options” in the bottom left corner of the screen. If you don’t see the Options button, triple-click the Side or Home button again and enter your passcode.
- Customize Features: Turn on or off the following options as needed:
- Sleep/Wake Button: Disables the Sleep/Wake button.
- Volume Buttons: Disables the volume buttons.
Configuring Guided Access to restrict physical volume button access for a controlled user experience.
*   **Motion:** Limits the device's response to motion, preventing screen rotation and disabling shake gestures.
*   **Keyboards:** Disables the keyboard from appearing.
Deactivating keyboard input within Guided Access to prevent text entry and maintain focus on the app.
*   **Touch:** Disables all screen touches.
*   **Dictionary Lookup:** Enables the "Look Up" feature when text is selected.
Allowing dictionary definitions within Guided Access to facilitate learning while using restricted apps.
* **Time Limit:** Sets a time limit for the Guided Access session.- Apply Changes: Once you have configured the desired options, tap “Done” in the top right corner.
Ending a Guided Access Session
To end a Guided Access session:
- Triple-Click: Triple-click the Side or Home button.
- Enter Passcode: Enter your Guided Access passcode.
- Tap End: Tap “End” in the top left corner of the screen.
- Alternative: If you have enabled Touch ID or Face ID for Guided Access, you can double-click the Side or Home button and authenticate using your fingerprint or facial recognition.
Conclusion
Guided Access is a versatile feature that can be used in a variety of situations to enhance focus, limit distractions, and provide a more controlled user experience. By understanding how to set up Guided Access and customize its options, you can make the most of this powerful tool on your iPhone or iPad. This guide has provided you with a detailed walkthrough of the setup process and customization options, ensuring that you can confidently use Guided Access to meet your specific needs.