Adobe Premiere Pro’s latest versions have revolutionized content placement with the introduction of Rulers and Guides. This feature empowers users to precisely position graphics and video elements, mirroring functionalities found in After Effects and Photoshop. This guide will provide a step-by-step approach on how to effectively use guides in Premiere Pro for tasks like exporting square videos tailored for social media.
Step 1 — Activating Rulers and Guides in Premiere Pro
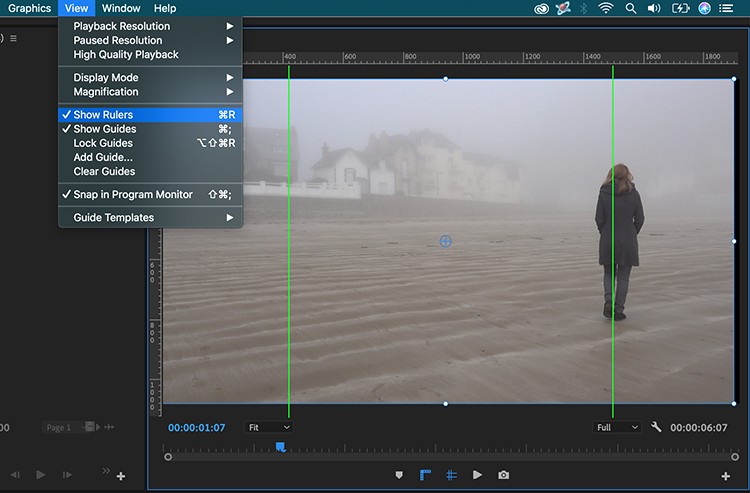
Before you begin setting up custom guides, you need to make them visible. Navigate to the View menu and select Show Rulers and Show Guides. To streamline this process and avoid repeatedly accessing the View menu, consider adding shortcut buttons to your workspace. Click the Button Editor (the plus sign) located at the bottom right of the panel, and drag the Rulers and Guides buttons to your preferred location for quick access.
Step 2 — Creating Custom Guides for Precise Positioning
A particularly useful feature of the new guides system is the ability to precisely position guides using either pixel or percentage values. This is extremely helpful for creating specific aspect ratios or safe zones. To illustrate, let’s create guides for a square video within a 1920×1080 sequence.
To create a 1080×1080 square, you’ll need to determine the horizontal offset for the vertical guides. Subtract 1080 from 1920, resulting in 840 pixels. Divide this number by two (840 / 2 = 420) to determine the distance each vertical guide needs to be from the left and right edges of the frame.
To add a guide, go to View > Add Guide or right-click on a ruler. In the “Add Guide” dialog box, input the position as 420 pixels. Ensure the orientation is set to “Vertical.” Create one guide for the left and another for the right. You can also use percentage values to quickly add guides for upper and lower thirds, as well as the center of the frame. For example, use 50% for the horizontal center and 33.33% and 66.66% for the upper and lower thirds respectively.
Step 3 — Fine-Tuning Element Placement with Guides and Snapping
With your guides in place, it’s time to position your video clips and graphic elements. To prevent accidental movement of your guides, select View > Lock Guides. Next, import your assets into your sequence. To ensure accurate placement, activate snapping by selecting View > Snap in Program Monitor. This will cause your elements to “snap” to the guides, ensuring perfect alignment. If you need to make adjustments, unlock the guides (View > Unlock Guides) and drag them to the desired position.
Step 4 — Saving and Sharing Guide Templates for Consistent Branding
To save your custom guide setup for future projects, navigate to View > Guide Templates > Save Guides as Template. This allows you to easily reuse the same guide layout across multiple projects, ensuring consistent branding and element placement.
To rename, import, or export templates, go to View > Guide Templates > Manage Guides. This is particularly useful when working in a team environment where maintaining uniformity in branding and element positioning is crucial. Sharing guide templates ensures that everyone adheres to the same standards.
The introduction of Rulers and Guides in Premiere Pro provides a powerful toolset for achieving precise control over element placement, improving workflow and ensuring professional results. Before this feature, precise positioning was significantly more challenging and time-consuming, often relying on estimations and manual adjustments. Now, Premiere Pro offers a streamlined and accurate solution.